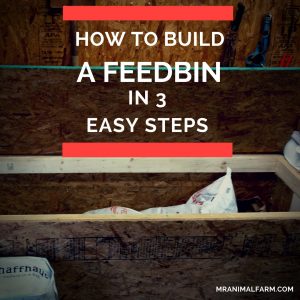
What the heck do you do if you walk into your barn in the evening, open up a cabinet drawer and a NEST FULL OF BABY MICE jump out at you?! Well, if you are me, then you squeal and run out of the barn. Compose yourself and then peak your head back in to see if they have all magically gone away. After all, the chickens and goats aren't going to feed themselves. And (gulp) their feed is in there - WITH THE MICE!
This was my realization that we NEEDED a feed bin.
If you have animal feed sitting around, you will eventually need a feed bin. You can buy feed bins or metal trash cans. But if you have a lot of feed to store, those options can get costly. A cost effective (and customizable) solution is to learn how to build a feed bin.
Before starting you will want to measure the area in which you want to put the feed bin. The space we wanted to use was not a typical spot so the dimensions are a bit odd. Our bin ended up being 8' 4" wide, 3' deep, and 4' tall (8.3 x 3 x 4). You are, of course, free to make any modifications you like so that you build a feed bin that will fit comfortably wherever you choose to put it. For the purpose of this tutorial (and ease of math) we will be making a feed bin that is 4 x 3 x 3.
Now, on to the instructions...
Feed Bin Building Supplies:
4 - 4' 2x4's (width)
4 - 3' 8" 2x4's (height)
4 - 2' 4" 2x4's (depth)
2 - 3' 2x4's (to lift off floor)
2 - 4x4 sheets of plywood (front/back walls)
2 - 3x3 sheets of plywood (side walls)
2 - 4x3 sheet of plywood (Lid and floor)
1 Pack of door hinges
2 ½" Torx screws
Drill
How to Build a Feed Bin step-by-step:
1.) Build the Base & Top
- First, line one 4' 2x4 with the end of one 2' 4" 2x4 creating an L shape.
- Screw the 4' piece into the end of the 2' 4" piece.
- Repeat this with the other 4' & 2' 4" pieces.
- Line both L shapes together to make a rectangle and screw them together.
- Repeat the above steps to build one more rectangle for the top.
- Lay the base on the ground and attach a 4x3 sheet of plywood.
- Finally, attach the 3' 2x4's flat against the 2' 4" 2x4's. This will raise your bin about 2" off of the floor and help keep pests out of your feed.
Place the top to the side for now until the end of Step 2.
2.) Build the Sides
- With the rectangle base flat on the ground, line up a 3' 8" 2x4s with the front corner and attach it with 2 screws. You will need to hold the 2x4 in place and drive the screw at an angle.
- Repeat this process with the remaining 3 corners of the feed bin.
- With all corners secure, place the remaining rectangle from Step 1 on top of the new corner posts. Attach the top using the same method as the base.
With the base and top now secure, you have the skeletal frame for your feed bin. Now we add the walls and lid and then we're done!
3.) Build the Walls and Lid
- Attach a 4x4 sheet of plywood to the front of the bin. Repeat for the back.
- Attach a 3x3 ssheet of plywood to each side.
- Using the provided screws, attach the hinges approximately 6" from both ends to the bottom of the remaining 4x3 sheet of plywood.
- Then, line the hinges up with the feed bin and make sure the lid is in the position you want.
- Last, using the provided screws, attach the hinges and lid to the feed bin.
This is another pretty quick building project. We built ours to make sure our goat and chickens had rodent free feed. So far, it has been a great success. (Looking for other building projects? Try out our chicken run, chick brooders, DIY chicken feeders!) Let us know what you think about this project in the comment section below.
You Might Also Like:
[pt_view id="1b72340sjr"]


