So, gardening season is upon us and we can't wait to get things growing! There's hardly anything better than going outside, picking a fresh vegetable and bringing it in to use for dinner. Starting plants inside (called seed starting) is a great way to get a jump start on the growing season and also for some plants that need longer growing times to production.
Growing our own food is part of how we save $2500 per year homesteading!
The first time we started plants inside, it felt so very overwhelming. (If you need some help transplanting your started plants, we have you covered.)
There are a ton of decisions, what kind of soil to use, what containers to use, where to put them. And, well, despite a ton of reading and research, the result - an epic fail. I am talking, all of our plants died within a few weeks. Seed starting shouldn't be difficult, but it can be.
After trying a lot of different things, we have come up with a seed starting system that is reliable and works well. So, here is how you can start plants inside successfully!
This year we will be starting broccoli, cauliflower, a few types of peppers and tomatoes inside.
Supplies you will need to start plants inside:
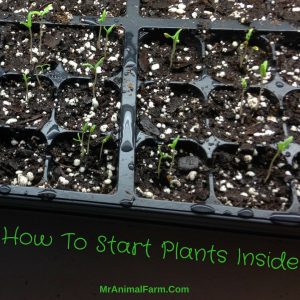
We like to use Jiffy Starter Trays like this. They are easy to use, accommodate a lot of seedlings and are easy to move around.
We like to grow our garden using organic standards, so we use an OMRI rated potting soil. The one we like the best is Black & Gold found here.
You will need seeds (of course)!
A shoplight which can be found at your local hardware store or online.
Lastly, you will need a small fan.
You should also make sure you have all your other gardening supplies ready for the season because those it will be time to transplant the started plants sooner than you think.
How to Start Plants (or seedlings) Inside
After trying several setups, we know what works best is a simple shop light hung from the ceiling (the chains allow you to adjust it up and down as the seedlings grow) and a small fan that clips to the end of the board that the trays are on. This allows the seedlings to get direct light and also get wind on them so that they are hardened off when you take them outside.
First, we take our starter tray and fill with potting soil.
Then, we make sure to tap the soil down to get all air bubbles out. It does not have to be packed super hard, but should be somewhat packed.
We then poke a small hole in each pod (depth varies by seed type and the seed package label will tell you what to use).
We add a few seeds to each hole (not all will sprout and not all seedlings will make it to planting).
Finally, we then cover the seeds with soil, add water and cover the tray with the top.
After a few days (time varies by seed type), you will see the seedlings peaking out through the soil. Once you see sprouts, you can remove the lid.
At this point, we turn the fan on to help the seedlings get strong stems.
Each day we check the soil to determine if they need water. Also, daily, we either turn the trays or move the fan from one end of the set up to the other so that they get a breeze from both directions.
As the seedlings grow, you can move the shop light up so that they do not get burned. Once each seedling has 2 true leaves, they should be ready to take and transplant outside.
We would love to hear what plants you will be starting inside! Leave us a comment below.
For More Gardening Fun, Check These Out
[pt_view id="5f37129sdf"]


