
• Skip to primary navigation
  • Skip to main content
  • Skip to primary sidebar
  • Skip to footer
  • Site Index
  • Fall Homesteading
  • Shop
    • Profitable Homesteading System
    • Jumpstart Your Homestead
    • Organized Chicken Keeper
    • G.O.A.T. Herd Management System
    • The Ultimate Planner for Breeding Goats
    • Couponing for Beginners Planner
  • Nigerian Dwarf Goats for Sale
    • Nigerian Dwarf Goats
  • About

Mranimal Farm

All About Silkies, Nigerian Dwarf Goats & More

menu icon
go to homepage
subscribe
search icon
Homepage link
  • Site Index
  • Fall Homesteading
  • Shop
  • About
  • Contact
  • ร—
    Home

    Blog

    Can You Freeze Asparagus?

    By MrAnimal Farm

    fresh cut asparagus on cutting board

    Yes, you can freeze asparagus using an easy blanching and flash freezing technique. The best way to freeze asparagus is to blanch, flash freeze, and then bag it for deep freezing. It will last about a year or so and will retain most of it's flavor the entire time, with the peak in the first 2 or 3.

    Scroll on down and keep reading to find out how you can freeze this wonderful veggie!

    fresh cut asparagus on cutting board
    [feast_advanced_jump_to]

    Why Freeze Asparagus?

    Asparagus is one of those vegetables that is so good. Nothing is better than lightly covering them in some olive oil and tossing them on the grill alongside whatever else you may be cooking.

    Fresh asparagus only stays good in the fridge for around 5 days. And, that's even if you keep it at optimal conditions.

    Freezer LifeFridge Life
    up to 1 year3 to 5 days

    Unfortunately, like most fruits and vegetables, asparagus is seasonal. This means that is is only available during certain times of the year. And, while it may be available during non-seasonal times, it is usually harder to find, more expensive and a less good quality.

    So, since asparagus is only in season from February til June, you might want to find ways to preserve it for non-season months as well. Luckily, this is really easy to do by blanching and freezing it.

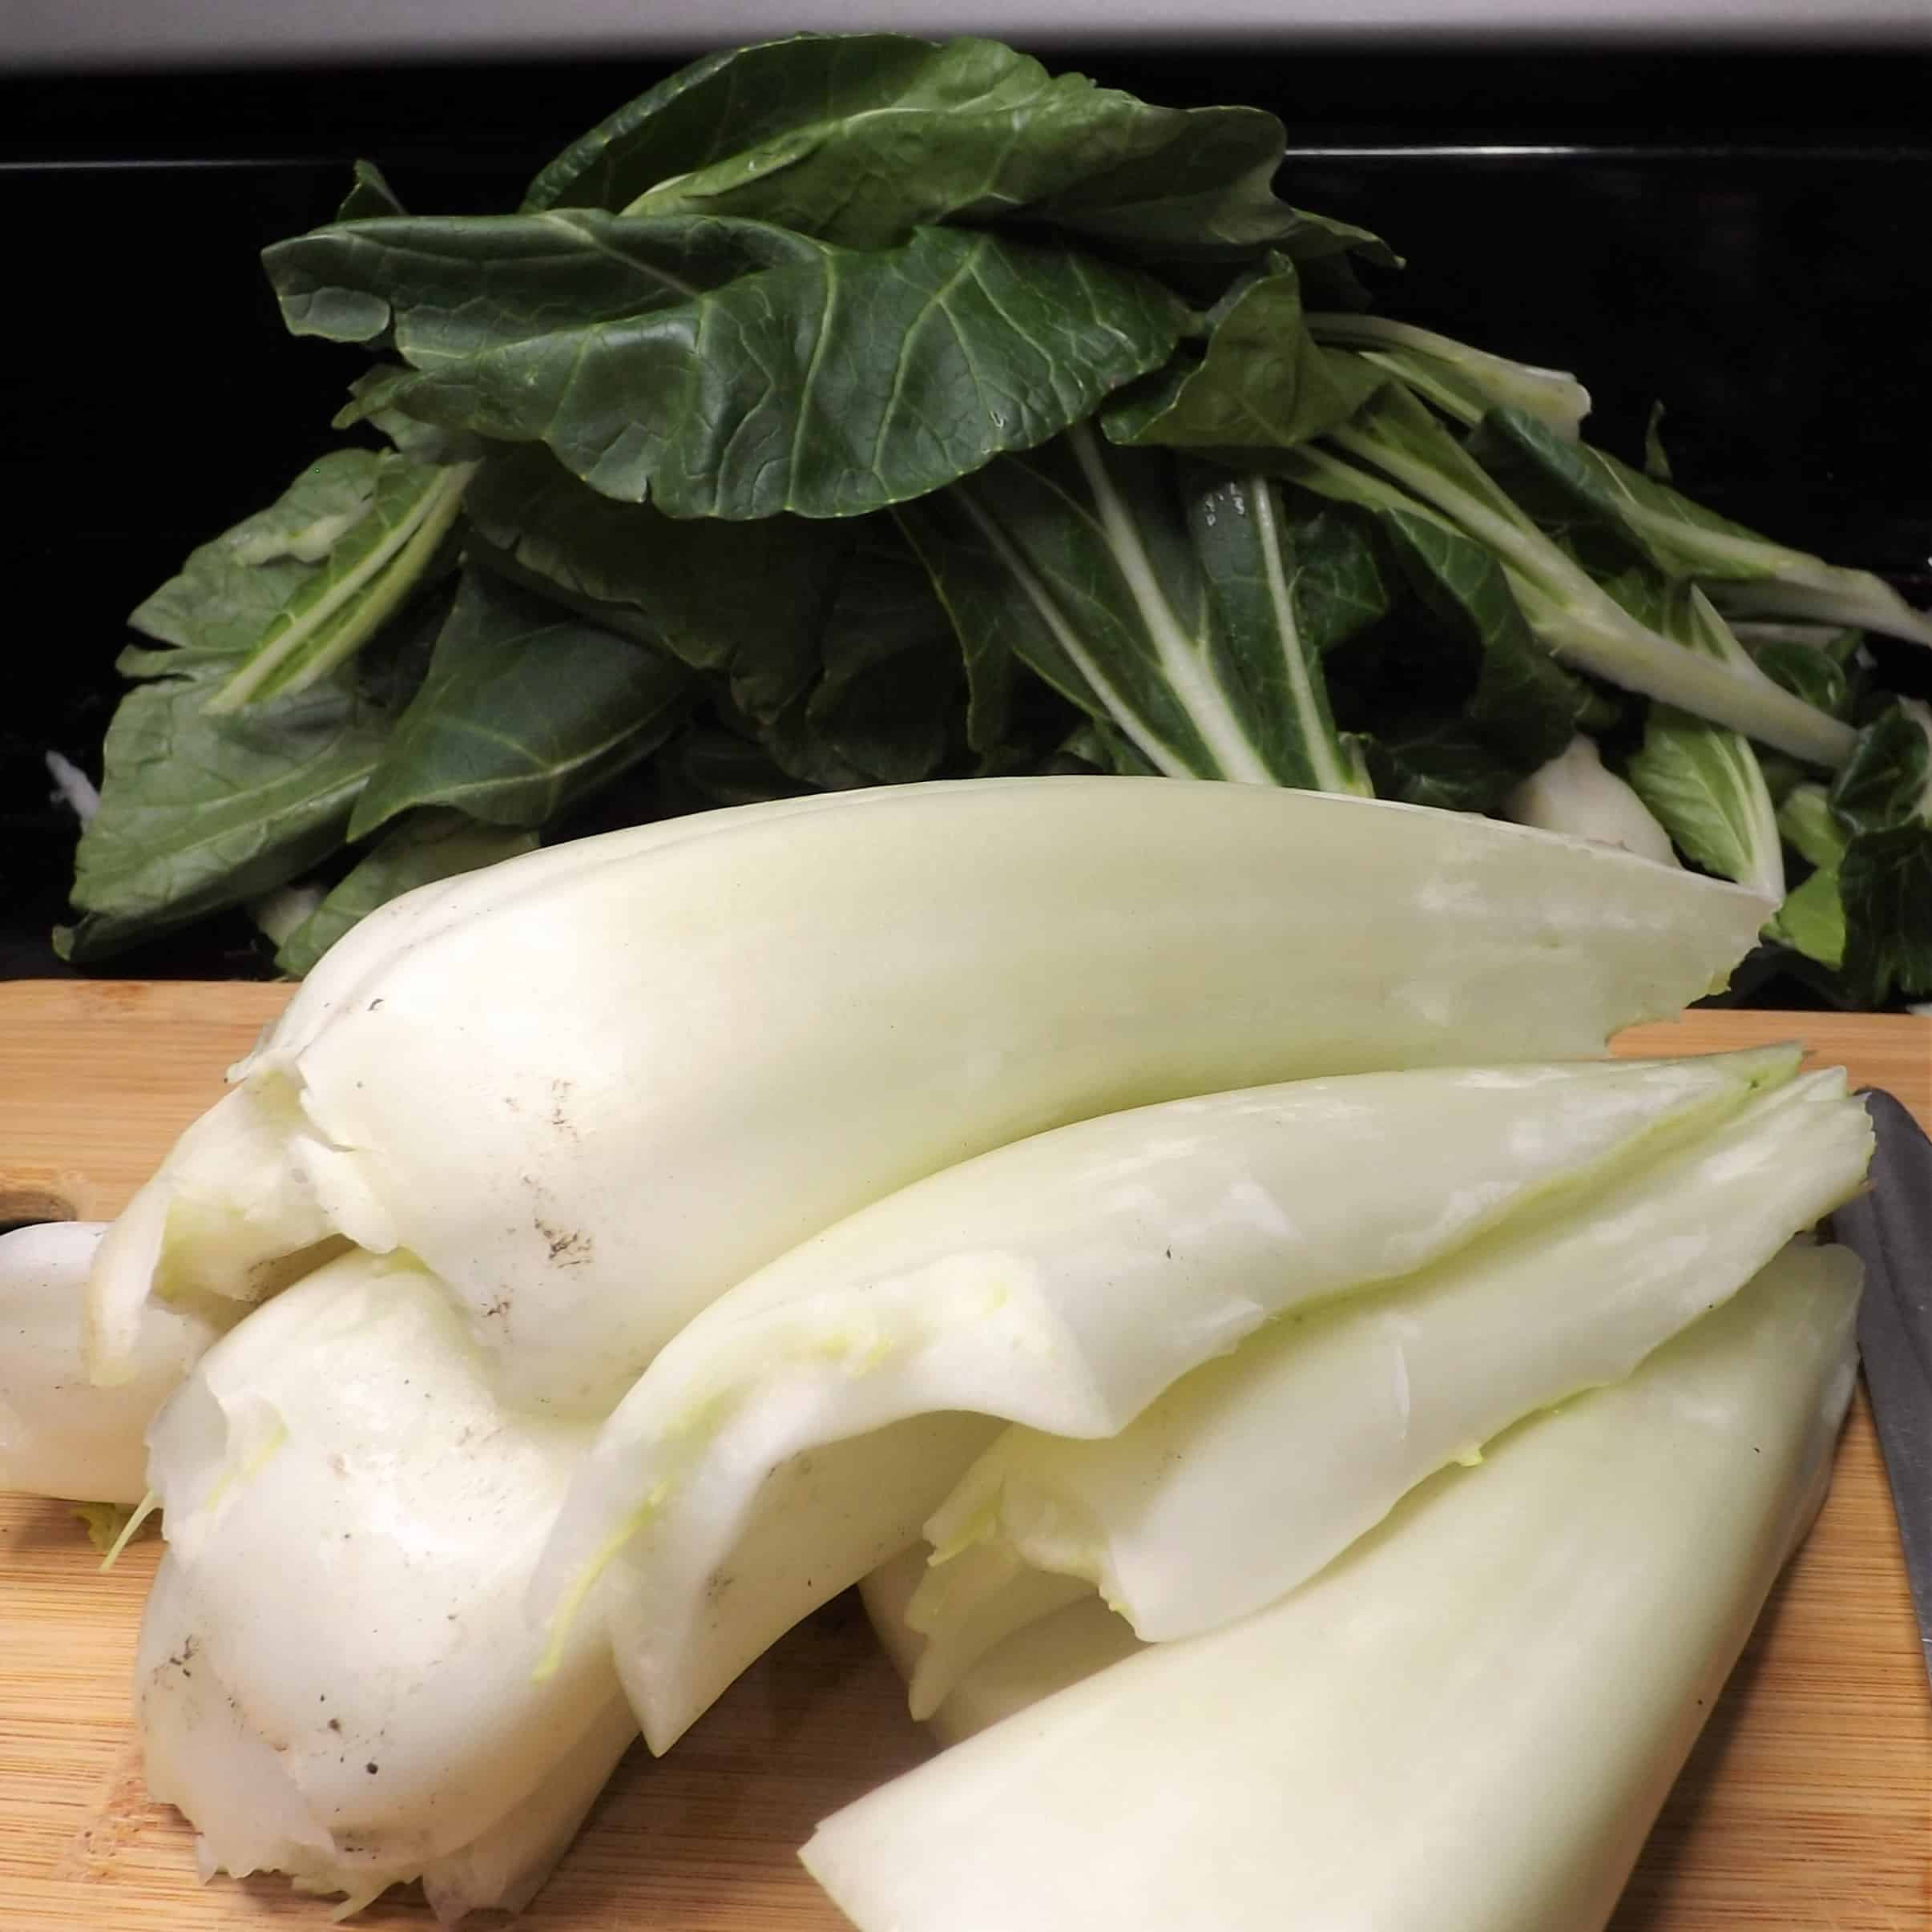
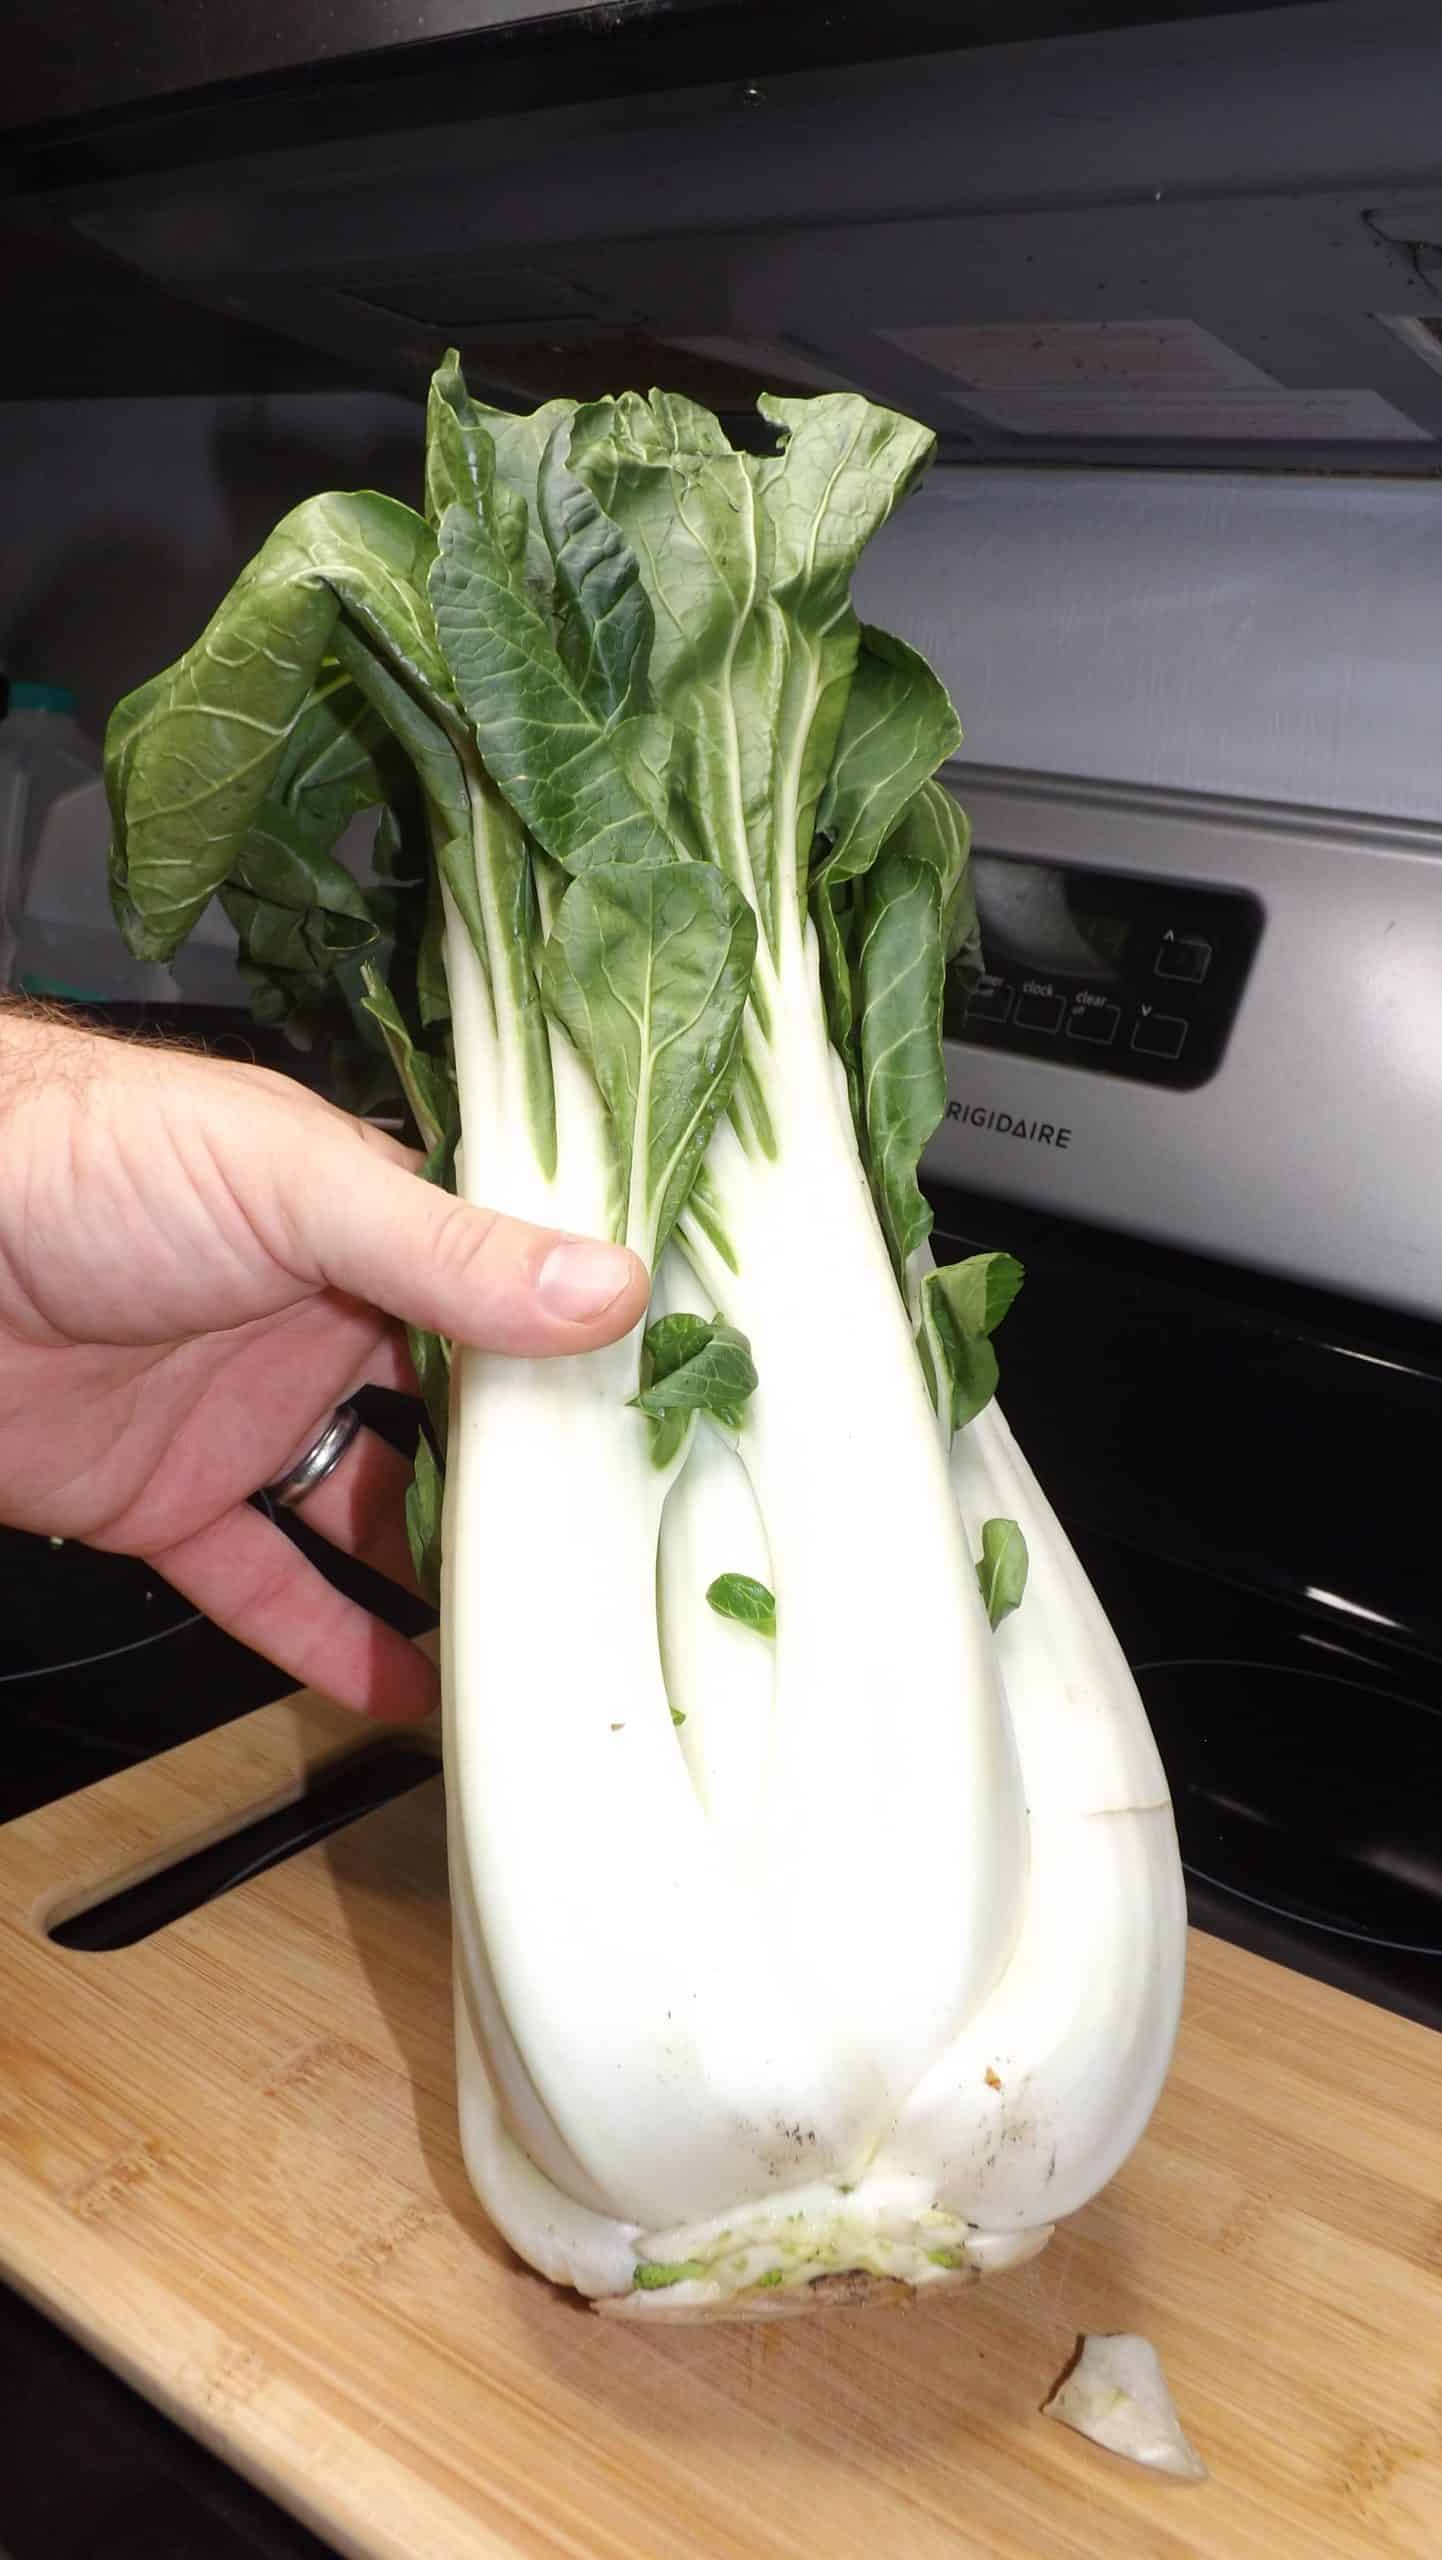
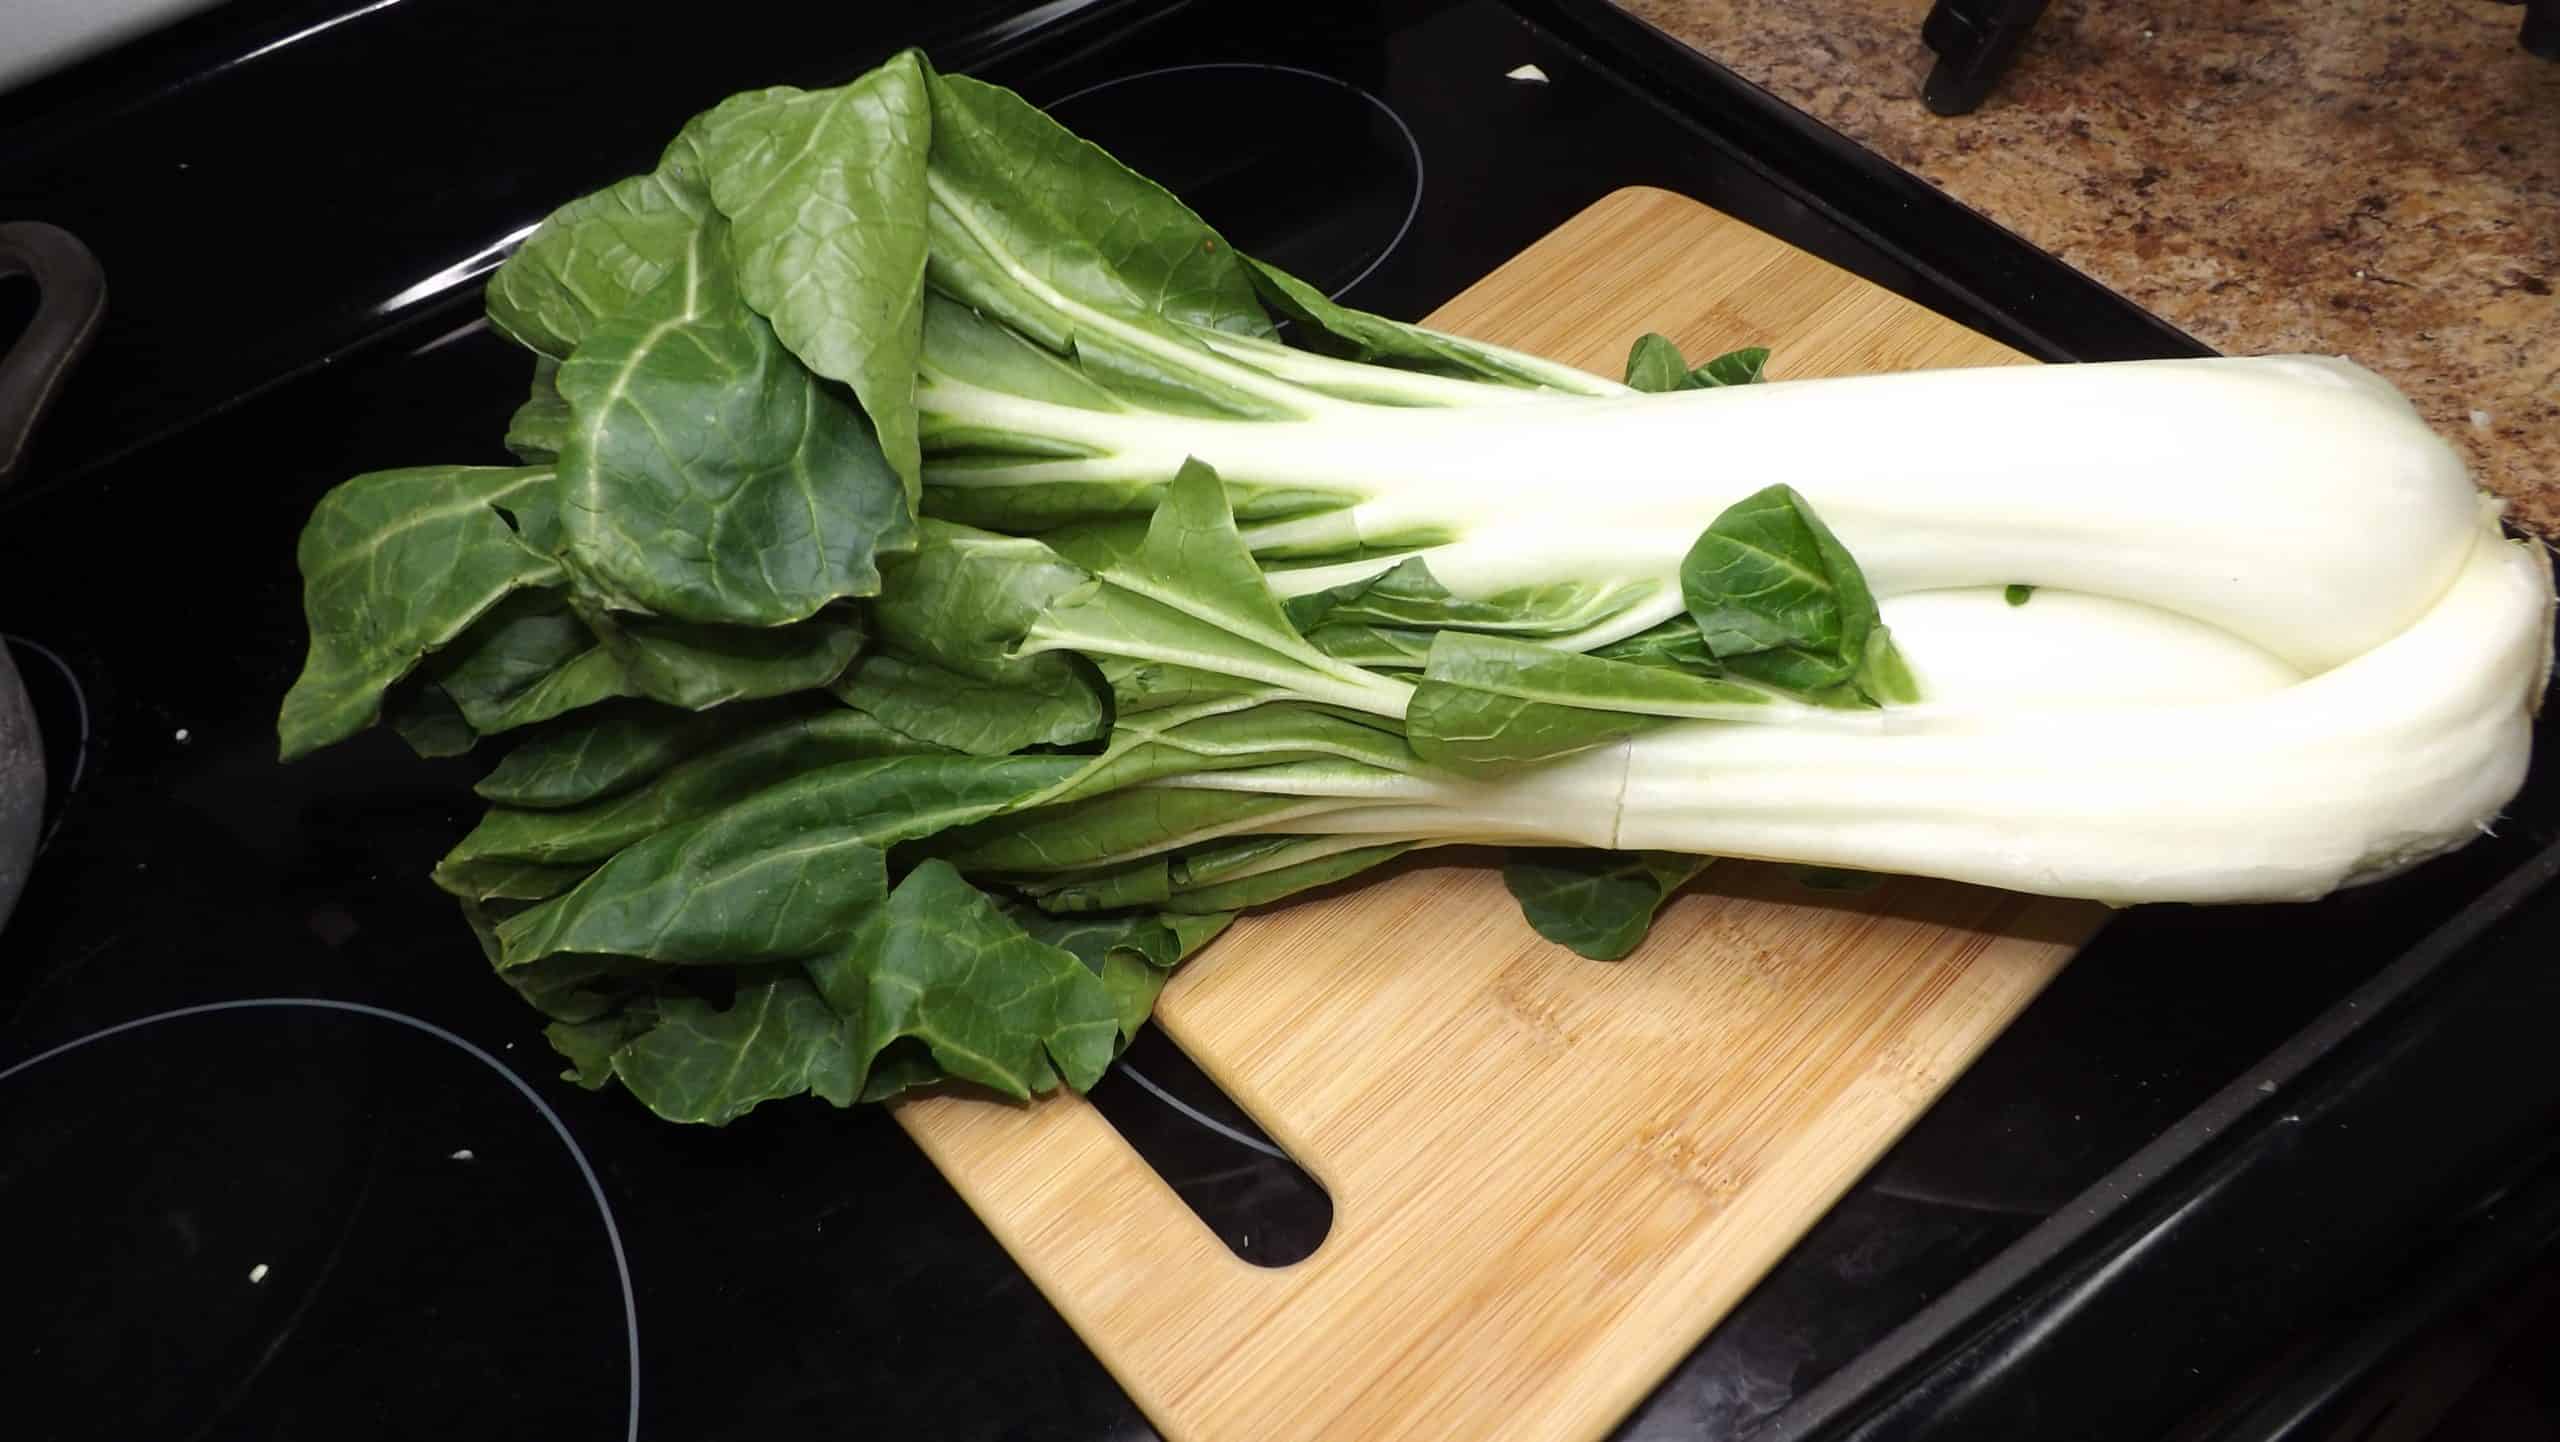
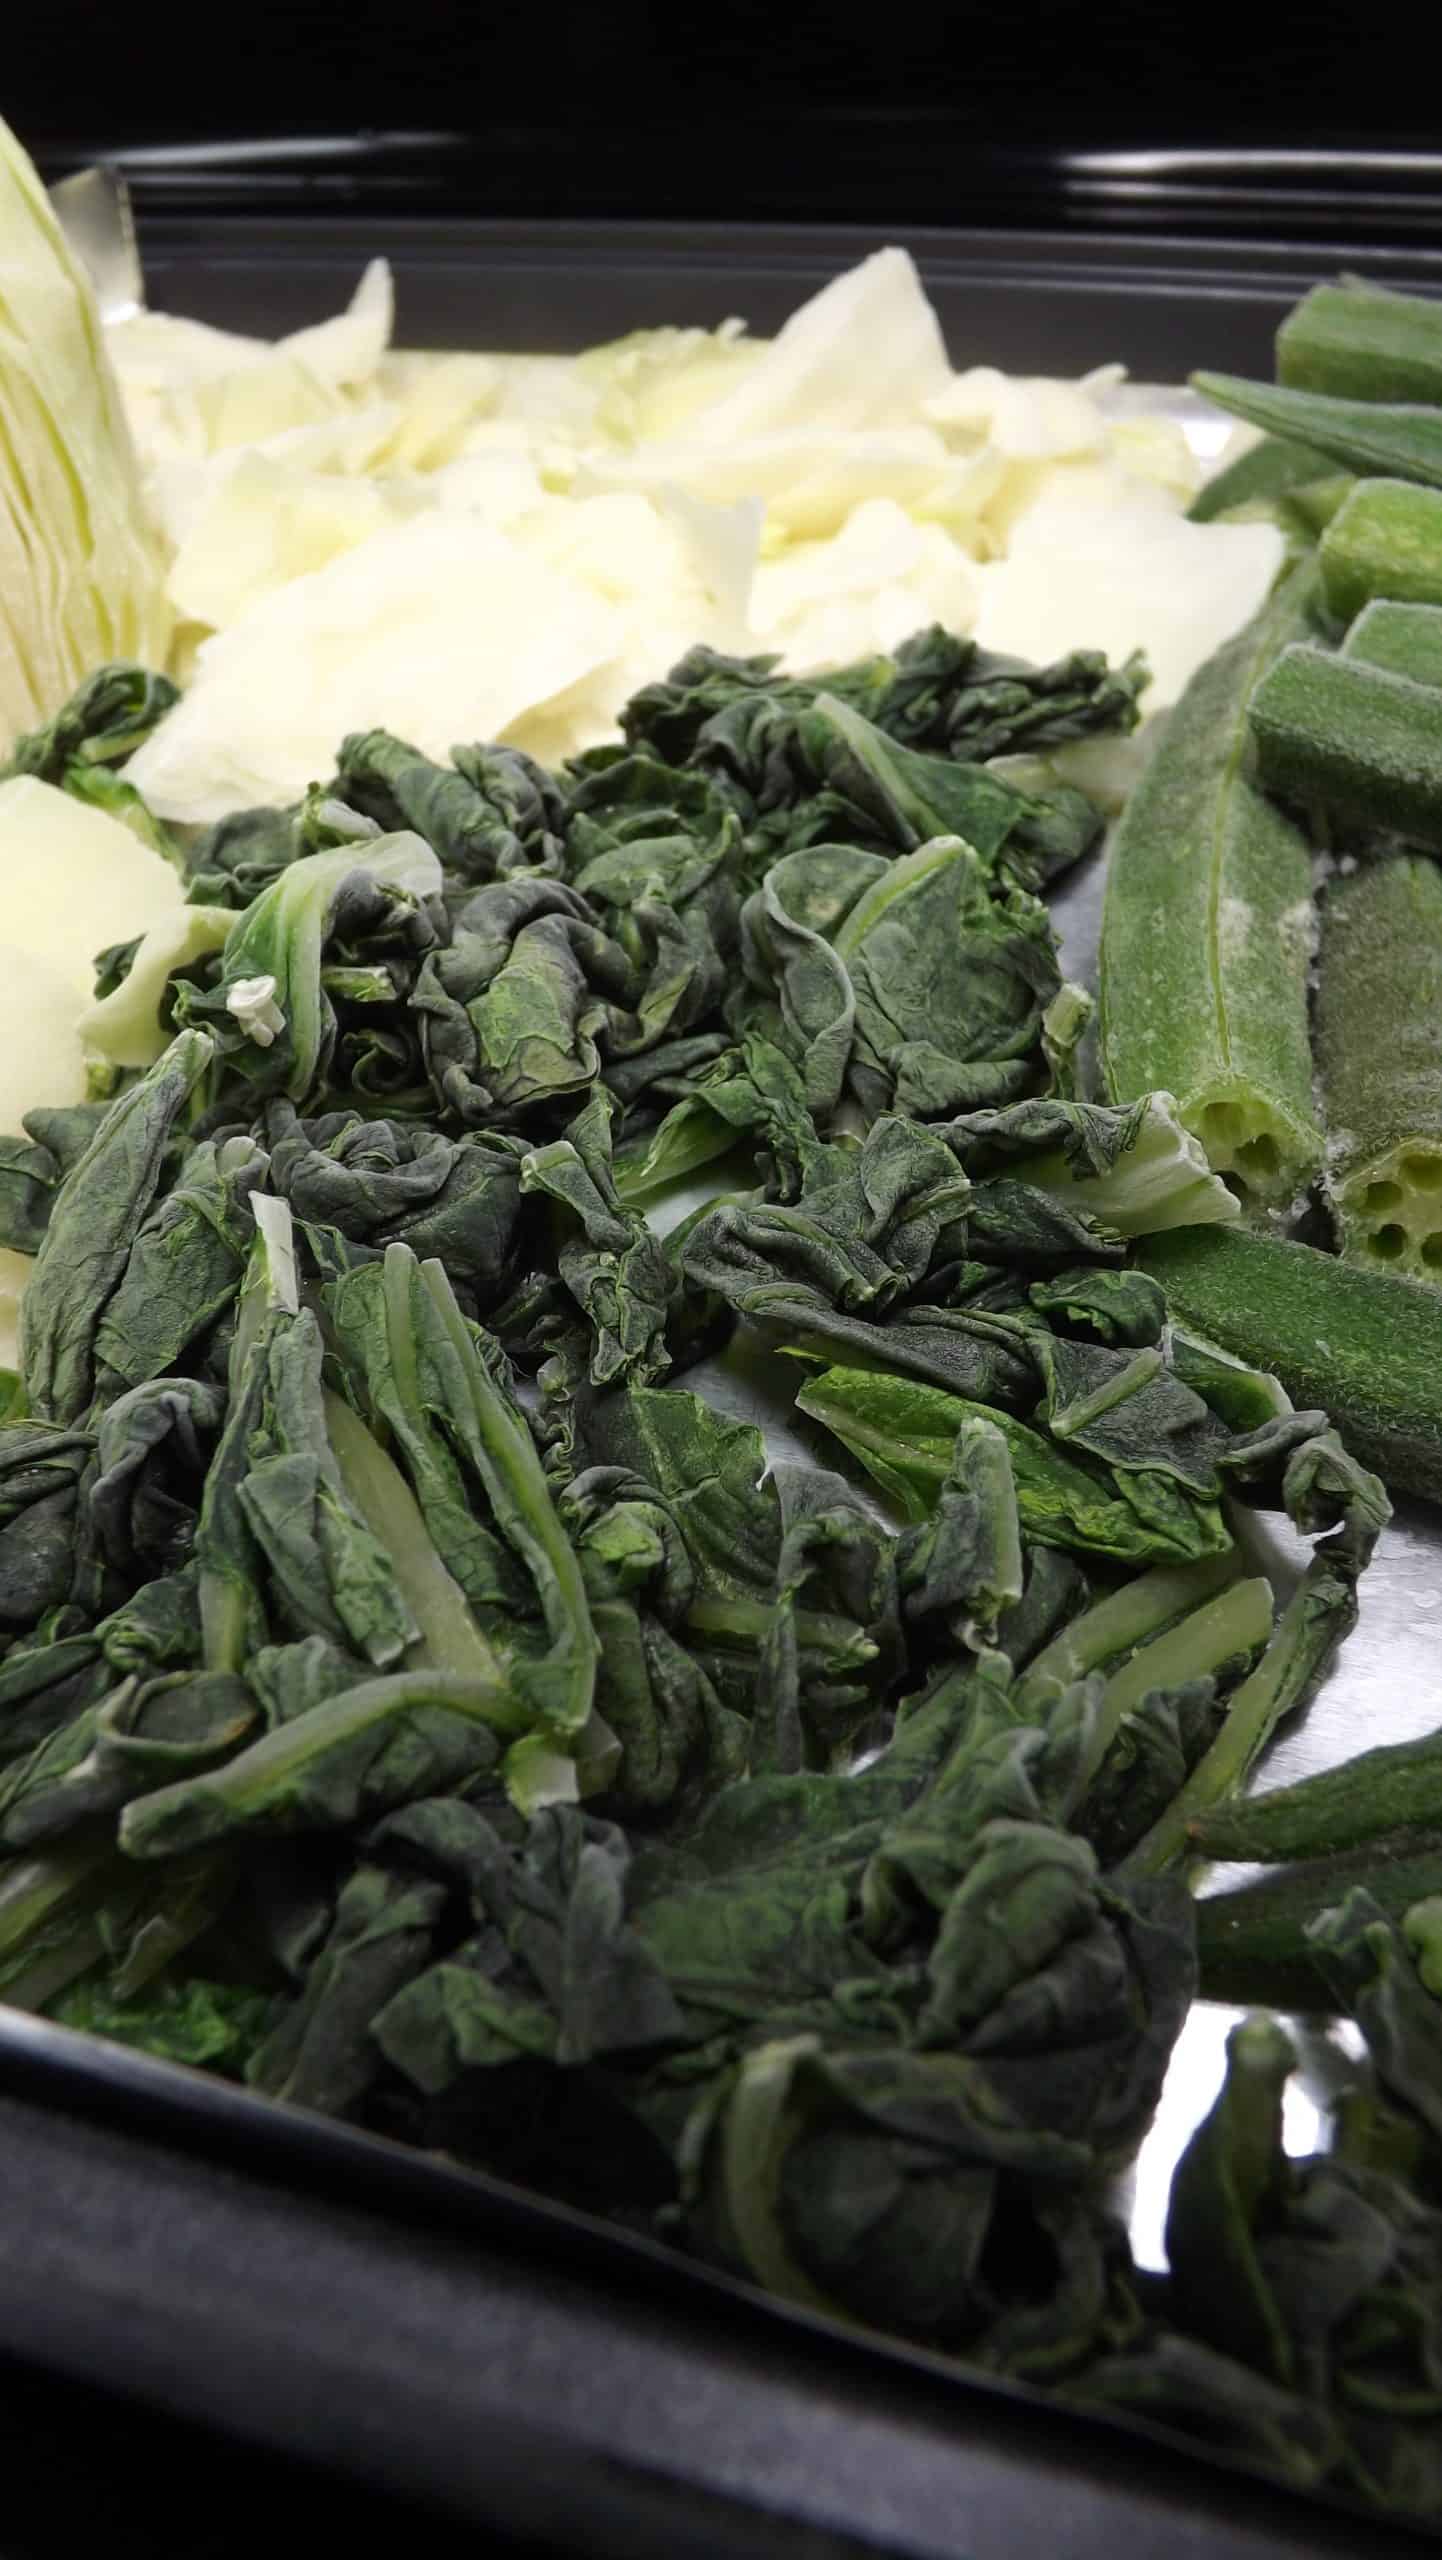
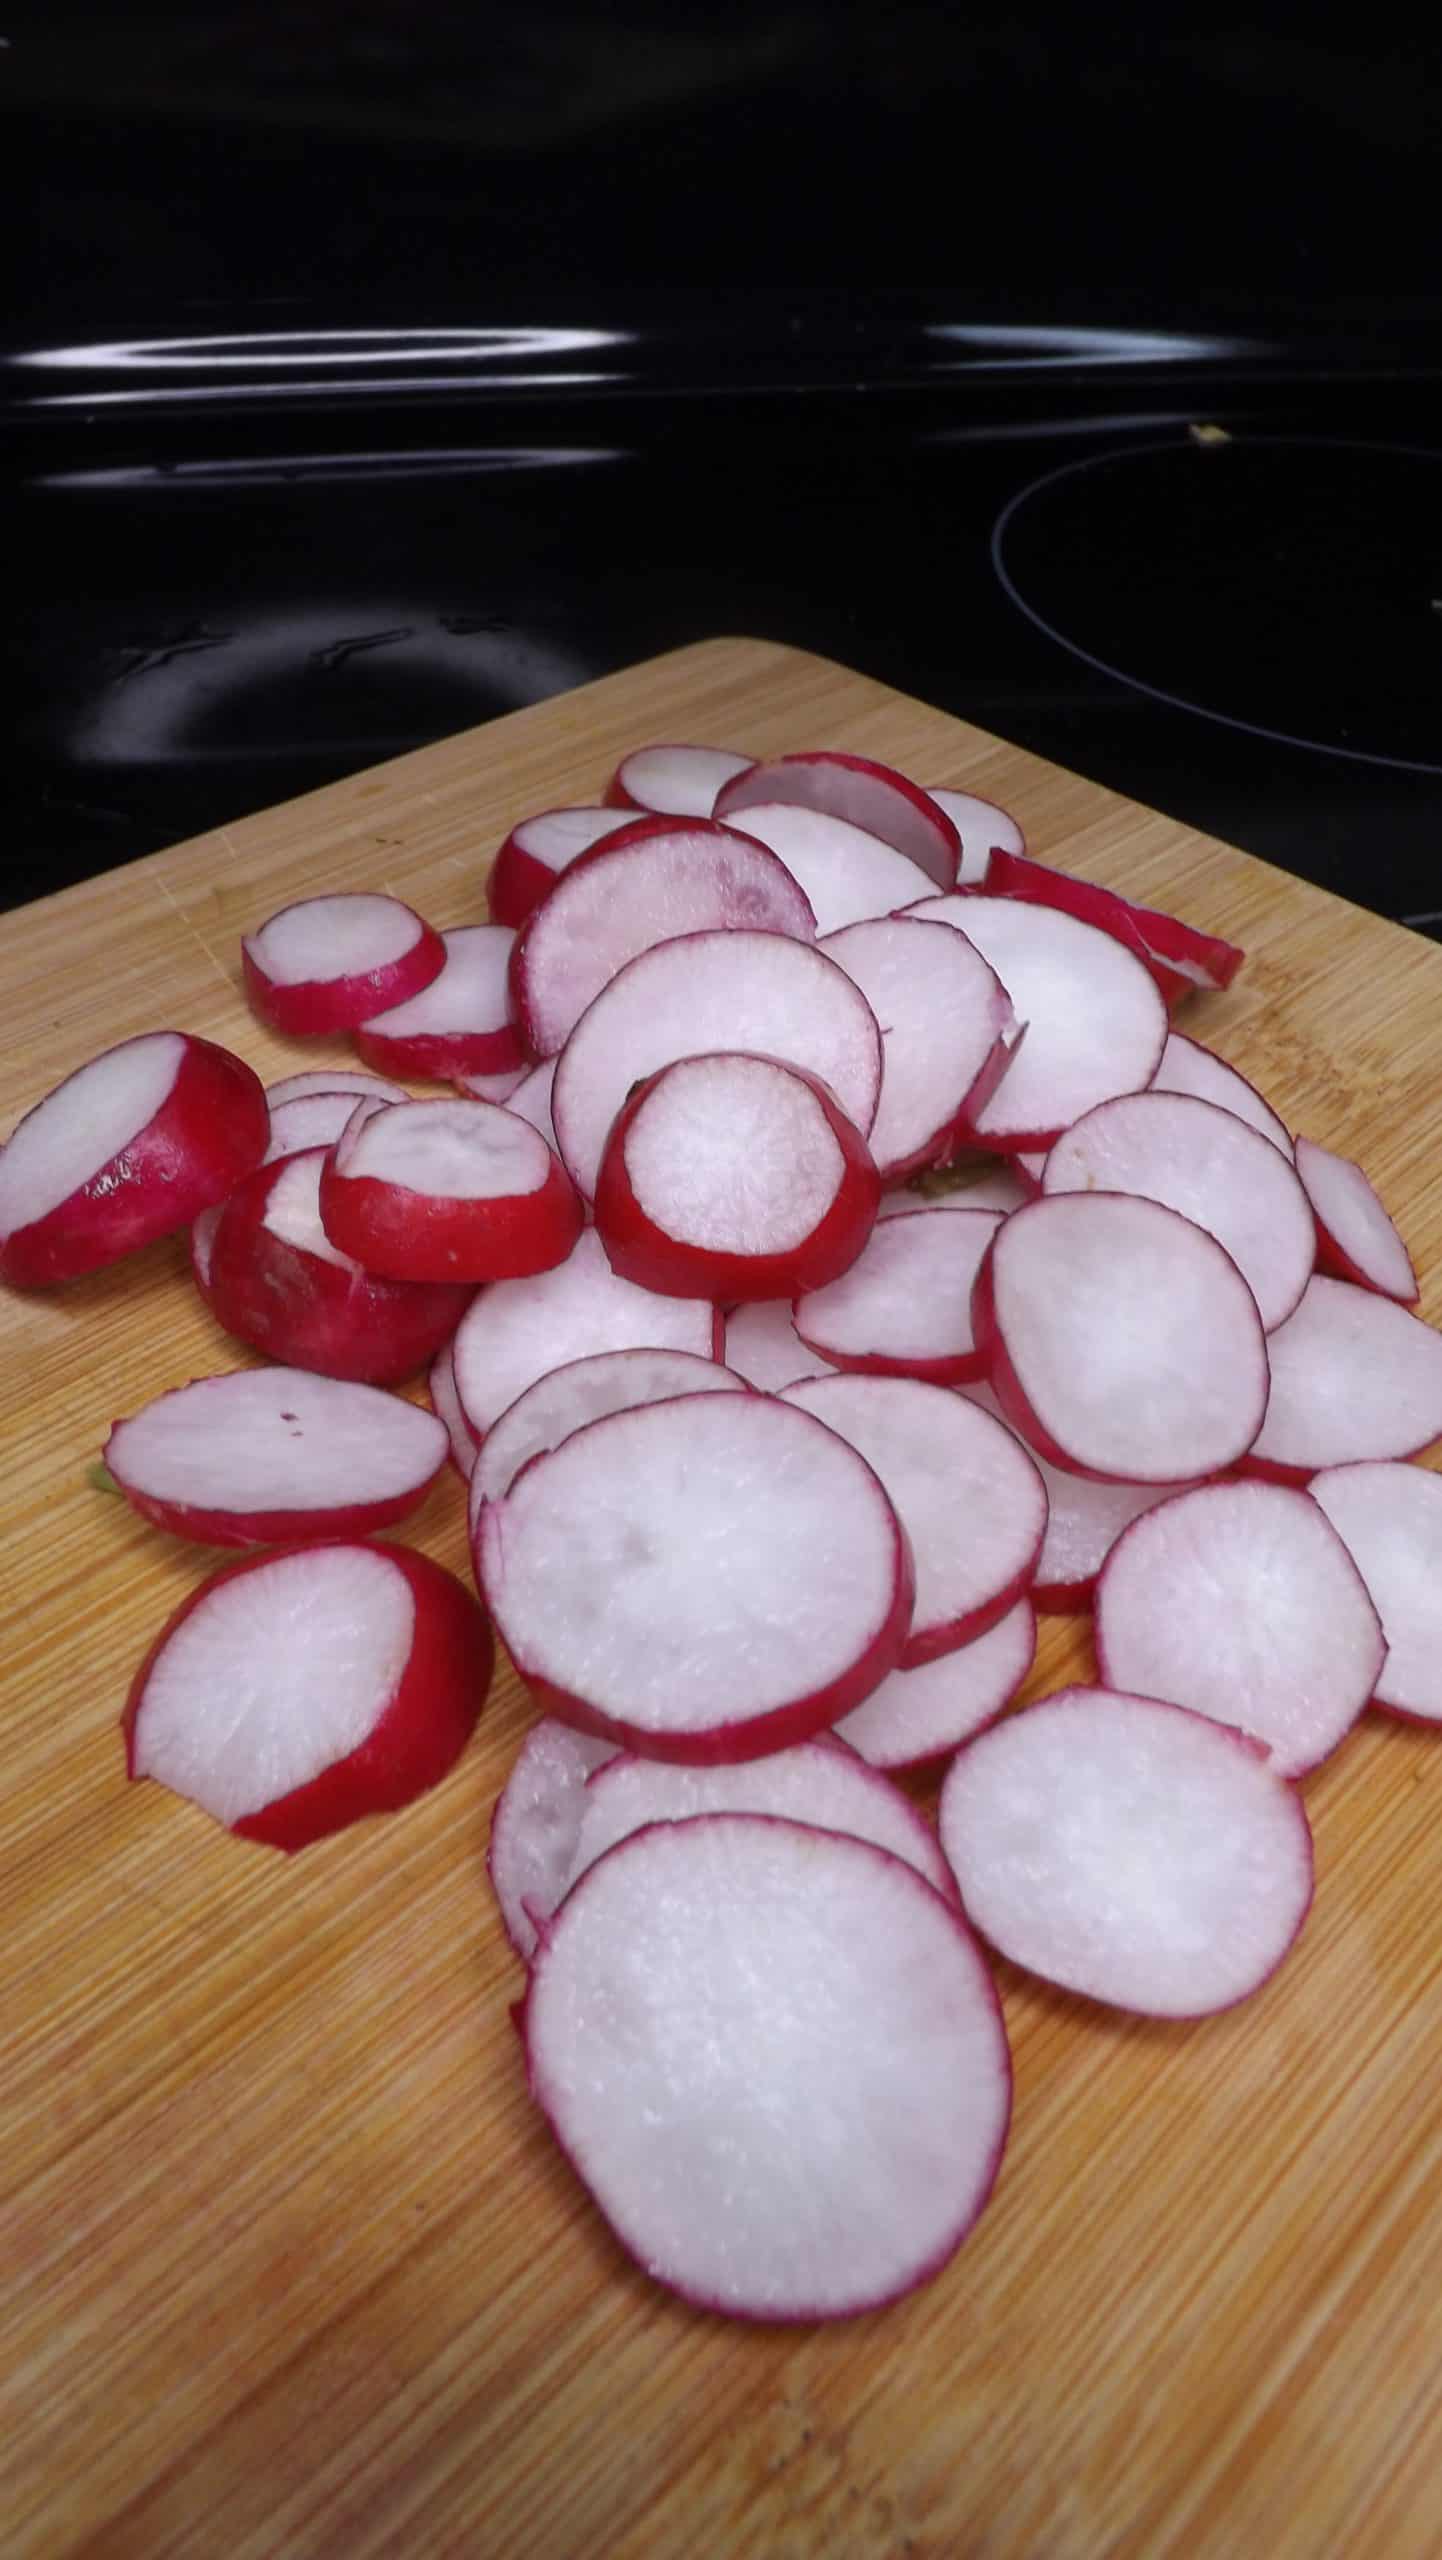
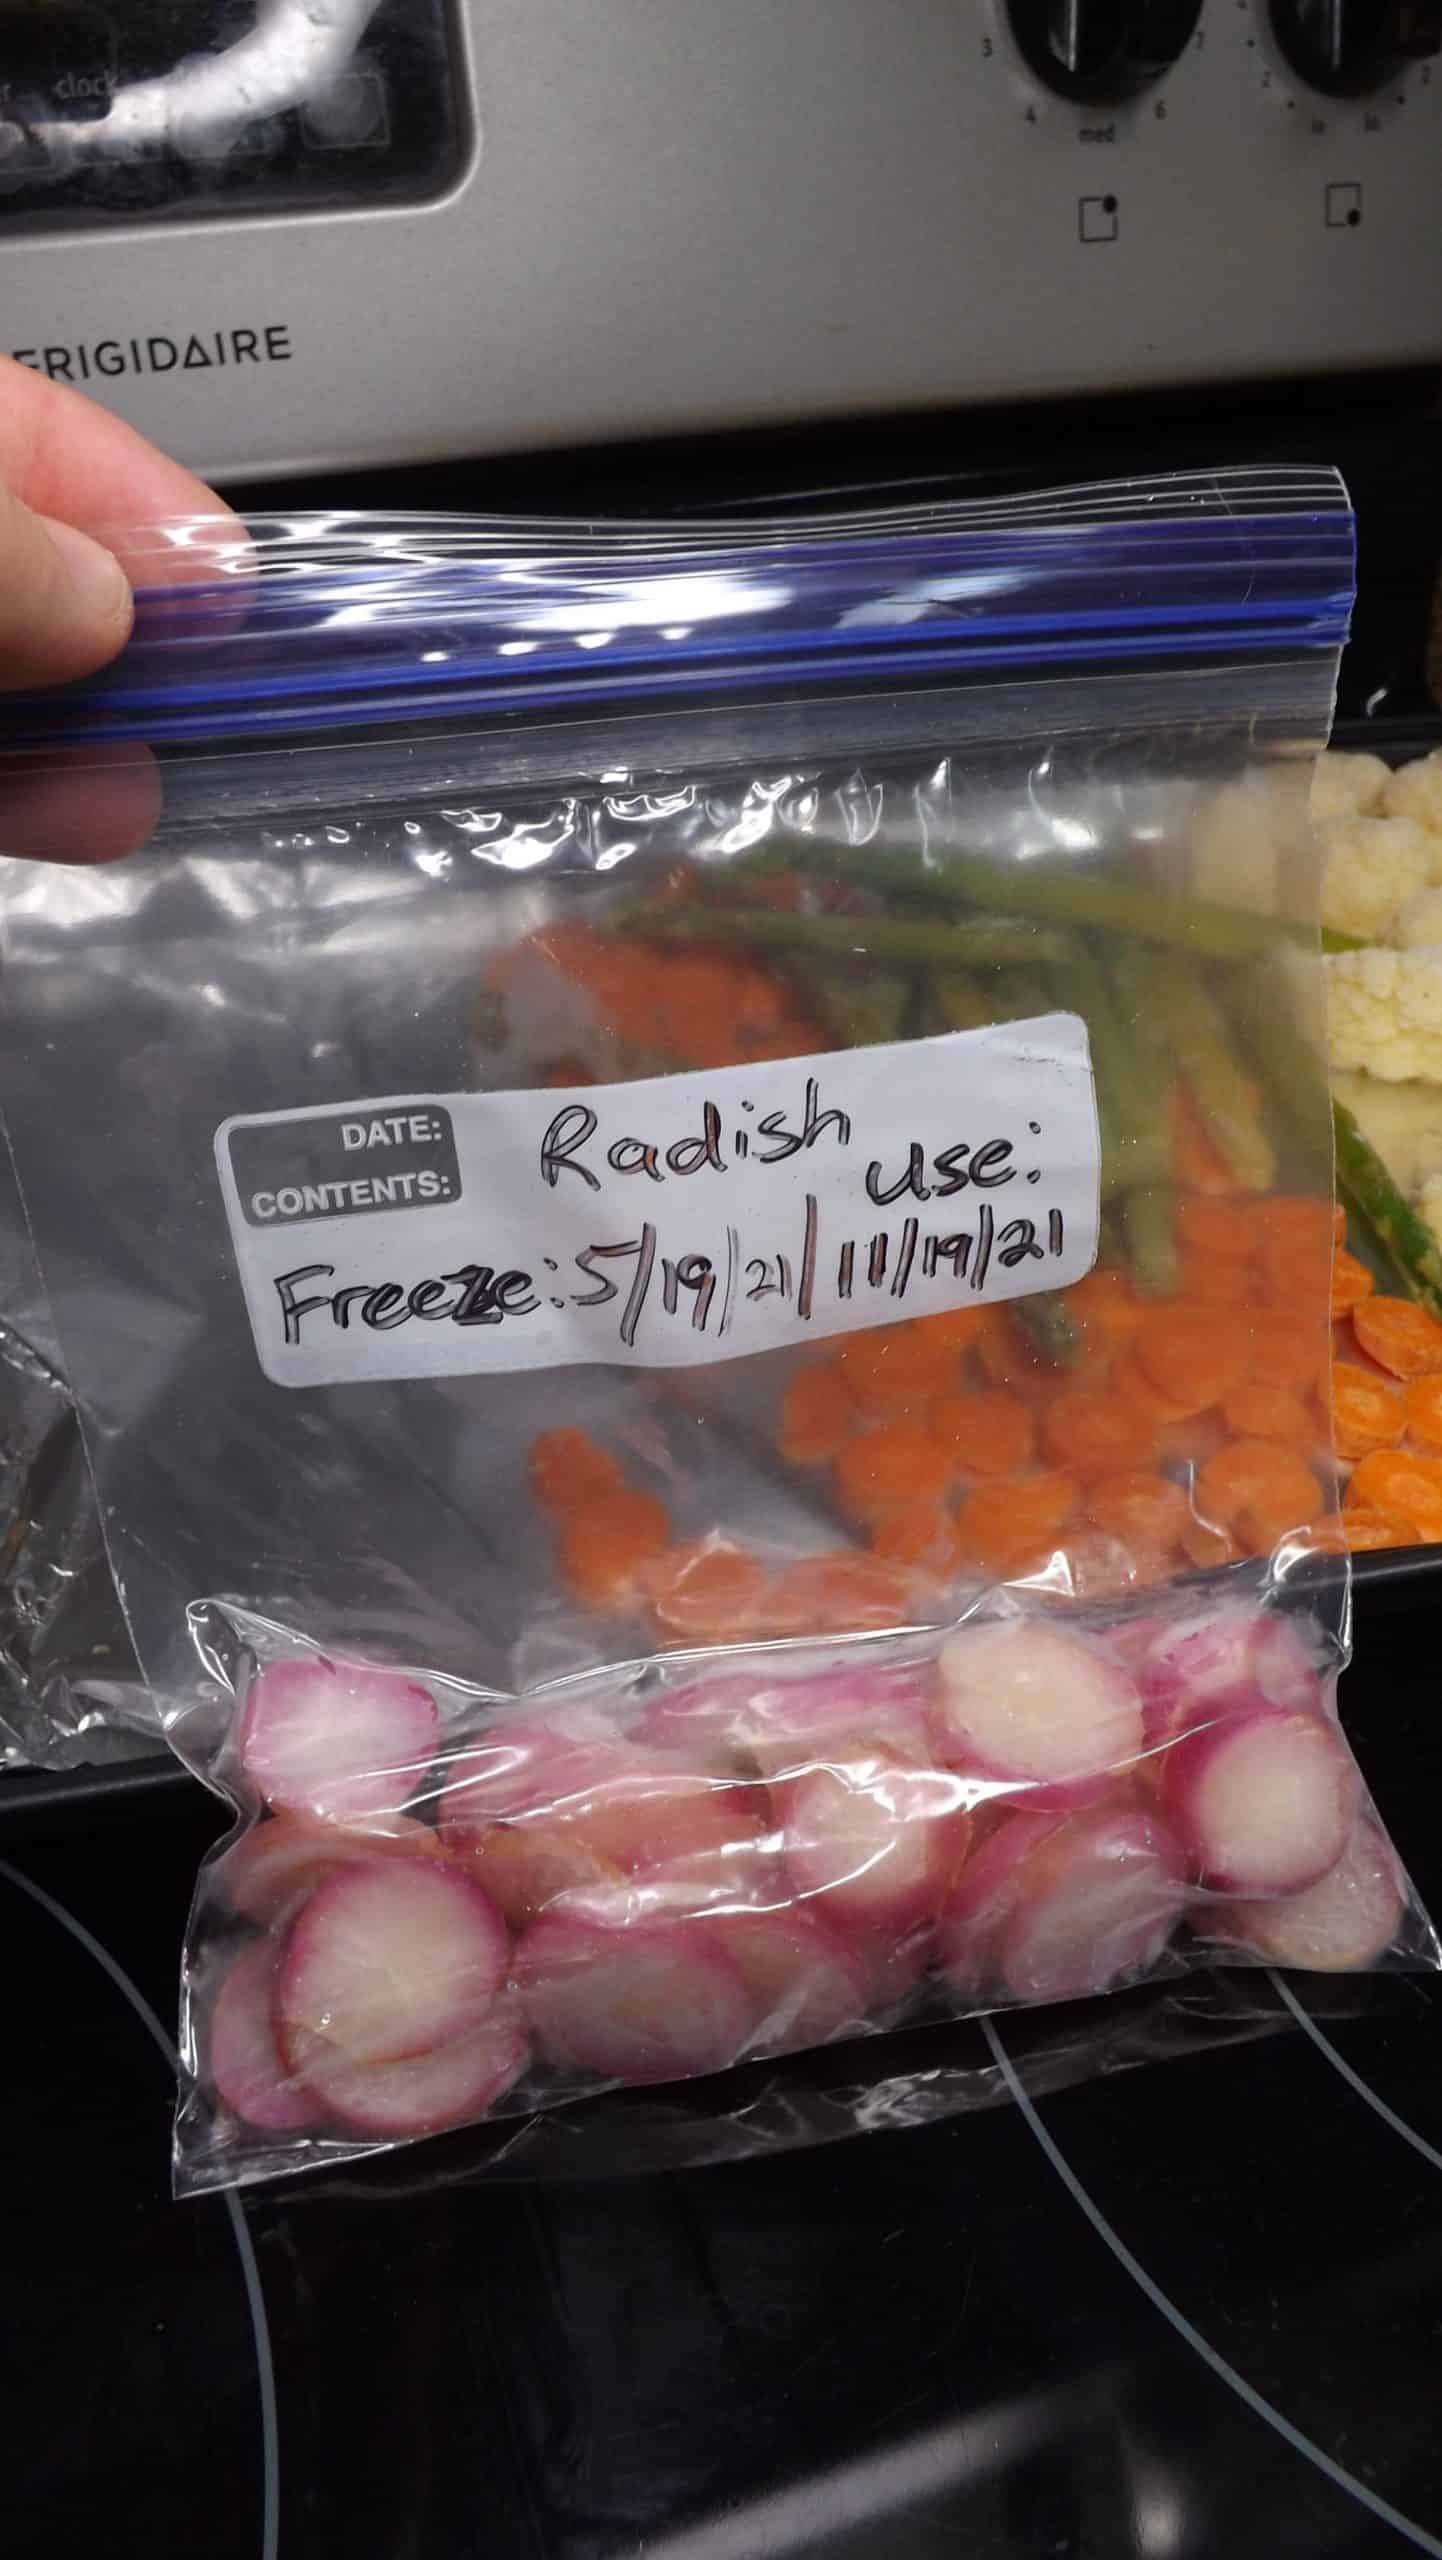
    It is the same method we use with many of our more dense veggies like freezing yellow squash, freezing zucchini, freezing radishes and freezing beets as well as some less dense veggies like when you freeze cabbage and freeze Bok choy.

    Need to know all about freezing? These freezing food cheat sheets will help!

    Admittedly, it will lose some of it's crisp texture like any other vegetable, but you were going to cook it until it was tender anyway, right? It can be added directly into a recipe without being thawed first or can thaw in the fridge overnight.

    Asparagus Freezing Stats

    BlanchedSmall: 2 minutes per 1 lb
    Medium: 3 minutes per 1 lb
    Large: 3-5 minutes per 1 lb
    (up to 5 depending on thickness)
    Prep StyleWhole
    Pieces
    Time To Freeze2 to 4 hours (flash freeze)
    12 to 24 (deep freeze)
    Time to Thawa few hours in the fridge
    can cook in oven or microwave without thawing
    Usescasseroles
    baked dishes
    soup
    pasta
    Freezer Lifeup to 12 months

    Can You Freeze Asparagus Without Cooking?

    If you plan to eat the asparagus relatively soon (like within a week), you will probably be fine not to freeze asparagus first. But, if you plan to go any real length of time, you should always blanch your veggies before freezing them.

    Why do we say blanch instead of cook? Blanching works because it is essentially starting the cooking process. Many fruits and veggies have an enzyme that cause them to continue aging even if they are frozen. Blanching kills that enzyme and stops the aging process. When we quickly remove the food and put it in an ice bath that sudden temperature change stops the cooking process.

    Need to get all your food preserved easily? Check out the Ultimate Guide To Freezing Food so that you can fill your freezer without in minimal time.

    How To Freeze Asparagus

    You can freeze asparagus as whole stalks or cut into pieces. Whole stalks seem to hold up a little better but both work just fine. We will use a combination of blanching and flash freezing to get them ready for the deep freeze.

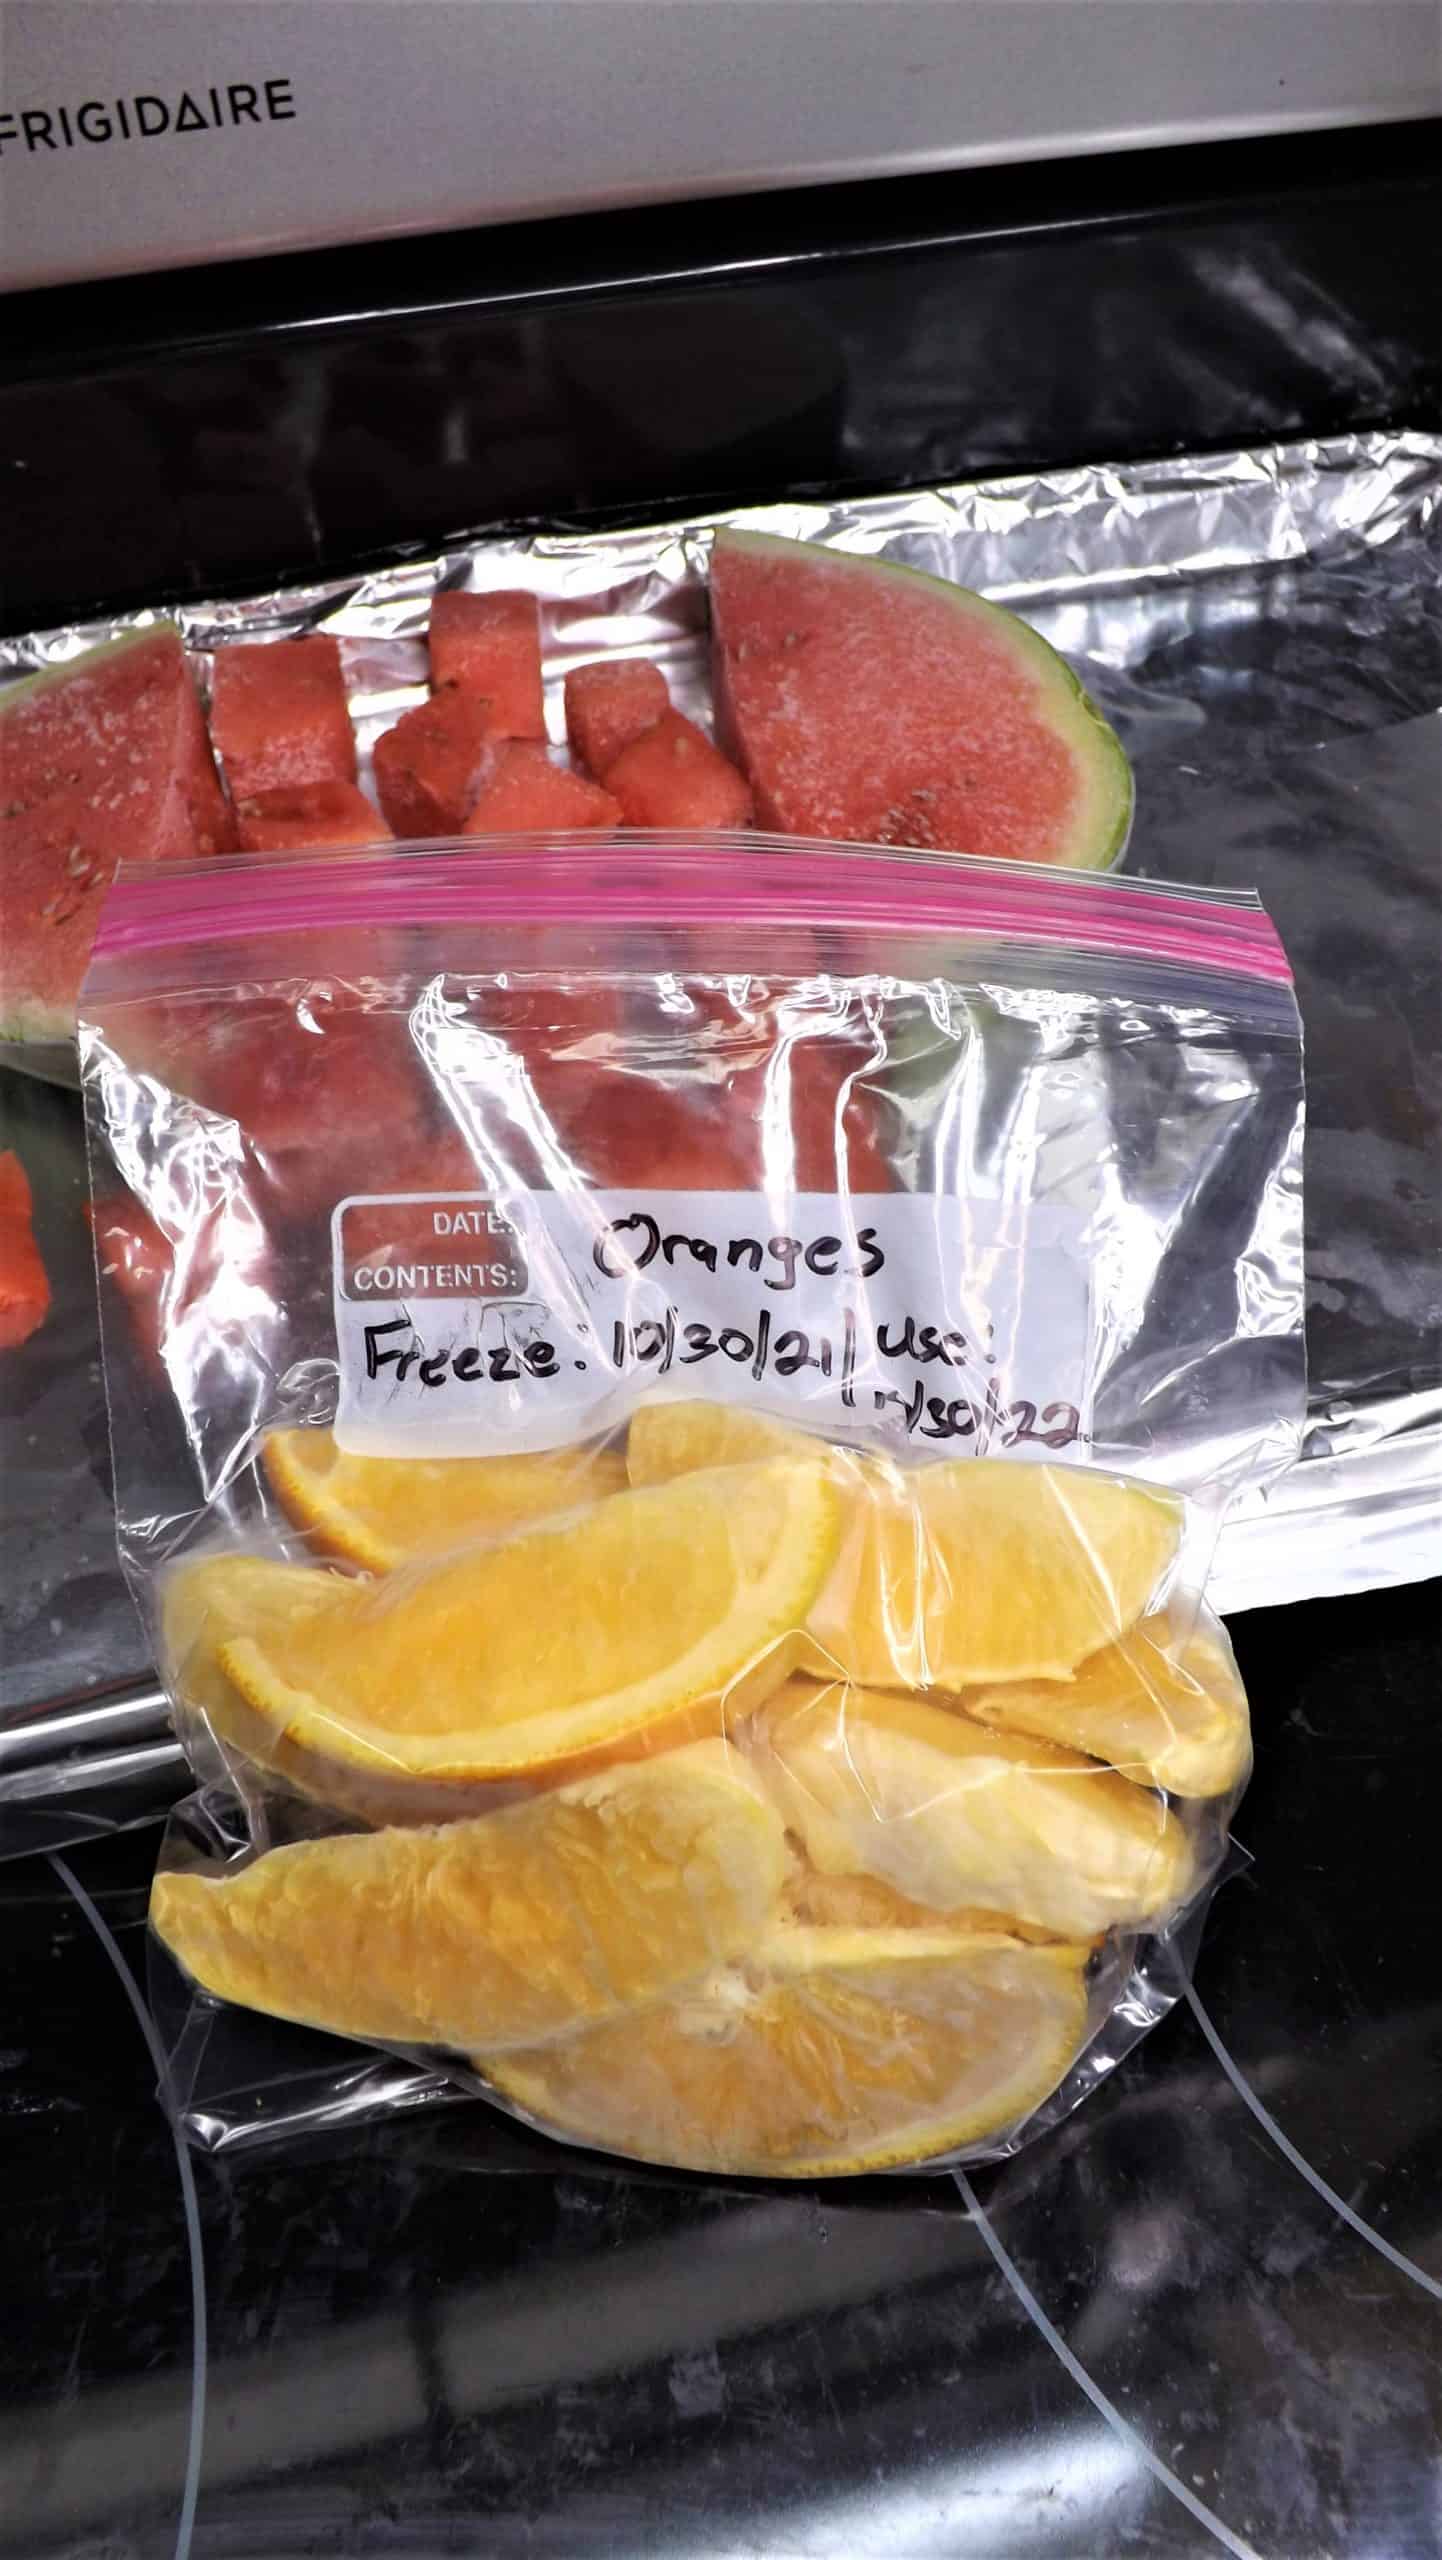
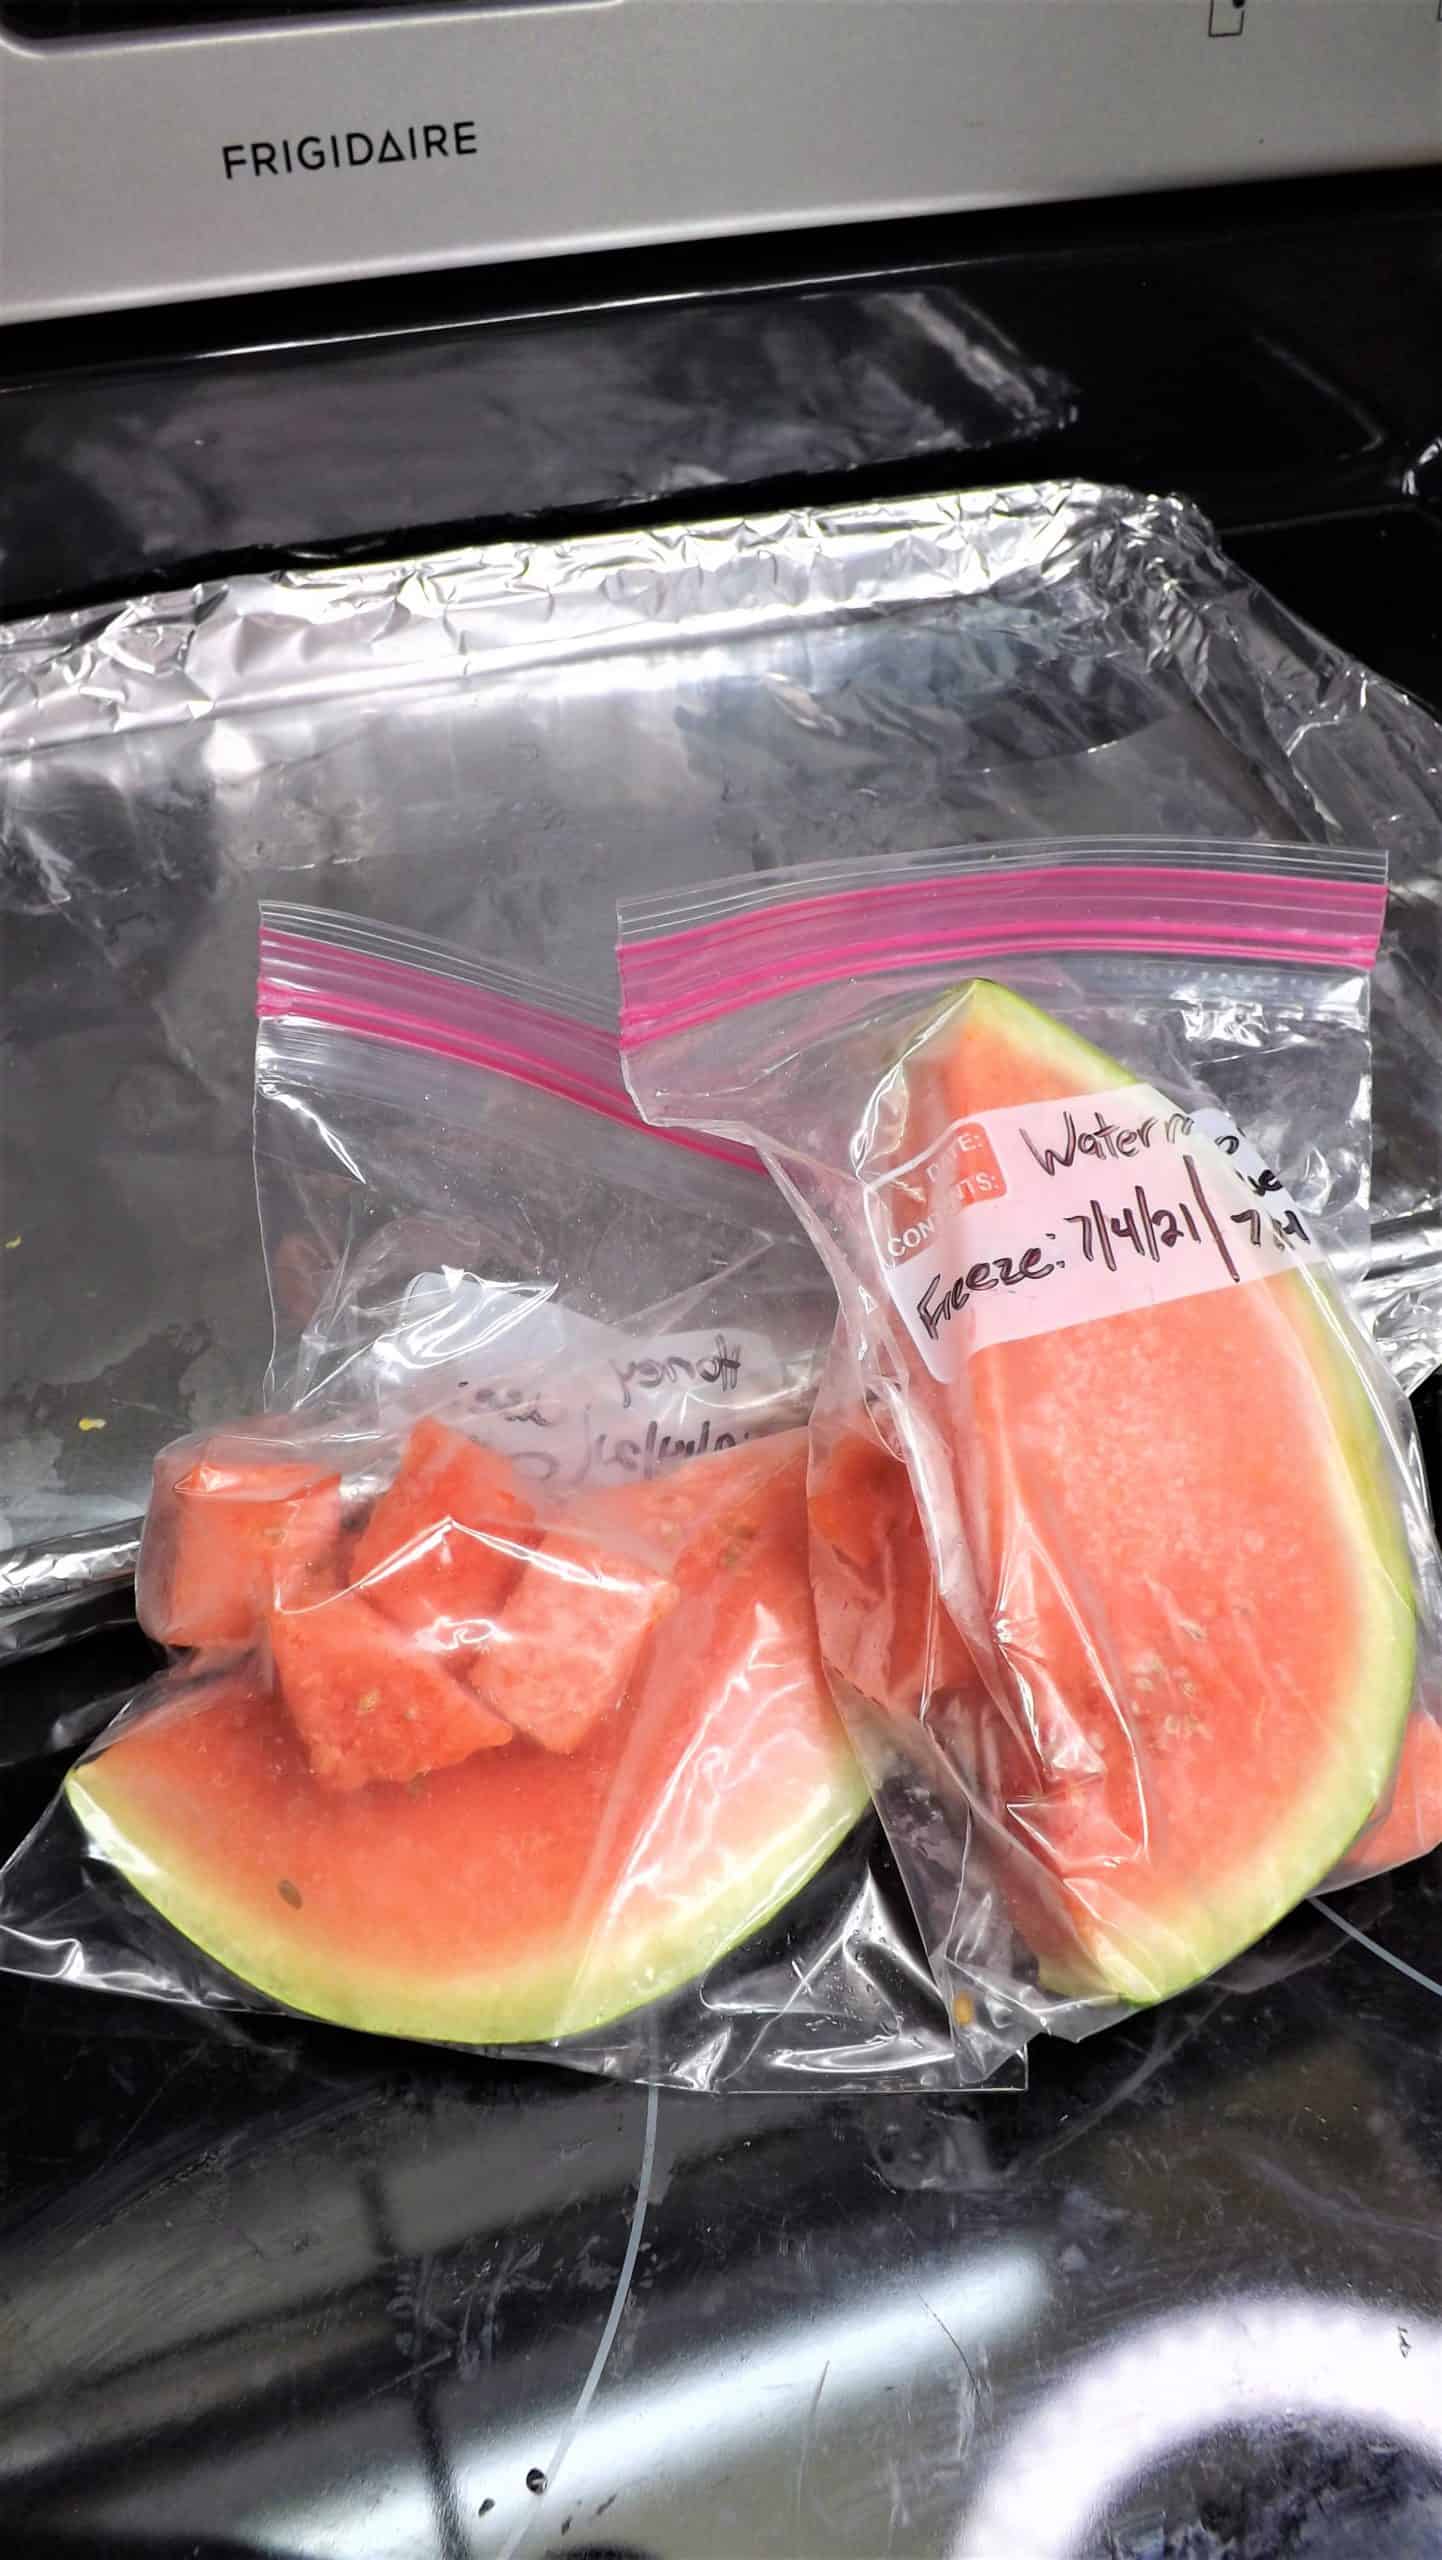
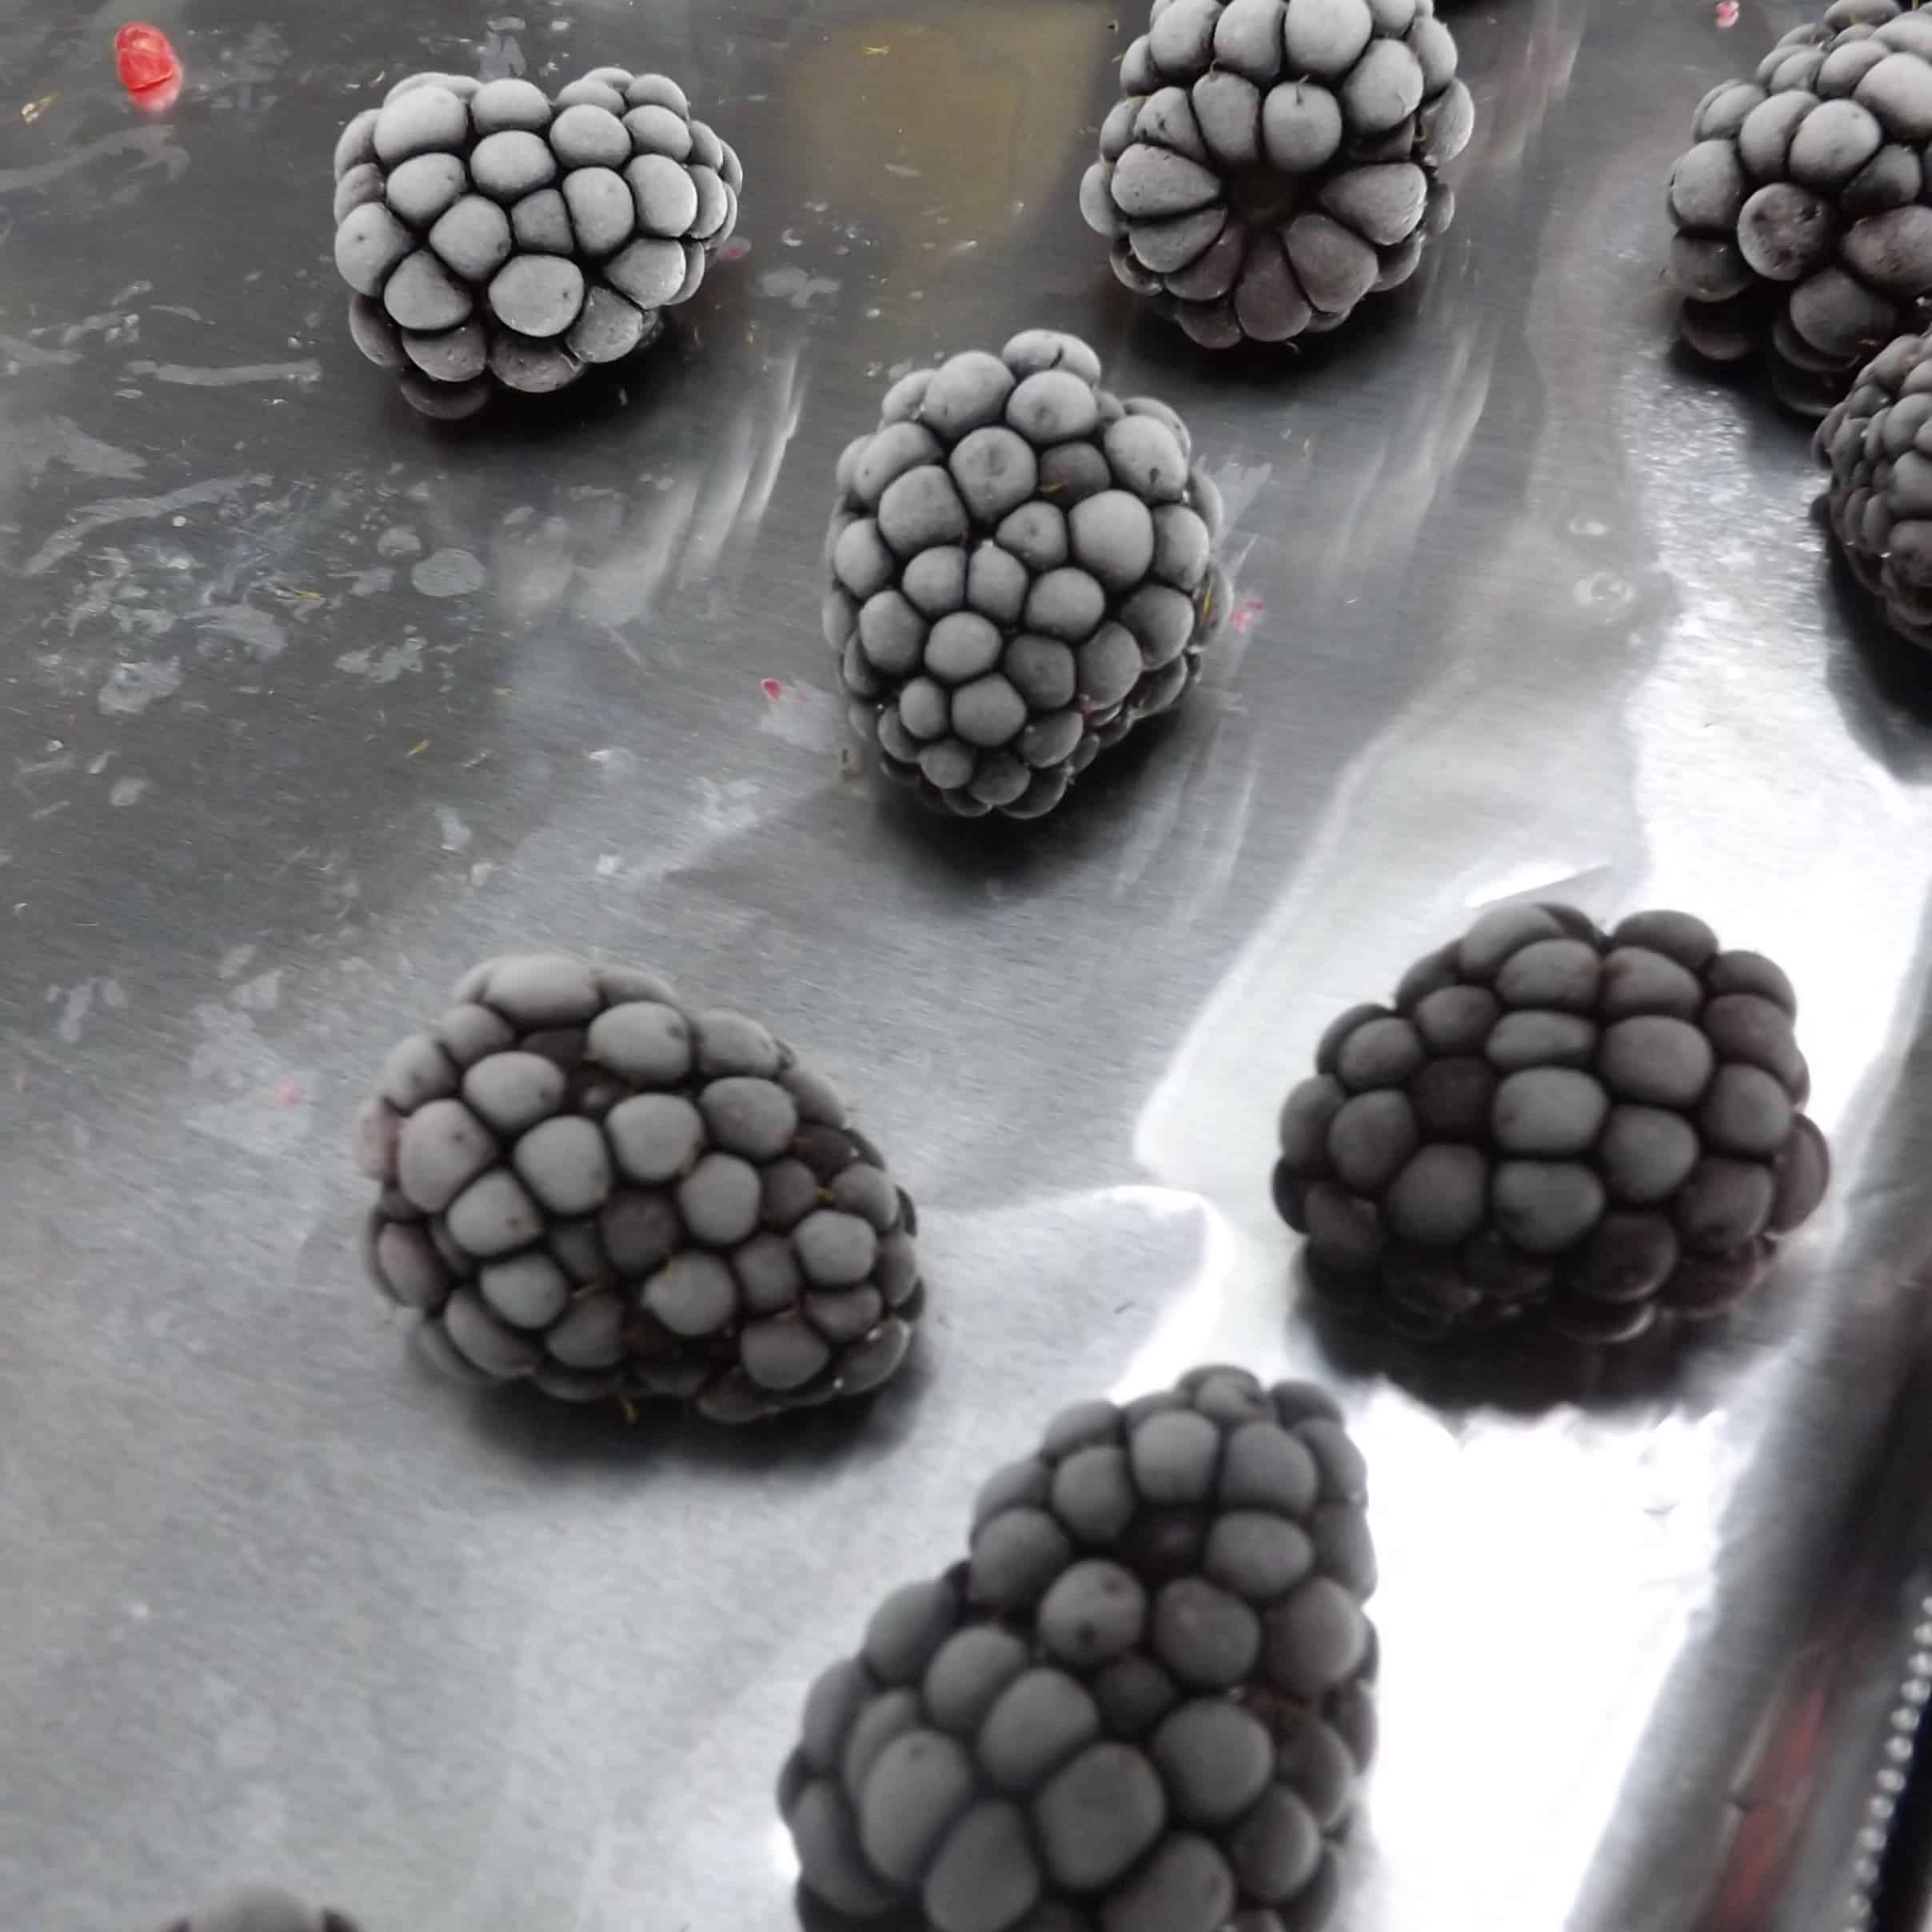
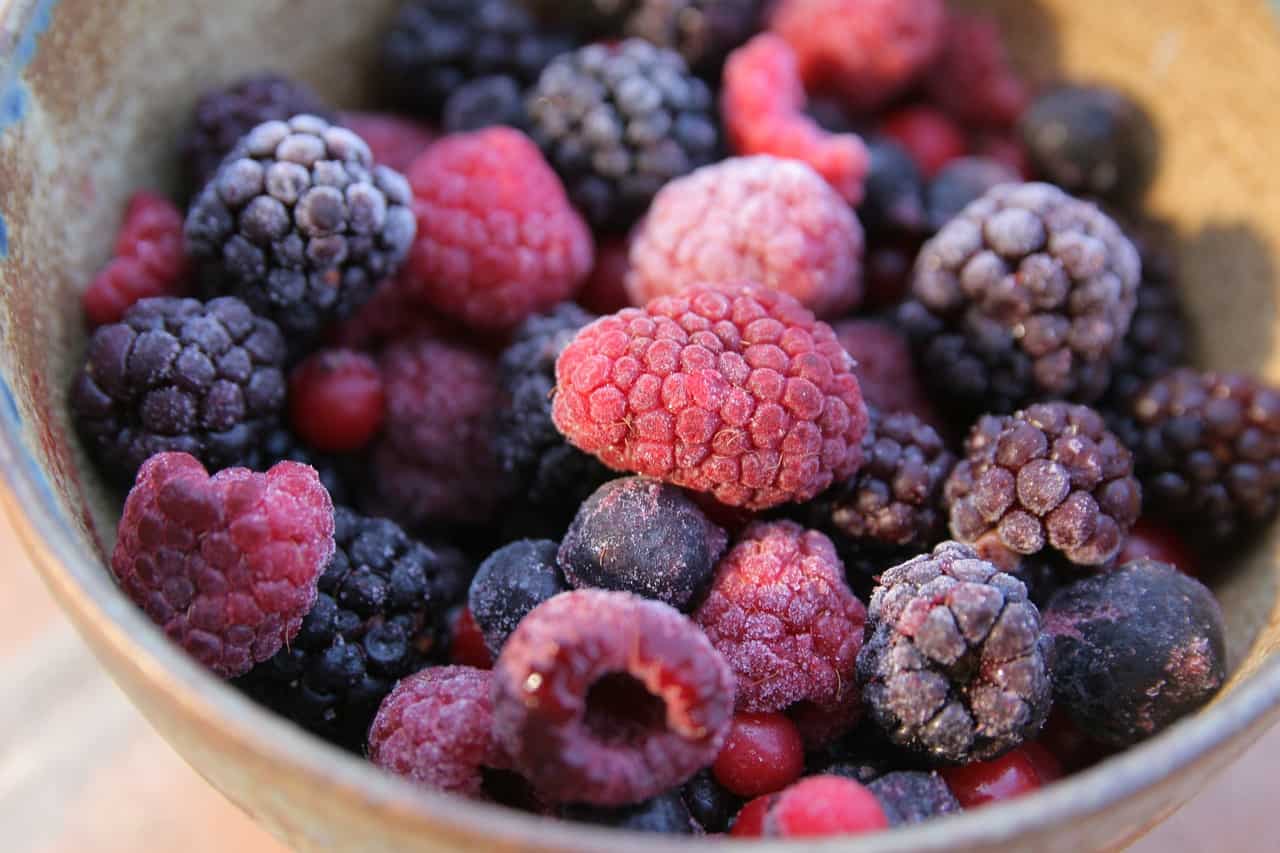
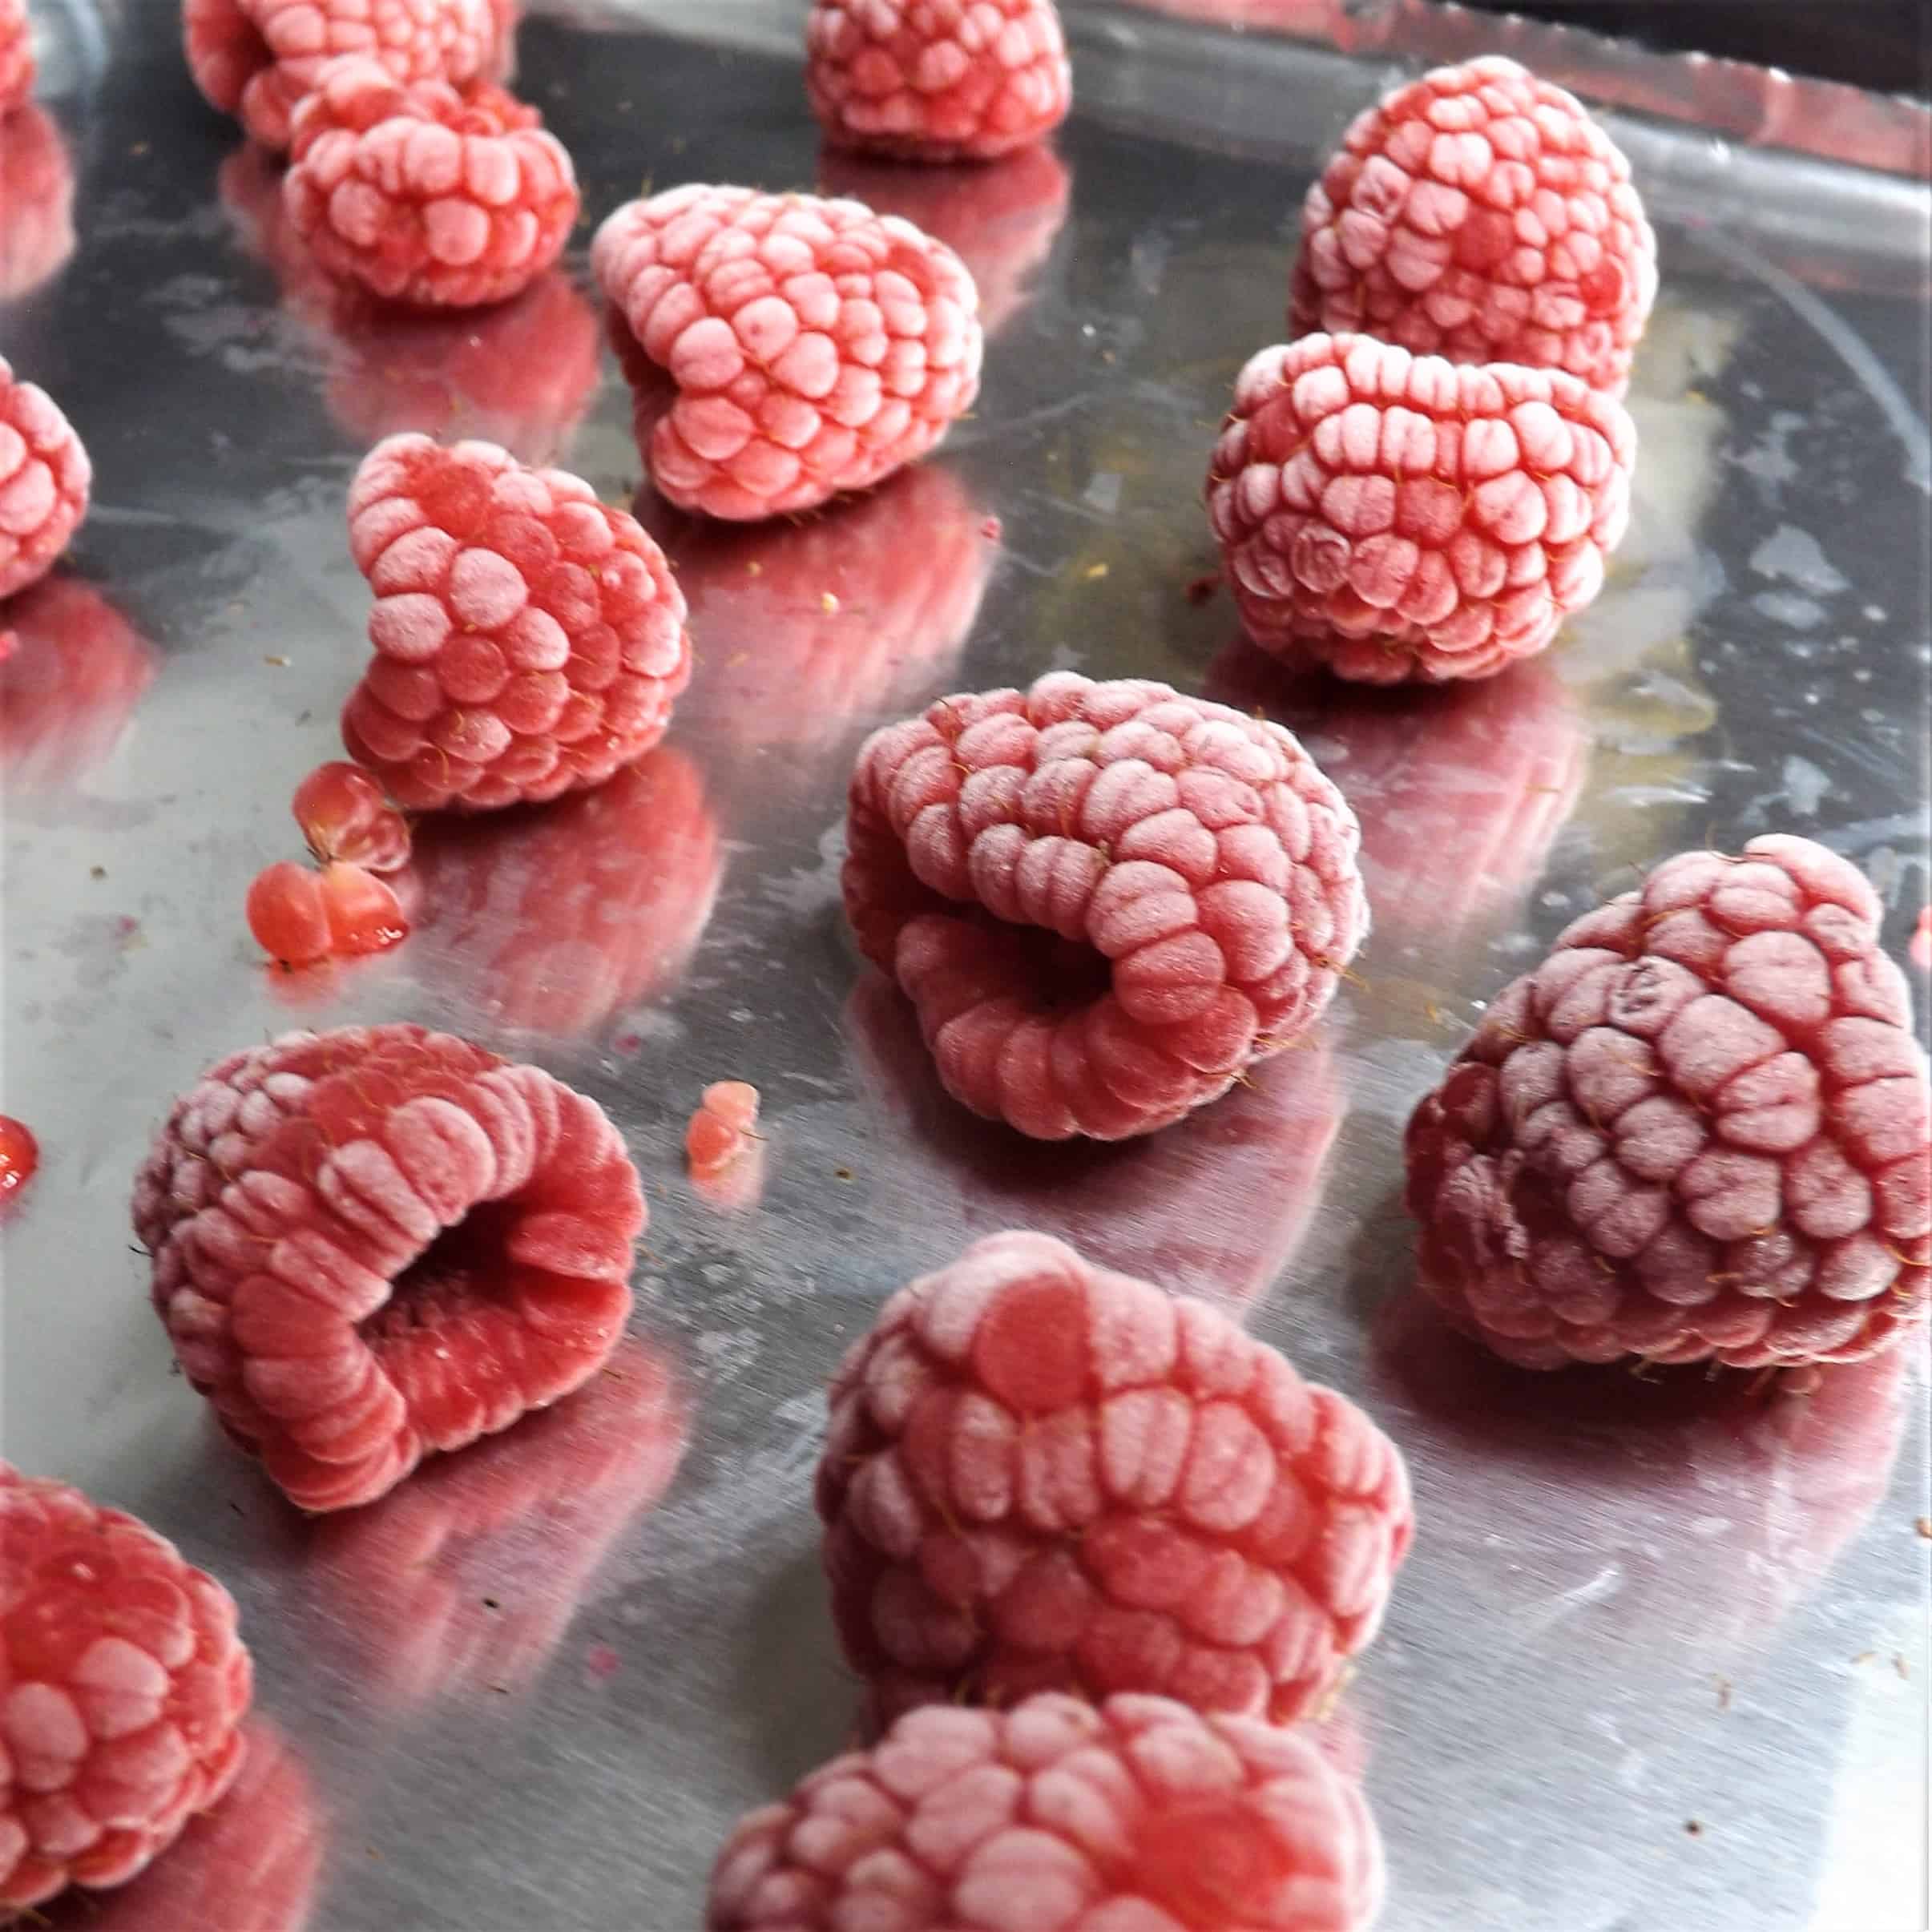
    Flash freezing is great when you are freezing multiple pieces or chunks of food and don't want them to stick together. This method is also commonly used to freeze blueberries, freeze blackberries, freeze carrots, freeze watermelon and cantaloupe and freeze raspberries.

    Step one: Wash and sort asparagus. Rinse it well under water. Then, sort it according to thickness (this helps for blanching later).

    Pro tip -

    • Small is thinner than a pencil
    • Medium is about the thickness of a pencil
    • Large is anything thicker than a pencil

    Step two: Trim asparagus. Use a knife to cut the ends off each stalk. This is usually ยฝ an inch or so. You'll want each stalk to be approximately the same length.

    Pro tip: if you want to freeze asparagus sliced, now is the time to slice up each stalk into 1 inch sections.

    Step three: Blanch the asparagus. Fill a pot with water and bring it to a boil. Add the asparagus and boil for the time listed below.

    Then, quickly remove from the boiling water and add just the asparagus to a bowl of ice water to quickly cool it down. This prevents it from getting fully cooked.

    • Small: 2 minutes per 1 lb
    • Medium: 3 minutes per 1 lb
    • Large: 3-5 minutes per 1 lb (up to 5 depending on thickness)

    Step four: Remove the cooled, blanched asparagus from the ice bath. Pat it dry with a paper towel.

    Removing excess water is important so that you don't have water added during freezing. This can lead to freezer burn and also being mushy when defrosted.

    Step five: Flash freeze the asparagus. Place it in a single layer on a cookie sheet. Then, place it in the freezer for a few hours until it is partially frozen.

    Step six: Remove the asparagus from the freezer. Portion into the sizes you will be using when thawed and place in freezer bags.

    Seal and label the bag and then place them into the freezer.

    Top Tips

    • Dry well. Make sure to get all of the water off of the asparagus before flash freezing. This prevents freezer burn and ensures it will not be water logged and mushy upon thawing.
    • Do not overcook. Blanching is essential because it stop enzymes from continuing to age the food while frozen. However, if you actually cook the asparagus (or don't get it cooled quickly enough) it can become mushy upon thawing.
    • Sort into similar sizes. By sorting the asparagus into similar thickness, it allows you to better control how long you should blanch it.
    • No air. Squeeze all of the air from the freezer bag before sealing it. This will help to maintain maximum freshness.

    How to Defrost Asparagus

    Defrosting or thawing asparagus is relatively simple. You can remove it from the freezer and pop it into the refrigerator overnight.

    Or, if you will be cooking it, you can simply cook it straight away. Just be aware that if you choose this route you will need to add additional cook time to your recipe.

    You can use your frozen or defrosted asparagus in any way you typically would - grilled, steamed, in soups or casseroles. Or any of your other favorite recipes.

    Freezing Asparagus FAQ

    Why is my asparagus soggy after freezing?

    Asparagus can be soggy after freezing if you blanch it too long (or don't cool it quickly enough. Or, if you don't get all of the water off of it before freezing it.

    Is asparagus good after being frozen?

    Yes, asparagus is good after being frozen. Like anything, it can lose a smidge of its texture. But it still is tasty and perfect for most any recipe you usually use it in.

    Can I freeze fresh, uncooked asparagus?

    No, you should not freeze fresh, uncooked asparagus. It has an enzyme in it that will cause it to continue to age in the freezer if you do not blanch it first.

    If you need more help getting your foods frozen, check out the Ultimate Freezing Food Guide for a complete quick start reference so that you can have a well-stocked freezer.

    Access the Ultimate Freezing Food Guide Here

    How to Freeze Asparagus

    MrAnimal Farm
    Freezing asparagus is an easy way to make sure you have access to this yummy veggie all year (even when it is not in season). You can freeze the stalks whole or in slices.
    5 from 1 vote
    Print Recipe
    Prep Time 20 minutes mins
    Freezing Time 2 hours hrs
    Course Side Dish
    Cuisine American

    Equipment

    • Knife
    • Cutting Board
    • Cookie Sheet
    • Colander
    • Freezer Bags
    • Large Pot
    • Marker or Pen to label bags

    Ingredients
      

    • 1 lb Asparagus you can certainly do more, it will just take multiple rounds of blanching.

    Instructions
     

    • Rinse the asparagus under water in the sink. Using a colander helps so that you can sit it in that and let the water run over it.
    • Sort the asparagus stalks into similar sized thickness. This will help later during blanching.
      Small is thinner than a pencil; Medium is about the thickness of a pencil; Large is anything thicker than a pencil
    • Trim the ends off the stalks of the asparagus. Usually about ยฝ an inch or so. Try to get each stalk the same length.
      Tip: if you want to freeze as slices, then slice the spears up now. 1 inch slices works best for blanching.
    • Set your pot of water on the stove and bring it to a roiling boil.
    • Toss your asparagus into the pot to blanch it. Try to do it in batches according the the thickness you sorted earlier.
      Blanching times:
      Small: 2 minutes per 1 lb
      Medium: 3 minutes per 1 lb
      Large: 3-5 minutes per 1 lb (up to 5 depending on thickness)
    • Remove the asparagus from the boiling water and place into a container filled with ice water to quickly cool it down. This prevents it from overcooking.
    • Once cooled, remove it from the water and thoroughly dry it off so no excess water remains.
    • Flash freeze it by laying it in a single layer on a cookie sheet and placing it into the freezer for a few hours.
    • Once partially frozen, remove it from the freezer and portion it out into the amounts you will use when thawed.
    • Bag each portion into freezer bags, making sure to squeeze out any excess air before sealing.
    • Label each bag with amount and date before pressing flat and putting it into the freezer.

    Notes

    Tips for success:
    • Dry completely.ย Make sure you have gotten any excess water off of the asparagus before flash freezing.ย  This ensures it won't be too mushy when thawed.
    • Don't overcook.ย Although you must blanch the asparagus before freezing, fully cooking it can make it mushy when thawed.ย  Make sure to quickly cool it and sort it by thickness so that you only blanch as long as necessary.
    • Squeeze out the air.ย Remove all of the air from the freezer bag before sealing it.ย  This will help to lock in maximum quality.
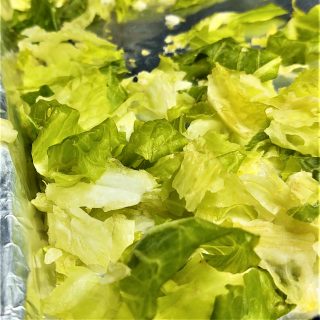
    ย 
    Keyword Freezing Asparagus
    Tried this recipe?Let us know how it was!

    Can You Freeze Lettuce?

    By MrAnimal Farm

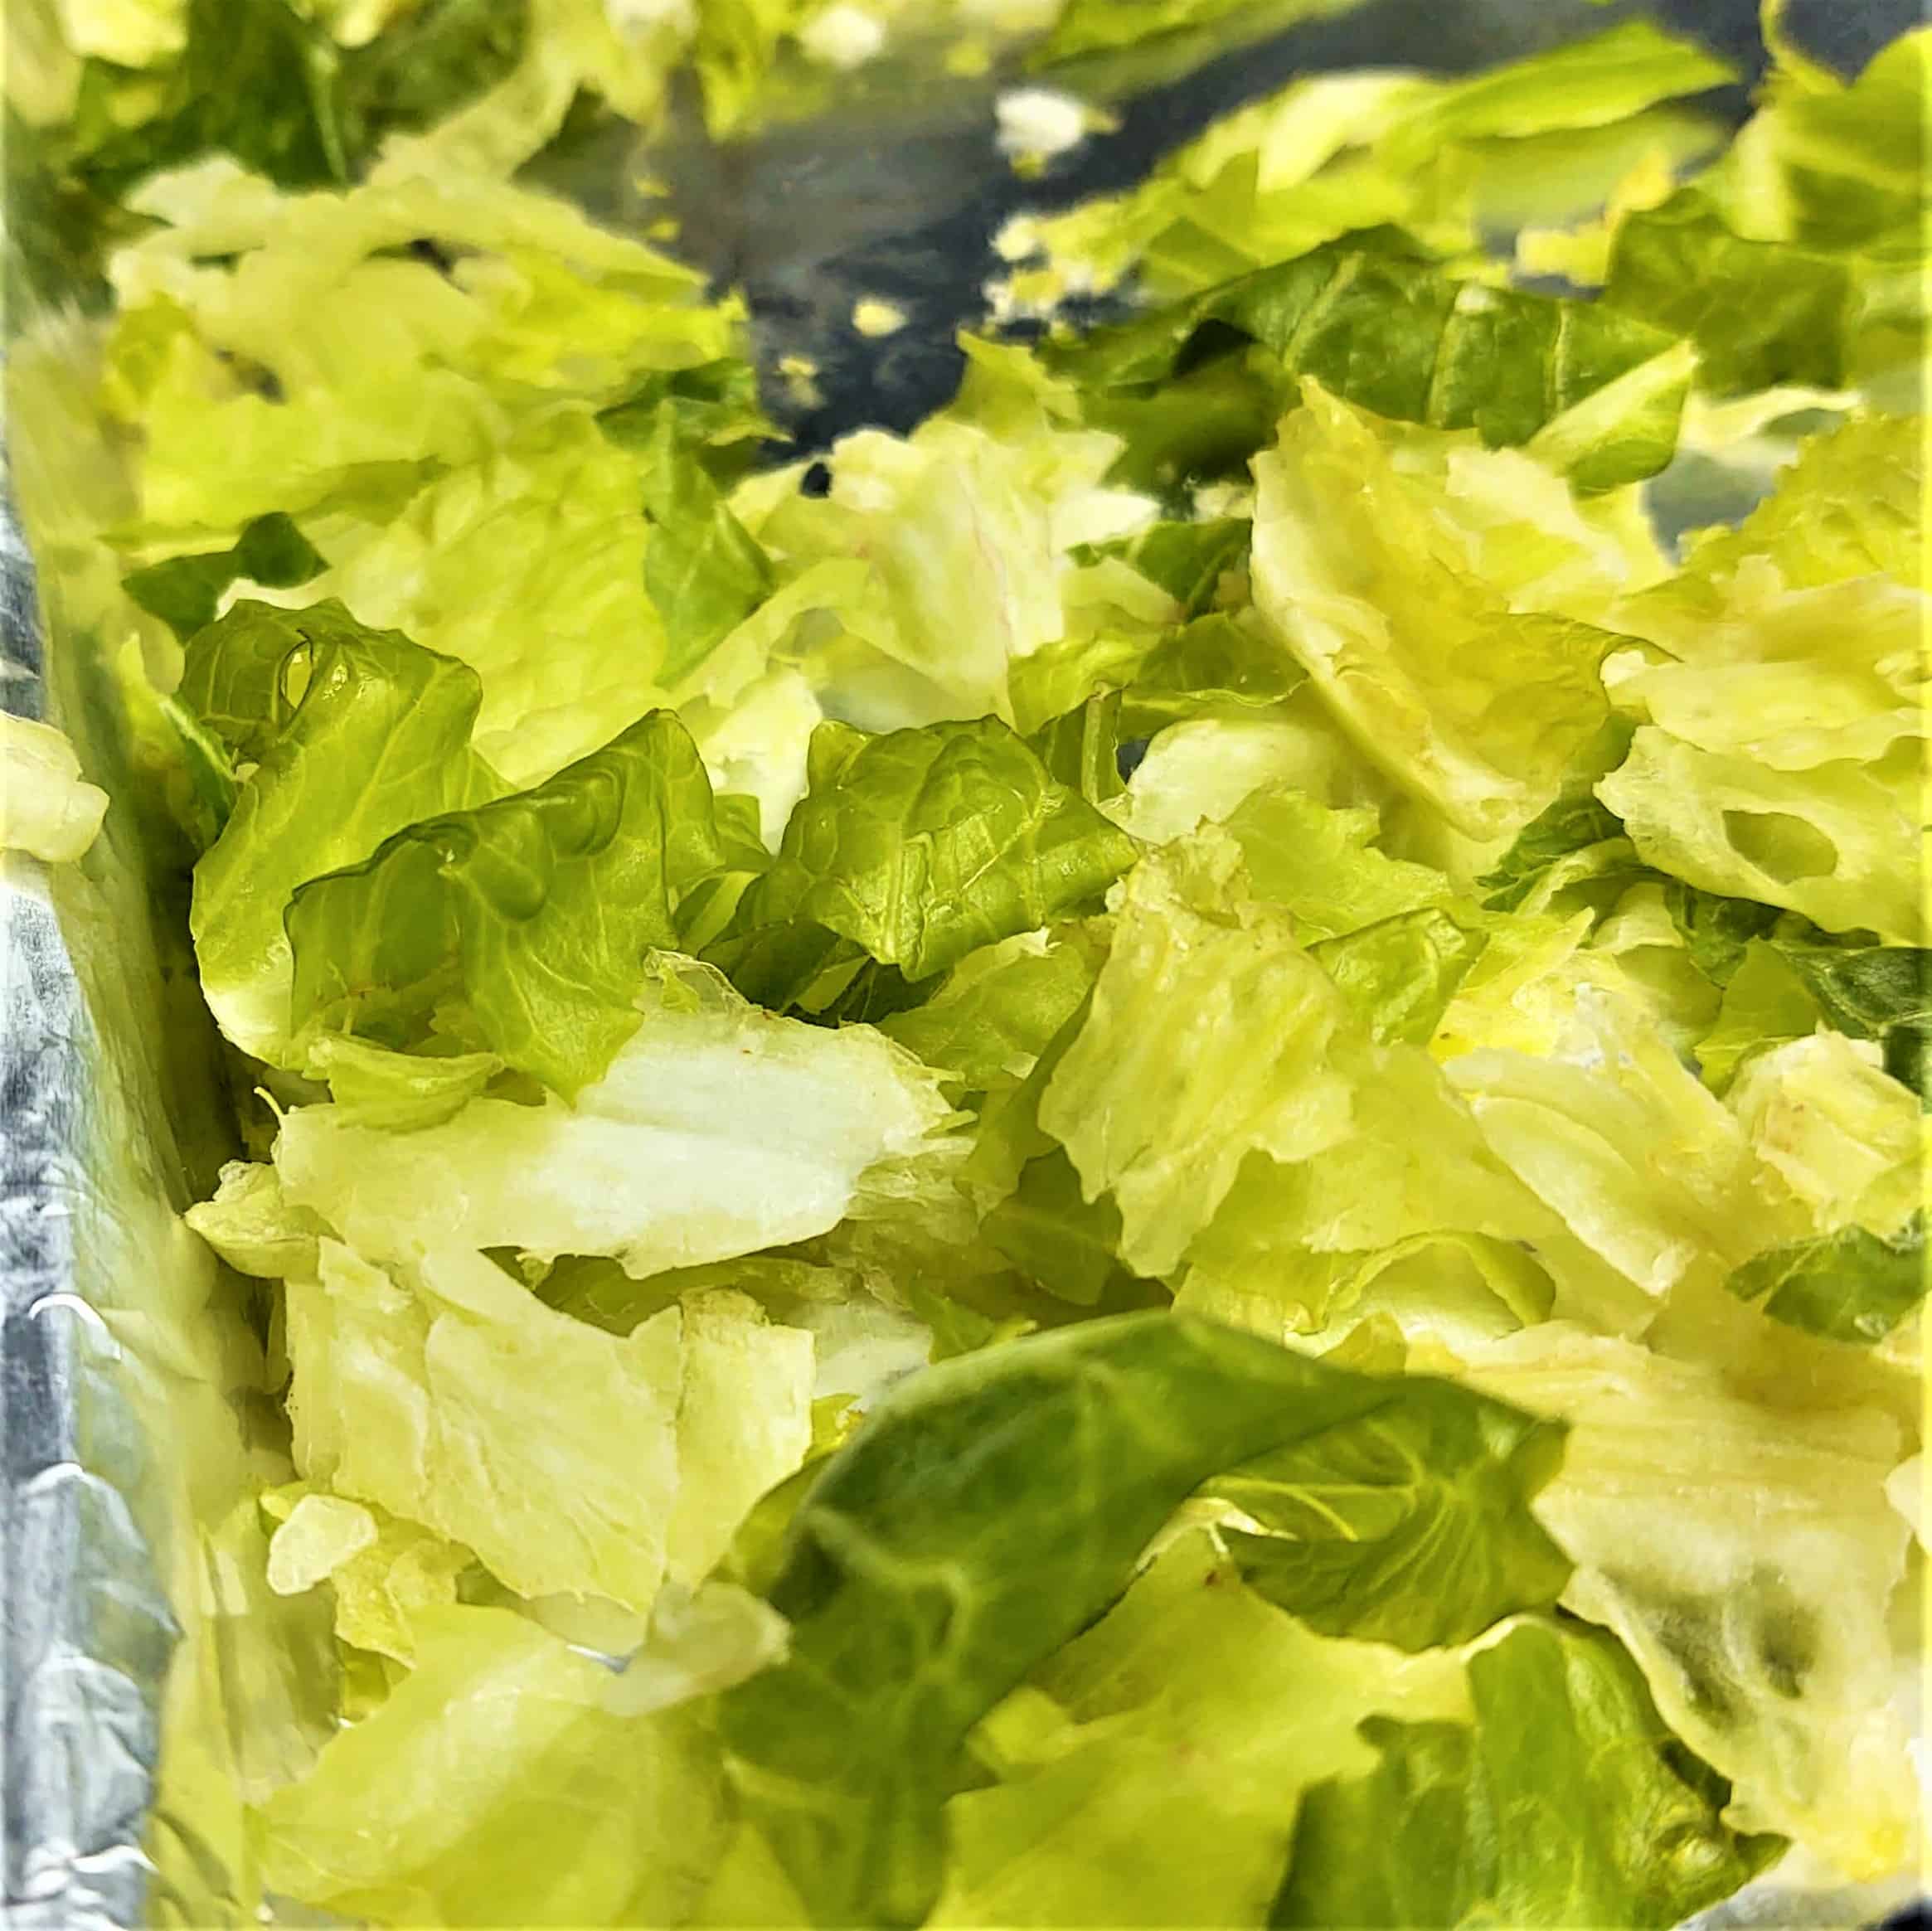
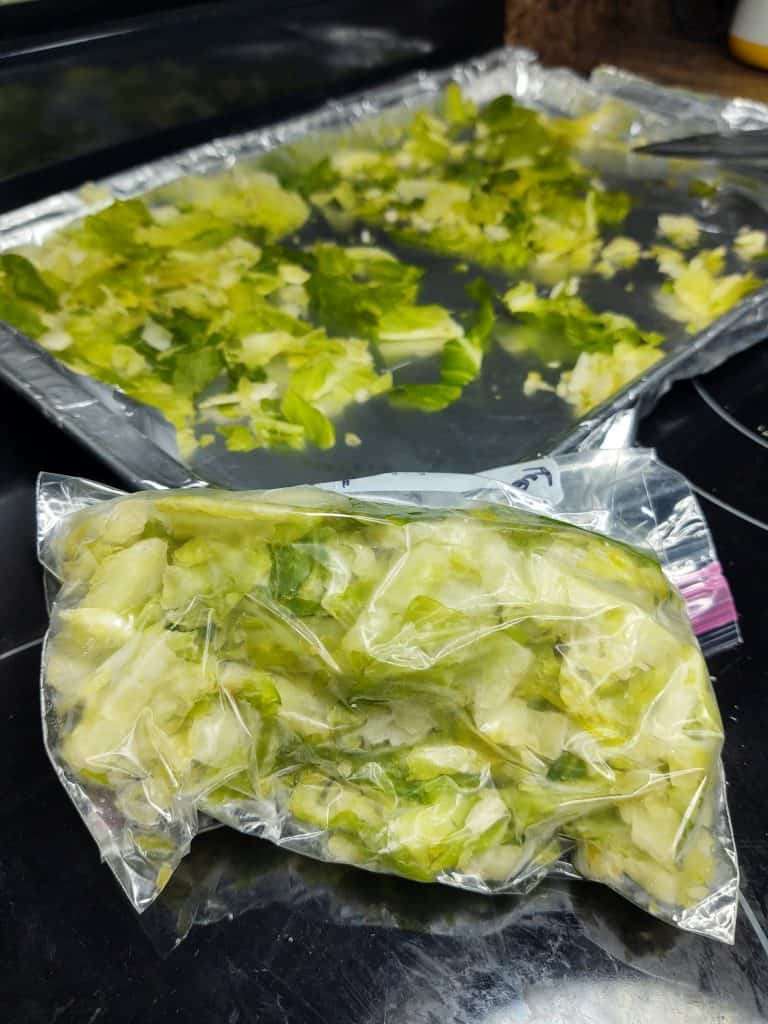
    frozen lettuce on baking pan wrapped in foil

    Technically, yes, you can freeze lettuce. However, lettuce has a load of moisture in it , so it does not make a good freezing candidate. But, if you need to, you can flash freeze both full leaves and shredded lettuce and then bag it in freezer bags. The best way to freeze lettuce is to puree it and freeze it in an ice cube try for use in smoothies.

    So, freezing lettuce is possible. Any way you freeze it, it will be mushy and not good for salads or sandwiches. It will work just fine in soups and other recipes that do not rely on it's crisp texture. Frozen lettuce has a freezer life of up to a year with the first 2 or 3 months still retaining the most flavor and quality.
    If you want to learn more about how to freeze lettuce (or more exact reasons why you shouldn't) keep on reading!

    frozen lettuce on baking pan wrapped in foil

    [ez-toc]

    Can you freeze lettuce?

    As you have already learned from above, freezing lettuce isn't a great idea. It can be done, though, so let's talk more about how to get the best results.

    If you want to freeze lettuce you should try and stick to freezing types of lettuce with thicker leaves. While none of them are going to come out still firm enough for a salad, the heavier leaf varieties of lettuce do much better.

    Thick LeavesMidrange LeavesThin or Delicate Leaves
    Butterhead (Boston, Bibb, Mignonette)
    Coral
    Endive
    Escarole
    Little gem
    Looseleaf
    Radicchio
    Romain
    Stem Lettuce
    Iceburg
    Mache (Lamb's lettuce)
    Oakleaf
    Speckled
    Arugula
    Cress or Watercress
    Frisee
    Mesclun

    Freezing Stats

    Blanchedno
    Prep Styleleaves
    shredded
    Time To Freeze12 hours
    Time to Thawno need if adding to recipe (soups, stews, etc)
    Usesbest in soups and stews
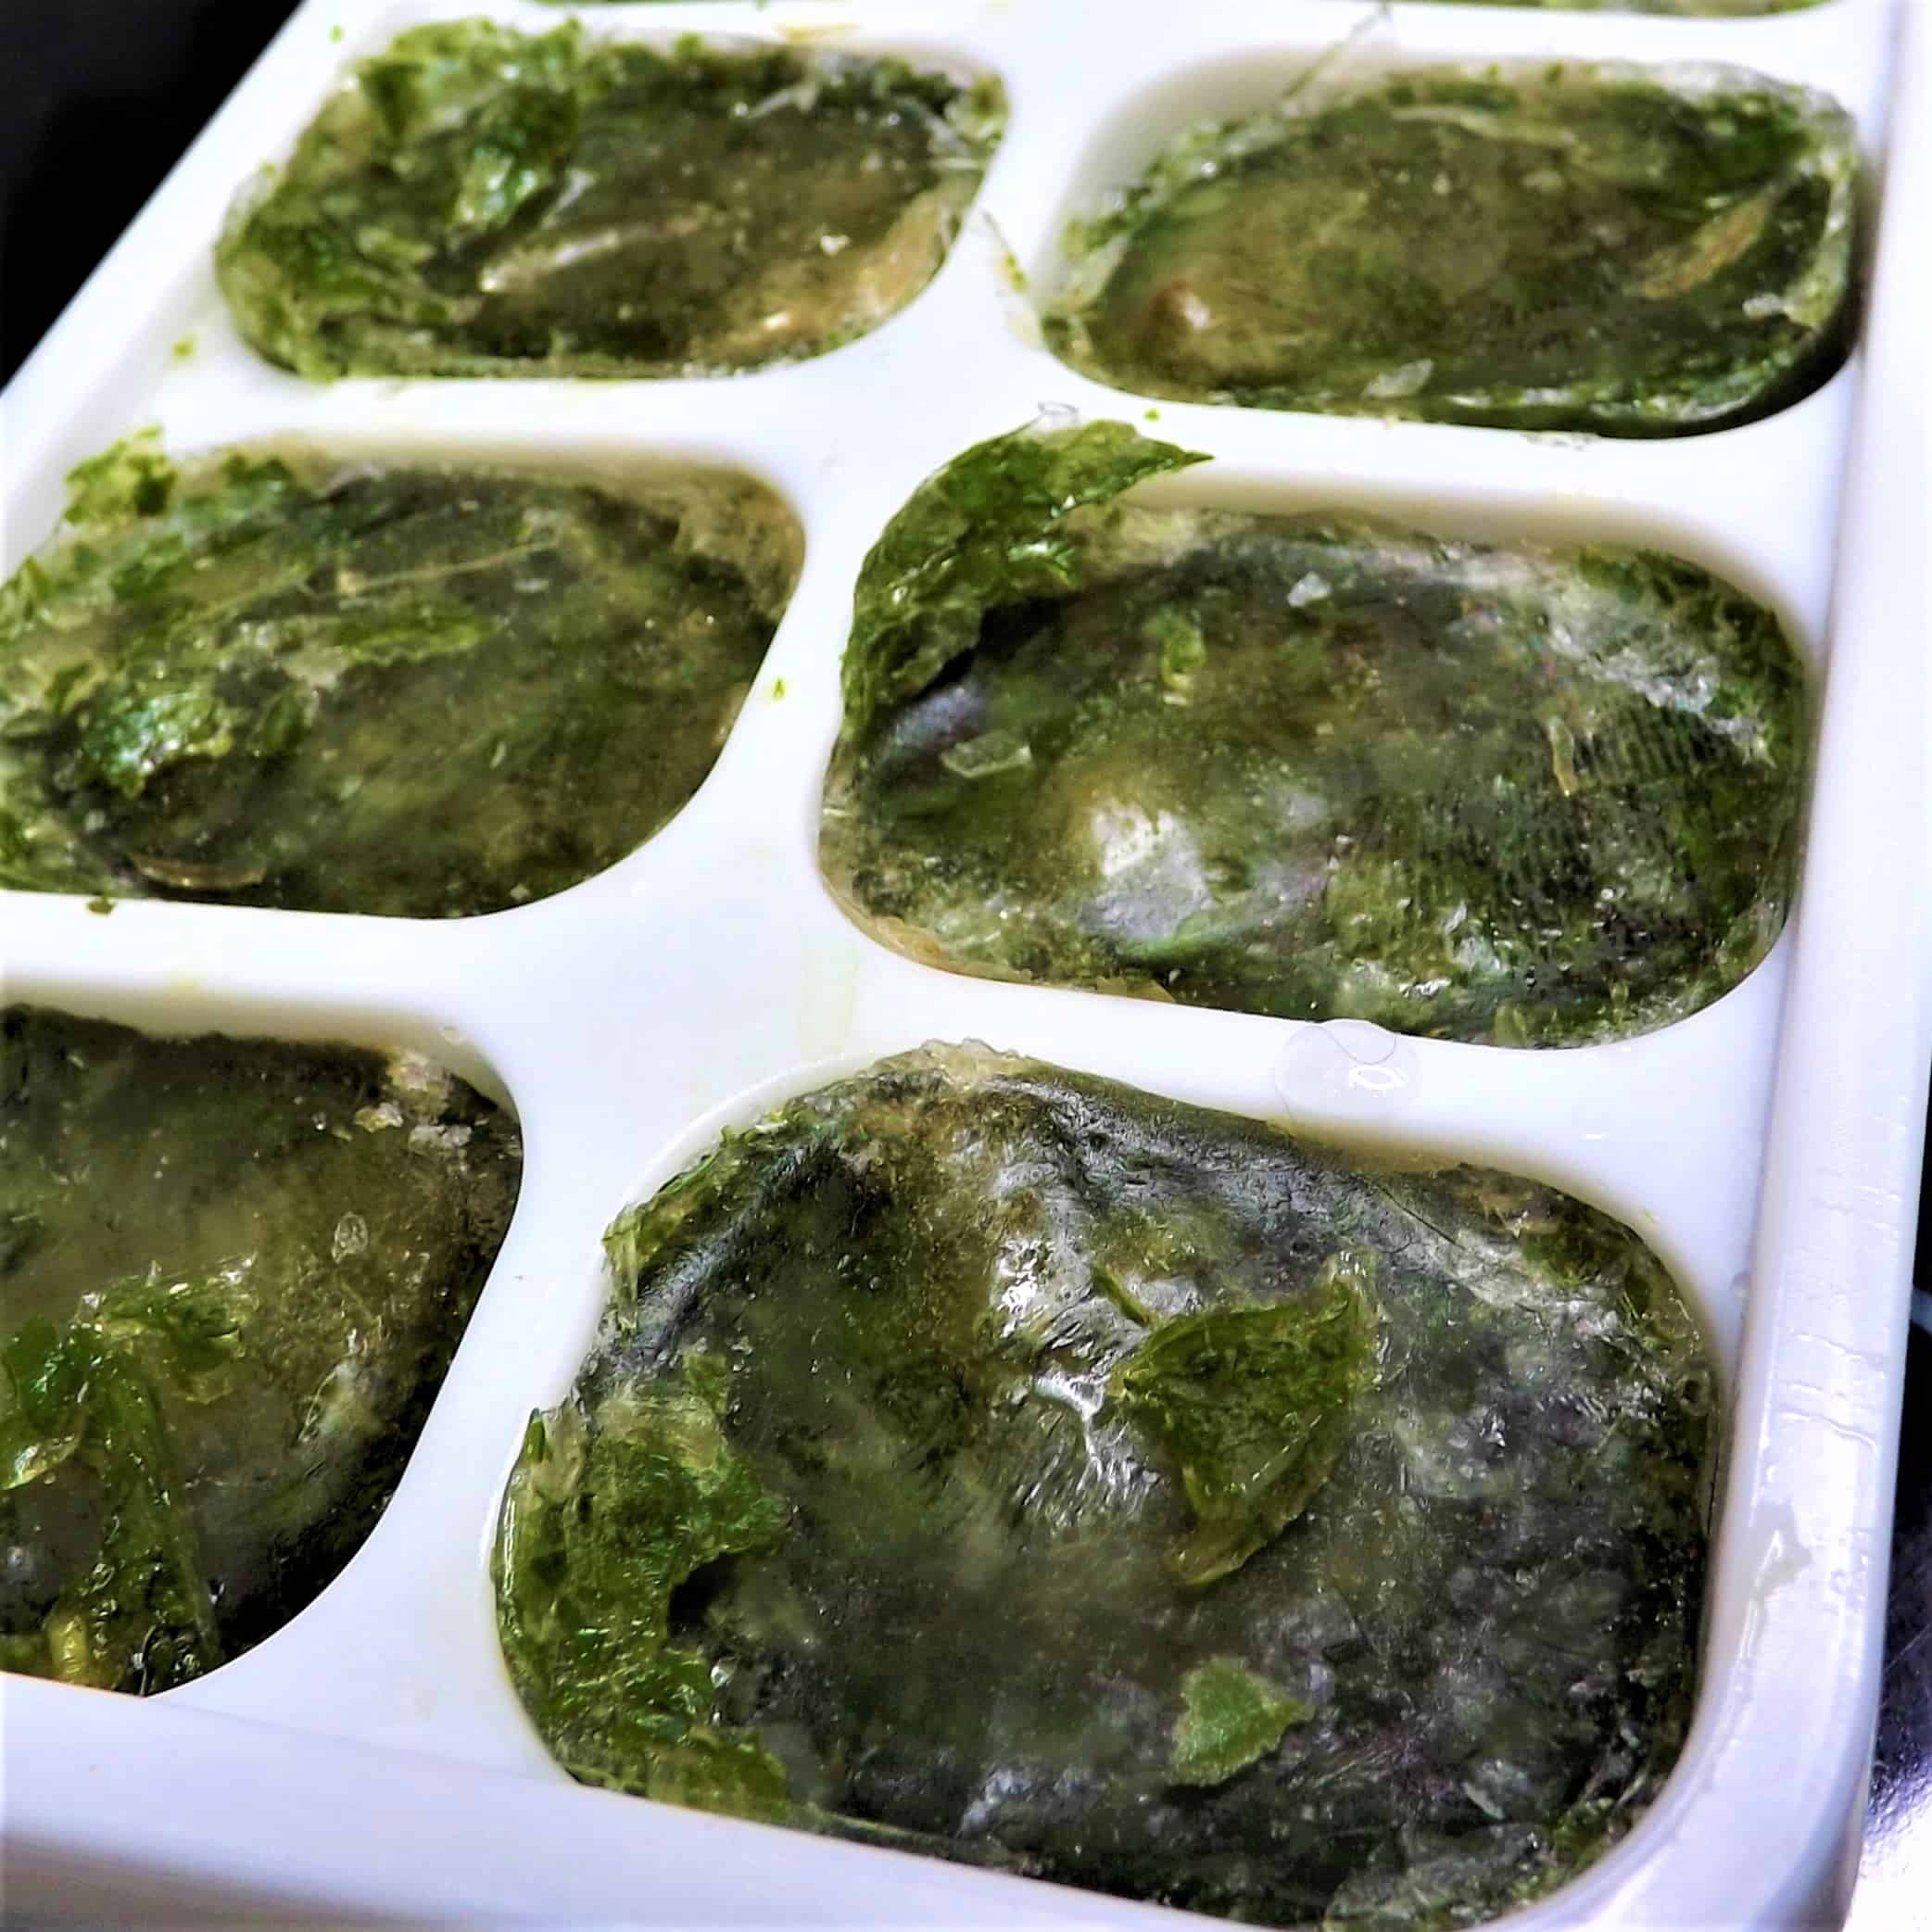
    ice cubes for smoothies
    Freezer Lifeup to 12 months
    best quality in the first 2 to 3 months

    Why do some fruits and vegetables not freeze well?

    The more moisture in the fruit or vegetable combined with the fragility of the cell wall is how you can determine if something will freeze well or not. Essentially, what happens is when you freeze lettuce, or something similarly thin like cabbage or Bok choy, the moisture, in this case water, expands while it freezes.

    This expansion causes a rupture in the cellular wall which leads to overall instability. An individual, micro, instance of this would not be a problem, but when it spreads throughout the entire body of cells, it changes the structure completely. That is how you go from a crisp, even rigid at times, piece of lettuce to a handful of mushy goo.

    Need to get all your food preserved easily? Check out the Ultimate Guide To Freezing Food so that you can fill your freezer without in minimal time.

    So, how can you preserve lettuce?

    As you may know, preserving food especially via freezing your fruits and veggies is a great way to stay stocked up on the food you eat and cut down on your good costs.

    Unfortunately, lettuce is not a great candidate for preservation. Freezing and thawing it destroys it's cellular structure and makes it very mushy.

    The best you can do, if you want to keep it crisp, is prolong it's fridge life. You can loosely wrap lettuce in a wet paper towel, bag it, and stick it in your crisper drawer in the refrigerator. You can also store individual leaves in a bag but dry them off first. Neither method will extend the amount of time they are good. They will however, preserve some of the crisp texture for much longer.

    Freezer LifeShelf Life/Fridge Life
    up to 12 months
    best quality in the first 2 to 3 months
    7 to 10 days (unwashed, in fridge)

    Supplies

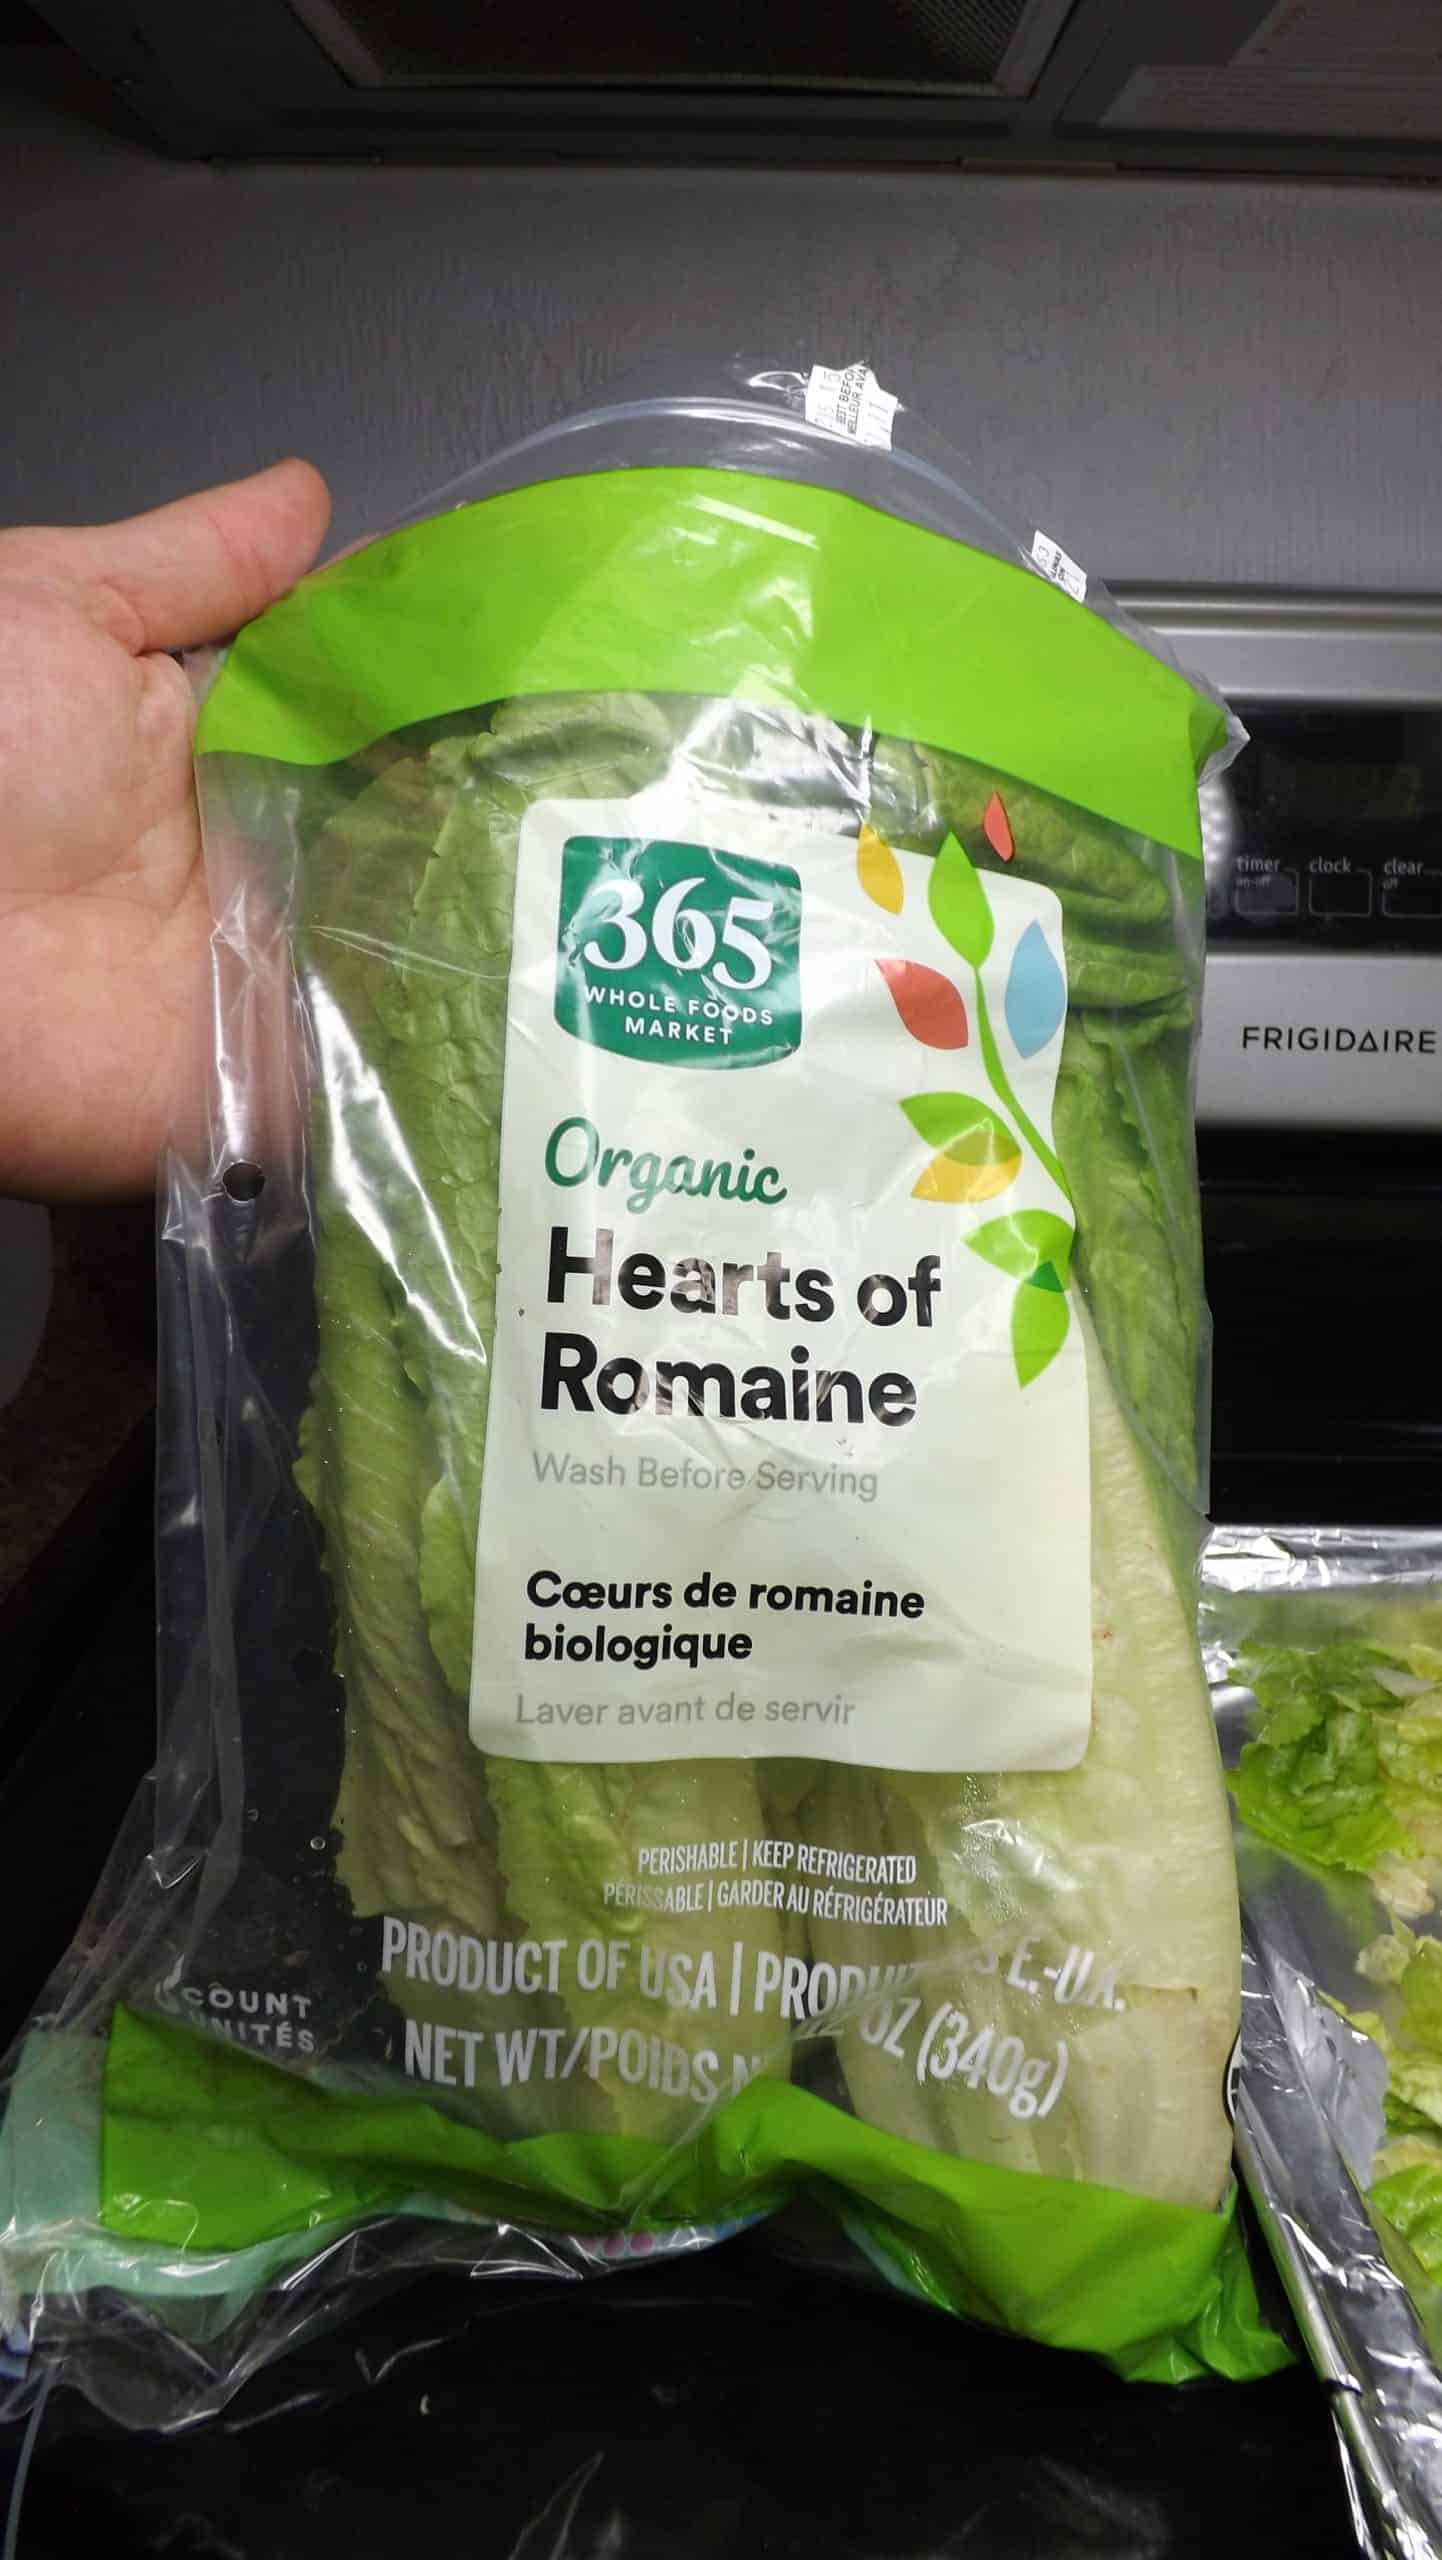
    • lettuce (any kind, but we're using Romain)
    • colander
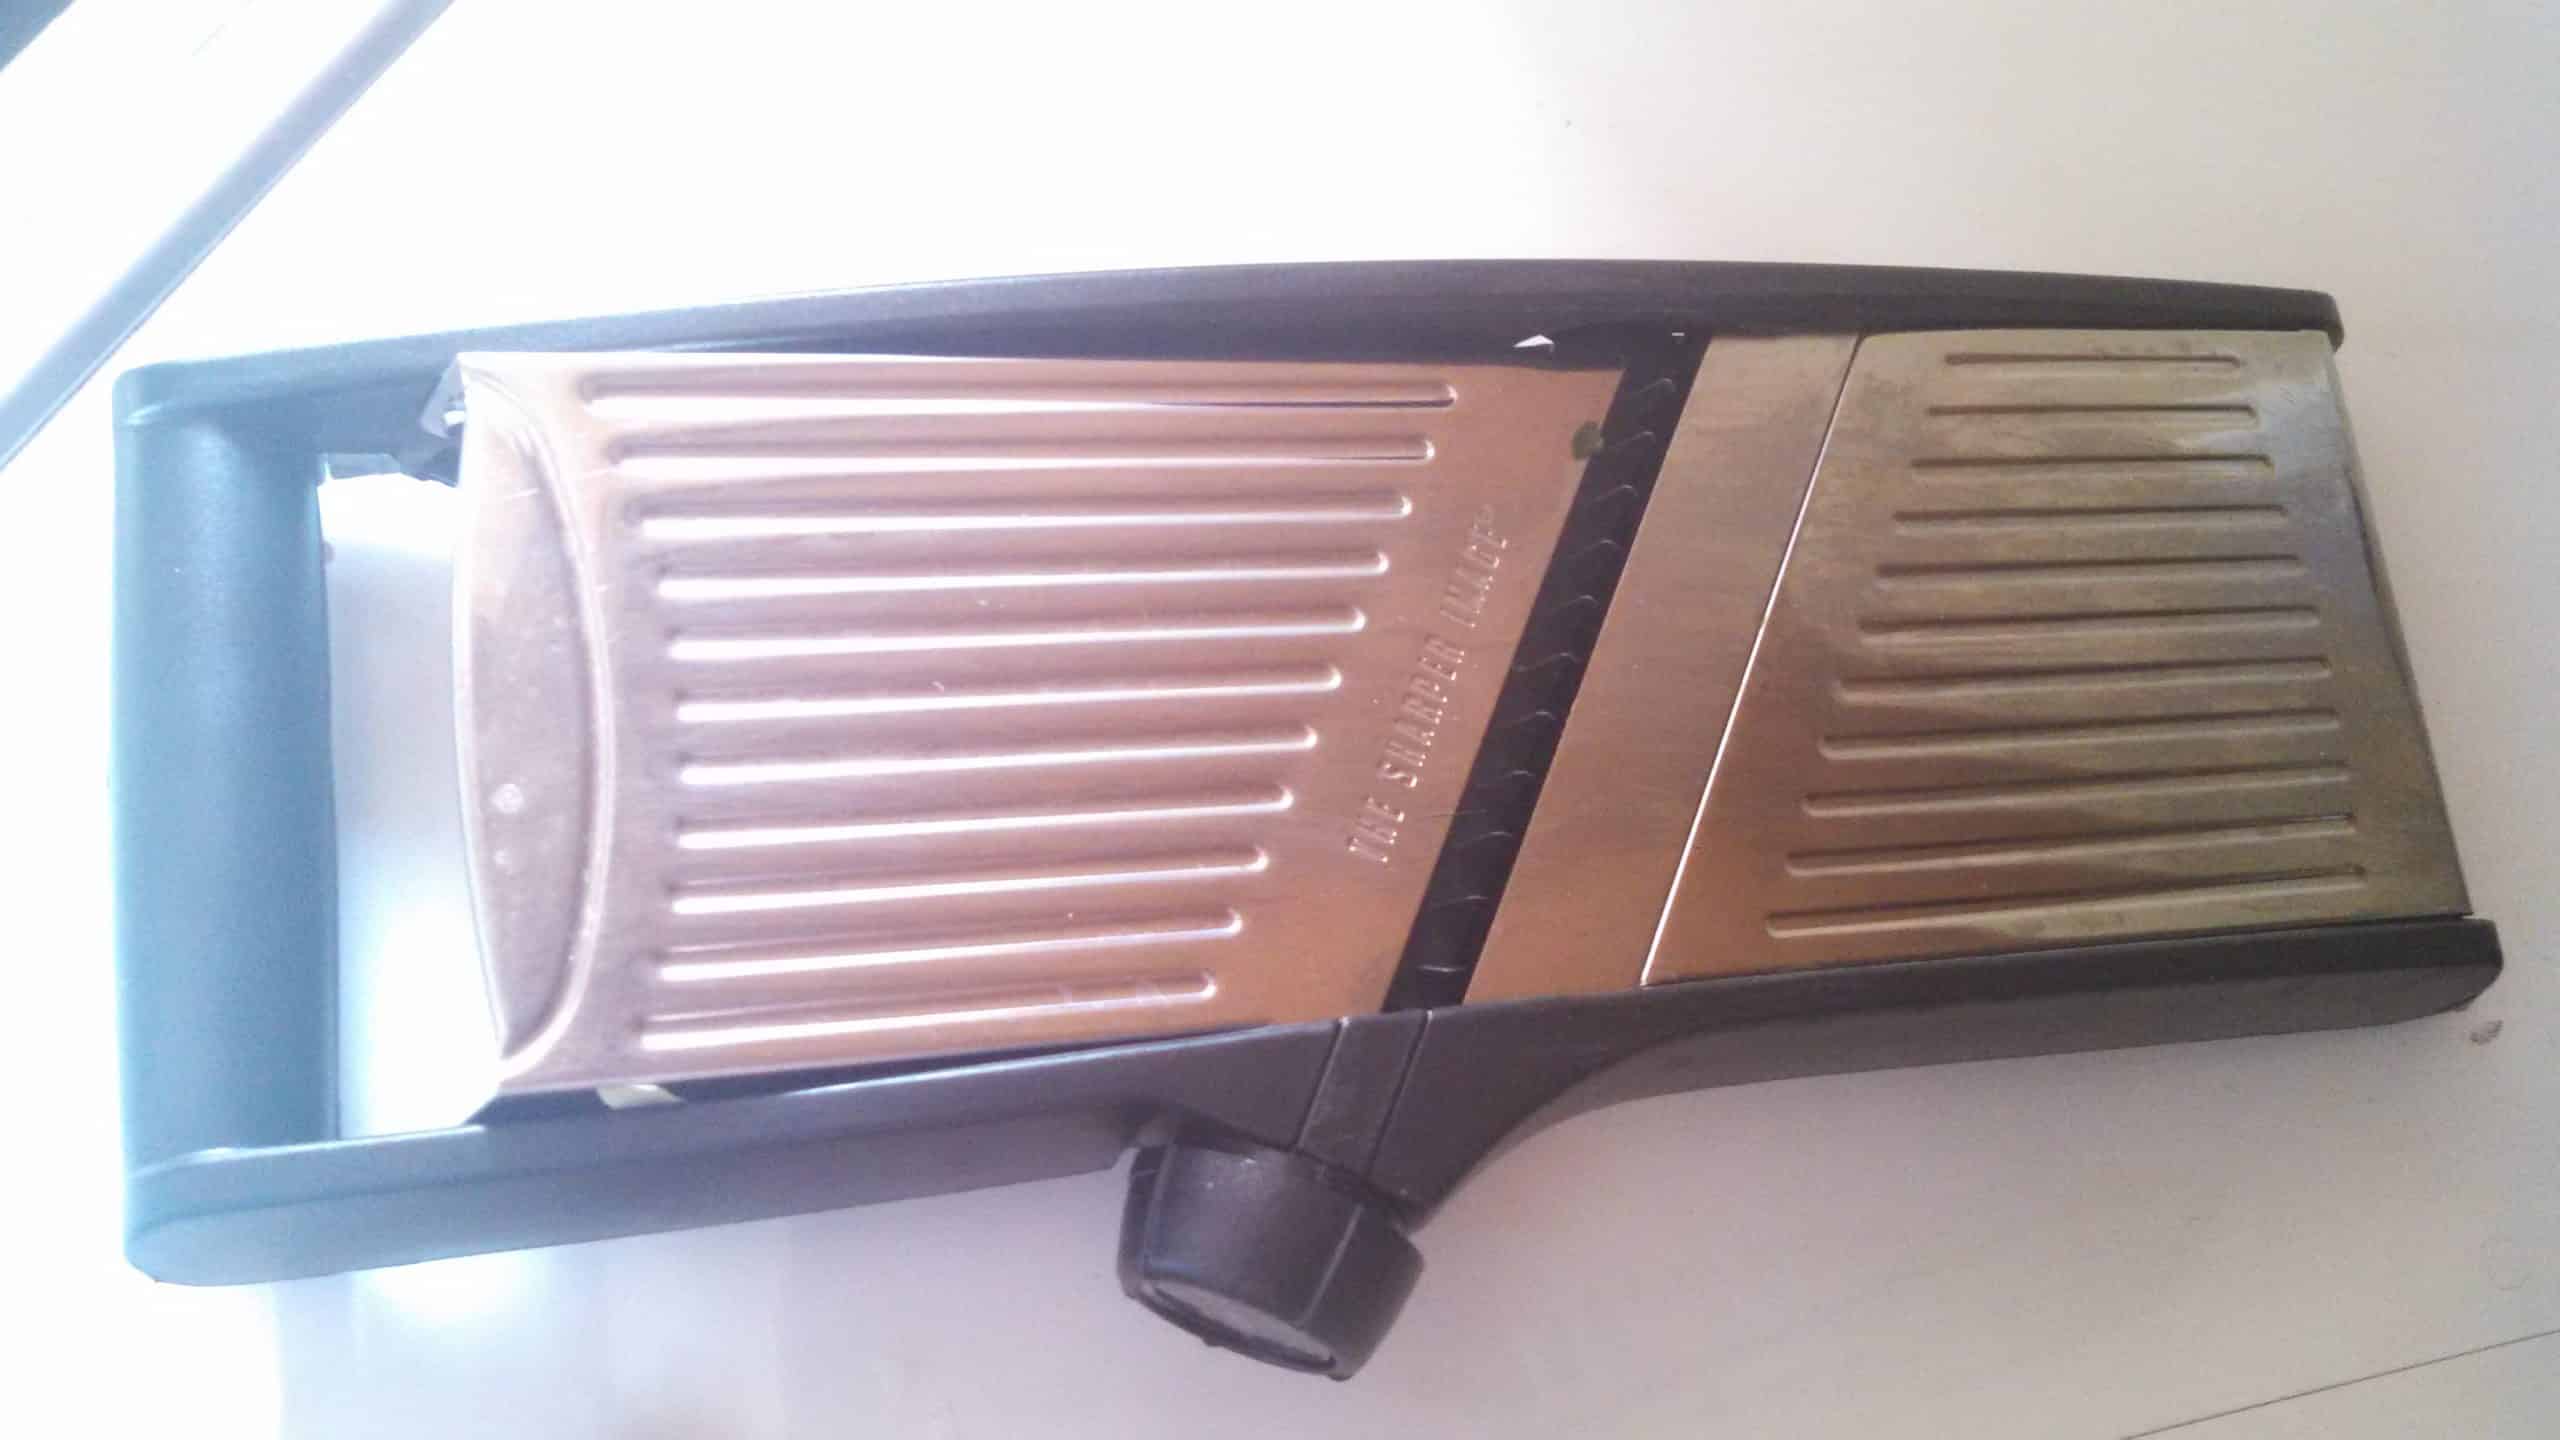
    • mandolin slicer with protective gloves (for shredding)
    • knife and cutting board (for shredding if no mandolin slicer)
    • cookie sheet (for flash freezing)
    • Freezer bags
    • Sharpie or marker
    • Freezer
    bag of romaine lettuce

    How To Freeze Lettuce

    We're going to cover two ways to freeze lettuce; flash freeze and puree. Flash freezing can be done with whole leaf, separated from the stalk or head, or shredded lettuce. Puree will be made into lettuce ice cubes.

    Whether you grow your lettuce or buy it from the store, these methods will work.

    Flash freeze

    Flash freezing is commonly used when freezing a lot of vegetables. Basically is a pre-freeze before you store for long term freezing. You get individual pieces of what you are preserving cold enough that the moisture closest to their surface will harden and they will not stick together.

    This method keeps foods with more water from sticking and clumping together and makes it easier to only thaw or use what you need at a time instead of the whole container.

    You do this by:

    • covering a cookie sheet with aluminum foil or parchment paper
    • laying the food out in a single, non-overlapping, layer
    • sticking the cookie sheet into the freezer anywhere from 2-4 hour up to overnight (depending on what you are freezing)
    • removing the cookie sheet from the fridge and continuing with the instructions

    This method will give you the best results with smaller, more moist, foods and portions like when freezing blueberries, freezing blackberries, freezing carrots, freezing watermelon, freezing cantaloupe chunks and freezing raspberries.

    Whole leaf or shredded
    • Wash your lettuce in the sink over a colander (the colander is in case you drop any so it won't get in a dirty sink)
    • Either separate the leaves from the stalk/head or use a mandolin slicer/knife to shred your lettuce.
    • Flash freeze.
    • Once frozen, place the leaves or scoop the shredded lettuce into freezer safe bags.
    • Label the bags with the contents, freeze date, and use by date
    • Place in a freezing location that will remain as undisturbed as possible for about 24 hours
    Puree
    • Wash your lettuce in the sink over a colander (the colander is in case you drop any so it won't get in a dirty sink)
    • Cut the lettuce enough to fit the leaves into a food processor
    • Use the puree function until it is no longer solid (sometimes the pulse or manual function works better)
    • Pour liquid into an ice cube tray, leaving about ยผ open at the top to allow for expansion
    • Flash freeze for up to 12 hours
    • Once frozen, pop the lettuce cubes out of their tray and put them in a labeled freezer bag.
    • Place in a freezing location that will remain as undisturbed as possible for about 24 hours
    frozen lettuce on baking pan wrapped in foil

    Frequently Asked Questions

    Here are some of the more common questions about freezing lettuce.

    Q1. Does freezing ruin it?

    Yes. Freezing destroys the texture and crisp quality of lettuce. It's taste will remain at an okay level for a short period of time. We recommend using the ice cube method and using frozen lettuce as an ingredient to your smoothies.

    Q2. Can you freeze a bag of shredded lettuce?

    You can freeze bagged lettuce. You would want to follow the same process above that we use for shredded lettuce; wash, shred, flash freeze, bag, deep freeze.

    Q3. Can you freeze lettuce soup?

    Lettuce soup actually freezes very well. Lettuce soup is probably the best use of frozen lettuce other than lettuce ice cubes for a smoothie.

    Q4. How do you defrost it?

    Don't thaw it out. You can use the ice cubes frozen and they will blend easily. The leaves/shredded are thin enough that they will thaw quickly in whatever recipe in which they are used.

    Q5. How can I use frozen lettuce?

    Unfortunately, the two most popular uses of lettuce, salad and sandwiches, are not an option once lettuce is frozen since it will become too waterlogged and soggy. If you have some recipes that do not rely on the crispness of lettuce then frozen lettuce can work. But, again, your best bet is going to be ice cubes for a smoothie.

    Final word

    Now we know that freezing lettuce isn't very good unless you are planning to use it for smoothies or different recipes. If you are hoping for a nice refreshing salad in about 2 months or so, you are in for a big disappointment.

    If you need more help getting your foods frozen, check out the Ultimate Freezing Food Guide for a complete quick start reference so that you can have a well-stocked freezer.

    Access the Ultimate Freezing Food Guide Here

    Phoenix Chicken

    By MrAnimal Farm

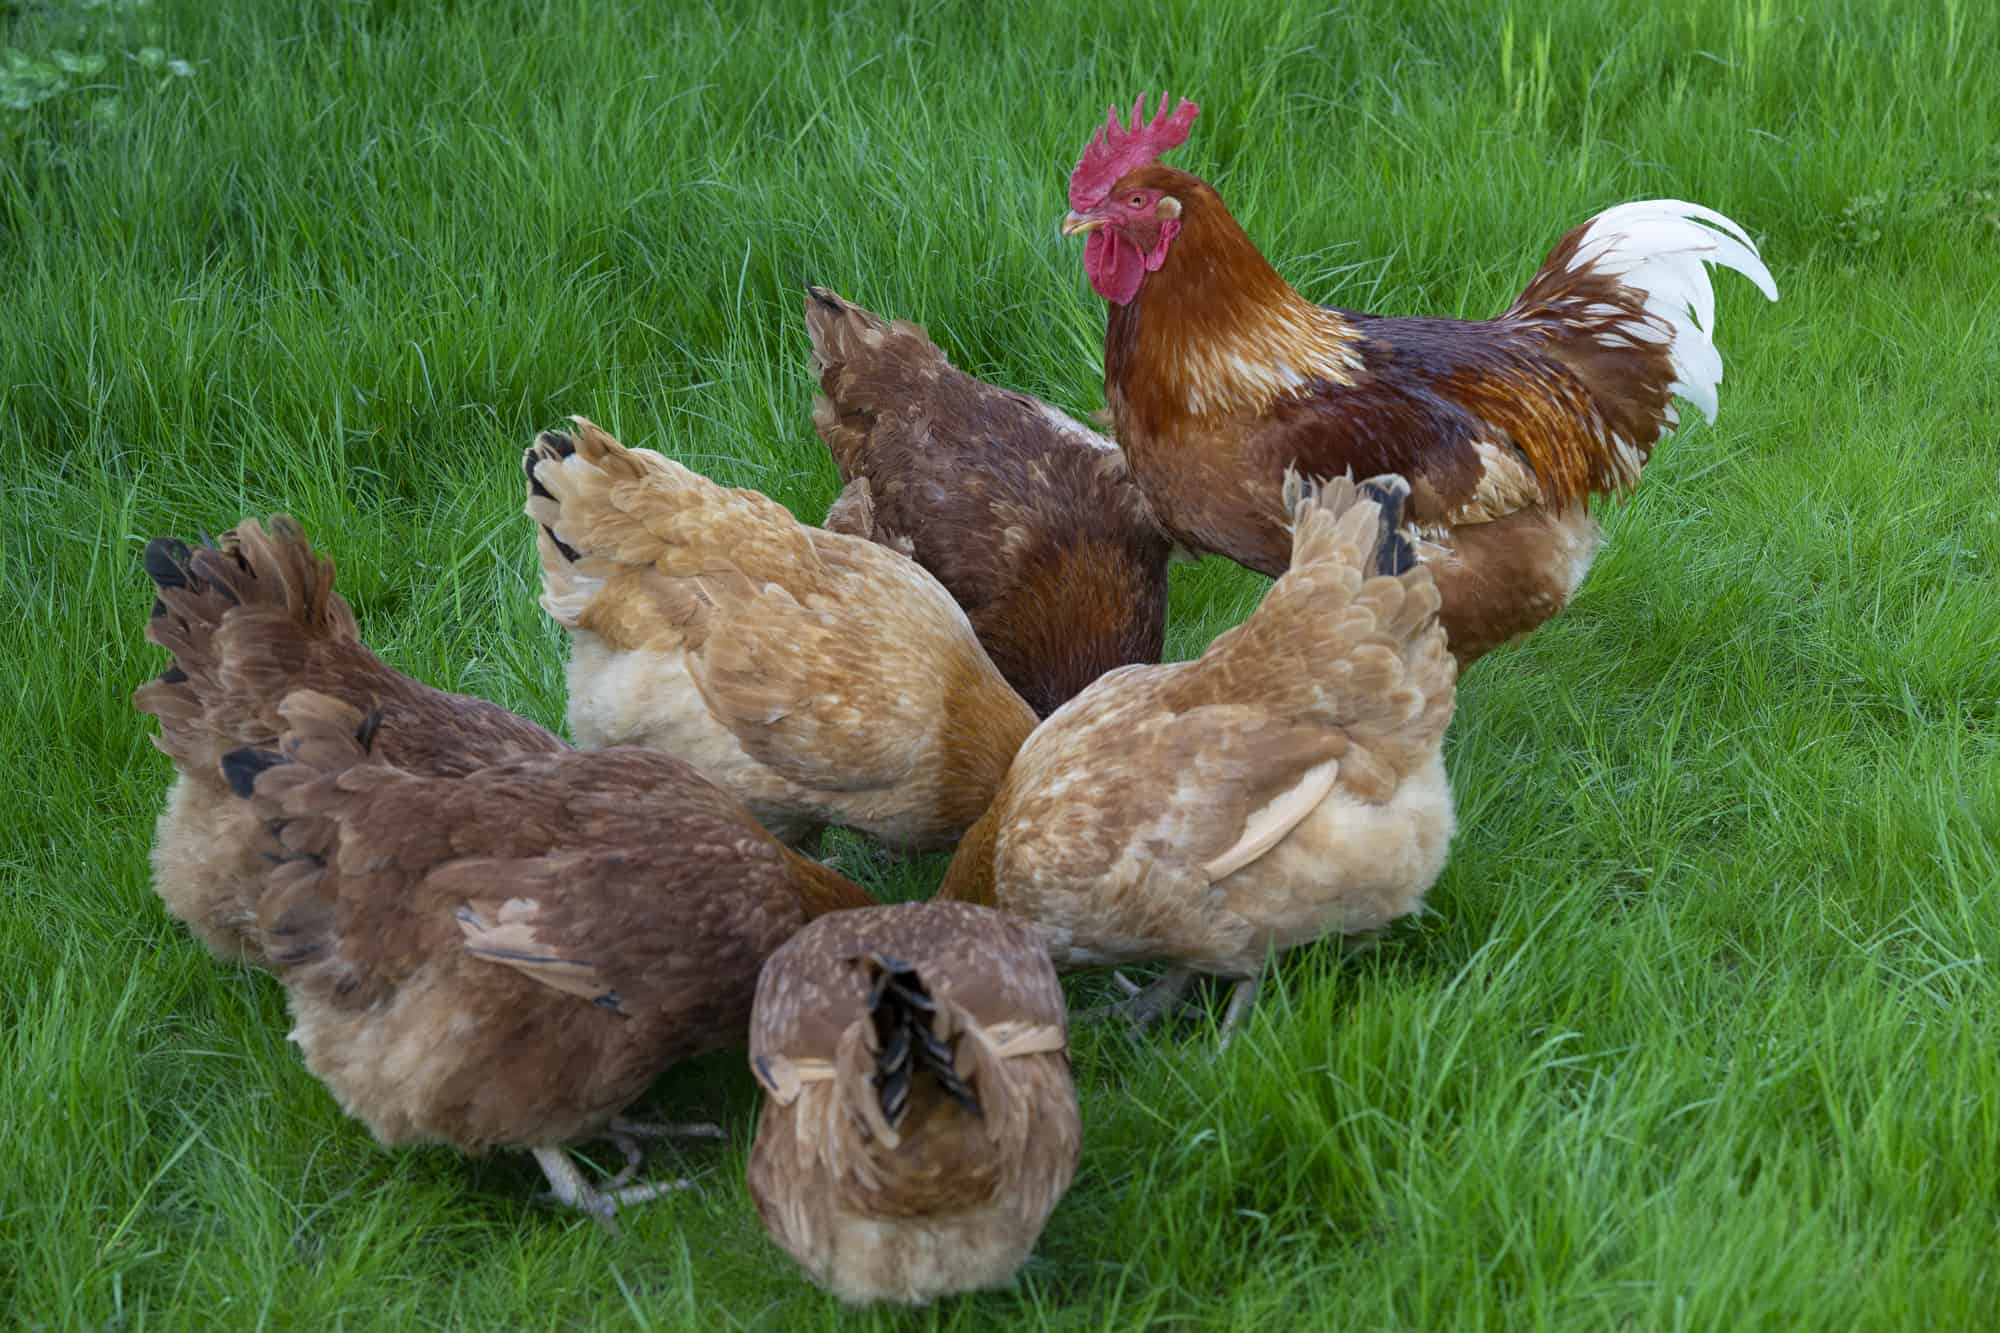
    Phoenix Chickens are another unique-looking breed of chicken that you can easily recognize just from looking at their tails. This is an excellent choice for the aspiring chicken enthusiast to add to their flock who is looking to make their way into the show world especially if youโ€™re interested in caring for unique chicken breeds.

    The Phoenix Chicken may not be a great choice if you are looking for meat or eggs as they are rather poor at providing both. The bird usually lays 45 eggs a year, which isnโ€™t going to keep your family fed, and they are a rather small breed. Depending on where you live, you may also find that it may be hard to keep a Phoenix Chicken without doing some extra work to your coop first.

    The Phoenix Chicken breed usually lives for around seven years with proper care and is an accepted show breed in the US. If you are getting a Phoenix chicken for shows, you will want to pay special attention to the birds that your chickโ€™s parent stock.

    As you may have guessed, the tail of the Phoenix Chickens is going to be a big part of scoring your bird against others. The breed is a bit harder to find than some, so make sure you research the breeder thoroughly. If you are still interested in owning one of these beautiful birds, then keep reading below to learn more.

    Phoenix Chickens

    Size5.5 Pounds (Rooster)
    4 Pounds (Hen)
    ClassOriental
    ColorWhite, Brown, Black, Black-breasted, Silver, Red, Gold
    TemperamentDocile (Hen)
    Aggressive (Rooster)
    HardinessNot Cold Hardy
    Eggs/Yr45
    Egg SizeMedium
    Egg ColorSilver or Gold

    [ez-toc]

    History and Origin

    The Phoenix Breed comes from Germany and was created by a man named Hugo du Roi. The breeding process to create the breed was quite strenuous as several different breeds, including Yokohama fowl, had to be used in order to create the long tail that the Phoenix is known for. The most notable breeding creating the Phoenix is the long-tailed Onagadori. The bird was formally accepted into the APA in 1965, and there are currently three colorations of the Phoenix chickens accepted into shows.

    What do they look like? 

    The Phoenix chickens really do look a bit like the depiction of the mythical Phoenix. The birdโ€™s most notable feature is their long flowing tails. The tail of each Phoenix can differ a bit, and while some will have tails with feathers that are several feet long, while others will have shorter tails that they can easily hold off the ground. The tail feathers usually hang at a downward angle. 

    They have dark eyes, usually with a reddish tint and clean blue legs. Similar to a Rhode Island Red, they also have a single comb that is recognizable by its five spikes. Both the comb and the wattle of the Phoenix are red, and the bird's earlobes are white. The wattle is medium in rooster and small in hens, but both sexes have a round or oval shape. You will also note that this breed has long nails.

    These arenโ€™t one of the largest chicken breeds as the rooster weighs around 5.5 pounds while hens only weigh around 4 pounds. The breed comes in a large assortment of colors; White, Brown, Black, Black-breasted, Silver, Red, Gold. Out of these, gold, black-breasted, and silver are accepted by the APA as show birds. There is also a Bantam version that weighs in at around 1.5 pounds.

    The chicks arenโ€™t going to stick out or have incredibly long tail feathers. Despite their parents striking appearance, Phoenix chicks still look pretty normal. The chicks arenโ€™t completely yellow, though, and usually have brownish-black markings on their bodies.

    Need some help keeping your chickens health and care taken care of? Check out the Organized Chicken Keeper for an easy to follow system.

    Temperament 

    The temperament of the Phoenix chicken can vary depending on if you have a hen or a rooster. The Phoenix roosters are aggressive and wonโ€™t take well to other roosters. The hens, on the other hand, are docile and wonโ€™t make much of a fuss when housed with other chickens. If you are planning to put your Phoenix in a mixed coop, watch to ensure no one is picking at their tails. The long feathers may draw the curiosity of other chickens in your coop.

    You should note that this is a breed that isnโ€™t very social, and they are perfectly happy being only chickens. This is great news if you donโ€™t like the thought of having a large flock of chickens.  They also arenโ€™t fond of being pets, as they donโ€™t like too much handling by people. 

    If you are looking for a pet chicken that you can interact with, the Phoenix may not be the best breed. To try and encourage them to be friendlier, you can raise them from a young age with handling, but there are no guarantees that this will allow you to pet them or pick them up in the future. You should also avoid leaving your Phoenix chicken around children.

    Phoenix chickens can also tend to be a bit shy and arenโ€™t fans of busy or noisy environments. To keep your Phoenix stress-free, try to place them in a quieter area of your yard. If you are looking to make these birds free-range, then you may need to take some extra precautions as well.

    The long tails can easily drag mud, and the birds wonโ€™t be happy with the extra weight that comes with a wet tail. The breed can also fly, so you may want to consider building a run where they can safely forage without escaping. Luckily, these birds are happy being in their coop, but you will have to do quite a bit of work to ensure that they are happy. 

    What is their purpose? 

    The Phoenix Chicken is a show breed or a breed that should be kept by those who enjoy caring for oriental (like Shamo Chickens and Sultan Chickens) chickens. Phoenix chickens are extremely poor layers as they lay around 45 eggs a year. That means that these chickens lay eggs less often than average. While they can lay more, you shouldnโ€™t expect them to be a good food supplier.

    These chickens are also tiny, so getting good portions of meat from them isnโ€™t possible. If you are looking for a food-providing breed, you should check out another breed like the Serama chicken or a dual purpose breed like the Sussex or Australorp.

    This chicken also doesnโ€™t make a good pet as they donโ€™t like to be touched or handled. With all that in mind, the Phoenix Chicken is still a brilliant breed that can be fascinating to keep. There are three varieties allowed in shows, and with the right care, you birds are sure to wow the judges.

    When choosing to buy a Phoenix chicken, you will want to be extra careful. This isnโ€™t the most common breed in the US, so finding chicks may give you a bit of trouble. You also will want to consider the quality of the chick's parent hen and rooster as the quality of the tail is going to be a huge part of scoring in shows. While the bird with the longest tail isnโ€™t always going to win, you do want to make sure that the bird has healthy feathers with the correct coloring.

    A show itself can be a great place to learn about Phoenix chicken breeding programs. If you run into the right breeder, you can even get a look at the hen and rooster pair that are making your eggs. Some chicks will cost more than others, as chicks bred from competition winning birds will have a premium price. 

    Care and Health

    If you are thinking of trying to breed the Phoenix chicken yourself, then you may be in luck. This is a bird that goes broody, but getting chicks may take a while as they donโ€™t lay that many eggs a year.

    Roosters are also a bit aggressive, so they may not take well to you checking on your hens for eggs. Try to raise your rooster from a young age to ensure that they are used to you by adulthood. Be sure to separate males at a young age to keep any aggressive tendencies from popping up in your flock.

    In terms of general health and care, this bird is a bit different from others that you have kept or read about as it has some special needs. For starters, your coop needs to be able to properly accommodate the Phoenix chicken.

    These birds have long tails, meaning that they will need high sitting perches to lounge on. You will likely have to adjust these as your chicks grow, as there is no way to know how long or short their tails will be when they reach adulthood. Large branches are an excellent choice for your coop; just make sure to secure them so that they wonโ€™t fall down when your chicken is using them.

    Next, you will need to make sure that the coop is well insulated. Phoenix chickens donโ€™t do well in cold environments. This may make it harder to keep these birds in colder states as they are more prone to getting frostbite. But as long as you know how to keep chickens warm in the winter, you should be OK.

    Along with a roomy coop, you need to ensure that they always have access to fresh water and food. It may be best to go with a mostly covered water bowl as long tails, and open water generally doesnโ€™t mix well. Outside of this, these chickens donโ€™t face any special health problems. Be vigilant of any strange behavior and always check for parasites as mites can spread quickly through a coop.

    These birds donโ€™t really have any special grooming needs unless they get covered in mud. If you are planning to let your Phoenix chicken outside, keep in mind that they can fly. If there are areas, like an open pool, that you need to keep your bird out of, try to make a run to contain them.

    These birds aren't huge fans of noise, so try to keep them in a quiet part of your yard. A cover for them to go under when itโ€™s raining should also be provided unless you want to spend time helping them clean their muddy tails.

    FAQ 

    Are Phoenix Chickens good layers? 

    No, these chickens donโ€™t lay well, and many only lay around 45 eggs per year.

    Are Phoenix Roosters aggressive?

    Yes, the roosters are aggressive, and you shouldnโ€™t keep them together.

    How big does a Phoenix chicken get? 

    Phoenix chickens are rather small, with hens only weighing in at 4 pounds and roosters only weighing in at 5.5 pounds.

    Are Phoenix chickens broody? 

    They are broody, but they donโ€™t lay many eggs, which may make breeding a little complicated.

    What colors do they come in? 

    Phoenix chickens come in White, Brown, Black, Black-breasted, Silver, Red, Gold. Out of these colors, only black-breasted, silver, and gold are accepted by the APA.

    What colors are their eggs?

    The eggs of the Phoenix chickens have a silver or gold coloring.

    If you need more help with taking care of your chickens, check out The Organized Chicken Keeper for a complete system for managing their health through keeping their supplies stocked and coop clean.

    Access The Organized Chicken Keeper Here

    If you need more help with taking care of your chickens, check out The Organized Chicken Keeper for a complete system for managing their health through keeping their supplies stocked and coop clean.

    Access The Organized Chicken Keeper Here

    Sicilian Buttercup Chickens

    By MrAnimal Farm

    Sicilian Buttercup is a widely adored breed of chicken known for their unique pattern, buttercup-shaped comb, and friendly temperament. The chicken breed isnโ€™t that bad at egg-laying either, and most owners note that they are fun to watch. No matter what breeds in your flock the Sicilian Buttercup can fit right into your home.

    The Sicilian Buttercup can lay around 180 golden-colored eggs per year, but they are usually small in size. They can also provide a bit of meat, although there are several breeds that outshine them in this use. They are great as show birds and are recognized by the APA.

    Sicilian Buttercups may be a bit hard to find depending on where you live, as they are a rare breed of chicken. If you are looking for one, you may have to do some research online to find a reputable breeder.

    The breed usually lives somewhere between 5 to 8 years with proper care. They can be a bit of a handful to keep though, as these birds love to explore and can fly short distances. Any chance they get to fly the coop, they will take, so you will need to be vigilant when feeding or going to check on them.

    If you are up for the challenge of trying to keep this delightful breed in check, then keep reading the guide below to learn all about caring for the Sicilian Buttercup chicken.

    Sicilian Buttercup Chickens

    Size6 Pounds (Rooster)
    5 Pounds (Hen)
    ClassMediterranean
    ColorGold
    TemperamentDocile
    HardinessNot Cold Hardy
    Eggs/Yr180
    Egg SizeSmall
    Egg ColorGold

    [ez-toc]

    History and Origin

    The Sicilian Buttercup is a breed that comes from the region of Sicily in Italy. The breed is quite old, and chickens looking similar to the Buttercup are even in paintings from the sixteenth century. While the exact age of the Silesian Buttercup isnโ€™t known, we do know that they were brought over to America during the nineteenth century, and by 1918 the breed was recognized by the APA, just 6 years after the organization was founded. At the time they were brought over, they were even being used as a food source.

    Sadly, the breed is now listed as โ€œthreatenedโ€ but will likely bounce back thanks to renewed interest in the breed. The breed also sometimes goes by another name; the Sicilian Flowerbird. In the past, it seems that other color varieties existed, but those have now been phased out.

    What do they look like? 

    The Sicilian Buttercup chicken has a very prominent coloring that should be relatively easy to recognize. The hens mostly have gold feathering, while the roosters will appear a bit more orange in their coloring. Hens have small black markings dotting their feathers that begin at the neck and travel down their bodies, while roosters have solid coloring. Their tails have a slight angle upwards with black at the ends, and they generally have a solid coloring on their head and neck.

    One of the most notable features of the breed is their two single combs that connect in the center. The combs resemble that of a buttercup, making it instantly recognizable; the upright standing combs are usually bright red in coloring.

    The legs of the Buttercup have a green hue, and they have red, medium-sized wattles. In some Buttercups, you may even find that spurs have grown on the chickenโ€™s leg. This isnโ€™t something to worry about as it is a common occurrence in Mediterranean chicken breeds.

    Sicilian Buttercup hens grow to be around 5 pounds, while the roosters will grow to be around 6 pounds. There is also a smaller Bantam version of this breed. Once upon a time, there were other colorings of Sicilian Buttercup chickens, but these seem to currently be lost to time.

    As for now, the only breed is the standard gold, but this could change at any time with breeding; just donโ€™t expect new varieties to easily be accepted by the APA or even the BPA.

    The Buttercup chicks donโ€™t yet have their combs, but they have some similar black marking to the full-grown version. If you are looking at chicks, it can still be hard to identify a Sicilian Buttercup chick from other breeds.

    Need some help keeping your chickens health and care taken care of? Check out the Organized Chicken Keeper for an easy to follow system.

    Temperament 

    The Sicilian Buttercup is not an aggressive breed of chicken, so you can integrate them into a docile flock of other breeds. The Buttercup roosters even have docile temperaments. If you plan to house multiple Sicilian Buttercup roosters together, you should still keep a close eye on them to identify any fighting, as most roosters will get aggressive around one another.  If all goes well, though, your flock should be peaceful.

    Handling the Sicilian Buttercup chicken may be a bit hard, especially if you didnโ€™t spend a lot of time socializing them as chicks. One of the biggest reasons this isnโ€™t a cuddly breed isnโ€™t because they hate people though, they are just full of energy.

    This is why many owners note that they are entertaining to watch; these chickens love to be on the go. You can often see them happily running around your yard since they adore exploring. They also have the ability to fly, so keeping them in one place can be rather tricky.

    Buttercups hate to be confined, so itโ€™s best to have an area for them to roam freely outside. Keep in mind that these energetic birds like to try and escape whenever their coop is open, so keeping them all in one place can be a task.

    You should conside building a chicken run that is large for them to get their energy out in; just make sure that they can easily clear the fence you use to make it. The last thing you want is for them to go on an adventure in the nearby woods.

    What is their purpose? 

    Sicilian Buttercup chickens have quite a few uses. To begin with, they lay a decent amount of eggs throughout the year. You can expect to get around 100 or so small eggs from your hens throughout the year. A small flock of hens can provide you with a good amount of eggs during the year.

    How long chickens lay eggs can depend on their breed, but also their health. This breed lays for several years as long as they are kept healthy.

    As for meat, the roosters are large enough to get an ok amount of meat off of, but you will probably do better with a dual purpose chicken breed like a Rhode Island Red, Sussex, or an Australorp.

    The Sicilian Chicken can be pets and their energetic nature makes them rather fun to interact with. To ensure that your chickens are friendly, you will need to start socializing them as chicks. By petting them and holding them securely, you can make them easier to handle as adults.

    The breed is a docile one, but you shouldnโ€™t leave children unattended around them to avoid any accidents from occurring. This can be especially troublesome as young children may want to indulge the Sicilian Buttercup and chase after them as they bolt around your yard.

    Sicilian Buttercup chickens are popular as show birds and accepted by the APA. You can easily enter them into competitions, and with the proper care, even win some. You will want to be careful when purchasing chicks for shows as the APA has strict standards, and the last thing you want is for your โ€œSicilian chickโ€ to grow into another breed. Be sure to check out reputable breeders online and take notes of who is reputable.

    You can also talk with Sicilian Buttercup chicken keepers at shows and possibly buy chicks from them. Meeting breeders at shows gives you the ability to inspect the hens and roosters that they use for breeding.

    Please be aware that buying chicks that are the offspring of show winners will also cost a bit more money as they are from a proven competitive lineage. On the bright side, getting a chick from a show champion can give you a leg up on some of the competition.

    Breeding the Sicilian Buttercup can be a bit tricky as they are not a broody breed. If you plan to raise chicks, then you should go ahead and invest in an incubator. Without one, you will rarely ever see a chick hatch in your coop, if it ever even happens at all.

    This breed of chicken is a bit more expensive than others, as chicks can cost you around $11. While this doesnโ€™t reach the heights of special varieties like the Ayam Cemani, this is still pretty pricey in comparison to regular chicks. If you want a flock, you may even want to save up for a while. Keep in mind that you may have to drive a ways to get this breed or even have them shipped; this can greatly add to their overall cost.

    Care and Health 

    The Silesian Buttercup Chicken needs a large coop to rummage around in, especially during the winter. These birds can get frostbite, and while the cold wonโ€™t kill them, you should avoid your flock getting too cold at all costs. To help offset the cold, be sure that your coop has proper insulation and that it is as draft free as possible to provide warmth for your chickens when the temperature starts to drop.

    These birds do well in the heat; just make sure that they have access to fresh water at all times by choosing one of the best chicken waterers.ย  You will also want to provide them with nutrient-rich food every day; this is especially important if you want them to consistently lay eggs.

    The larger challenge comes from the fact that these birds donโ€™t like confinement. The Sicilian Buttercup isnโ€™t a breed that you can keep in the coop year-round; they need room to run. This makes them pretty hard to keep if you have limited room in your backyard.

    You will want to build a run, as they will go off and explore their surroundings with little to no fear. The run will need to be on the larger size, and you should make sure to use tall fencing as these birds can and will fly out of the run.

    Be aware that they will most likely make a run for the door whenever you open the coop, given that they arenโ€™t asleep. When taking care of the chickens, you need to be extra careful when entering and exiting the coop.

    This is more important on days with bad weather as you donโ€™t want a sopping wet chicken because they boldly ran into a downpour. You will also want to consider how to let them get exercise in winter without exposing them to the cold for long periods of time.

    You wonโ€™t need to worry about bathing. These chickens are doing anything out of the ordinary for their coop. They are very hardy, and aside from normal problems like mites, you wonโ€™t find yourself with sick birds. Be sure to inspect your flock regularly just to ensure that there are no signs of health problems; mites can be especially annoying once they show up as they waste no time invading every single chicken in the coop.

    FAQ 

    What color eggs do Sicilian Buttercups lay? 

    The Sicilian Buttercup Chickens lays a small egg with a golden coloring.

    Are Buttercup chickens friendly? 

    They are friendly, but due to their energetic nature, they arenโ€™t likely to sit on your lap or allow you to hold them for long periods of time.

    Are Sicilian Buttercup chickens good layers? 

    Yes, these chickens lay around 180 eggs a year.

    Are Sicilian Buttercups rare? 

    They are a rare breed, and finding them may be difficult depending on where you live. Both the APA and BPA consider them to be a threatened breed.

    Are buttercups Bantams? 

    They are not Bantams, but there is a smaller Bantam variety of Sicilian Buttercup chickens.

    Are Buttercup chickens broody? 

    No, this breed rarely gets broody, so you will need an incubator to hatch chicks.

    How big do Sicilian Buttercup chickens get?

    Sicilian Buttercup Chickens rooster will reach around 6 pounds while hens only reach around 5 pounds in size.

    If you need more help with taking care of your chickens, check out The Organized Chicken Keeper for a complete system for managing their health through keeping their supplies stocked and coop clean.

    Access The Organized Chicken Keeper Here

    Yokohama Chickens

    By MrAnimal Farm

    The Yokohama Chicken is a small bird with a very unique look; in fact, some people even mistake them for other birds. They are known for their small builds and long tails. This gives them a strikingly different appearance from your more common chicken breeds. They are typically show chickens, though, and arenโ€™t the best food producers.

    Yokohama chickens are unique as they are poor at providing meat and eggs. You should only expect to get around 52 eggs a year from the bird, and they are small in size. This isnโ€™t surprising as the Yokohama is a tiny breed.

    They are living their best life as a pet or a show bird. If you are looking for a food-providing chicken, then you should look into another breed to add to your flock like the Leghorn chicken breed. If you want to keep a unique breed but have minimal space, the Yokohama chicken can be a great choice.

    The breed typically lives for around 5 years to 7 years with proper care. This breed is happy to hang out in their coop all day, making them relatively easy to manage. Keep in mind that this is a breed that isnโ€™t a huge fan of the cold, so you will need to have a well insulated coop.

    If you are interested in the Yokohama chicken, then keep reading below to learn more about the breed.

    Yokohama Chickens

    Size4.5 Pounds (Rooster)
    3.5 Pounds (Hen)
    ClassFancy
    ColorRed Saddled, White
    TemperamentDocile
    HardinessNot Cold Hardy
    Eggs/Yr52
    Egg SizeSmall
    Egg ColorCream

    [ez-toc]

    History & Origin 

    Despite the naming of the Yokohama, they are actually a German breed of chicken and not Japanese. They get the Yokohama name from the port that they were originally shipped out of. You will want to vigilant when trying to find the Yokohama due to it also including the Phoenix chicken as part of the breed in some countries. This breed is a creation by Hugo du Roi and has a distinctive red coloring along their bodies.

    What do they look like? 

    The Yokohama chicken is an extremely small breed. The roosters usually only weighing in at 4.5 pounds and hens only growing to be around 3.5 pounds. The Yokohama is known for the red section of feathers that runs through the middle of their body. There is also a white variety, and both are recognized by the APA. 

    The breed has a pea-shaped comb that is red in color and yellow legs. They have orangish-red eyes, and depending on the chicken; they may not have a wattle at all. If a wattle is present, it will be a red color and small.

    You will also notice that this breed has sickle feathers and an extremely long tail. While each bird will have a different tail length, some tail feathers can grow to be a foot or more in size. Generally, the roosters tend to have longer tails than the hens.

    There are also some unrecognized varieties of the Yokohama, they are; golden duckwing, silver duckwing, black-red, blue-red, spangled, and black-tailed. The Yokohama chicks are usually yellow in color with red stripes on their back. This makes them a little bit easier to identify from other breeds.

    Need some help keeping your chickens health and care taken care of? Check out the Organized Chicken Keeper for an easy to follow system.

    Temperament 

    The Yokohama chicken is a docile breed that makes an excellent choice as a pet. The breed wonโ€™t go around causing fights in the coop and as long as you know how to introduce new chickens, then can easily blend in with other docile flocks. Just make sure that no other chickens are trying to peck at the Yokohamas long tail feathers.

    They also donโ€™t mind being held and even seem to enjoy being carried around by their owners. That is a rarity in chickens. While this can vary between individuals, the Yokohama is a safe bet for owners who want a cuddly bird.

    While you will still need to oversee interactions, this is a breed that is good with children and can tolerate a lot of attention. Make sure to handle the Yokohama chicken as they grow to ensure that they are comfortable with handling.

    Raising them from a young age is one of the best ways to make sure they are comfortable with you and your family. You should be cautious if you plan to house multiple roosters together. Male chickens tend to be more aggressive towards each other. 

    Yokohama chickens love to stay in a roomy coop all day, but they also enjoy going out to wander as well. The breed does tend to be curious, so it can be hard to keep them in one place. They are a very small breed of bird, making them an easy target for predators. You will want to build a run to ensure they are safe. Yokohama can fly, so make sure you make the fence of the run high enough to contain them.

    What is their purpose? 

    The Yokohama chicken isnโ€™t going to keep you or your family fed during the year for several reasons. This bird lays around 52 small eggs a year, making them one of the worst layers you could choose.

    They are also small in size, and even the roosters arenโ€™t going to provide you with a decent serving of meat. Even having a full flock of Yokohama chicken wouldnโ€™t be good enough to provide you with a substantial amount of food.

    Even though they are not a breed of chicken that lays eggs often, as mentioned above in the temperament section, the Yokohama chicken is a perfect choice for a pet. They like being picked up, they get along with children, and can be stay inside of their coop with little issue.

    They are also a great choice for a show bird, and there are currently two recognized varieties by the APA. Just remember, it can be difficult to purchase show birds as you will need to be extra careful with the chicks you are buying.

    The Yokohama isnโ€™t a common bird as it isnโ€™t regularly available around the US. You will need to get your Yokohama chick from a specialty breeder. Before buying your chick, thoroughly research the place you are getting them from to verify that they are purebred, as this is extremely important for competitions.

    Alternatively, you could visit some chicken shows and look for Yokohama chickens. You are likely to find someone who is selling chicks, and this gives you a chance to look at the hen and rooster they are breeding to get their chicks.

    The Yokohama hens are broody and will gladly hatch fertile eggs. While it may take a while to get chicks since they donโ€™t lay often, when left with a Rooster, you are sure to get chicks sooner or later. Just be sure to keep watch on the young roosters as they grow to prevent any potential fights from happening.

    Care and Health 

    The Yokohama chicken isnโ€™t going to cause you too much trouble in the care department. They need pretty standard care, in general.

    You will want to provide a roomy coop for these chickens to live in, especially if you are planning to keep them confined. The chicken coop plans will need plenty of insulation and be draft free as these birds donโ€™t do well in the cold. However, keeping a draft free coop is one of the main ways to keep chickens warm in the winter.

    Luckily, this wonโ€™t be as much of a problem for those who live in places with cold winters as the Yokohama will happily live in their warm coop through colder months of the year.

    Yokohama chickens should always have access to water, but you may want to look for an option under cover to keep their long tails from getting too wet. You can find the perfect waterer by using one of these best chicken waterers.

    You will also want to provide plenty of food with high protein, they may be small, but it takes a lot of nutrition to grow those long beautiful tails. Make sure that you know how much food a chicken needs so you can provide an adequate amount.

    If you are planning to let the Yokohama outside, then you are going to need to make some preparations in advance.

    The breed is curious and will wander far away from the coop if left unattended. You will need to build a chicken run with high fences so they canโ€™t escape. Yokohama chickens are horrible at foraging, so never assume that they are catching a lot of food while left to wander around in the run. The breed isnโ€™t any more prone to health problems than the average chicken. As always, be sure to look out for any strange or lethargic behavior and check your flock regularly as parasites like mites spread quickly.

    FAQ 

    How much is a Yokohama chicken worth? 

    Male Yokohama chicks usually go for around $4, while the females tend to cost slightly more at around $6. Since they are more of a rare breed you may have to have a breeder ship chicks to you.

    How big do Yokohama chickens get? 

    Yokohama chickens are small birds, with the roosters only growing to 4.5 pounds and the hens only reaching 3.5 pounds.

    How long can Yokohama chickens live? 

    Yokohama chickens, when cared for properly, can live between 5 and 7 years; possibly longer if the conditions are right.

    Are Yokohama chickens cold-hardy? 

    No, the Yokohama chicken isnโ€™t cold hardy. Since they don't mind confinement, it's easy to keep them safe and comfortable in the winter with a warm coop.

    What color eggs do Yokohama chickens lay? 

    The color of the Yokohama chickenโ€™s eggs is cream.

    What can you use Yokohama chickens for?

    The Yokohama chicken is a bad food provider. They are usually kept strictly as pets are to be entered into shows. You can also make money with your chickens by incubating your chicken eggs and selling the chicks if you have good breeding line.

    If you need more help with taking care of your chickens, check out The Organized Chicken Keeper for a complete system for managing their health through keeping their supplies stocked and coop clean.

    Access The Organized Chicken Keeper Here

    Can You Freeze Mozzarella Cheese?

    By MrAnimal Farm

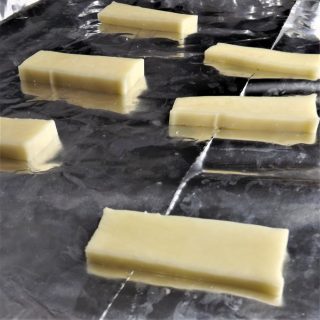
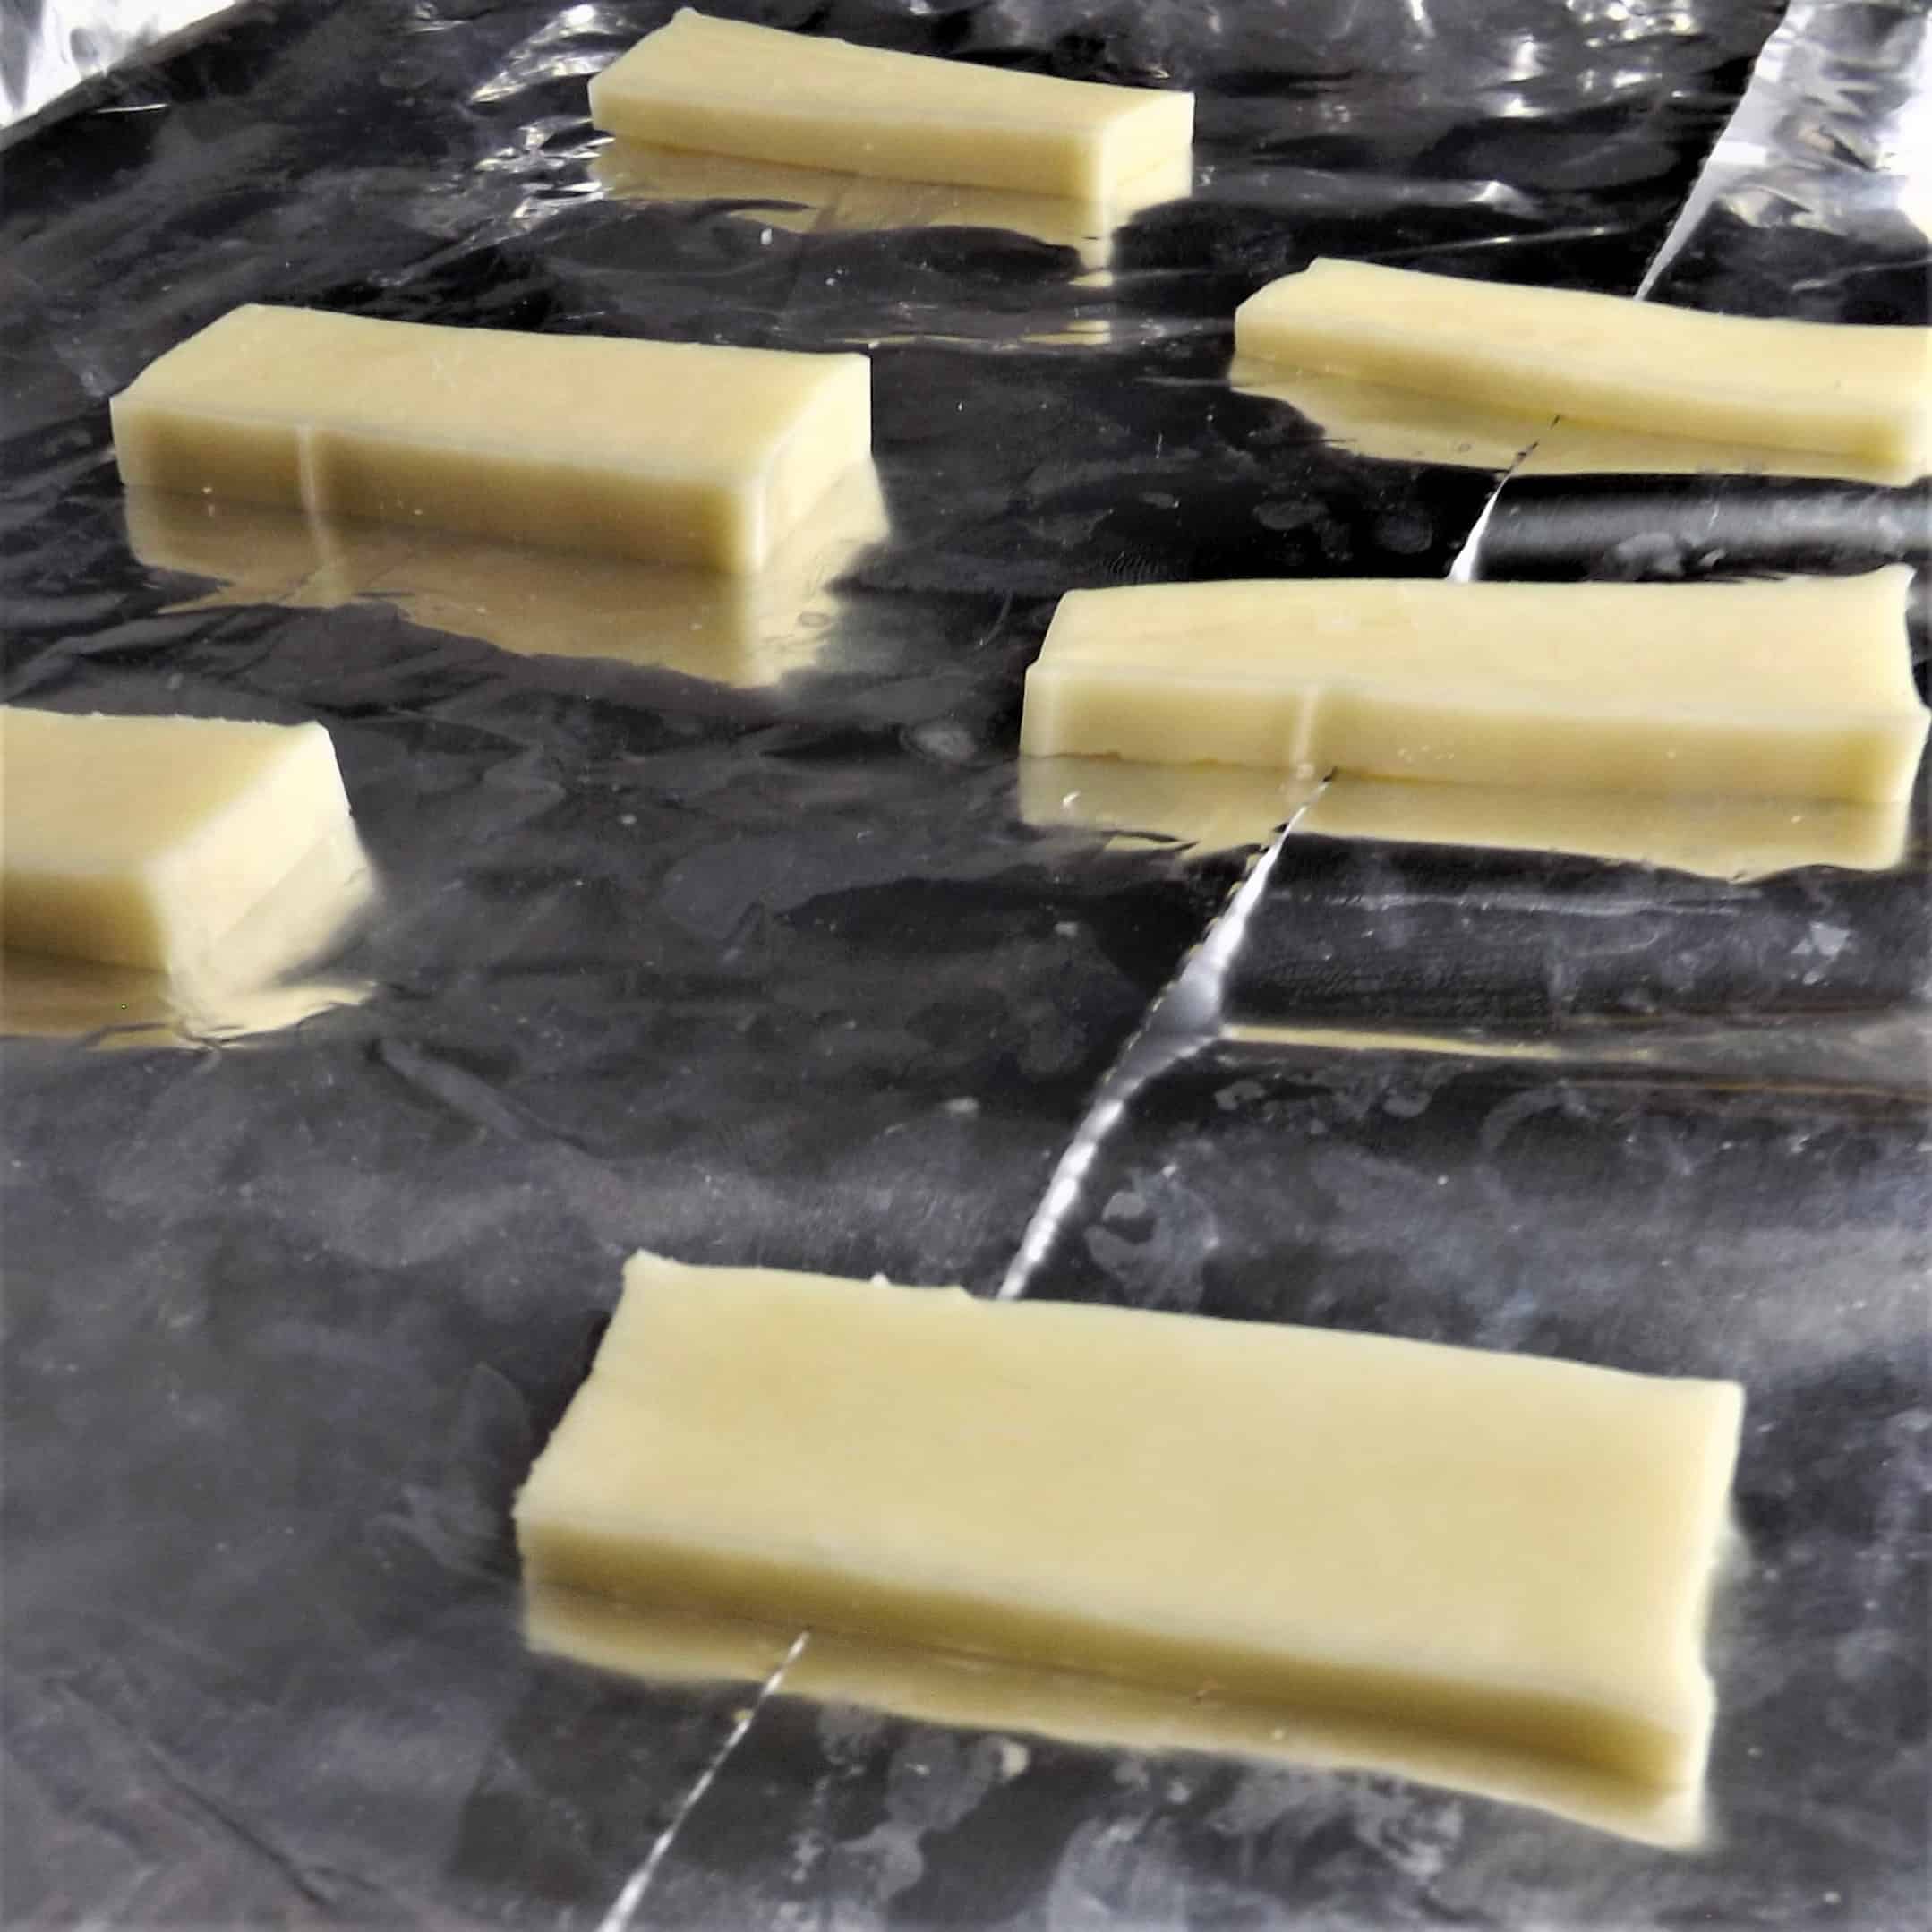
    frozen mozzarella slices on baking pan wrapped in foil

    You can freeze mozzarella in just about any way you can find it; shredded, blocks, fresh mozzarella balls, even battered and breaded mozzarella cheese sticks! Depending on the type of mozzarella you are freezing, it can stay frozen for 3 - 9 months.

    If you want to learn more about the best methods to freeze mozzarella cheese, keep on reading!

    frozen mozzarella slices on baking pan wrapped in foil
    [feast_advanced_jump_to]

    Why Freeze Mozzarella Cheese?

    Freezing mozzarella cheese allows you to extend it's shelf life from 2 months (unopened) in the refrigerator to 3 - 9 months in the freezer. Additionally, it barely loses any of it's flavor when frozen. And, it thaws like a dream when used as a melted topping for pizza, casseroles, soups, or anything else you want.

    Freezer LifeFridge Life
    freshest in first 2 to 3 months
    keeps from 3 to 9 months
    up to 2 months

    We freeze a ton of mozzarella. Whatever we can't grow or make ourselves, we wait for it to go on sale and then load up our emergency stock pile with our other frozen food. It is a great way to save money because you can stock up when the price is at it's lowest. And then you have it ready to go whenever you need without an extra trip to the store.

    Since cheese makes just about everything better, we buy a ton of it and then freeze it. It is similar to freezing feta cheese or freezing goat cheese.

    Frozen mozzarella is best used as a melting cheese. If you want to put it on top of a pizza, or pre-made freezer meal, you will be pleasantly surprised with how much flavor your cheese will retain.

    It is important to note that if you are expecting to freeze expensive, fresh mozzarella and then have it retain it's same quality later, it will leave you disappointed. Some higher quality cheeses are prized specifically for how soft and creamy they are.

    After freezing it, the texture will be much more dry and crumbly. So, do be aware of that if you choose to freeze fresh mozzarella balls or something similar.

    Mozzarella Freezing Stats

    Prep Stylein container
    cubes or chunks in bags
    crumbles in bags or container
    Time To Freeze12 to 24 hours
    Time to Thaw24 to 48 hours in fridge
    Usessalads
    side dishes
    snack
    sandwiches

    How To Freeze Mozzarella Cheese

    Mozzarella is one of those cheeses that is available in several different forms for several different uses. Today we are going to focus on freezing shredded (fresh and store bought), full blocks, and fresh mozzarella balls.

    Several of these methods will involve flash freezing. If you are not familiar with flash freezing, it is essentially a pre-freeze before the deep freeze. The steps are:

    • cover a cookie sheet with aluminum foil or parchment paper
    • spread the food you are freezing on top of the cookie sheet in a single layer
    • place the cookie sheet in the freezer and leave anywhere from 2 hours (shredded) to overnight (thick slices or cubes)
    • Once the food has started to harden, remove the sheet from the freezer and then continue with the rest of the freezing preservation process

    Knowing how to flash freeze is really useful. You can even use it when you are learning how to freeze cantaloupe and other fruits and veggies, too.

    Need to get all your food preserved easily? Check out the Ultimate Guide To Freezing Food so that you can fill your freezer without in minimal time.

    Shredded mozzarella

    Freezing shredded mozzarella is quite easy. You can follow the steps below based on if you are shredding your own or if you have purchased it shredded at the store.

    Freshly shredded

    • Shred or grate your mozzarella onto a covered cookie sheet for flash freezing
    • Spread the cheese out as thin as you can to prevent it from clumping together.
    • Flash freeze by popping it into the freezer for a few hours.
    • Once pre-frozen, scoop your shreds and add them into a freezer bag
    • Squeeze as much air out as you can and seal
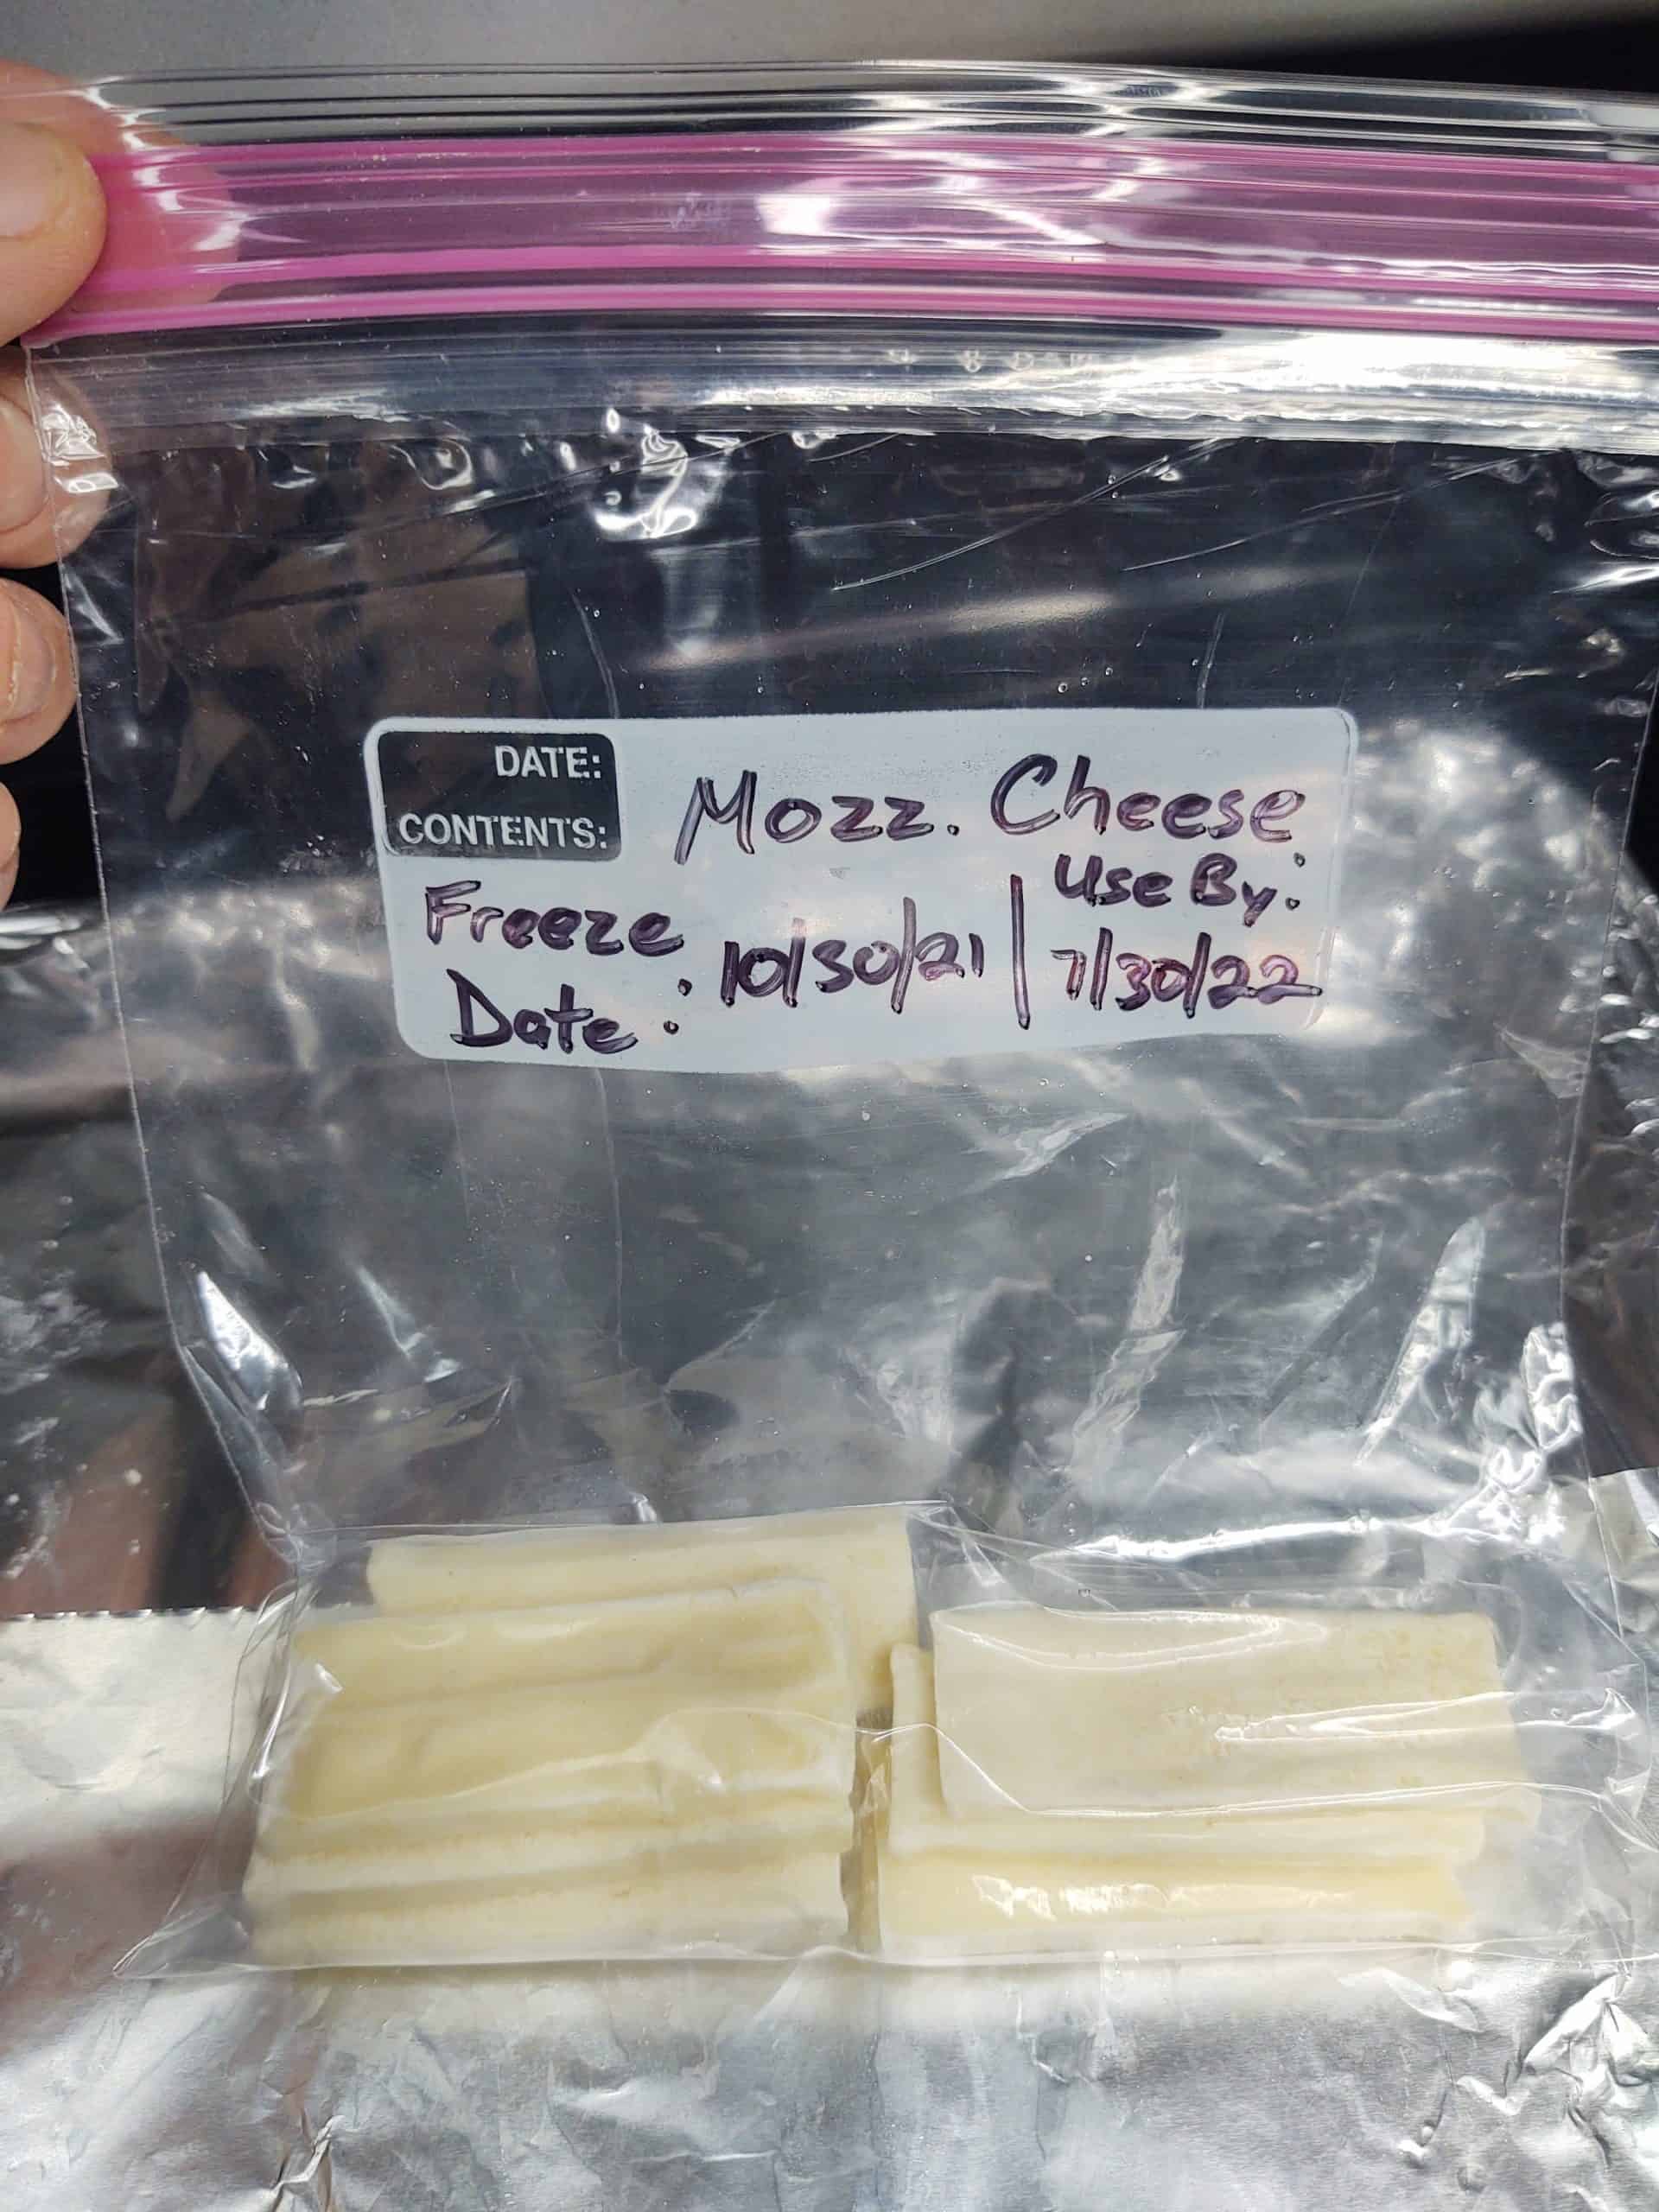
    • Place this bag into a second labeled freezer bag
    • Squeeze the air out of the second bag and seal
    • Place the bag into the freezer and allow up to 24 hours to completely freeze

    Store bought

    All you need to do with store bought is stick it in the freezer unopened in its sealed bag.

    Mozzarella blocks

    A solid block of mozzarella will, once frozen and thawed, become very brittle and crumbly. It will still taste good, but it's texture will not be great for some things you would use it for.

    We recommend thinking about what you will need that block for in the future and then prepare it accordingly.

    If you are going to want to grate or shred it, either do that first and freeze using the method above or freeze the block solid and then grate without thawing it.

    However, slices for sandwiches and things are generally what you would use a block of cheese for. Use a knife and cutting board to slice your block up BEFORE you freeze it.

    If you're freezing slices follow all of the steps or skip the slice specific steps at the beginning and go straight to the wrapping step if you're freezing a solid block.

    • Use a knife to cut according to your needs
    • Lay all of your slices in a single layer on a covered cookie sheet and flash freeze them. Once frozen, take them out and prepare to wrap.
    • You can either freeze individual slices or, bundle them in groups according to what you will need per meal.
      • For example, if you have a family of 4 that will each eat 1 sandwich for lunch, wrap 4 slices together so you can thaw them at the same time.
      • Pro tip: place a small square of parchment or wax paper in between each slice prior to wrapping to keep them from freezing together.
    • (Full Block steps start here) Wrap your cheese as tight as you can in cling wrap.
    • Then put a second layer of cling wrap around the cheese.
    • Put the wrapped cheese in a freezer safe baggie and push out all of the air.
    • Place the bag in the freezer and let it freeze for about 24 hours.

    Pro tip: You can use a straw to literally suck the extra air out of the bag if you leave a small opening at the top of the zipper bag.

    Double pro tip: Use physics to your advantage and dip the mostly closed bag in a large bowl of water. The water pressure will push the air towards the top of the bag. Then, just zip it tight.

    freezer bags of frozen mozzarella in front of baking pan wrapped in foil

    Fresh mozzarella balls

    This is the good stuff that you find in the specialty cheese section, individually wrapped in it's own brine. Fresh mozzarella balls are similar to other soft creamy cheeses, like Boccincini and Burrate, which should not be frozen but enjoyed fresh.

    Freezing, while a great way to preserve your cheese so it will last much longer, will destroy the creaminess of these types of cheeses.

    But, if you still want to do it anyway, this method, similar to the block method above, will give you the best results.

    • Drain all of the liquid off of the mozzarella balls and pat them dry with paper towels.
      • You don't want to freeze it in the liquid. At worst you will end up with soggy, frost bitten cheese and at best it will just take longer to defrost with no discernible advantage from having been frozen in liquid.
    • Decide if you are freezing whole balls or if you want slices, cubes, etc and cut accordingly
    • If you are cutting it, place all of the pieces in a single layer on a covered cookie sheet and flash freeze them. Once frozen, take them out for wrapping.
    • (Ball steps start here) Wrap your cheese in cling wrap very tightly.
    • Wrap another tight layer around the first.
    • Put the wrapped cheese in a pre-labeled freezer bag.
    • Place the bag in the freezer and let it freeze for about 24 hours.

    This method will also work with marinated mozzarella balls. You just want to make sure they are tight enough that the air and moisture cannot mix in the freezer.

    How to Defrost Mozzarella Cheese

    You can use grated and shredded frozen mozzarella straight from the freezer without thawing first if you are planning to cook or melt it. It is thin enough that, even if put on a salad, it will not stay frozen for long.

    For the other types, take the bags from the freezer and put them in the fridge. Allow them to slowly thaw over 24 to 48 hours. This will make sure that they keep as much of their flavor and texture as possible.

    How to Use Frozen or Thawed Mozzarella

    • Salads
    • Sandwiches
    • Pizza
    • Lasagna
    • Soups
    • Omelets

    Freezing Mozzarella FAQs

    Can I refreeze thawed mozzarella?

    No, you can't refreeze mozzarella. Not only will it really mess with the overall quality and texture, but the safety will also be questionable after the multiple temperature changes.

    Can I freeze mozzarella sticks?

    Mozzarella sticks are really easy to freeze. Line them up on a cookie sheet, flash freeze, and put them in labeled bags. If freezing breaded mozzarella sticks, when you are ready to make them, skip thawing and put them straight into the oven at 350ยฐ for 10 minutes.

    Will frozen mozzarella still melt?

    Yes, frozen mozzarella will still melt, it may just take it slightly longer to do so.

    If you need more help getting your foods frozen, check out the Ultimate Freezing Food Guide for a complete quick start reference so that you can have a well-stocked freezer.

    Access the Ultimate Freezing Food Guide Here

    How to Freeze Mozzarella Cheese

    MrAnimal Farm
    Freezing mozzarella cheese is super easy and a great way to save money by stocking up on it when it is on sale. You can freeze it in blocks, balls or shredded.
    5 from 1 vote
    Print Recipe
    Prep Time 10 minutes mins
    Freezing Time 12 hours hrs
    Course Snack
    Cuisine American

    Equipment

    • Freezer Bags
    • Cookie Sheet
    • Knife or Grater optional
    • Cling Wrap For block or slices
    • Marker or Pen to label bags

    Ingredients
      

    • Mozzarella Cheese Block, Shredded or fresh balls

    Instructions
     

    For shredded mozzarella

    • If you are freezing store-bought mozzarella, simply toss the sealed and unopened bag straight into the freezer.
    • If you are shredding your own, take your block of mozzarella and shred it with a cheese grater.
    • Spread the shredded cheese in a single layer on a cookie sheet and pop it into the freezer for about 2 - 3 hours to flash freeze it. It should be partially frozen.
    • Remove from the freezer and pour it into freezer bags in the portions you will want when you defrost it.

    For blocks of mozzarella

    • You can freeze an entire, unopened block of mozzarella by placing it directly into the freezer. Pop it into a freezer bag for extra protection if desired.
    • If you have already opened the block of mozzarella, wrap it in cling wrap. Then, pop it into a freezer bag and put it into the freezer.

    For slices of mozzarella

    • If not done already, slice the mozzarella into the size slices you prefer.
    • Place them on a cookie sheet and flash freeze by putting them in the freezer for a few hours.
    • Remove from the freezer and place into freezer bags.

    For fresh mozzarella balls

    • Use a paper towel to thoroughly dry the balls.
    • Wrap each ball in cling wrap. Two layers provides maximum protection.
    • Place the wrapped balls into a freezer bag and place it into the freezer.
    • If you want to slice the balls, you you dry them and then follow the steps for slices of mozzarella above.

    Notes

    Top tips
    • Squeeze all the air out of the freezer bags before sealing to maintain the highest quality and prevent freezer burn.
    • Label bags with date and amount so that you know exactly what is in them.
    • Press the contents of the bags flat and even before freezing so that they are easy to stack and save room in the freezer.
    • Place parchment paper between each slice if freezing slices so that they are easier to separate.
    • Package each bag in the amount of cheese you will want or need when defrosting so that you only defrost what you need each time.
    Defrosting/Thawing
    • If cooking or melting the cheese, you can use it frozen.
    • To defrost, place it in the refrigerator overnight.
    ย 
    Keyword Freezing Mozzarella Cheese
    Tried this recipe?Let us know how it was!

    Can You Freeze Goat Cheese?

    By MrAnimal Farm

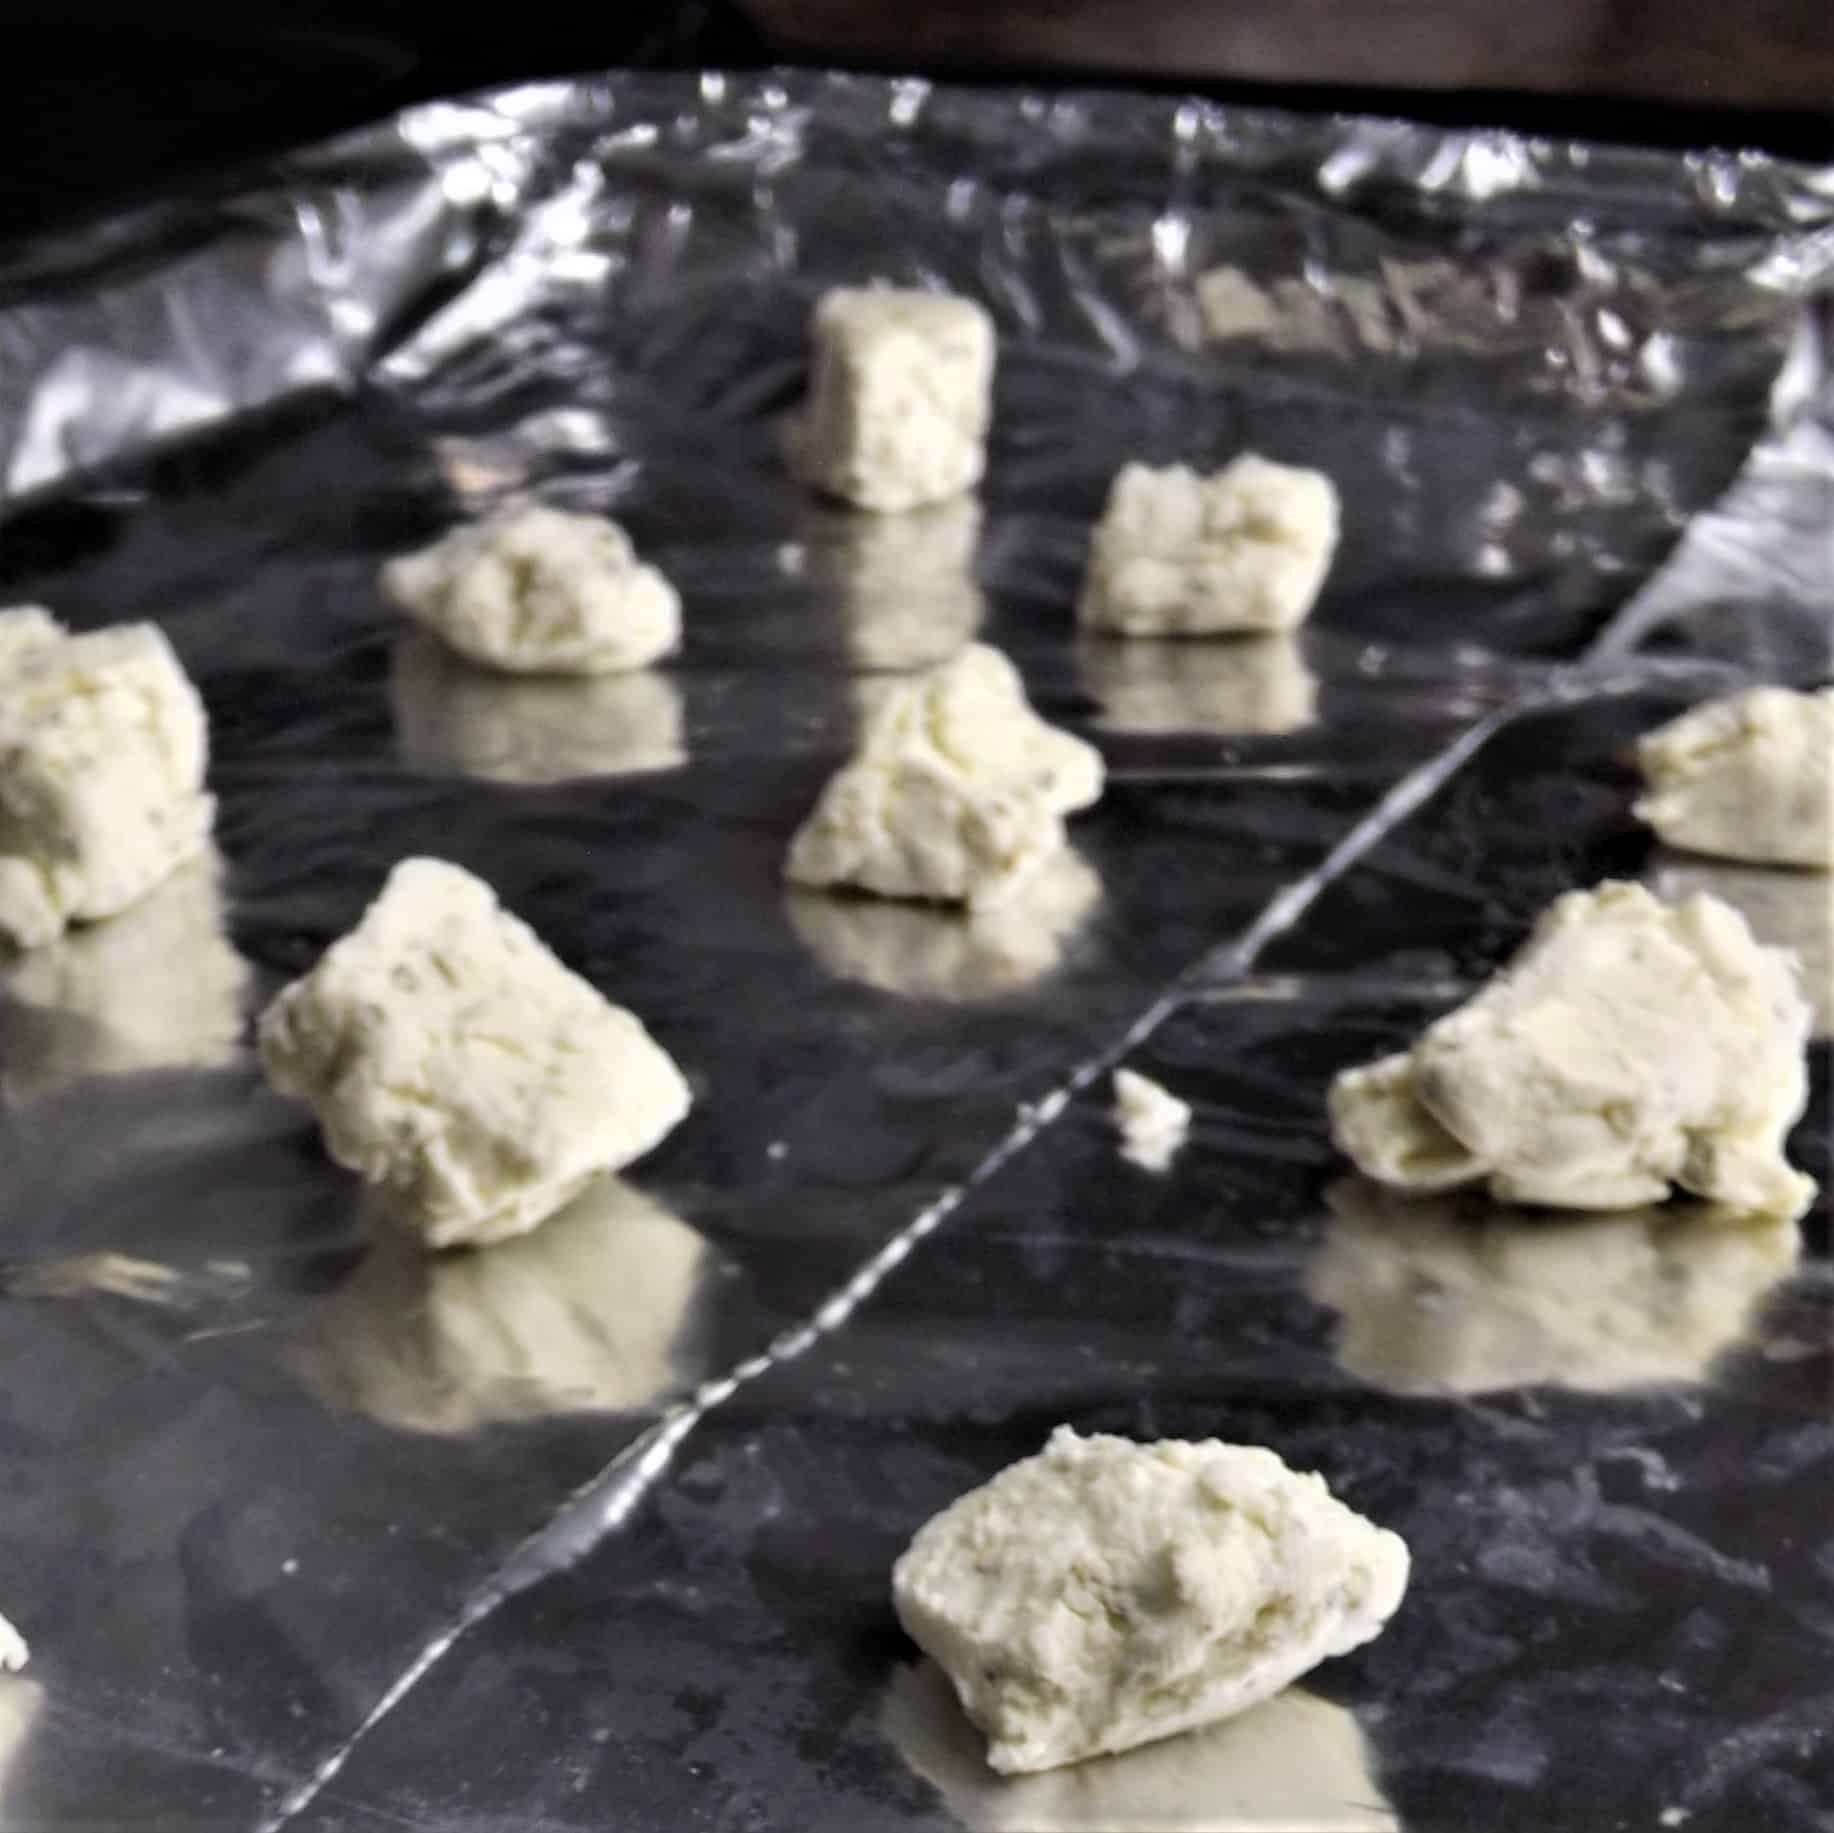
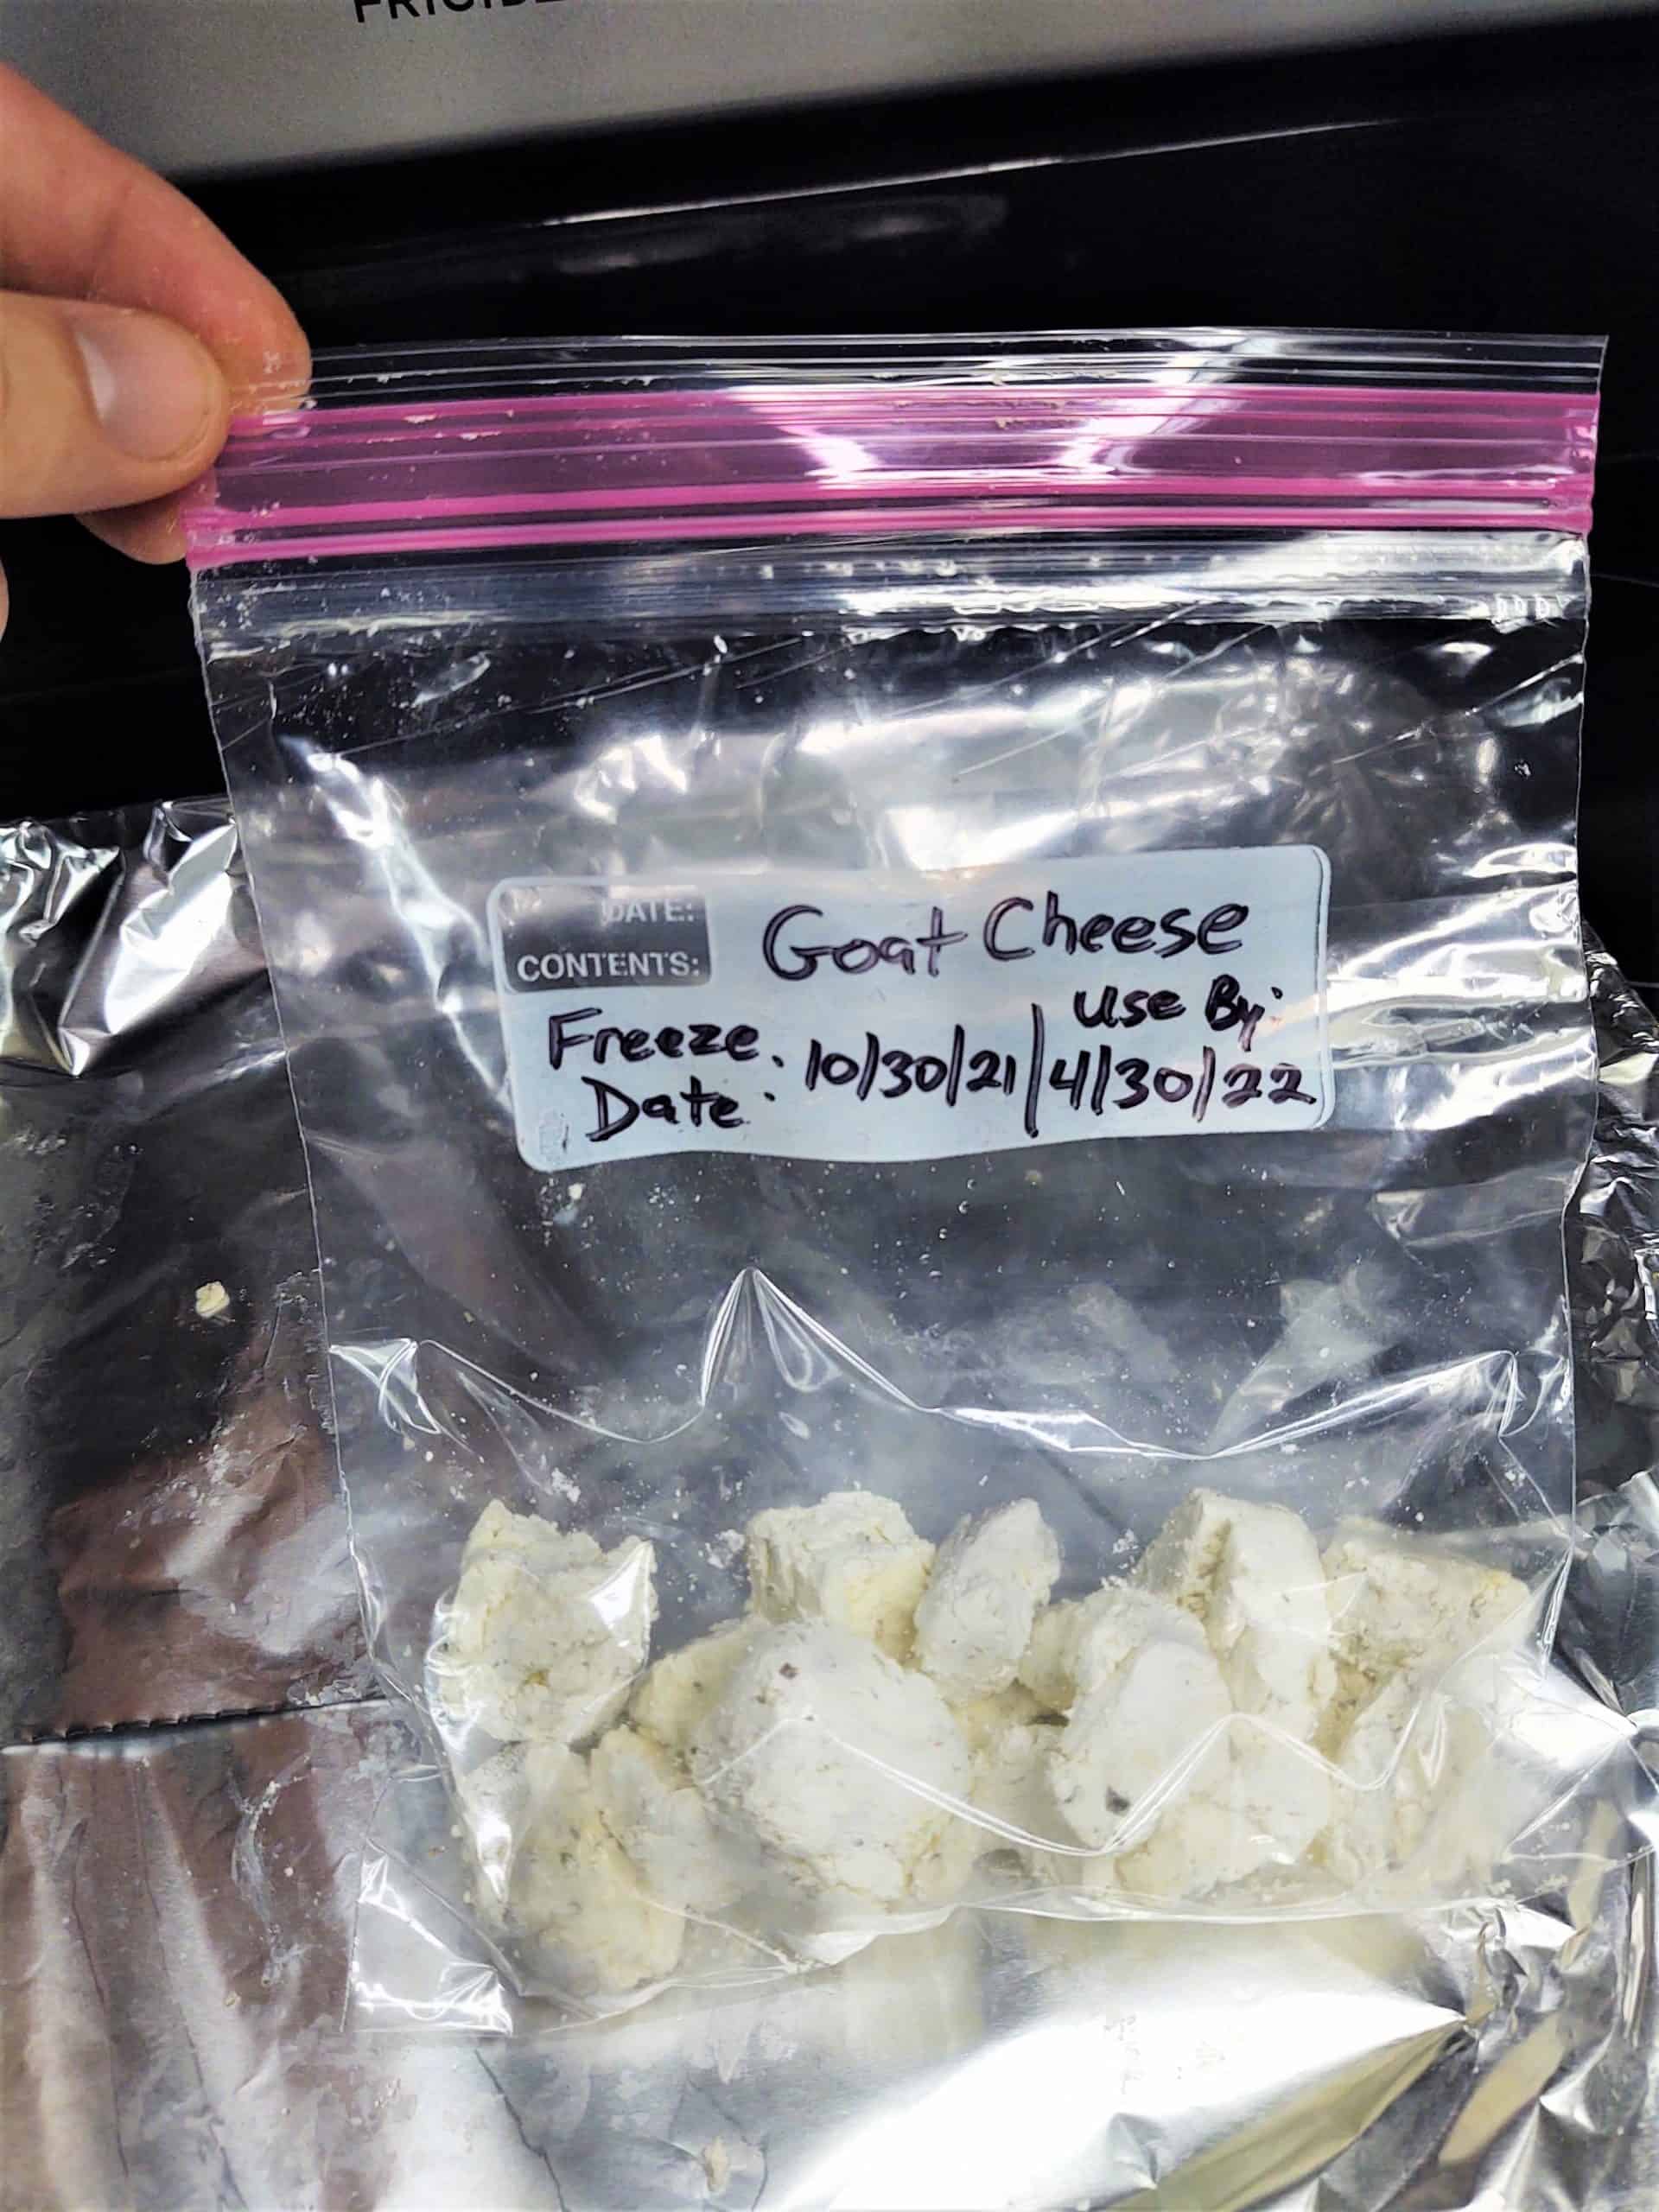
    frozen goat cheese on baking pan wrapped in foil

    Can you freeze goat cheese? Goat cheese seems to be one of those things that is really polarizing. You either love it for it's sharp flavor and creamy texture or you hate it for those very same seasons.

    We, and probably you too since you're here, are firmly in the "Love it!" camp. So, when you find a good sale or have made too much from your own dairy goats milk you have to find a way to preserve it so it doesn't go bad before you can eat it.

    Keep on reading to see exactly how you can freeze goat cheese in any of it's (very delicious) forms!

    frozen goat cheese on baking pan wrapped in foil

    [ez-toc]

    Can You Freeze Goat Cheese?

    You can freeze goat cheese. There are a few ways to do so and, when frozen and defrosted properly, your cheese will lose very little flavor and only a bit of it's original texture.

    Freezing in small, meal size or single serving cubes works best, but you can also freeze goat cheese spreads, goat cheese logs, goat cheese crumbles, homemade goat cheese balls, heck, even cranberry goat cheese can be frozen.

    The most important part is to wrap your cheese tightly in cling wrap twice, and then put it in an airtight container or baggie before freezing it. To thaw, move your goat cheese from the freezer to the fridge and let it slowly defrost over 24 to 48 hours. Goat cheese will stay good in the freezer up to 6 months but is at it's peak before the 3 month mark.

    As we've already said, yes, you can freeze goat cheese. Goat cheese freezes very well, as a matter of fact. Some forms freeze better than others. For example, Goat cheese spreads freeze but will usually be a bit watery when you unfreeze them. Logs, or chรจvre, freeze a bit better and will generally keep their soft exterior but turn grainier towards the center.

    Goat cheese crumbles freeze the best overall with very little, if any, change to it's original flavor and texture. Similar to freezing mozzarella cheese, that is mostly due to it's very low moisture content. Moisture and oxygen are the enemies of well preserved frozen foods. The more moisture and air you can keep away from what you are freezing the higher quality it will retain.

    Freezing Stats

    Blanchedno
    Prep Stylespread in container
    cubes or chunks in bags
    crumbles in bags or container
    Time To Freeze12 to 24 hours
    Time to Thaw24 to 48 hours in fridge
    Usessalads
    side dishes
    snack
    Freezer Life3 to 6 months

    Why should you freeze it?

    Goat cheese has a very short fridge life. Usually only a week or so. If you eat a lot of it, made a bunch, or just found a great deal on Costco goat cheese (or anywhere else) and bought a ton, you will want to be able to keep it for much longer than if you just kept it cold in your refrigerator produce drawer.

    Frozen Vs Non-frozen

    Freezer LifeFridge Life
    3 to 6 months1 to 2 weeks

    Supplies

    You are going to need the following supplies:

    • Goat cheese: crumbles, logs, or spread
    • cling wrap
    • Freezer bags
    • Sharpie or marker
    • Freezer
    • knife and cutting board

    How To Freeze Goat Cheese

    We will cover how to properly freeze 3 forms of goat cheese today; spreads, logs, and crumbles. All 3 are easy to do and essentially break down to, wrap tightly and keep the air out. Before starting, make sure to label your freezer bags and/or containers with the contents, freeze date, and use by date.

    Let's see more details.

    Need to get all your food preserved easily? Check out the Ultimate Guide To Freezing Food so that you can fill your freezer without in minimal time.

    Goat cheese spread and/or Goat cheese crumble

    Crumbles are the best form of goat cheese you can freeze. Because they are already hard, crumbly, and lack much moisture, they do not have as much of a change during the freezing and thawing parts of food preservation.

    • If you have already opened the container of goat cheese spread you will need to wrap it before freezing.
    • Remove the lid from the spread and wrap the container tightly in cling wrap. Then, put the lid back on over the wrap (it will secure the wrap in place).
    • With the lid back on, wrap the container a second time, just as tightly as the first.
    • Place the wrapped container into a freezer bag and squeeze all of the air out before sealing.
    • Place the bag into the freezer and allow around 24 hours to freeze completely.
    Unopened container
    • If you have yet to open the container, you can leave it as is without wrapping it in cling wrap.
    • Place the unwrapped container into a freezer bag and squeeze all of the air out as you did in the steps above.
    • Place the bag into the freezer and allow around 24 hours to freeze completely.

    Goat cheese logs or chรจvre

    You can freeze logs whole. Follow the same steps below, just skip the part where you cut it first. However, we do recommend you freeze in smaller portions. Goat cheese cannot be refrozen without disastrous effects to the quality, flavor, and texture.

    We like to cut ours into cubes or chunks that are either the size for a meal or single, individual servings. That way, when you thaw, you only thaw what you need and nothing goes to waste.

    • Use a knife and cutting board and cut your cheese log according to the size portions you need.
    • Wrap each piece individually in cling wrap. Make sure it is tight and no air at all can get to the cheese.
    • Take another section of cling wrap and wrap the cheese a second time.
    • Do this for all of your cheese servings.
    • Place all of the wrapped cheese in a freezer bag and push the air out.
    • Pu the bag in the freezer and let it freeze for about 24 hours.

    Pro tip: Close the zipper bag with only a small corner unzipped. Use a drinking straw to suck the rest of the air out of the bag before zipping it shut.

    Super pro tip: The most efficient way to remove air is to use a bit of physics. Zip your bag with just a small corner open as in pro tip 1. Then, lower the bag into a large bowl or sink of cool water (cool so it does not melt the cheese). Submerge the bag all the way to the opening but without getting any water in the bag.

    The water pressure around the bag will squeeze all of the air out of the bag as you lower it. Think about what swim trunks or a t-shirt look like when someone is coming out of the water. The way the water almost makes the cloth suck and stick to their skin is the same concept as the pressure pushing the air out.

    freezer bags of frozen goat cheese in front of baking pan wrapped in foil

    How do you defrost it?

    Generally, thawing a frozen food does not take too long and can be done quickly under running water, in the microwave, or just on the counter. Goat cheese, however, is a little different. To thaw any types of cheese discussed today you will need to put it into the fridge and let it slowly defrost for 24 to 48 hours.

    Goat cheese does not always melt very well. If it reheats too quickly, or overheats, it will change in texture and become very grainy. Some types, like spreads, will even start to separate.

    If you do try and thaw a log more quickly over heat (not recommended) do it very slowly and only to the point where the goat cheese starts to melt but not fully melted. It may separate but can be mixed back together with okay results.

    Final word

    As you now know, goat cheese, in all of its various forms, can be frozen with great results. As long as you follow the right packing methods and use the slow thaw method you're goat cheese should taste almost as good as the day you bought it!

    If you need more help getting your foods frozen, check out the Ultimate Freezing Food Guide for a complete quick start reference so that you can have a well-stocked freezer.

    Access the Ultimate Freezing Food Guide Here

    Can You Freeze Honey?

    By MrAnimal Farm

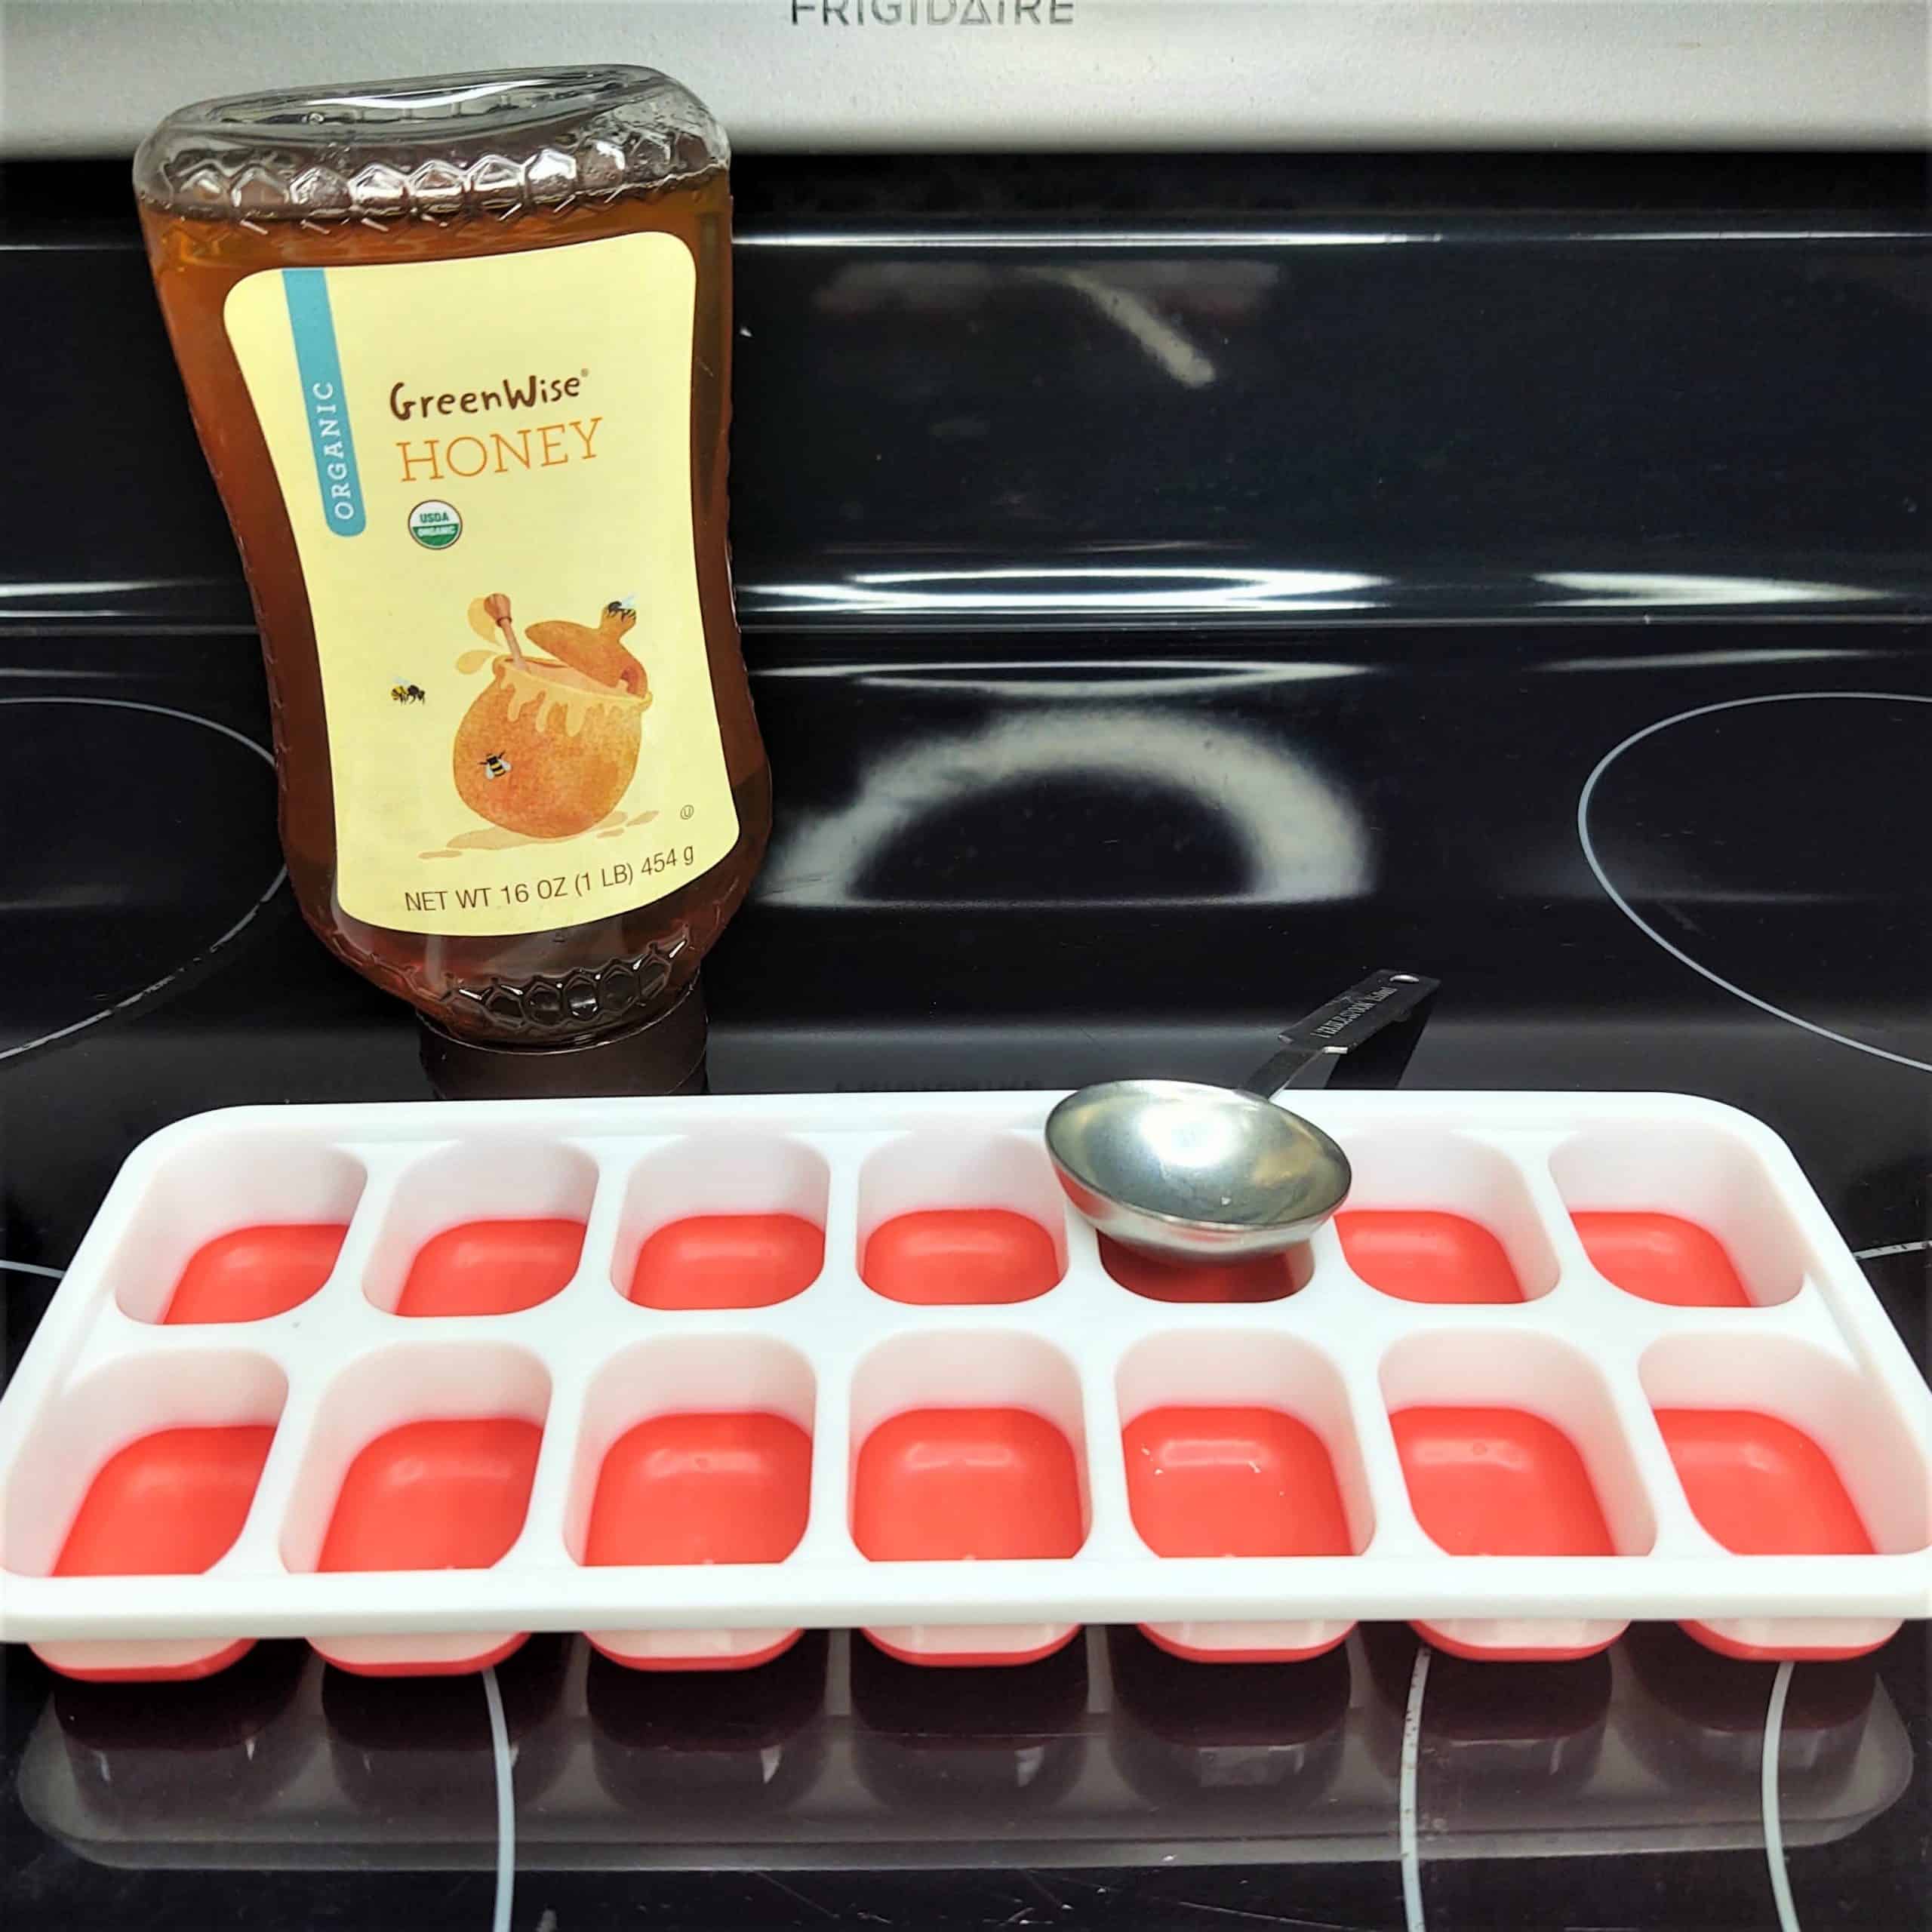
    honey, measuring spoon, and ice cube tray on stovetop

    Can you freeze honey? It is certainly possible to do so. Freezing honey is a fantastic way to keep it's temperature at a steady level so it will retain it's taste, quality, texture, and nutritional value over long periods of time. It will also help prevent future crystallization.

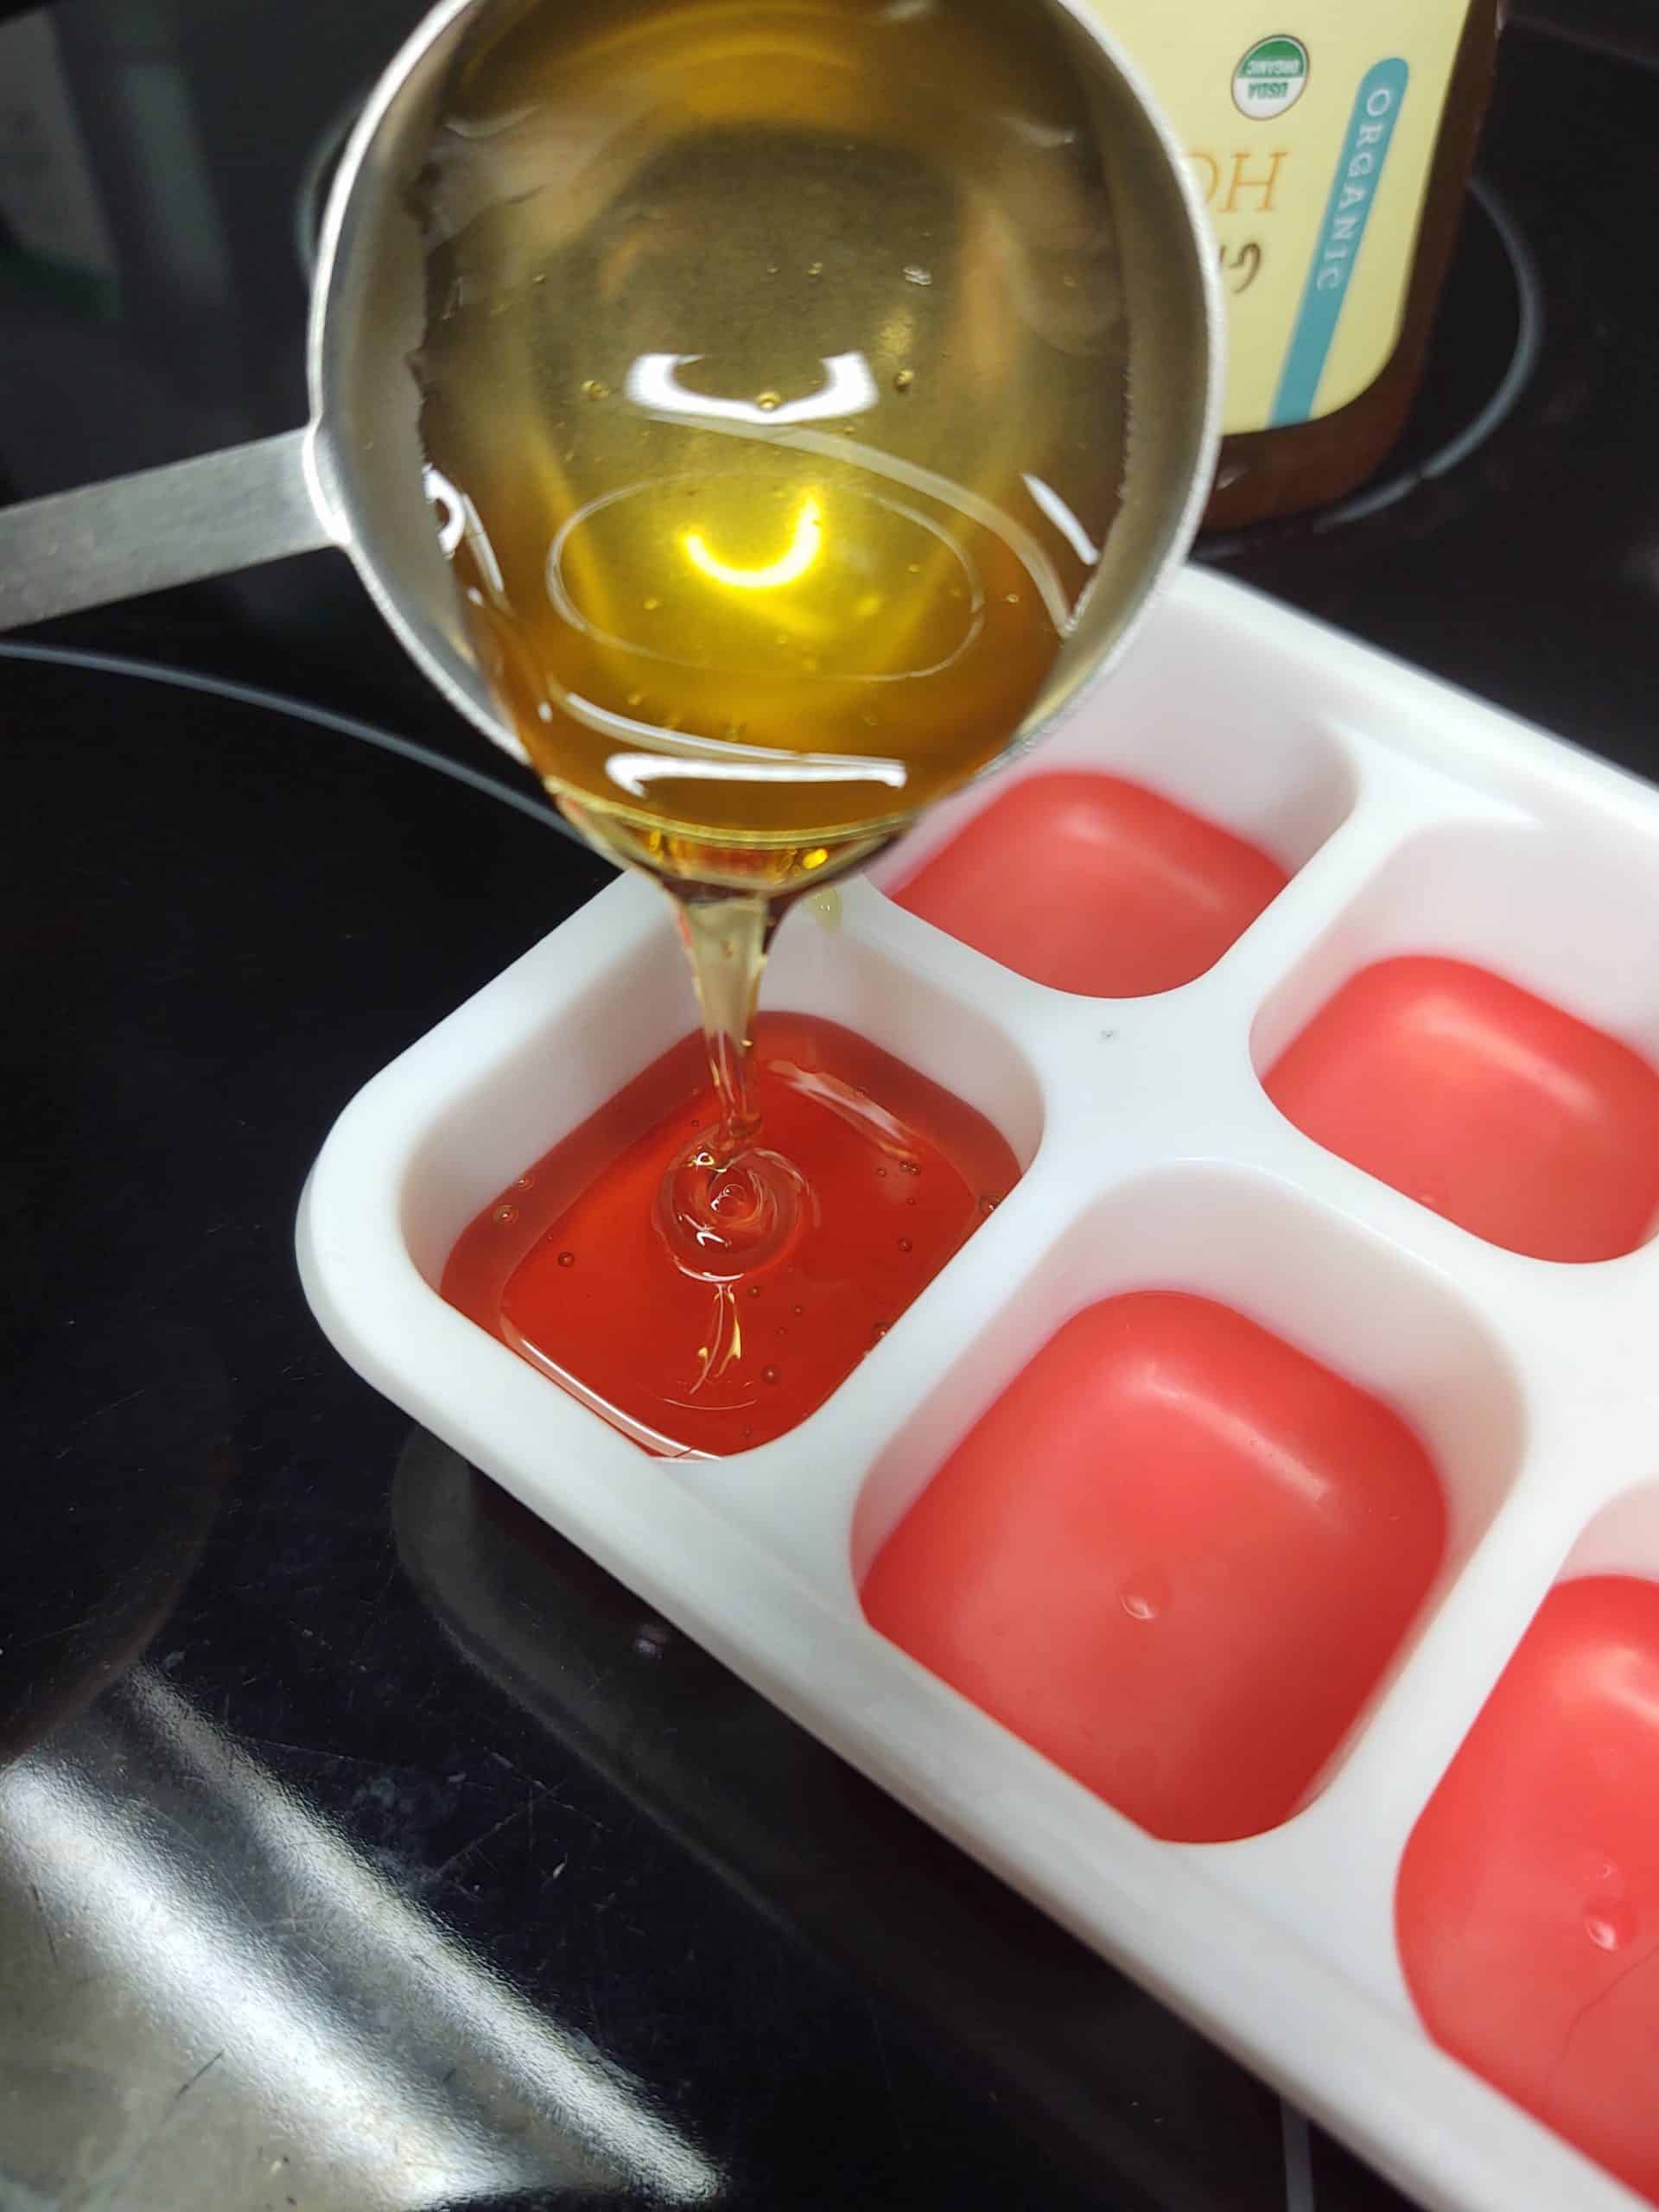
    The easiest way to freeze honey is to put it into a Mason jar, close the lid tightly to keep out the moisture, and stick in a chest freezer where it can stay undisturbed. It can also be frozen as single servings in an ice cube tray.

    You can even freeze full honeycombs if you are a beekeeper. Honey is naturally long lasting and can keep, on its own, for thousands of year. Under the right conditions, your frozen honey can last a lifetime or more. When you are ready to defrost it, place the jar in a bowl of warm water so it can reheat gradually to a thickness you can use.

    If you are curious to learn multiple ways to freeze honey and the benefits therein, keep on reading!

    honey, measuring spoon, and ice cube tray on stovetop

    [ez-toc]

    Can You Freeze Honey?

    You can freeze honey using a few different methods. Here are some quick freezing stats to help you decide if and how you want to freeze your honey.

    Freezing Stats

    Blanchedno
    Prep Stylejars
    ice cubes
    full honeycomb
    Time To Freeze24+ hours
    Time to Thawless than 1 hour depending on amount
    Usesanything you would normally use honey for
    Freezer Lifeup to the end of all time in space (theoretically)

    Why should you freeze it?

    Honey has a low level of moisture and a low pH level so it retains a high level of quality when frozen for much longer than most foods. It will also retain it's flavor and texture which is the most common complaint about freezing as a food preservation method.

    Honey can have it's quality affected over time if it is in an environment that experiences large fluctuations in temperature. Freezing will keep honey at a consistent temperature while also keeping bacteria growth from occurring. Similar to freezing jam, the high sugar content in honey will keep it from freezing into a solid block of ice. Instead it will become almost like an incredibly thick and viscous gel.

    Need to get all your food preserved easily? Check out the Ultimate Guide To Freezing Food so that you can fill your freezer without in minimal time.

    Why should I not freeze honey?

    The thickness of the honey and need to keep moisture out at risk of crystallization are really the only drawbacks to freezing it; mainly the moisture concern. It is best to freeze in a glass jar because it is the best at keeping out moisture. However, honey cannot be refrozen so the thickness becomes an issue when trying to only thaw what you need.

    The best way we can figure around this is to pre-freeze in ice cube trays for single use portions and either accept they may crystalize in a plastic freezer bag or have less efficient storage space and pack the cube into a glass Mason Jar.

    Another thing to keep in mind concerning storage and crystallization is where it will be kept while frozen. For honey to freeze up to the solid gel phase of freezing it needs to get down to ast least -43.6ยฐ F. The standard home freezer will usually get under -50ยฐ F. However, a kitchen freezer is often opened a few times a day and can cause the temperature to fluctuate and risk crystallization.

    Honey freezes best and maintains it's quality best if it is kept in a deep chest freezer where it is open less often.

    Supplies

    You are going to need the following supplies:

    • honey or honeycomb
    • Mason Jars
    • ice cube trays (for ice cubes)
    • Measuring cup
    • Freezer bags
    • Sharpie or marker
    • Freezer

    How To Freeze Honey

    We recommend three ways to freeze honey. As we mentioned above, there are pros and cons each with their own tradeoffs for each method. Pick whichever one works best for you.

    Step One

    Decide how you want to freeze. Full honeycomb freezing really only has one way, which will be listed on it's own below. Here is a table that will give you the pros and cons of freezing full jars or single serving ice cubes.

    ProsCons
    Mason Jars- air tight
    - less likely to crystallize
    - can store more honey in a smaller space
    - large amounts of honey are difficult to thaw
    - can't refreeze unused honey
    - bulky; takes up more space, in general
    Ice Cubes- single servings lead to less waste
    - plastic bags take up less space, in general, than Mason Jars
    - thaws quickly
    - plastic bags are porous and can let in moisture
    - more likely to crystalize
    - messier to handle since honey
    - inefficient use of space if stored in glass due to shape

    Determine the method you want to use, gather the appropriate supplies, and move on to step two.

    Step Two

    If you want to measure out the amount of honey you put in the Mason Jars, you can. We will usually just fill them about ยพ of the way full leaving a space at the top to allow the honey to expand.

    If you want single serving honey ice cubes, you'll do the same as when freezing cilantro or freezing jam in ice cube trays.

    Fill the pods of an ice tray with a tablespoon or 2 of honey. You can use an actual measuring spoon, if you like, or just eyeball it. Make sure to leave about ยผ of the pod open, just like with the Mason Jars.

    pouring honey into an ice cube tray

    For those freezing a full jar, continue to step three. If you are freezing ice cubes place the trays in the freezer for around 4 hours or until solid to the touch.

    Step Three

    Regardless of which method you are using, this step is for labeling the storage unit. Use a Sharpie to write the contents (honey), freezing date (today), and use by date (forever โˆž).

    Step Four

    Once you label your lids, hand tighten them down on the Mason Jars as much as you can. Then stick them in the freezer for long term storage.

    For ice cubes, once they are solid enough to handle, pop them out of the tray and put them in a pre-labeled baggie or Mason Jar and into the freezer.

    Pro Tip: For the absolute best quality with minimal crystallization, use glass for either method and use a chest freezer or dedicated freezer that is only opened rarely.

    Beekeeper Honeycomb Variation

    We are not beekeepers so we are not going to offer too much commentary on those best practices. However, we have learned the methods used by experienced beekeepers so we could include them in this guide, as well.

    The short and sweet version is:

    1. Do not harvest the honey by uncapping the hive.
    2. Take the entire honeycomb frame and wrap it tightly in plastic. You can use large rubber bands or string to hold the plastic in place.
    3. Place the frames into a dedicated, deep, chest freezer that will stay closed until it's time to harvest the honeycomb.

    Do anything you can to minimize moisture. Moisture can soak into the wooden frames and start to mold.

    How do you defrost it?

    Honey is easy to defrost. You will want to let it reheat gradually. Simply put the jar in a bowl of warm-ish water and let it sit on the counter until it is thin enough to use.

    Can I refreeze honey?

    You should not try and refreeze honey. It will freeze again, but it will degrade in flavor, quality, texture, and nutrients. If you are going to use frozen honey regularly, it is better to freeze in smaller, single use portions like you can do when freezing mint leaves.

    Frequently Asked Questions

    Here are some more common questions about freezing honey.

    Q1. Will freezing destroy the nutrients in honey?

    Not at all. Freezing honey is great because it makes it last even longer than normal while maintaining it's nutritional qualities as well as retaining it's quality and flavor.

    Q2. Why is my honey crystallizing?

    The primary reason that honey crystallizes is due to the combination of cold temperatures and the presence of moisture, typically water. The glucose and water will react to the cold and turn into crystals. It's funny that the sub zero temperature in freezing is a better way to avoid crystallization than simply keeping honey in the fridge.

    Crystallized honey is still perfectly safe to eat. It is just thicker and more difficult to use.

    Q3. How can I remove the crystals in my honey?

    Getting rid of the crystals in your honey is really easy. You will want to heat the honey up very, very slowly. Place the honey in a sauce pan of water and put it on very low heat. As it heats, the crystals will start to dissolve. Once the crystals are all gone, remove the honey from the water, put the cap on tightly to keep out air and moisture, and return it to your pantry.

    If you need more help getting your foods frozen, check out the Ultimate Freezing Food Guide for a complete quick start reference so that you can have a well-stocked freezer.

    Access the Ultimate Freezing Food Guide Here

    Can You Freeze Jam?

    By MrAnimal Farm

    frozen jam in ice cube tray

    Can you freeze jam? As a matter of fact, jam, both homemade and store bought, freeze very well. Because of the presence of sugar, it already has preservation qualities. Freezing it just enhances them and allows them to keep even longer.

    Ready for more details on how to use the food preservation methods mentioned above? Keep on reading and find out!

    frozen jam in ice cube tray

    [ez-toc]

    Can You Freeze Jam?

    Freezing jam is really easy. The two best methods are the full jar method, which uses a freezer safe plastic container or, preferably, a Mason Jar and the ice cube method, which freezes jam into smaller, personal use size portions. Either way will preserve your jam an additional 12 months, although you will get the best quality in the first 6 months.

    Thawing in the fridge overnight is recommended as it can be kept a bit longer but you can also "quick thaw" in a bowl of cool to warm water.

    We are going to show you the two best methods for freezing depending on your own personal needs.

    Jam, because of it's consistency, is similar to freezing apple sauce, freezing salsa, freezing half and half, or even freezing sauerkraut. However, it is unique in that the high sugar content will cause it to freeze a little differently.

    First, though, let's go over a few basics so you can get the best result no matter the method you use.

    • Make sure you use an airtight, freezer safe container. We prefer Mason Jars for large batches and ziplock bags for ice cubes.
    • It's best to freeze in portions you will use right away instead of thawing everything at once
    • Do not freeze homemade jam while it's still hot
    • Label your jar lids or freezer bags with the contents, freeze date, and the use by date.

    Freezing Stats

    Blanchedno
    Prep StyleMason jar
    freezer bags
    Time To Freeze12 to 24 hours
    Time to Thaw12+ hours (slow thaw)
    under 1 hour (quick thaw)
    Usesnormal jam use
    Freezer Life6 to 12 months

    Why should you freeze it? (Reason or reasons)

    You should freeze jam to make sure it keeps for as long as you need it. Generally, freezing is done with homemade jam. That's because making jam can take a while so it is usually done in larger batches than one could, or should, at least, eat before it would go bad.

    The table below will show you a comparison of jam life when frozen versus being kept in the fridge.

    Frozen Vs Non-frozen

    Freezer LifeFridge Life
    6 to 12 monthsup to 3 months

    Supplies

    You are going to need the following supplies:

    • jam
    • ice cube trays (for ice cube method)
    • Measuring cup
    • Mason Jars
    • Freezer bags
    • Sharpie or marker
    • Freezer

    There are two ways that we think are best for freezing jam; large batches in Mason Jars or small, single use portions as ice cubes. We will cover them both below.

    How To Freeze Jam

    These methods work for homemade and store bought jams.

    Step One

    Determine your portion size. If you want to freeze large batches you will want to gather together your Mason Jars or freezer safe containers.

    For freezing single servings of jam, get out your ice cube trays.

    If you are freezing store bought jam, move to the next step. Homemade jam needs to completely cool to room temperature before moving to the next step.

    Need to get all your food preserved easily? Check out the Ultimate Guide To Freezing Food so that you can fill your freezer without in minimal time.

    Step Two

    You may want to get out your measuring cups or measuring spoons for step two.

    You can simply fill a Mason Jar ยพ of the way up, leaving ยผ of the jar with headspace. The headspace is left so the jam has room to expand without cracking the glass. If you want more exact measurements, you can use your measuring cups to see exactly how much jam you are freezing in each jar.

    Single servings ice cubes of jam (or jam cubes) are very easy and, in our opinion, the most useable method of freezing. You do this essentially the same way you freeze honey or cilantro in ice cube trays.

    Take out an ice tray and add 1 to 2 tablespoons of jam into each open pod. You may be able to fit more or less depending on the size of the tray you are using.

    Just like with the Mason Jars above, leave about a ยผ of the pod open so the jam can expand when freezing. Once the tray is filled, stick them in the freezer for about 4 hours.

    scooping jam into an ice cube tray

    Step Three

    If you have not already, get out your jar lids or freezer bags and a sharpie. You will want to write the contents, the current date you are freezing everything, and then the day you need to use it by.

    Step Four

    Once labeled, place your Mason Jars of jam in the freezer, where they can stay for up to a year. It will take around 12 to 24 hours for them to completely freeze. During this time, try to keep the freezer closed as much as possible. this will ensure a quicker freeze and lessen the chances of freezer burn later.

    Once your ice cubes have had about 4 hours to freeze, or are solid enough to handle. Remember, jam will not freeze completely solid so transfer the jam cubes from the tray into a freezer bag as quickly as you can so the heat from your hands will not start to melt them.

    Once bagged, put them in the freezer and allow them time to completely freeze, same as the jar method above.

    freezer bags of frozen jam cubes

    How do you defrost it?

    There are two methods you can use to defrost jam; the "slow thaw" and the "quick thaw".

    Slow Thaw (Recommended)

    Simply place your jar or ice cubes in the refrigerator for a few hours (best if left overnight). The slower warming in the, still cold, fridge will help cut down on the jam getting too watery. It will also keep bacteria growth at bay.

    Quick Thaw

    The quick thaw method is when you place the jar or freezer bag of jam on the counter or in cool to warm water. Typically your jam will defrost within an hour but, the quick thaw can make the jam more runny and the fruit mushy.

    Plus, the quick change from frozen to room temp can accelerate the growth of bacteria so only use this method if you need jam right away and only thaw what you need. If you unfreeze too much, dispose of it instead of trying to refreeze it.

    Why...?

    Can I refreeze it?

    Jam, when refrozen, loses a considerable amount of quality and can be unsafe depending on how it was thawed. The "slow thaw" method from above will remain safe but still poor quality upon refreezing.

    "Quick thaw" in the sink should be used immediately and not refrozen. At best, the quality will suffer greatly, at worst, bacteria growth can make the jam unsafe if left too long.

    So only thaw what you will use.

    Frequently Asked Questions

    Here are some of the more common questions about freezing jam.

    Q1. Can you freeze marmalade?

    Marmalade can also be frozen using the same techniques as freezing jam. The main difference is going to be the effect freezing has on the large fruit pieces in marmalade. Freezing will draw out moisture which can make them a bit soggy.

    Q2. Can you freeze store bought jam?

    Store bought jam freezes just as well and just as easily as homemade jam. We recommend you transfer the jam from the original glass container to a freezer safe plastic container or Mason Jar.

    Q3. Does jam freeze solid?

    The sugar in the jam will not freeze all the way. The jam will just become thicker but never truly become solid. That will not impact how well it is preserved, however. Your jam will still keep.

    Q4. How can I tell if jam has gone bad?

    Bad jam is easy to spot (and also a terrible band name). You can tell by the way it looks, smells, and, hopefully you catch it before you find out, by taste.

    • Your first clue is separation and liquid pooling at the top. The jam will also start to turn a darker color. Sometimes you will even start to see some mold growing.
    • Bad jam will have a rancid smell to it. Instead of the sugary sweet fragrance you are used to, it will smell more like a public park trash can after a hot summer picnic (or something similar)
    • If the sight and smell does not catch you, the taste certainly will. Instead of a delicious fruit explosion in your mouth, it will have a sour and rotten taste to it. Hopefully you catch bad jam before tasting it.

    If your jam exhibits any of these sign, throw it away and do not use. You do not want to freeze or consume bad jam. If you use a clean spoon while serving your jam, it can help down how quickly your jam will turn. Using a dirty spoon can introduce new bacteria into the jam which can then accelerate the spoiling process.

    Final word

    As you can see, jam is easy to freeze. You can freeze full batches for up to a year or, our preference, freeze smaller single use portions. Both methods work great and are guaranteed to keep you in jam as long as you want it.

    If you need more help getting your foods frozen, check out the Ultimate Freezing Food Guide for a complete quick start reference so that you can have a well-stocked freezer.

    Access the Ultimate Freezing Food Guide Here

    Can You Freeze Cilantro?

    By MrAnimal Farm

    frozen cilantro on baking pan wrapped in foil

    Not only can you freeze cilantro, but it's pretty easy too. While it is very different in flavor, the preservation process is not unlike that of fresh mint leaves. In fact, you use pretty much the same techniques for both.

    Want to learn all the ways you can freeze cilantro, including those delicious flavor bombs? Keep reading!

    frozen cilantro on baking pan wrapped in foil

    [ez-toc]

    Can You Freeze Cilantro?

    Yes, you can freeze cilantro, easily. It can be frozen as whole stalks, chopped, or as ice cube flavor bombs; chopped cilantro frozen in pods of water, oil, butter, or homemade pesto.

    Thawing is as simple as leaving a sprig on the counter while you cook or sticking it in the fridge for a few hours. You can use frozen cilantro in the same manner you would normally use it other than garnish. It will become soggy once defrosted so it's texture and visual appeal will suffer. It stays at peak freshness for 6 months but can keep for up to a year.

    Cilantro is one of the best herbs to freeze. It will retain the majority of its flavor throughout being frozen and will only suffer in texture and how it looks. The best thing about it is the method of making frozen ice cube flavor bombs.

    Cilantro can be frozen either chopped or as whole stalks. Aside from the aforementioned flavor bombs, you can also vacuum seal and flashfreeze/zipper bag, as well.

    Freezing Stats

    Blanchedyes, if whole; 15-30 seconds
    Prep Styleminced in ice cubes
    chopped
    whole leaf
    Time To Freeze2 to 4 hours in most cases
    Time to ThawN/A
    Usesanything you would normally use cilantro for except garnish
    Freezer Lifebest in first 6 months
    up to 12 months

    Why should you freeze it?

    Obviously, freezing cilantro will make sure it lasts much longer than if you were to leave it on the counter or in the fridge. As we mentioned already, the frozen flavor bombs will actually help you save time cooking later on. Just toss the appropriate amount of whatever seasoning you need in a flavor bomb cube and then add those to your recipe when cooking.

    Frozen Vs Non-frozen

    Freezer LifeShelf Life/Fridge Life
    6 to 12 months3 to 4 days

    Supplies

    You are going to need the following supplies:

    • fresh cilantro (from garden or store bought)
    • cookie sheet (for flash freezing)
    • blender or food processor (for chopping)
    • ice cube trays (for mint cubes)
    • Freezer bags
    • Sharpie or marker
    • Freezer
    • knife
    • vacuum sealer

    How To Freeze Cilantro

    As we mentioned above, we have several methods you can use to freeze cilantro. Each method will need you to start out doing the same couple of things. Before starting you should:

    • wash your cilantro in a colander in the sink
    • label all of your freezer bags with the contents, freeze date, and use by date
    • gather any other supplies you will need while the cilantro dries completely

    Without Blanching

    Ice cubes aka Flavor Bombs

    These are done pretty much the same way you freeze jam or freeze honey in ice cube trays.

    1. After cleaning, place your cilantro, stalk and all, into a food processor with a bit of oil or water
    2. Use the manual or pulse setting to chop everything up into small bit
    3. Now, scoop about a tablespoon of the chopped cilantro into the reservoirs of an ice cube tray or...
      • use your chopped cilantro to make cilantro pesto.
    4. Then fill the reservoirs with water, oil, butter, or pesto. Make sure to leave about ยผ of the pod empty to allow room for expansion.
    5. Stick the trays in the freezer for about 2 to 4 hours so they can freeze.
    6. Pop the cubes out of the tray and put them into a pre-labeled freezer bag for long term storage.

    How to thaw: When you're ready to use your flavor bombs you can either put them directly into the dish you are preparing or leave in a small dish in the fridge or on the counter for a few hours.

    Need to get all your food preserved easily? Check out the Ultimate Guide To Freezing Food so that you can fill your freezer without in minimal time.

    With Blanching

    The following methods need to be blanched prior to preservation. Blanching is a very common step needed when freezing foods.

    You can also blanch prior to making the flavor bombs above, but it is not necessary. If you have never done it before or you want a refresher, here is how to blanch cilantro.

    1. Set a pot of water to boil on the stove
    2. Fill a large mixing bowl with ice water
    3. Place your cilantro in a colander that will fit in the pot of water
    4. Once the pot of water is at a rolling boil lower the colander into the boiling water for 20-30 seconds.
    5. After 20-30 seconds, take the cilantro out of the boiling water and immediately put it into the ice bath
    Vacuum Seal
    1. Trim the cilantro down into pieces that will easily fit into the vacuum bag.
    2. Blanch according to the directions above
    3. Pat dry the cilantro with paper towels. You want to make sure there is as little moisture as possible when sealing and freezing.
    4. After dry, place the cilantro in the vacuum bag.
    5. Follow the directions for your specific model of vacuum sealer
    6. Once sealed, you can put the bags in the freezer where they will keep for up to a year

    How to thaw: Follow the same thaw and use instructions from the Ice cube method above.

    Flash Freezing
    1. Blanch following the instructions above
    2. Line a cookie sheet with parchment paper or aluminum foil. Cover the pan with a single layer of cilantro
    3. Stick it into the freezer for a couple of hours. It will not take long for it to freeze
    4. Once frozen, place the cilantro into labeled bags and put back in the freezer

    How to thaw: Follow the same thaw and use instructions from the Ice cube method above.

    freezer bags of frozen cilantro

    Frequently Asked Questions

    Here are some of the more common questions about freezing cilantro.

    Q1. How long will it last?

    Frozen cilantro will last in it's various frozen forms between 6 and 12 months. The first 6 months it will be the freshest with degrading quality over the remaining 6.

    Q2. Can I refreeze it?

    No, it is not recommended. Cilantro will not hold up very well and will suffer a steep decline in quality if refrozen.

    Q3. What can I use frozen cilantro for?

    Because freezing tends to make vegetation soggy it is best to avoid anything that uses cilantro as a garnish. It will retain most of it's flavor though and can be used in recipes as normal.

    If you need more help getting your foods frozen, check out the Ultimate Freezing Food Guide for a complete quick start reference so that you can have a well-stocked freezer.

    Access the Ultimate Freezing Food Guide Here

    Can You Freeze Sauerkraut?

    By MrAnimal Farm

    Can you freeze sauerkraut? You can and it's pretty simple to do. There are, however, some drawbacks to freezing it.

    But, if you want to learn how to freeze it in the most efficient and long lasting way possible, keep on reading.

    [ez-toc]

    Can You Freeze Sauerkraut?

    Yes, you can freeze sauerkraut, but you it's not always a great idea. If you do want to freeze it, the easiest way to freeze sauerkraut is to simply drain out as much liquid as you can, bag it, and then freeze where it will stay fresh for up to 6 months.

    You can thaw it in the fridge, microwave, or just put it straight into your favorite recipe. However, be forewarned. Freezing sauerkraut will change the flavor and texture. The worst part is that it will also destroy the good bacteria that helps give you a healthy gut.

    Freezing Stats

    Blanchedno
    Prep Stylebagged
    Time To Freeze12+ hours
    Time to Thawovernight in fridge
    a few minutes under water
    5 minutes in microwave
    put in recipe without thawing
    Usessnack, meal, smoothie, etc
    Freezer Lifebest within 2 months
    keeps for up to 12 months

    Why you shouldn't freeze it

    Bacteria sometimes reacts to extreme cold in the same manner it reacts to extreme heat; it dies. So, the very thing that makes freezing food such a fantastic preservation technique is the very reason it ruins the nutritional benefits of sauerkraut.

    Also, it's bloody disgusting.

    Freezing fruits and veggies, in this case fermented cabbage, almost always becomes a bit bloated with moisture and, once thawed, will become soggy and mushy. Instead of enjoying the crisp bite of homemade sauerkraut, you end up feeling like you have a mouth full of wet paper towels.

    A much better idea is to freeze cabbage and then use that to make fresh sauerkraut. But, if you must, here is the way to get the best results.

    Need to get all your food preserved easily? Check out the Ultimate Guide To Freezing Food so that you can fill your freezer without in minimal time.

    Supplies

    You are going to need the following supplies:

    • colander
    • Measuring cup
    • Freezer bags
    • Sharpie or marker
    • cookie sheet (for freezing whole)
    • Freezer

    How To Freeze Sauerkraut

    This will work with both store bought and homemade.

    Step One

    You will want to drain as much liquid out as you can. The easiest way to do this is to dump all of your sauerkraut into a colander in the sink. Removing as much liquid as you can will help to cut down on some of the mushiness later on.

    Step Two

    Decide on how large you want your portion sizes to be. If you are freezing just for yourself or one other person, we recommend sticking with portion sizes of a cup or two frozen in quart size freezer bag. Smaller portions are best when freezing as you only thaw what you need and usually nothing goes to waste.

    Step Three

    If they are not already pre-labeled, label your freezer bags with the contents, freeze date, and best by date. Next, start scooping your servings into freezer bags.

    Step Four

    Once the bags are all full, you will want to squeeze as much air out of them as you can to avoid frostbit later on. An easy way to do this is to zip all but one small corner of the zipper shut. Then, dip the bag into a bowl or sink of water and submerge up to the opening, without letting water into the bag.

    The water pressure will do a much better job at squeezing the air out than you or I could ever hope to do.

    Step Five

    Once your bags are all air tight start stacking them in the freezer. It is best to lay a cookie sheet or something flat down on the shelf first. Often when you have something that is not completely solid, it will push through the bars of the shelf and then freeze. When it freezes, it expands and then becomes stuck.

    So, stack your bags as flat as you can in the freezer. They should freeze solid in about 12 hours or so.

    How do you defrost it?

    You can thaw overnight in the fridge and it can last just under a week. If you need it more quickly you can run the bag under cold water for a little while until it is thawed enough to work with. You can also stick it in the microwave or directly into whatever recipe is calling for it.

    Frequently Asked Questions

    Here are some of the more common questions about freezing sauerkraut.

    Q1. Is it better to freeze or can sauerkraut?

    It is much better to can sauerkraut than to freeze it. Canning may still hurt the probiotics but it will at least retain most of it's texture and flavor.

    Q2. Can you freeze pork and sauerkraut after it's cooked?

    You sure can. You will want to follow the same method we used for sauerkraut above. Make sure you have as little moisture as possible, then stick it in a labeled, freezer safe container and place it in the freezer. You can use that same method to freeze many popular (or unpopular) sauerkraut dishes, like pork and sauerkraut or sauerkraut and sausage.

    Q3. Can you use frozen cabbage to make sauerkraut?

    The general consensus is that you can make sauerkraut using frozen cabbage. The results may have a bit of a change in texture or possibly taste but you definitely can.

    Final word

    We've learned that you can freeze sauerkraut, you just shouldn't. It will keep for up to a year but will never live up to the taste and texture of fresh sauerkraut. You are better off making smaller batches, canning, or making your own with frozen cabbage.

    If you need more help getting your foods frozen, check out the Ultimate Freezing Food Guide for a complete quick start reference so that you can have a well-stocked freezer.

    Access the Ultimate Freezing Food Guide Here

    If you need more help getting your foods frozen, check out the Ultimate Freezing Food Guide for a complete quick start reference so that you can have a well-stocked freezer.

    Access the Ultimate Freezing Food Guide Here

    Dorking Chicken

    By MrAnimal Farm

    dorking chicken

    If you are in the market for a chicken but want a balanced bird all the way around, then look no further than the Dorking Chicken. This is a versatile breed that is not only friendly but can be dual purpose; used for both egg-laying and meat.

    Dorking Chickens are a rarer breed of fowl that are great at providing food for your family, whether it be meat or eggs. The breed hails from Britain and is a rarer breed of chicken that is currently under the controlled conservation status. This is a larger breed of chicken and will usually weigh in at around eight to fourteen pounds, with females being slightly smaller than males.

    The breed can lay up to 200 medium to large-sized eggs per year and will continue laying even into the winter. Their hefty size also makes them an excellent choice for meat, but if you are just looking for a companion, then they will fit that bill as well, as they are a friendly breed of fowl. The breed has a lifespan of around seven years.

    Keep reading below to learn more about the Dorking Chicken and some of its strange features.

    Dorking Chickens

    Size14 Pounds (Rooster)
    8 Pounds (Hen)
    ClassSCCL (single comb clean leg)
    ColorSilver With Gray, White, Red, Cuckoo, Dark
    TemperamentFriendly
    HardinessNot Cold Hardy
    Eggs/Yr140 - 200
    Egg SizeMedium to Large
    Egg ColorWhite

    [ez-toc]

    History and Origin

    The Dorking chicken has a rather interesting history as they are one of the oldest British breeds of chicken.  Many believe that the Dorking Chicken actually came over with the Romans due to the fact that the chicken has five toes. This is because a writer from ancient Roman mentioned a five-toed chicken, just like a Silkie, that was well balanced and an excellent breeding stock.

    The history that we do know, though, shows that the Dorking Chicken came from the small town of Dorking, England. For some time, the breed was one of the primary sources of meat for London. Once it was no longer the sought-after breed for meat, the breed moved on to exhibition shows and competed in the first poultry show in the country. This earned it a spot as one of the first exhibition breeds, and to this day, Dorking Chickens can still be found in poultry shows.

    This is now considered to be a rare breed of chicken, so finding a breeder to buy one from can be quite difficult and costly. How much these chickens cost can depend on their quality. It may be easier to find a reputable breeder for the Dorking at a livestock or chicken show.
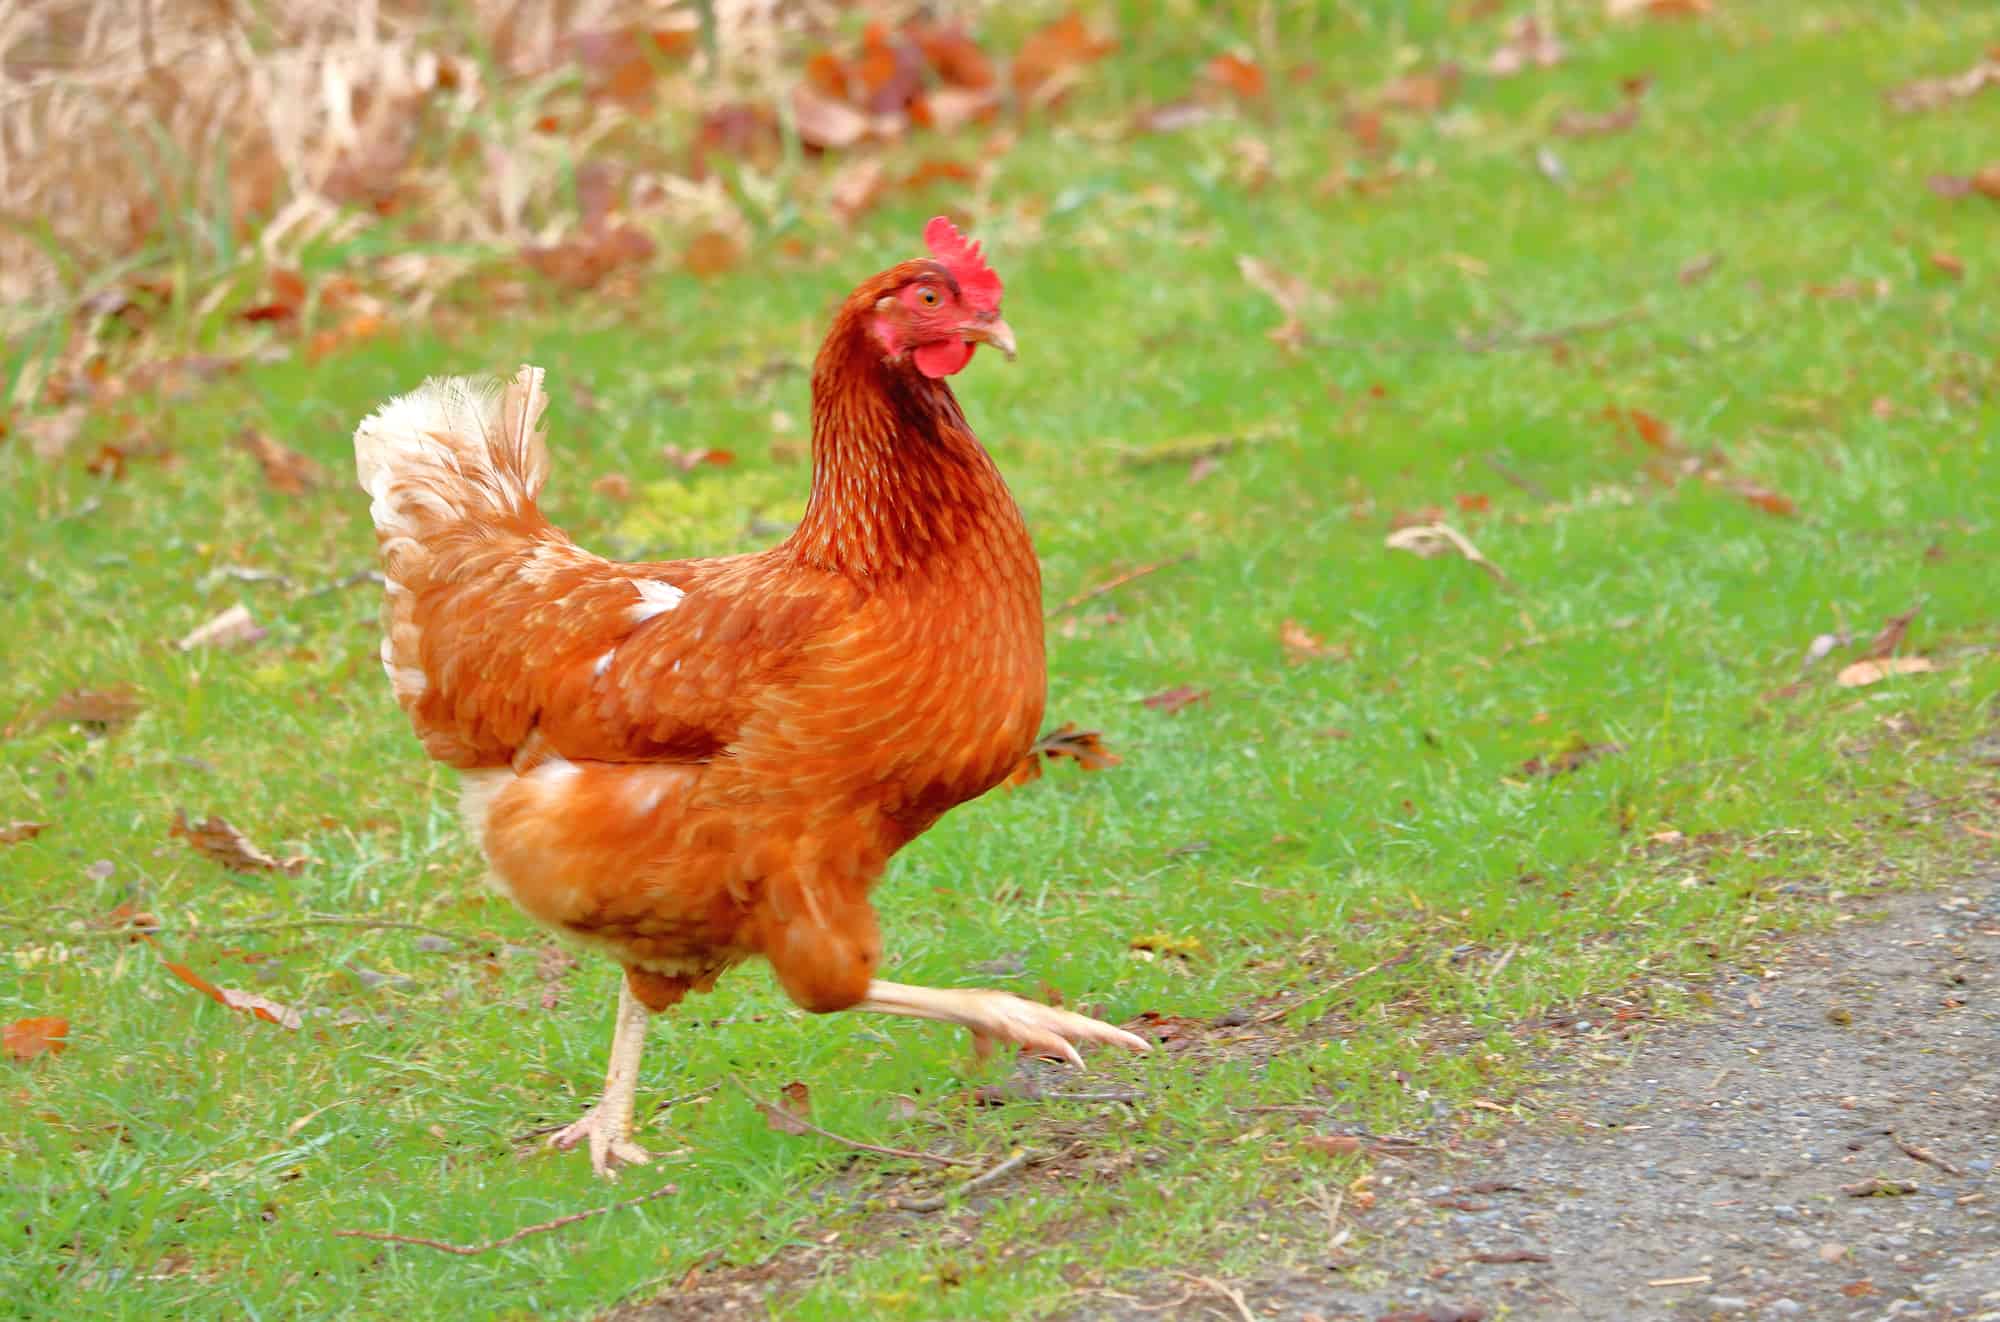
    What do they look like? 

    There are five different colorings that are recognized in Dorking Chickens; Silver With Gray, White, Red, Cuckoo, Dark. Most of these colors will have a mix of dark feathers on the Dorkings body, with the exception of the all-white variety.

    The birds have short legs,  short necks, white skin, and have a single comb/rose-colored comb (similar to Ancona Chickens) on their head. They have red earlobes, and their body is rectangular in shape. 

    It has long red wattles, and with the exception of the all-white Dorking, most breeds will have black feathers on their body, along with the coloring. You should also note that the bantam Dorkling weighs slightly less than the regular variety, usually coming in at around eight pounds.

    There are also quite a few color variations of this breed that arenโ€™t currently recognized. In addition, this breed has a very distinct feature that will help you recognize them right away, a fifth toe!

    Need some help keeping your chickens health and care taken care of? Check out the Organized Chicken Keeper for an easy to follow system.

    Temperament 

    The Dorking is a friendly breed of bird that can be easy to handle and make an excellent companion for those who desire pet chickens. The breed is known for being passive, even around children, and have shown signs of growing attached to their owners. This breed will even tend to follow humans around, so you should watch where you step when your flock runs up to greet you.

    This breed is known for being free-range as they wonโ€™t wander far from their home. They are foragers and will happily pluck away at any bugs they find hiding around their coop. As with any breed of animal, be sure to monitor young children around the Dorking Chicken to ensure that no accidents take place.

    What is their purpose? 

    As mentioned above, the Dorking Chicken is a good all-around bird. They are good egg layers, and their hefty size makes them a good choice for meat. They are also used as show chickens but can be excellent companions as well. 

    At their smallest, this breed weighs in at around 8 pounds, with some of the largest birds hitting a hefty fourteen pounds. It is also considered by many to be one of the most delectable breeds of chickens you can have.

    In addition, they can provide between 140 - 200 eggs a year or two to four eggs per week and donโ€™t seem to slow down laying, even when cold weather hits. This usually begins when they are around six months old. When they reach the six-year mark, you can expect their laying habits to stop or at least slow down as they have entered old age.

    If you are looking to breed a large flock, then you are in luck as well. The Dorking hens are exceptional mothers, even if the chick isnโ€™t their own. This means that you wonโ€™t need to worry about having to intervene in the breeding process; just place a rooster into your flock, and with any luck, you should have chicks in no time.

    If you are looking to enter chicken shows, then you will want to be especially selective when purchasing chicks. This is a rare breed, and finding a purebred Dorking Chicken can be a bit of a challenge. 

    Care and Health 

    Dorking chickens are generally a hardy breed that are generally easy to care for. You should keep in mind that this is a larger breed of chicken when planning out your coop and run. They will need much more room than smaller breeds. If you already have chickens in your coop, you should also note that due to the Dorkingโ€™s temperament, they will likely find themselves at the bottom of the pecking order.

    This is a chicken with a single comb, so they wonโ€™t do well in cold temperatures. Ensure that you have a proper way to keep your chickens warm in colder weather as they are susceptible to frostbite.

    A well insulated and wind free coop can help keep your chickens toasty throughout the fall and winter. Some varieties of Dorking chickens, like the white Dorking, will do better in the cold.

    Dorking Chickens are also a bit of a messy breed, so you may find yourself having to clean up after them regularly; some may even require baths. As always, remember that itโ€™s best to have the best chicken feeder and best chicken waterer set up to ensure that your flock has proper access to food and water at all times.ย 

    If you plan to make your Dorking Flock free-range, then remember to check on them regularly. While they wonโ€™t wander far from their coop, they should have a set schedule and access to clean water at all times. You should bring the flock inside when the sun begins to set as they will be ready to settle down for the night.

    If you notice that your Dorking Chicken has stopped laying eggs at a young age, then check to see if they are losing feathers. This breed tends to take a break from egg-laying when it is molting. Molting chickens usually happens about once a year.

    FAQ 

    What color eggs do Dorking chickens lay? 

    The eggs that the Dorking chicken lays are generally white in color. However, they will sometimes lay a creamier color of the egg. This has sometimes been linked to the coloring of the chicken itself.

    Are Dorking chickens good layers? 

    While they may not be as talented at laying as the some other breeds, a flock can keep your family fed.

    How long do Dorking chickens lay eggs? 

    They hens are ready to lay eggs once they are around half a year old and will stop when they are around six years old.

    Are Dorking chickens rare? 

    Yes, the breed is considered to be rather rare. Depending on where you live, it can be hard to get ahold of a Dorking chicken or at least one that meets breeding standards.

    How long do Dorking chickens live? 

    The Dorking Chicken has a lifespan of around seven years.

    How much are Dorking chickens? 

    A female Dorking Chicken will cost you in the $5 range, while a male usually costs you a bit under $4. Be sure to double-check the parents and familiarize yourself with the breed to ensure you are getting a purebred Dorking.

    How many eggs do Dorking chickens lay?

    Dorking chickens are rather good at laying eggs, and you can expect to get between 140 - 200 eggs a year, and they wonโ€™t slow down for cold weather either! This amounts to between two to four eggs per week per chicken

    If you need more help with taking care of your chickens, check out The Organized Chicken Keeper for a complete system for managing their health through keeping their supplies stocked and coop clean.

    Access The Organized Chicken Keeper Here

    Shamo Chicken

    By MrAnimal Farm

    shamo chicken

    Shamo chickens might have caught your eye due to their rather unique appearance. This oriental breed of chicken is quite striking as they look like something you would see in a caricature drawing. This is the perfect bird for chicken enthusiasts, especially since this breed is a great show bird.

    The Shamo Chicken is an interesting breed as it is more of an enthusiastโ€™s bird. Shamo chickens arenโ€™t great egg layers, and as you can likely tell by their muscular appearance, they arenโ€™t very tasty as they produce tough meat.

    They are also known to be an aggressive breed, so trying to introduce them to your flock may end in more than just a few ruffled feathers. Despite all of this, they are a hardy breed that can live up to twelve years with the proper care.

    shamo chicken

    The breed also has an interesting history and depending on where you live, you may even need a license to own one. If you are up for trying to raise show birds though, then this unique breed is a great place to start. Keep in mind that this is a breed of chicken that you will need to be attentive to as it grows to ensure you smooth out any aggressive tendencies towards humans.

    Shamo Chickens

    Size11 Pounds (Rooster)
    7 Pounds (Hen)
    ClassPea Comb
    ColorBlack, Red, Black With Red Breast, Dark, White with Dark Markings
    TemperamentAggressive
    HardinessVery Hardy
    Eggs/Yr80
    Egg SizeMedium
    Egg ColorLight Brown

    [ez-toc]

    History & Origin

    Shamo chickens originally came from Thailand, despite the fact that they are now a breed that is heavily associated with Japan Interestingly enough, the breed is even sorted by their weight. There are currently five weight-based types of Shamo Chicken; the basic Shamo, Yamato Gunkei, Nankin Shamo, Yakido, and K-Shamo, the smaller Bantam version.

    The breed is now rare and under a โ€œwatchedโ€ status and Japan has had to place them under protection in years past to save the breed. Japan has shown a vast interest in this breed dating back several hundred years, appearing in artwork, to their current preservation movements. Luckily, those efforts are paying off and Shamos have now spread throughout the world.

    What do they look like?

    The Shamo breed is a pretty distinct one, so you shouldnโ€™t have much trouble identifying them yourself. They come in four different colors  Black, Red, Black With Red Breast, and Dark. They have a pea comb, and a sloped tail.

    Their feathers are closely held to their bodies while their wattles are small. In fact, some Shamo chickens donโ€™t even have wattles. Their eyes have a pearl color, while their beaks and legs are yellow.

    shamo chicken
    A top view of black Shamo chicken in farmland

    The breedโ€™s wattles, when they have them are red, the same color as their earlobes. Shamos look as though they are standing upright and have a muscular build. These birds typically grow to be around 30 inches tall. They have also been noted to have an angry look at all times, although this doesnโ€™t actually indicate the temperament of the bird.

    Temperament

    The Shamo Chicken is not a friendly bird, and even with knowing how to introduce new chickens, you can still have disastrous results. The Shamo Chicken was bred to be a fighting breed, and this has sadly made them very aggressive. They donโ€™t tend to do well with other chickens, especially when housed with a docile breed. Shamos may also be trouble around smaller animals. This breed is known to be aggressive as chicks, and Shamo Roosters should never be housed together.

    Outside of other animals, the breed has been noted to act calmly, but small children should not be left alone around them. The best way to guarantee your Shamo Chicken is socialized to humans is by handling them from a young age; not doing so may leave you with an angry hen.

    shamo chicken
    A shamo chicken eating its food in a meadow

    This breed does like to free roam, but you may want to consider building a large pen if you have other animals nearby. Despite all of this, the hens are broody and will take care of their eggs.

    Need some help keeping your chickens health and care taken care of? Check out the Organized Chicken Keeper for an easy to follow system.

    What is their purpose?

    This is an Oriental breed that is mainly kept by chicken enthusiasts and as a show bird. They only lay 80 eggs per year, and their meat is described as being tough. This breed is currently under โ€œwatchโ€ status on the conservation list, so owning one may require a license depending on where you live.

    If you are looking to purchase a chick for show purposes, make sure to take special care when shopping for chicks. One of the best places to learn about chicks is at a show itself, as this is a rare breed. You will want to ensure that the chick you are entering into shows is a purebred Shamo, and if you are at a show, you may have a chance to see the Hen and Rooster the chicks are being bred from.

    If you plan on breeding Shamos yourself, then you shouldnโ€™t have too much trouble as the hens make great mothers. You will want to check in on the chicks as they grow and separate any males to keep fighting in your flock at a minimum.

    Care and Health

    The Shamo Chicken is a generally hardy bird that doesnโ€™t need to be specially groomed, but like most chickens, they will need a proper coop. This is a larger breed of chicken, so you will want to make sure you have a roomy home for them, especially if you intend to try and keep a few hens together.

    You should also ensure that they always have access to the best chicken waterer and the best chicken feeder so that they can have clean water and full crops. They will give themselves dust baths, but unless they decide to roll around in a puddle of mud, you shouldnโ€™t have to worry about bathing this breed.

    To keep chickens in the winter, you should consider providing a more insulated and wind proof coop, as with most animals left in the cold, Shamo chickens are at risk for frostbite. If you plan on allowing your Shamo chickens out of their chicken run to free-roam, be extra vigilant to the areas they can have access to.

    While they wonโ€™t want to wander far away from home, you want to ensure that your yard is free of dangers. While they will happily forage for food, they still need an average amount of feed which means, they are about average in terms of the cost to feed chickens.

    Having a set schedule is important with free-range birds as they will know when they get let out, and you can guarantee they are safely put up before night falls. While they are aggressive, this breed likely wonโ€™t win many fights against larger predators like foxes.

    FAQ

    What are Shamo chickens good for? 

    Shamo chickens are excellent show birds and are perfect for you if you have always wanted to try your hand at raising show chickens. They are also perfect for enthusiasts who enjoy taking care of oriental breeds.

    Can Shamo chickens fly? 

    No, the Shamo chicken canโ€™t fly. You wonโ€™t need to worry about them trying to clear any nearby fences.

    What does Shamo mean in Japanese? 

    It is based on the word Siam, which translates to Thailand, where the breed originally came from.

    Are Shamo chickens aggressive? 

    Yes, these chickens wonโ€™t do well with other chickens and have to be socialized at a young age.

    How big do Shamo chickens get?

    The male Shamo can reach 11 pounds, while the female usually weighs in at around 7 pounds. They are very tall and regularly grow to be around 30 inches tall.

    How long can Shamo chickens live?

    Shamo Chickens are very hardy and can live up to 12 years.

    If you need more help with taking care of your chickens, check out The Organized Chicken Keeper for a complete system for managing their health through keeping their supplies stocked and coop clean.

    Access The Organized Chicken Keeper Here

    Sultan Chicken

    By MrAnimal Farm

    sultan chicken

    The Sultan Chicken is a gorgeous bird with a striking appearance that has attracted the eye of chicken enthusiasts for years. They are an excellent show breed of chicken, but they will take a bit of special care. If you are looking for a unique chicken for purposes other than eggs or meat, the Sultan Chicken may just be a perfect choice for your coop.

    Sultan Chickens are easily recognizable due to the unique way that their feathers grow on their body. This oriental breed is mostly kept as pets or used in shows as they arenโ€™t great at providing eggs or meat.

    This is also a breed that will require quite a bit of care to keep healthy, making them a bit more geared towards an owner who has experience taking care of chickens. This breed only lives between five to eight years and may not take well to certain climates.

    sultan chicken

    Despite their shortcomings, they are a friendly breed that will be affectionate towards you and your family. They also have an interesting history and can be a pleasure to watch grow. Below we go over everything you need to know about bringing home your very own Sultan Chicken.

    Sultan Chickens

    Size6 Pounds (Rooster)
    4 Pounds (Hen)
    ClassDuplex Comb
    ColorBlue, Black, White
    TemperamentDocile
    HardinessNot Cold or Hot Hardy; Need Special Care
    Eggs/Yr50
    Egg SizeSmall
    Egg ColorWhite

    [ez-toc]

    History & Origin

    As their royal name suggests, these birds once entertained royalty and were kept as pets by Sultans. Their original name is โ€œSerai-Tavukโ€ or โ€œbird of the Sultanโ€ and they could be found in palace gardens. While the breed did have its start in Turkey, they made their way into English-speaking countries in 1854.

    They are an oriental breed the same as Phoenix chickens and Shamo Chickens are.

    They became a part of shows in the west, where they are regularly seen competing against in large shows. Despite spreading into other countries, the breed is considered to be rare. They have also been placed under the โ€œcriticalโ€ section of the conservation status. This is due to the fact that these chickens arenโ€™t broody and are hard to keep healthy.

    What do they look like?

    Sultan Chickens are quite striking in appearance and one can easily identify them due to the unique way feathers grow on their bodies. To begin with, this breed of chicken has its legs covered in feathers right down to its feet, similar to Black Copper Marans. In fact, some Sultan chickens even have feathers covering a majority of the top part of their feet. These fluffy features stand for the rest of their body, too, as they have plumage covering them from head to toe.

    The feathers on their head can even cover up their V-shaped combs and earlobes, hiding their bright red coloring. Reminiscent of Polish chickens, some even appear as though they are weaning a feathery hat on their head.

    The Sultanโ€™s tails are made up of long feathers that are usually pointed upward. Uniquely enough, many Sultan chickens even boast a fifth toe, like Silkies, although this feature seems to be related to family genetics.

    They have low-sitting wings, and the feathers on their bodies point backward. They come in three officially recognized colors; blue, white, and black. There is a Bantam version and other colors of the Sultan, but these colors are not recognized by the association.

    Despite their unique appearance as adults, Sultan chicks actually look pretty normal and are easy to confuse with other breeds. When grown the Sultan rooster will weigh in at around 6 pounds while hens will weigh around 4 pounds. While they donโ€™t take up a lot of space, they will still need a roomy coop.

    Need some help keeping your chickens health and care taken care of? Check out the Organized Chicken Keeper for an easy to follow system.

    Temperament

    The Sultan chicken is a sweet bird that is a perfect pick for a pet. They are known for their kind and affectionate nature, and, so when you introduce new chickens you are less likely to find them fighting with each other.. They have even been noted to be gentle with children, although you should still keep watch to prevent any accidents from happening as this is a brittle breed. 

    One thing you may notice from time to time is that your Sultan may be a bit jumpy. This is due to their thick plumage partially blocking their vision. Take care not to sneak up on this breed or make any loud noises that may alarm them. Even a loud dog may upset the Sultan, especially if itโ€™s their first time being around barking. Even when scared, they arenโ€™t likely to attack, but the negative stress can affect their health. 

    sultan chicken

    They love to talk, so prepare yourself to have daily conversations with your Sultan. You will also want to keep them away from aggressive breeds as they wonโ€™t do well in a fight.

    They do enjoy spending time outside and roaming, but they should have an enclosure, like a chicken tractor or predator-proof chicken run, where you can keep a watchful eye over them. While they will happily run up to you and interact with you when free roaming, they donโ€™t do well in most types of weather.

    What is their purpose?

    The Sultan chicken is definitely not a dual purpose chicken as it is an extremely poor food provider for several reasons. For starters, they take a lot of care that you wouldnโ€™t need to put into other breeds.

    They do not lay often. In fact, if you know how often chickens lay eggs typically, this breed is way below that average. They lay an extremely low number of eggs, around 50 a year and since they arenโ€™t large birds they wonโ€™t provide you with a substantial amount of meat.

    They are primarily pet or show birds. Shows are where they really shine, and they can be a good choice if you are looking to compete in the competitive ring. You will want to be incredibly selective when finding a breeder for Sultan chickens as they are a rare breed, and the chicks may not have any extra features other than an extra toe. 

    Before buying a Sultan, check with reputable farms and breeders. You can also go to shows to try to meet Sultan owners who are also in the breeding business. This can be a great way to see the hen and rooster your chick will be coming from, and you will be able to ask questions about the breed.

    In addition to all of this, you should note that they are hard to breed. The hens are not broody and are terrible at keeping watch over their eggs. If you do want to try and breed them, then keep in mind that you may need to learn how to help a chick hatch. You will need to have the best egg incubator on hand and be vigilant with gathering eggs. Keep in mind that this breed doesnโ€™t lay much, making the breeding process a bit frustrating.

    Care and Health

    Caring for the Sultan chicken is where complications can really set it with this breed. The Sultan chicken is not a hardy bird, and it can be hard to keep healthy. Depending on where you live in the world, this task can be incredibly hard as they arenโ€™t very tolerant of many weather conditions. You will want to have a proper-sized coop prepared and insulated to ensure that your Sultan is able to thrive. Due to their temperature sensitivity, some owners even decide to just let their Sultan live in their home.

    The first thing that you will want to make a note of is just how much plumage this bird has. Due to their heavy feathering, they donโ€™t do well when they get wet or muddy. Their feathers will hang onto the mud, making walking around hard for them.

    They donโ€™t do well when wet, so leaving them outside when there is a chance of rain is a no-go. If your Sultan does get muddy or wet, then you need to take care of them ASAP. 

    You will want to give them constant access to freshwater by choosing the best chicken waterer, but you should look into options that can keep them dry. Just leaving out a bowl of water will likely end in disaster for this breed.

    You should make sure to properly measure out their food each day. Even if your Sultan does seem to be doing well when foraging, you should never assume they are finding enough food to meet their daily dietary needs. Though the cost to feed chickens on average may be higher than the cost for this breed due to their foraging.

    If they are muddy, you will need to give them a safe bath and then dry them off thoroughly to avoid infections. Keeping chickens warm and dry is one of the best ways to ensure the health of the breed. You should be aware that being wet can stress the Sultan out, leading to further health problems.

    These chickens are extremely sensitive to the cold, so their coop will need to be warm at all times. They should always remain inside in the winter and in a dry environment. If you live in an area that is constantly cold, then you may face even more issues keeping this breed healthy as they do enjoy going outside.

    You will want to consider covering any run you make for them to ensure they donโ€™t get wet. In addition, leaving them in the heat for too long can give their feathers a brass color, which will lose you points in a show.

    You will need to be extra cautious of predators around Sultans. Due to their thick plumage, they canโ€™t see well out of their eyes. You can fix this with regular trims, but they still have a much higher risk of being snuck upon. Even if they can see the predator, their chances are still low as they arenโ€™t fast.

    If placing a Sultan in a mixed flock, closely watch to make sure there is no pecking. These birds are known for being pecked to death by other curious breeds. Finally, keep a watch if they have a fifth toe, as you will need to trim their nails from time to time.

    FAQ 

    Are Sultan chickens rare? 

    Yes, they are hard to find and considered to be an endangered species. You will want to be careful when trying to find a breeder.

    What are sultan chickens good for? 

    Sultan Chickens are great pets and show birds. They wonโ€™t provide you with a good source of food.

    How many eggs do sultan chickens lay? 

    You can expect for your Sultan to lay around 50 small eggs a year.

    How much does a sultan chicken cost? 

    The average cost of a Sultan hen sits at around $8, while roosters will run you around $5. Which is about the average for how much chickens cost. Be careful when purchasing this breed, especially if you plan to use them for shows.

    Are Sultan chickens broody? 

    Sultans are not broody, and breeding them can be pretty difficult. If you do plan to breed them, be ready to use an incubator to ensure the chickenโ€™s hatch. This is one of the many reasons they are rare.

    Are Sultan chickens cold-hardy?

    No, this chicken breed will die if left in the cold, and you will need to take special care of them in the winter. In addition, they will not do well in the rain, and leaving them soaked can lead to sickness.

    If you need more help with taking care of your chickens, check out The Organized Chicken Keeper for a complete system for managing their health through keeping their supplies stocked and coop clean.

    Access The Organized Chicken Keeper Here

    New Hampshire Chicken

    By MrAnimal Farm

    new hampshire chicken

    New Hampshire chickens are a great choice for new chicken keepers as they are a hardy, easy to care for chicken breed. They are easy to distinguish thanks to their red and brown coloring and will blend in well with a flock. New Hampshire chickens are also relatively easy to find as they are an all-American breed.

    Their versatile status makes the New Hampshire a popular chicken that can blend in well with just about any home. This breed is perfect for meat, eggs, shows, and being a pet.

    They arenโ€™t an expensive breed of chicken either as they are easy to breed and can be found on many farms around the US. So, they make a good chicken to add to any backyard flock.

    They also live for around seven years when provided with the proper care and can withstand living in most environments. Just make sure that you have prepared a proper living space for them and they will thrive.

    New Hampshire red chicken in a field

    The breed lays around 200 eggs a year, making them a great source of food. How long a chicken lays eggs for will depend on their health and environment.

    They can also be used for meat as they clock in around 6.5 pounds just for the hens and handling them is easy as they have a docile personality. If you are looking for a show bird, then they are a safe bet as well. They have been recognized as an official breed for quite some time.

    To keep learning more about this unique breed of chicken, keep reading below.

    New Hampshire Chickens

    Size8.5 Pounds (Rooster)
    6.5 Pounds (Hen)
    ClassSCCL (single comb clean leg)
    ColorRed and Brown
    TemperamentDocile
    HardinessVery Hardy
    Eggs/Yr200
    Egg SizeLarge
    Egg ColorBrown

    [ez-toc]

    History & Origin

    As you can likely guess from the name, these chickens were first created in the state of New Hampshire. In 1951, farmers were looking for a faster-growing chicken. By selectively breeding the Rhode Island Chicken, the New Hampshire chicken was created. The breed hit maturity incredibly fast. In fact, some New Hampshire chickens will start laying eggs for you as early as 23 weeks old.

    The New Hampshire chicken was officially created in 1915, and by 1935 they were accepted into the American Standard of Perfection. The breed has since become widely spread as they are a popular choice for chicken keepers all over the US. Due to its popularity with children, it was even crowned as the official poultry bird of New Hampshire state. They have also made it overseas as Holland has now created a new blue coloring of the New Hampshire chicken.

    What do they look like?

    The New Hampshire chicken has a mostly reddish-brown body with dark feathers coming out of their tails, similar to a Red Ranger chicken breed. While some New Hampshire chickens may be a lighter or darker red than others, they should all have very similar coloring.

    On hens, you may also notice black tips on the feathers on and near their throats. They have a single comb on top of their heads and clean legs. If you have a rooster, the comb will be standing up, but hensโ€™ combs have a chance of laying over on their heads.

    New Hampshire red hens and roosters in grass

    They have larger-sized bright red wattles and red earlobes to match. Their beaks have a reddish coloring to them, as do their eyes. New Hampshire chickens have a round body, and hens will weigh in at around 6.5 pounds. Roosters will weigh around 8.5 pounds, and both sexes have yellow toes. There is a Bantam version of the breed that weighs in at around 2 pounds.

    You should note that leaving the breed in the sun for extended periods of time will cause their feathers to lighten. While this wonโ€™t affect the health of the bird, it could be a problem if you are planning to enter them into a show. In addition to the breed standards above, a blue version of the New Hampshire chicken exists, as does a white version.

    The New Hampshire chicks are born yellow and will grow into their red coloring quickly. Depending on the chick, you may be able to see some red in their feathers when they are born. Be careful when looking at chicks, as they do look similar to the Rhode Island Red chicken. Luckily, this problem doesnโ€™t persist into adulthood as the Rhode Island and New Hampshire chickens have some strikingly different features, such as their wattles.

    Need some help keeping your chickens health and care taken care of? Check out the Organized Chicken Keeper for an easy to follow system.

    Temperament

    New Hampshire chickens are perfect for keeping in flocks and wonโ€™t fight among themselves. They also can get along with other breeds of chickens, as long as they arenโ€™t aggressive. This breed also loves people and will happily interact with you whenever you cross their paths.

    They love attention and when raised with handling, they wonโ€™t be mad if you pick them up or pet them. The breed can even be patient around children, but you should still be cautious as young children shouldnโ€™t be left alone with them. They are also a quiet breed of chicken, so you wonโ€™t need to worry about them getting too chatty.

    One area that things will change a bit is when there is food involved. New Hampshire chickens can be a bit food aggressive, so be especially careful when giving them feed. You will want to ensure that young children donโ€™t feed them and check to make sure that everyone in your flock is getting the appropriate amount of food.

    If you notice aggression problems among your flock, then you will need to work on establishing a new feeding strategy to keep the more dominant chickens in line.

    In most flocks, a pecking order will be established early on, so as long as you are providing the proper amount of food, birds should work it out themselves. If you are mixing breeds together, then this can be a bit of a problem. There is a high chance that your New Hampshire will try to protect the food, in which case, you will need to look into providing additional feeders.

    This is a breed that loves to roam, so making them free-range is quite easy. Depending on the amount of land you have, you can let them walk around your yard or build a chicken run. In fact, letting New Hampshire chickens roam around outside is usually an essential part of making them happy.

    What is their purpose?

    New Hampshire chickens are great for everything and considered a great dual purpose chicken. Whether you are looking for meat, eggs, shows, breeding, or even just a pet, this breed excels at each of these categories.

    This breed can provide a good amount of meat, especially when it comes to the 8.5-pound roosters. While there are some larger chicken breeds you could raise out there, they may not be as good at laying as the New Hampshire.

    On average, you are looking at getting around 200 eggs per year per hen. This breed grows to maturity extremely quickly and will begin laying eggs at around 23 weeks old. They have been noted to lay up to 250 eggs and having a flock will ensure that you have breakfast most every morning. The egg production may slow down in the winter, but with the right environment (warm, insulated, and draft free), this likely wonโ€™t be a problem. 

    This is also a common bird you can see in shows, so raising them to compete wonโ€™t be hard. They are a hardy bird, and even a first-time competitor may do well with the New Hampshire chickens. You also may find that itโ€™s easier to get chicken care tips for this breed due to their popularity on the show floor.

    When buying a New Hampshire chicken, try to gather as much information as you can on reputable breeders; a show is a great place to start. If possible, ask to see the hens and roosters the chicks are being raised from. While this isnโ€™t a rare breed, you will still want to ensure that youโ€™re not buying the wrong chick.

    Lastly, New Hampshire chickens are broody and can provide you with a decent amount of chicks. The breed has even been known for taking other breedsโ€™ eggs under their wings and hatching them.

    If left with a rooster, you will likely have chicks within a few months, as long as the birds are being well taken care of. Just try to ensure that they are laying their eggs in the coop and not while roaming around in your yard, as this will impede hatching.

    Care and Health

    To begin with, you will want to set up a coop that is large enough to hold these birds. At 6.5 to 8.5 pounds, this breed will need quite a bit of room to spread their wings. Ensure that the coop you build is well-insulated to keep the cold and rain out, as with most single combs, the New Hampshire chicken wonโ€™t do well if it gets cold. They are also prone to get frostbite on their combs. So, make sure to these chickens are kept warm in the winter.

    New Hampshire chickens are happiest when they are able to spend time outdoors. You will want to either build a run or chicken-proof your yard. This breed generally wonโ€™t wander too far and will stick close to their coop. You will want to be vigilant with your schedule to ensure that your flock knows what time they go out each day.

    While chickens do tend to wander back into their coops in the evening. Itโ€™s important to ensure you have all your birds accounted for by nightfall as predators like foxes will be prowling around.

    new hampshire red hen in a grassy field

    These birds do forge well when they are left to free-roam, but you should never ensure that they are finding enough food to meet their dietary needs each day. You will need to know how much feed chickens need and give it to your chickens every day to ensure they stay healthy.

    As mentioned above, this breed can be food aggressive, so having multiple of the best chicken feeders and best chicken waterers you can are a great idea. If you plan to add any other chickens in make sure to know how to introduce new chickens to try and avoid fights.

    The New Hampshire chicken will also require spaces where they can be in the shade during the summer.

    You wonโ€™t need to worry about especially bathing this breed every week, but you should inspect your flock regularly. Parasites are a common problem in chickens, and once one bird gets a case of mites, it will quickly spread through the flock. Other than these problems, this is a hardy breed that can live in most places in the world without a problem.

    FAQ

    Are New Hampshire chickens good layers?

    Yes, the New Hampshire chicken is a fantastic breeder that will provide you with around 200 eggs a year. On top of that, they are known for laying through the winter and will ensure you have food year-round. 

    Are New Hampshire Reds friendly? 

    These are friendly birds that love to be around people and can blend in with other peaceful breeds. While you will still want to get them used to handling when they are young, they make excellent pets.

    Are New Hampshire chickens good for meat? 

    Yes, Hens grow up to 6.5 pounds, and roosters grow to 8.5 pounds. They both have round bodies and will provide you with a decent amount of meat.

    What age do New Hampshire Reds start laying? 

    New Hampshire chickens can start laying as early as 23 weeks. They are a breed made to mature fast.

    How long do New Hampshire Reds live? 

    New Hampshire chickens can live around 7 years or so. When considering how long chickens can live it depends on the level of their care and health.

    What color eggs do New Hampshire Reds lay? 

    The New Hampshire chicken lays brown eggs.

    What size eggs do New Hampshire chickens lay? 

    The size of the New Hampshire chickens lays large eggs.

    Are New Hampshire reds quiet? 

    Yes, this is a quiet breed of chicken.

    Are New Hampshire chickens heat tolerant and/or Cold Hardy?

    While they arenโ€™t incredibly sensitive to the cold like some breeds, they do have a single comb that is susceptible to frostbite. You will want to keep them warm in the winter.

    If you need more help with taking care of your chickens, check out The Organized Chicken Keeper for a complete system for managing their health through keeping their supplies stocked and coop clean.

    Access The Organized Chicken Keeper Here

    Houdan Chickens

    By MrAnimal Farm

    The Houdan Chicken is a fancy-looking French breed of chicken with striking coloring. Outside of their black and white spotted coloring, the most prominent feature this breed has is a heavy amount of plumage on their head. If you are looking for a unique breed of chicken that is both friendly and great for shows, then the Houdan chicken may be perfect for you.

    The Houdan is a chicken that is kept for meat, shows, eggs, and as pets. The breed lays around 150 eggs a year and are a breed that can be found all around the world.

    While they still arenโ€™t a common breed of chicken, finding one in the states wonโ€™t be too much of a hassle. They are also easy to identify as they are a unique breed of chickens and boast five toes. They have a calm and friendly temperament that will work well with first-time chicken keepers.

    Houdan chickens arenโ€™t huge birds, but they can still provide a decent amount of meat. The breed lives for around seven to eight years with proper care. How long a chicken lives usually depends on breed and health.

    The roosters like to be kept in large flocks and are generally pretty friendly, so keeping a large amount of Houdans is easy.

    If the Houdan Chicken has piqued your interest, then keep reading below to learn more about caring for the breed.

    Houdan Chickens

    Size6.5 Pounds (Rooster)
    4.5 Pounds (Hen)
    ClassContinental
    ColorBlack and White, White, Black, Cuckoo, Pearled Gray
    TemperamentDocile
    HardinessNot Cold Hardy
    Eggs/Yr185
    Egg SizeMedium
    Egg ColorWhite

    [ez-toc]

    History & Origin

    This is an older breed of chicken that is said to predate writing, with the first written account occurring in 1858. They are prominent in parts of Europe and considered to be of French origin. It made its way to America by 1865 and was recognized officially by the APA in 1874. The breed has since been bred to achieve different colors. In fact, the white Houdan chicken was invented in America in 1867. Since being standardized they have become a regular in chicken shows around the world.

    What do they look like?

    The Houdan chicken is easy to identify as it has five toes (like Silkies and Salmon Faverolle) and a V-shaped comb (like Crevecoeur chickens and Cream Legbar Chickens. In Europe, the comb may be butterfly-shaped, but this version of the Houdan does not meet the APA standards.

    They feature small red waddles with pale beaks and legs that have a whitish or pinkish coloring to them. Both the wattles and combs have a high chance of being hidden by feathers in the hens, while roosters should be more visible and larger. This crested chicken also has a beard, with the majority of their feathers being held close to their body.

    They have a large amount of plumage coming out of their head (similar to a Polish chicken) long bodies, and slanted tails. They come in Black and White, White, Black, Cuckoo, and a Pearled Gray coloring.

    The breed weighs in at around 6.5 pounds for males and 4.5 pounds for hens. Though they are also a made bantam chicken breed, meaning they come in a miniature size also.

    Out of these, the black and white speckled coloring is the most common. The black and white coloring is a bit random, leading to several different variations in the patterns on their feathers, making each Houdan just a little bit different than the others.

    The Houdan chicks are mostly yellow in color, but they will feature black feathers on their backs. Thanks to the black feathering and fifth toe, they are a bit easier than some breeds to identify when they are young.

    Need some help keeping your chickens health and care taken care of? Check out the Organized Chicken Keeper for an easy to follow system.

    Temperament

    Houdan chickens are a friendly breed of bird that can get along well with other chickens and humans. They can do well in both quiet and noisy environments and are easy to interact with. To ensure your Houdan chicken is easy to handle, be sure to interact with them as they grow.

    The Roosters even enjoy living in large flocks, making it easy to integrate other breeds. They can do well with children, but itโ€™s always recommended to still keep watch just in case things start to go south.

    If you donโ€™t have a lot of room on your property for chickens to roam, this is an excellent breed to choose. They can blend in well with other docile breeds and be kept in yards with limited free-roaming space. Houdan Chickens do well when they spend large amounts of time in their coops.

    If you have room, though, then this breed will be more than happy to be free-range. This breed of chicken is able to fly, so if you plan to keep them in a run, you will need to ensure that they arenโ€™t able to escape easily.

    What is their purpose?

    Houdan chickens are great all-around, dual purpose chicken breed, like Australorps, Sussex, and Orpingtons. They are able to lay around 150 eggs a year, but they will slow down in the winter. Their eggs are usually medium in size and have a white coloring to them.

    The breed is also a decent meat provider, but you shouldnโ€™t be expecting them to compare to some of the larger chicken breeds. You may want to consider having a mixed flock if you want to have eggs year-round.

    This breed is an excellent choice if you are just looking for a pet. Their friendly temperament means that they do enjoy handling, so you can pet your bird or have them follow you around. The most popular use of the Houdan chicken is as a show bird.

    This is an old breed, and chicken keepers have had hundreds of years to perfect the Houdan. They are a popular show bird, especially in Europe, and can compete in shows of all sizes.

    If you are planning to use the Houdan to compete, then you will want to pay special attention when purchasing chicks. Check in to reputable breeders to see if they are breeding show birds or visit some shows.

    Itโ€™s easy to speak with Houdan owners at shows, and you can likely find some that are actively breeding chicks. This will also give you a chance to inspect the hens and roosters that are being used for breeding chicks.

    If you are planning to breed the Houdan chicken, then you may run into a few problems. For starters, this is a broody chicken breed, but they can be a bit clumsy. Houdan hens have a tendency to crack their eggs as they put too much weight on them. To be safe, you should have an incubator on hand, as itโ€™s a surefire way to get chicks.

    Care and Health

    While the Houdan may be a smaller breed of chicken, you will need to find large chicken coop plans to build them a shelter.. This becomes even more important if you are planning not to let your birds free roam.

    This isnโ€™t a cold-hardy breed, and they will get frostbite incredibly easily. To ensure this doesnโ€™t happen, you will need to make your coop is well insulated in the colder months.

    You may also want to limit the amount of time your birds spend outside in colder months or just keep them inside. If you live in a cold area, then these chickens wonโ€™t do well unless heavy preparations are made. So, be sure you know how to keep chickens warm in the winter.

    If you plan to let them free-roam during the warmer months of the year, then it may be a good idea to build a run. This breed can fly and having a run to keep them contained is an excellent way to keep them out of trouble. Just be sure to provide shade in the summer so that the Houdan isnโ€™t in danger of overheating.

    Like most breeds, the Houdan needs access to fresh food and water. Even if your Houdan chickens appear to be foraging well when outside, you should still feed them to ensure their dietary needs are met.

    The Houdan is also a bit more of a problem in the parasite department as its fluffy plumage makes a great home for mites. Be sure to check your chickens regularly and eliminate any pests as they will quickly make their way through your flock. Otherwise, you shouldnโ€™t have too much to worry about as these birds wonโ€™t need you to do their grooming for them.

    FAQ

    What are Houdan chickens good for? 

    The Houdan is a good all-around bird. You can get meat and eggs out of the Houdan, and if you are looking at entering shows, they are an excellent choice.

    What color eggs do Houdan chickens lay? 

    Houdans typically lay around 150 medium-sized eggs per year, but arenโ€™t good layers in winter.

    Are Houdan chickens endangered? 

    While they can be a bit rare depending on where you live, this breed isnโ€™t endangered.

    Where is the Houdan chicken from? 

    The Houdan chicken comes from France, and the breed is so old that they predate standard record keeping.

    How long do Houdan chickens live? 

    Houdan chickens typically live between seven to eight years when given the proper amount of care.

    Can Houdan chickens fly? 

    Yes, Houdans can fly, so if you are building a run, this will need to be accounted for.

    Are Houdans broody?

    Houdans are broody, but breeding them may be difficult as they have issues with cracking their eggs.

    If you need more help with taking care of your chickens, check out The Organized Chicken Keeper for a complete system for managing their health through keeping their supplies stocked and coop clean.

    Access The Organized Chicken Keeper Here

    Cream Legbar Chickens

    By MrAnimal Farm

    cream legbar chickens

    Cream Legbar chickens are an interesting breed of chicken that can be easily recognized due to the strange crest of feathers that grows from their heads. These birds look like they have grown a feathery head of hair and, like the name implies, are one of the many Legbar breeds. These chickens lay blue-colored eggs and are known for being easy to handle.

    The Cream Legbar chicken is an autosexing breed that lays a beautiful blue egg. They are a great choice if you are looking for a decent layer. These friendly chickens are perfect for those with little chicken-keeping experience and have quite a bit of interesting history behind them.

    While this chicken isnโ€™t really good for meat, it can live in diverse flocks, so keeping other breeds with them is easy. The Cream Legbar will lay around 180 eggs per year, and they are all a blue egg laying chicken setting them apart from your standard white and brown eggs.

    cream legbar chicken

    Depending on the chicken, you can expect your Cream Legbar to live between five to ten years with proper care. The breed is also auto-sexing. This means you don't need to know much about how to sex a chicken as you can tell just by their color. This is similar to the sex-linked, Sapphire Gem Chicken breed.

    Sadly, this breed is rare in the United States, so you may have a bit of trouble finding a breeder at first.

    If their blue eggs and quirky hairstyle appeal to you still appeal to you though, then keep reading below to learn more about the Cream Legbar Chicken.

    Cream Legbar Chickens

    Size7.5 Pounds (Rooster)
    5.5 Pounds (Hen)
    ClassSCCL (single comb clean leg)
    ColorSilver, Gold, Cream
    TemperamentDocile
    HardinessHardy
    Eggs/Yr180
    Egg SizeMedium
    Egg ColorBlue

    [ez-toc]

    History & Origin

    The Cream Legbar is a British breed of chicken that was created in the 1900s by genetic researchers. They were bred at Cambridge University and came about due to crossing Leghorn chickens and Plymouth Rock chickens. As time went on, the breed was further cross-bred to gain new colors like white. Their blue eggs originate through breeding with the Spanish Araucana chicken.

    By 1958 the breed finally became standardized, but interest in them started to decrease due to the fact that they laid blue eggs. By 1970, they were in danger of going extinct and even today are still under a โ€œwatchโ€ status on the conservation list. The ability for this breedโ€™s autosexing and the low amount of blue laying breeds available have now caused chicken enthusiasts to take more of an interest in the Cream Legbar Chickens.

    Another problem facing this breed and making them rare is the fact that many of the chicks sold claiming to be Cream Legbars arenโ€™t up to standard. While this may not be a problem for those looking for a decent layer or pet, this can cause issues with entering your chicken into shows and will likely cause your bird to be outright disqualified.

    You should keep in mind that many shows in America may not accept the Cream Legbar as a competitor anyways as they havenโ€™t yet been recognized by the APA.

    What do they look like?

    Like we just mentioned, you need to pay special attention to the breed standards for the Cream Legbar chicken. To begin with, the Cream Legbar has not received recognition by The American Poultry Association, but that is not the case overseas since 1958 so this is likely to change at any time. The standards listed below are from the British Poultry Club. 

    cream legbar chickens

    This breed will have grey and cream coloring, with barring on its body; this will be most notable on the chickenโ€™s tail and around the neck. There are some noticeable differences between the hens and roosters. Hens will have salmon coloring on their breast and more of a grey body.

    The roosters will have a cream or grey chest, wings, and legs. Hens also have wider bars on their bodies than the roosters. You will also notice that they have feathers growing out of their head that gives them the appearance that they have a tuft of hair or a small hat on.

    They have bright red wattles and white earlobes. Their legs are clean with a yellow coloring, much like on their beak. Some of them are a crested chicken, but not all will have the crests.

    The hens usually weigh in at around 5.5 pounds, while the roosters reach up to 7.5 pounds. Their body has a wedge shape, and they are muscular birds. Their tail goes up at an angle, and you will notice that their feathers have a silky feeling to them, not entirely unlike Silkie Chickens.

    They have long wattles, with the red coloring extending into their face and a single comb on their heads. If the chicken has too much brown on it, though, then it may not befall into breed standards. You want to see a fair amount of cream coloring on the bird.

    Temperament

    The Cream Legbarโ€™s temperament is a bit hard to pin down, but most importantly, they are not an aggressive breed. There seem to be two distinct temperaments that you will get when keeping the Cream Legbar.

    The first is friendly temperament, meaning the chicken will interact with you, follow you, and, if handled enough, may even let you pet it.

    The second temperament is a flighty one, which fits in with this breedโ€™s superior response to predators. These Cream Legbars are easy to scare and do not like anyone touching them.

    A mix of these two temperaments is also possible, and this breed seems to really vary from bird to bird. Rooster Cream Legbars on the other hand, can be a bit aggressive, especially when they are looking to mate.

    The best way to get your chicken used to you is to raise them as chicks and safely handle them as they grow. While this wonโ€™t cause some chickens to be less jumpy, it can at least ease them into your presence. Then, just know how to introduce them to your existing flock.

    Their chattiness may also be affected by their temperament, but there are many reports that flocks of Cream Legbars tend to be on the quieter side. This does change if they are spooked, though. They are considered to be a breed that is highly alert, allowing them to easily avoid any predators roaming around.

    Cream Legbars are good free-range birds, but they have a tendency to destroy their environment. They forage well (like Dorking chickens do) but are infamous for doing so to the point that they tear up their surroundings. Building a chicken run is a great way to still let your Cream Legbars roam without digging holes all around your yard.

    What is their purpose?

    The purpose of the Cream Legbar is going to differ a bit depending on where you live. While there are certainly some shows you can enter them in, donโ€™t expect to get into any major competitions until they recieve recognition by the APA.

    If you happen to be reading this from overseas, though, then you may have a much easier time raising them for show. Keeping them as a pet is also possible, but just how much you can interact with your Cream Legbar can vary, especially if the Cream Legbar you pick up has a more flighty temperament.

    They are good egg layers and will lay around 180 eggs a year. The eggs will be blue in color but sometimes can appear on the greener side. In addition, there have been cases of Cream Legbars laying white eggs.

    If you want a chicken that lays green eggs, there are many to choose from such as Easter Eggers.

    This is a breed that doesnโ€™t lay well in the winter months, so if your primary concern is having year-round eggs, you may want to have a mixed flock. Despite common myths, blue eggs taste the same as white and brown ones do. Cream Legbars wonโ€™t provide you with a good source of meat, though, as they have muscular bodies and are a bit small.

    cream legbar chicken eggs

    If you are planning to breed the Cream Legbar, then you will run into several different problems. Firstly, this is not a broody breed, so you canโ€™t really expect them to take care of their eggs. You will want to have an incubator on hand to ensure the chicks are hatching.

    Next, it may be hard to sell off chicks if that is your plan. Currently, there are only a handful of trusted breeders in the states, and only one of them is currently importing Cream Legbars from Britain.

    Care and Health

    While the Cream Legbar isnโ€™t a one of the largest chicken breeds, they still need a roomy coop that gives them plenty of room to move around in. Due to their single comb, they are sensitive to the cold weather and can easily get frostbite on their combs. To prevent this, make sure your coop is insulated from the elements to keep the chickens warm in the winter. You will also want to consider how you want to deal with this breed of chickens, as they love to free roam.

    Since the Cream Legbar are heavy foragers, they will tear up your yard without a second thought. If this is going to cause problems, then you will want to build a chicken run to help contain the damage. Be sure to have your flock on a schedule so they can know what time they are coming out of their coop.

    This is especially important during the evening as they should all be put up in the evening before the sunsets. While this breed is good at avoiding predators, itโ€™s still safe to have them all home and accounted for at the same time each day.

    The Cream Legbar needs constant access to clean water. So make sure to get them one of the best chicken waterers you can .

    Although they are amazing at foraging for food, you will still want to feed them each day to ensure and meet their dietary requirements. Though the average cost to feed chickens may be higher than the cost to feed this breed due to their foraging abilities.

    If you do end up with a flighty flock of birds, be careful when interacting with them to keep from spooking them. This will decrease the stress in your flock, helping them to stay healthier longer.

    Outside of normal issues like mites, this breed isnโ€™t at risk for any serious health problems. Just make sure they are warm in winter and have shade in summer. You also wonโ€™t need to worry about bathing this breed as they are generally pretty self-sufficient. 

    cream legbar chicken

    FAQ

    What color eggs does a Cream Legbar lay? 

    The Cream Legbar lays a unique blue color of egg that can sometimes look a bit more green in color than blue. Despite popular myths, the blue coloring doesnโ€™t affect the taste of the Cream Legbars eggs.

    Are Cream Legbar chickens friendly? 

    They are friendly chickens, but you may find that while they are happy to follow you around, petting is off the table. Some Cream Legbars tend to scare more easily than others, and some donโ€™t like to be touched at all.

    Is a Cream Legbar a bantam? 

    While the Cream Legbar is a small breed of chicken, they arenโ€™t classified as Bantams.

    How long do Cream Legbar chickens live? 

    The Cream Legbar tends to live anywhere between five to ten years. Exactly how long chickens live, of course, can differ based on the care the chicken receives.

    How rare are Cream Legbar chickens? 

    If you live in Britain, they are slightly rare, but in America, they are an incredibly hard-to-find breed. In fact, there are only a handful of breeders scattered around the states, so getting a Cream Legbar can be pretty difficult.

    Are cream Legbar chickens cold hardy? 

    The Cream Legbar should not be kept in the cold for long as they are a single comb breed. This means that they can get frostbite on their combs relatively easily.

    How much are cream Legbar chickens? 

    Cream Legbar hens tend to be around $29, while roosters will cost you slightly less at around $19.

    Do Cream Legbars go broody? 

    This is a breed that doesnโ€™t really go broody very often. If you are planning on breeding them, then you will need to have an incubator on hand.

    Are cream Legbar Roosters aggressive?

    The Cream Legbar rooster can be aggressive, especially when itโ€™s time to mate.

    If you need more help with taking care of your chickens, check out The Organized Chicken Keeper for a complete system for managing their health through keeping their supplies stocked and coop clean.

    Access The Organized Chicken Keeper Here

    Can You Freeze Beets?

    By MrAnimal Farm

    can you freeze beets

    Are you over run with beets? Maybe you grew too many in your garden. Maybe the assistant to the general manager at work brings them to the office non-stop. However you may have ended up with a ton of beets, you are probably wondering how to store them. Well, not only can you freeze beets, but you can do so in several (really easy) ways!

    If you want to learn some of the best food preservation techniques that can't be...beet...keep on reading!

    two beets and frozen shredded beets in a bag.

    [ez-toc]

    Can You Freeze Beets?

    Yes, you can freeze beets in several ways and forms. They can be frozen sliced, diced, chopped, shredded, grated, and more! You can leave the skin on, peel them, cook them, or freeze them raw. Thawing them out is as easy as sticking them in the oven, microwave, or your favorite soup or salad recipe.

    Keep yourself in a steady supply of frozen beets because they can keep for up to a year!

    Beets actually freeze very well. Today we are going to cover several different freezing methods so you can use them no matter how you want to prepare your beets.

    This method works for all kinds of beets. You can also freeze beet greens using the same method as Freezing Bok Choy and freezing cabbages. Make sure you start out with high quality, very fresh and firm beets. If you freeze something that's low quality, it's going to degrade that much more during the freezing process.

    Can you freeze beets without cooking them?

    Can you? Yes.

    Should you? No, unlike when freezing pumpkin, you should not freeze beets without cooking (or at least blanching) them first.

    Why? Whole beets when frozen have a significant change in their texture and quality. They will have a grainy texture that is not unlike eating a handful of purple sand (ok, maybe that's an exaggeration, but it's still pretty bad).
    You can, technically, still freeze beets that have been sliced, diced, chopped, or otherwise separated from the whole of the beet. But, in general, foods like fruits, vegetables, roots, tubers, etc. all fair much better in sub-zero temperatures after they have been blanched or cooked.

    Freezing Stats

    Blanchednot if cut
    2 minutes (1-2 lbs greens)
    Prep StyleRaw
    Cooked
    Chopped
    Diced
    Grated
    Mashed
    Minced
    Pureed
    Shredded
    Time To Freeze2 to 4 hours (flash freeze)
    12 to 24 (deep freeze)
    Time to Thawa few hours in the fridge
    can cook in oven or microwave without thawing
    UsesQuick dinners when you don't have time to cook
    salads
    soups
    Freezer Lifeup to 12 months

    Frozen Vs Non-frozen

    Freezer LifeFridge LifeShelf Life
    up to 1 year2 to 3 weeks3 to 5 days

    Supplies

    You are going to need the following supplies:

    • beets
    • cookie sheet (for flash freezing)
    • blender or food processor (for puree)
    • ice cube trays (for puree)
    • Freezer bags
    • Sharpie or marker
    • Freezer
    • mandolin slicer with protective gloves (for sliced)
    • knife and cutting board (for various cuts)
    • colander (for washing)
    • vegetable cleaning brush
    • large stock pot (steamed or boiled)
    • Ninja Foodi (good for roasting and air frying)

    How To Freeze Beets

    We will look at the many ways you can freeze beets that will keep for up to a year. First, though, we will look at how to flash freeze. It is a very useful method that is used in this, and many of our other freezing guides.

    Need to get all your food preserved easily? Check out the Ultimate Guide To Freezing Food so that you can fill your freezer without in minimal time.

    How To Flash Freeze

    Flash freezing is when you do a partial freeze of your food before bagging and storing for a deep freeze.

    • Cover a cookie sheet in aluminum foil or parchment paper
    • Arrange your food, sliced beets for example, in a single, non-overlapping layer
    • Stick the cookie sheet into the freezer for 2 to 4 hours just long enough for them to start to harden and have no outside moisture
    • Pull out the cookie sheet and put the slices into a pre-labeled freezer bag and put back in the 0freezer for long term storage.

    Now, let's look at the various methods of freezing.

    Cooked

    Below you will find a few ways to freeze cooked beets. We will include Steamed/Boiled, Roasted, Chopped/Diced/Sliced with Blanching, and how to blanch and freeze Beet Greens.

    Steamed/Boiled
    • Boil or steam your beets with the skin on (it is much easier to slip off after cooking)
    • They are ready once they are tender enough to stick a form in them.
    • Use a knife and cutting board to cut into slices
    • Put the slices on a prepared cookie sheet for flash freezing
    • After flash freezing, put the beets into pre-labeled bags and put in the freezer
    Roasted (with or without skin)
    • Cut into small pieces and spread in single layer on a cookie sheet
    • Coat them in olive oil and your preferred seasonings
    • Roast in oven at 350ยฐ for around 20 minutes, give or take (ready when fork can penetrate)
    • Cool and then stick pan in freezer to flash freeze for 2 to 4 hours
    • Once flash frozen, put them into freezer bags and into the freezer
    • Reheat in oven or in microwave
    Chopped, Diced, and Sliced
    • You can either blanch beforehand or not (but non blanched beets can have a grainy texture)
    • Cut them into small pieces and layer them onto a cookie sheet
    • Put the cookie sheet into the freezer to flash freeze for 2 to 4 hours
    • Once done, put them in a freezer bag and freeze
    Beet Greens
    • Choose the freshest and most tender beet greens you can
    • Blanche up to 2 lbs for 2 minutes
    • Flash freeze if you can
    • bag and freeze

    Raw

    Chopped, Diced, Grated, Minced, Shredded, and Sliced
    • Pick your preferred beet freezing form
    • If possible, flash freeze them first. The more you cut a vegetable the more moisture is released. When you are freezing in any of these forms they will clump and freeze together if immediately put into a bag.
    • After flash freezing, place them in a pre-labeled bag
    • Put in the freezer
    Pureed or Mashed
    • If you want to puree your beets, just cut them up and put them in your food processor.
    • If you are freezing Beet Mash, make that first and then continue to the next step
    • Take out an ice cube tray and pour the beet puree or mash into each of the reservoirs
    • Stick the tray in the freezer for a few hours (2 to 4 should work) until they are starting to freeze
    • Pop the cubes out and put the in a freezer bag for long term freezing.

    For Beet Mash, you can also use the same process as freezing mashed potatoes or sweet potatoes.

    Often Asked

    Q1. Can you freeze pickled beets?

    You can freeze pickled beets for up to a year. Place them in a freezer bag, plastic storage container, or Mason Jar, then add the pickling brine along with the beets. Remember to leave head room so the container will not break or rupture when the brine expands. Also, make sure they are in a freezer friendly container. Sticking the glass jar they come in, unless it's homemade in a Mason Jar, will crack and possibly shatter when freezing.

    If you need more help getting your foods frozen, check out the Ultimate Freezing Food Guide for a complete quick start reference so that you can have a well-stocked freezer.

    Access the Ultimate Freezing Food Guide Here
    pinterest image. text reads,

    Can You Freeze Oranges?

    By MrAnimal Farm

    fresh cut oranges on cutting board

    Yes, you can easily freeze oranges and they will last up to 12 months. Oranges can freeze whole, sliced, juiced or in halves. You can even freeze orange zest for future recipes.

    If you want to learn more about freezing oranges and keeping them fresh for a good long while, keep on reading!

    fresh cut oranges on cutting board

    [ez-toc]

    Can You Freeze Oranges?

    Almost every orange is able to be frozen. We will say up front that freezing oranges, just like freezing most fruits and vegetables, will decrease their quality, flavor, and texture as time passes. This is unavoidable but you can mitigate it a bit by employing some of the techniques we list below and using your oranges quickly.

    You can freeze all kinds of oranges and orange juice. The best way to freeze them is peeled slices using a combination of flash freezing and long term freezer bags. When kept at a constant sub-zero temperature, frozen oranges can last up to a year. They can easily be thawed in the fridge, on the counter, or tossed right into a smoothie, drink, cocktail, or other recipe.

    Frozen oranges also work best in recipes and smoothies. Essentially, anything that does not need the orange to retain it's original shape and texture can use frozen oranges.

    Freezing Stats

    Not all oranges freeze equally. The University of California did a study on Naval oranges and found freezing them will result in poor results. Oranges, when frozen, develop limonin; a compound that has a very bitter taste. Naval oranges have a higher level of limonin than other types of oranges. So, freezing Naval oranges will be very disappointing if you try it.

    However, other varieties of oranges and juice are fair game. Incidentally, you can also freeze limes and many other types of citrus fruit, like grapefruit and, lemons using the same methods we discuss today.

    Freezing Stats

    Blanchedno
    Prep Stylewhole
    slices
    wheels
    with peel
    without peel
    juice
    Time To Freezedepends on method
    2 to 4 hours (flash freezing)
    12+ deep (freezing)
    Time to Thaw2 to 4 (in fridge)
    <1 hour (on counter or under running water)
    Usessnack
    recipe ingredient
    smoothie
    Freezer Lifeup to 12 months

    Why should you freeze it?

    We say this a lot but finding a great deal on produce is really hard to pass up. You can buy more for the off season knowing that you can freeze oranges and have them all year around. We also like to freeze orange juice in ice cube trays to add some extra flavor to our drinks.

    The chart below will show you exactly how much longer you can extend the life of your oranges simply by freezing them.

    Frozen Vs Non-frozen

    Freezer LifeFridge LifeShelf Life
    up to 1 yearup to 1 monthup to 1 week

    Supplies

    You are going to need the following supplies:

    • oranges or orange juice
    • cookie sheet (for flash freezing)
    • ice cube trays (for juice)
    • Freezer bags
    • Sharpie or marker
    • Freezer
    • knife and cutting board (for slices, wheels, and halves)
    • pot or sauce pan (for syrup packing)
    • Mason Jars (for syrup packing)

    Need to get all your food preserved easily? Check out the Ultimate Guide To Freezing Food so that you can fill your freezer without in minimal time.

    How To Freeze Oranges

    There are several ways to freeze oranges. We will cover them in 3 sections; Without Peel, With Peel, and Juice.

    Note: All of the methods below recommend you label the bag, jar, or other storage container with the contents, freezing date, and use by date.

    Without Peel

    We will start freezing peeled oranges since that is the most likely way you will want to freeze them. Obviously, your first step in each of the below methods is to remove the orange peel.

    Dry Packing

    Dry packing is the easiest of the peeled methods.

    • Cut your orange into slices. Wheels and halves are possible, but much more difficult without the peel.
    • Use a knife to remove the seeds, if you like.
    • Place the orange slices into your labeled freezer bags.
    • Place the bag in your freezer until they are frozen.

    Note: This method is quick and easy. However, when dry packing the oranges all freeze together at the same time and will likely freeze into a single clump; making it difficult to use only what you need.

    A way to avoid that is to...

    Flash Freeze

    Flash freezing is, more or less, when you pre-freeze individual (just like when you freeze kiwi) slices before the deep freeze. this allows the moisture in the slices to stay within each slice until they freeze.

    • Cut your orange into slices and remove the seeds the same way as you would when dry packing.
    • Line a cookie sheet with aluminum foil or parchment paper.
    • Place the orange slices in a single layer on the cookie sheet and put them in the freezer for about 2 to 4 hours.
    • Once they freeze, take the slices off the cookie sheet and put them in a labeled freezer bag.
    • Put the bag back into the freezer for long term storage
    frozen oranges on baking pan wrapped in foil

    With Peel

    Here you will find a couple of freezing methods that leave the peel on the orange if that is something you prefer. The peel gives the orange a little extra bit of protection and also will give you the option of making an orange peel zest in the future.

    Whole

    Obviously, this means you are taking the orange, as is, and freezing it. This process is quite simple. All you need to do is:

    • Label a freezer safe ziplock bag with both the freeze and use by dates
    • Place a whole orange in the bag
    • Squeeze as much air out as you can
    • Put the bag in the freezer
    Wheels, slices, or halves

    If you want to keep the peel on, this is the best method. You can do this using the dry packing or flash freezing method listed above.

    • Cut your orange in half, wheels, or into slices.
    • Determine your method of freezing
      • Dry Packing
        • put them in a labeled freezer bag
        • squeeze out all the air
        • put in freezer
      • Flash Freezing
        • Cover cookie sheet with aluminum foil or parchment paper
        • Place oranges in single layer on cookie sheet
        • Freeze for 2 to 4 hours
        • Put oranges in labeled freezer bags
        • Place bags in freezer for long term storage
    Syrup Packing (best with slices; peel on or off)

    You've probably seen fruit at the store or the farmers market preserved in syrup. You can freeze cherries this same way.

    You can do it on your own and it's really easy but does take some extra time to prep the syrup.

    • Boil a 2:3 mixture of sugar and water on your stove top (measurements based on the amount of oranges being preserved)
    • Once the sugar has dissolved, take the pot off the heat and cool the syrup in the fridge
    • Once you're ready, prepare your oranges the same way described in the other methods.
    • Put the slices in a Mason jar; being careful not to over pack them as the oranges will need room to move and have syrup cover everything completely.
    • Pour the syrup into the Mason jar until the oranges are covered. Leave a bit of air space in the top of the jar; just like in canning. Around an inch, give or take, of headspace should do.
    • Put the lids on tightly and lable them the same as you would label freezer bags; contents, freeze date, and use by date.
    Juice

    Orange juice can be frozen in large quantities or small ice cubes. Both of these methods will assume you have either purchased orange juice or already juiced your own.

    Container

    Use a Mason Jar or some other freezer safe container to freeze larger quantities of orange juice for later.

    • Fill your container with orange juice.
    • Leave about ยพ" of headpsace so the juice can expand while freezing.
    • Place in the freezer.
    • Orange Juice should keep when frozen for 8 to 12 months.
    Ice Cubes

    We prefer freezing as ice cubes to flavor drinks.

    • Fill an ice cube tray up with orange juice. Be careful not to overfill.
    • Flash freeze for 2-4 hours.
    • Pop out cubes and put them in a labeled ziplock bag.
    • put back in the freezer until you need them later.
    freezer bags of frozen oranges in front of baking pan wrapped in foil

    How do you defrost it?

    Thawing after flash freezing will give you the best results since they are less likely to be frozen together in a large clump. Stick them in the fridge overnight and they hould be defrosted by morning. If you need them more quickly, you can stick them in a bowl on the counter or put them in a seperate zipper bag and run it under cool water. Either way should have them defrost in under an hour.

    The best way you can use frozen oranges is to not thaw them at all. Frozen fruit and veggies, in general, become water logged and lose a lot of their quality and texture after being frozen. They will still taste decent but not as good as you would really want fresh fruit to taste.

    Just like you can do with mint leaves and frozen watermelon you can use frozen oranges as a replacement for ice cubes in your drinks. As they melt, they will give anything from a glass of water to a tasty Screwdriver cocktail an orange infused flavor.

    How can I use frozen oranges?

    Frozen oranges work best as an ingredient to drinks (including garnishes), smoothies, and recipes (including zesting the peel).

    If you need more help getting your foods frozen, check out the Ultimate Freezing Food Guide for a complete quick start reference so that you can have a well-stocked freezer.

    Access the Ultimate Freezing Food Guide Here
    pinterest image. text reads,

    Can You Freeze Bok Choy?

    By MrAnimal Farm

    fresh cut bok choy on cutting board

    Sometimes you find a killer deal on Bok Choy and you have to miss out because there is no way you or your family could eat it all before it went bad. Fortunately, not only can you freeze Bok Choy, but you can do it pretty easily.

    Keep on reading to learn how you can freeze it and not have your food go to waste!

    fresh cut bok choy on cutting board

    [ez-toc]

    Can you freeze bok choy?

    Yes, you can freeze bok choy via flash freezing, blanching or a combination of techniques. Once frozen, Bok Choy will stay good for up to 12 months but is best when used within the first 4 to 6 months. There is no need to thaw when you're ready to use it

    It can be added to any recipe still frozen and it will thaw almost immediately.

    Bok choy is a type of cabbage. And just like the cabbage you may be used to seeing at the grocery store, Bok choy can also be frozen in the same ways.

    Freezing Stats

    Blanchedyes; 3 minutes
    Prep Stylechopped
    full leaves
    Time To Freeze2 to 4 hours
    Time to ThawN/A
    Usesrecipes that require Bok choy
    soups
    stews
    Freezer Lifeup to 12 months

    Why should you freeze it?

    Freezing food is a great way to preserve it. This can help you have access to seasonal foods off season, or stock up during garden season or a sale.

    Bok choy was cultivated and grown, primarily, in China. It is packed full of vitamins and nutrients and considered a super food. Unlike many fruits and vegetables where you usually have to separate the edible portion from a stem, stalk, or branch, you can eat all of the Bok choy plant. Both the leaves and stalk are both edible.

    Because it's such a great source of nutrition and there is little to no waste when cooking with Bok choy freezing it so you always have it available is a great idea. Plus, when you freeze it, it will last a lot longer than if you buy it fresh and leave it in the fridge.

    Need to get all your food preserved easily? Check out the Ultimate Guide To Freezing Food so that you can fill your freezer without in minimal time.

    Frozen Vs Non-frozen

    Freezer LifeShelf Life/Fridge Life
    4 to 6 months (peak freshness)
    6 to 12 months (quality will degrade but is still good to cook with)
    3 to 5 days

    Supplies

    • Bok choy
    • 2 colanders
    • knife and cutting board
    • large stock pot
    • large mixing bowl
    • kitchen timer
    • Measuring cup
    • cookie sheet (for flash freezing)
    • Freezer bags
    • Sharpie or marker
    • Freezer
    whole bok choy

    How To Freeze Bok Choy

    We mentioned above that you can flash freeze, blanch, or a combination of both methods to preserve Bok choy. We prefer to do them both and today we will show you how.

    Step One

    Start by cleaning your Bok choy. You can run it under cool water in your sink. We like to put down a colander so we can peel off the leaves and get everything rinsed thoroughly.

    You will also want to gather the rest of your supplies now.

    Step Two

    Once your Bok choy is good and clean, take out your knife and cutting board and get ready to separate the leaves. The entire vegetable can be eaten so there is no need to cut and throw away stems.

    You can either break off full leaves or you can chop the entire thing up into smaller bits. Both ways freeze the same. It comes down to a matter of preference for you.

    bok choy on cutting board sitting on stove

    Step Three

    Now it's time to blanch. Take a stock pot, fill it with water, and set it on your stovetop to boil. While you are waiting fill up a large mixing bowl with ice and water and grab a second colander or wash the one you used earlier.

    Add all of your Bok choy to the colander, When your water is at a rolling boil, lower the colander of Bok choy into the water and set a timer for 3 minutes. Keep an eye on the pot, however. You will know your Bok choy is ready to come out once the leaves start to turn green.

    When the timer goes off or the leaves change color, pull the colander out of the boiling water and place it in the bowl of ice water. The sudden ice bath will stop the cooking process right away.

    Pull the Bok choy out of the water and pat dry with a paper towel; removing as much moisture as you can.

    Do you have to blanch Bok choy before freezing?

    You don't have to blanch Bok choy before freezing it but we strongly recommend you do. Most fruits and vegetables contain an enzyme that allows them to continue the aging process even if they have been frozen. That means that your frozen food can still go bad and become an icy, rotten mess.

    When you boil the food for a short period of time, you are essentially partially cooking it which destroys that aging enzyme. Now you can freeze your food and not worry that it is going to spoil after you freeze it.

    Step Four

    Now we get to flash freezing. Flash freezing is when you pre-freeze your food in smaller segments before packaging them together for a deep freeze. Let's explain how to do this.

    Take a cookie sheet and cover it in aluminum foil or parchment paper. Lay all of your Bok choy, cut or whole leaf, in a single, non-overlapping layer. Depending on the size of your cookie sheet, freeze, and the amount of Bok choy you are freezing, this may take a few cookie sheets or a couple of rounds.

    Place the cookie sheets in the freezer and leave them for 2 to 4 hours (or overnight if you don't want to wait). While they are freezing, label your storage bags or containers with the contents, freeze date, and use by date. That way nothing gets lost and wasted.

    Once they have frozen, take the cookie sheets out of the fridge, load the labeled bags up with Bok choy and put them back in the freezer where they will stay.

    frozen bok choy and bok choy greens

    Frequently Asked Questions

    Q1. How do you defrost it?

    Just like cabbage, Bok choy does not need to be thawed before hand. It can be put right into the recipe for which you need it. However, if you would like to thaw it, you can simply run it under some cool water for a moment or so until it defrosts.

    Q2. How long will it last?

    Bok choy, when frozen using the methods listed above, can have a fresh freezer life of 4 to 6 months and will still be palatable for up to 12 months. Compare that to a non-frozen fridge life of 3 to 5 days.

    If you need more help getting your foods frozen, check out the Ultimate Freezing Food Guide for a complete quick start reference so that you can have a well-stocked freezer.

    Access the Ultimate Freezing Food Guide Here

    Can You Freeze Mint Leaves?

    By MrAnimal Farm

    chopped mint leaves frozen in ice cube tray

    If you've ever had a garden with mint you know once it takes root it grows like crazy. But, once the weather turns the mint will disappear just as quickly as it showed up. Then you're left for the rest of the cold months, prime hot tea with fresh mint time, with no mint to be had. You'll be pleased to know that not only can you freeze mint leaves but there are several ways to do it and all of them are pretty easy!

    You can freeze mint leaves either fresh or dehydrated. Depending on the method you use, frozen mint leaves will keep for 3 or 6 months. There's no need to defrost them as you can just add them to a recipe or drink and they will thaw automatically.

    Keep reading to find out which freezing method works best for you!

    chopped mint leaves frozen in ice cube tray

    [ez-toc]

    Can you freeze mint leaves?

    Mint leaves actually freeze very well. In fact, unlike most foods you can freeze, mint hardly loses any quality from the freezing process. It is also a very versatile freezer because you have so many ways you can freeze it.

    Mint leaves can be frozen either chopped or as whole leaves. You can also choose to freeze them fresh or dehydrated.

    Freezing Stats

    Blanchedno
    Prep Styleminced in ice cubes
    chopped
    whole leaf
    Time To Freeze2 to 4 hours in most cases
    Time to ThawN/A
    Usesgive a minty flavor to drinks
    the same as fresh mint leaves
    Freezer Life3 to 6 months

    Why should you freeze it?

    Freezing fresh mint will make sure you have mint all year round. Plus, if you are pulling it during your gardening season, it will help clear out some mint for other crops to grow.

    Freezing is really easy and just about anyone has the capability to do it. It also is the best method of storage to maintain a strong flavor over a long period of time.

    Frozen Vs Non-frozen

    Freezer LifeShelf Life/Fridge Life
    3 to 6 months3 to 5 days

    Supplies

    You are going to need the following supplies:

    • fresh mint (from garden or store bought)
    • cookie sheet (for flash freezing)
    • blender or food processor (for chopping)
    • ice cube trays (for mint cubes)
    • Freezer bags
    • Sharpie or marker
    • Freezer
    • knife
    • kitchen timer
    • dehydrator (we use this Ninja Foodi)

    Need to get all your food preserved easily? Check out the Ultimate Guide To Freezing Food so that you can fill your freezer without in minimal time.

    How To Freeze Mint Leaves

    As we mentioned above, we have several methods you can use to freeze mint. We will split them into two categories; Fresh mint and Dried mint. Let's start with fresh mint.

    Fresh Mint

    The following method are best for mint picked fresh from the garden or from the store. They will typically stay at peak freshness for about 3 months. You can still use it up to 6 months.

    Ice cube
    1. Remove stems and damaged leaves. Clean under cool running water
    2. Chop into fine pieces. Place a spoonful of chopped mint into an ice cube tray and fill halfway with water
    3. Stick trays in freezer for a few hours until frozen. Transfer cubes from tray into labeled freezer bag.

    How to thaw: To use, you can place the small mint cube into a drink or recipe, still frozen. If you want to remove the excess water, put the cube in a cup or bowl and leave out until it has melted. You can then pour the water through a fine mesh strainer and catch the mint.

    chopped mint leaves in ice cube tray
    Frozen Olive Oil and Mint cube
    1. Remove stems and damaged leaves. Clean under cool running water.
    2. Add your mint leaves and ยผ cup of olive oil into a food processor. Use the manual function until the oil and mint start to look like they are binding together. Fill an ice cube tray about halfway with the min and oil concoction.
    3. Stick trays in freezer for a few hours until frozen. Transfer cubes from the tray into labeled freezer bag.

    How to thaw: Follow the same thaw and use instructions from the Ice cube method above.

    Flash Freezing
    1. Remove stems and damaged leaves. Clean under cool running water.
    2. Line a cookie sheet with parchment paper or aluminum foil. Create a single layer of mint leaves on top of the cookie sheet.
    3. Stick the cookie sheet in the freezer for few hours. Once frozen remove them from the cookie tray and place them in a labeled freezer bag and put them back in the freezer.
    freezer bags of frozen mint cubes

    Dried Mint

    You can add an extra layer of preservation protection and double their freshness freezer life by dehydrating them first. When drying mint leaves, you can choose to freeze them or leave them out.

    Air Drying
    1. Take a branch full of mint leaves and place them in a dark, cool, well ventilated area. For best results, allow them to hang dry and keep them protected from dust. You can put a bag over them to assist.
    2. After a week or two, the leaves should be brittle and crumble easily
    3. Place them in a labeled freezer bag and stick them in the freezer

    Obviously, the easiest method since everyone has access to air. It is also the method that takes the longest; usually around a week or 2 for the leaves to completely dry out.

    Dehydrator (or Ninja Foodi with Multi-Function)
    1. Rinse a branch of mint leaves under cold running water to remove dirt and debris. Then pat or hang dry them.
    2. Trim the stems from your leaves so you just have the leafy green parts left.
    3. Follow the specific directions from your dehydrator manual for drying herbs, leaves, and spices.
    4. After they are dried, put them in a labeled freezer bag and put them in the freezer.
    Oven Drying

    Second to the microwave, the oven drying method is the quickest way to dry your leaves.

    1. Rinse your mint leaves off with cold water and pat or hang dry them.
    2. While they are drying cover a cookie sheet with aluminum foil and preheat the oven to 170ยฐ Fahrenheit.
    3. If you haven't already, strip the leaves from the branch and trim the stems from the leaves. Then make a single layer of mint leaves, with no overlap, on the cookie sheet.
    4. Put the sheet of mint leaves in the oven and set a kitchen timer for 2 hours. Come back and check to see if they are dry. If not, set the timer again and come back in an hour. Drying may take up to 4 hours.
    5. Once dried, put your mint leaves in their storage container and place them in the freezer.
    Microwave Drying

    This is the quickest most accessible, and almost the easiest way to dry your mint leaves.

    1. Rinse a branch of mint leaves under cold running water to remove dirt and debris. Then pat or hang dry them.
    2. Next, place a paper towel on a microwave safe plate and line the leaves on it.
    3. Set your microwave to cook on high for 30 second. Flip the leaves and then heat for another 30 seconds. Continue this process until the leaves are completely dried out.

    Pro Tips:

    • If you crush dried mint leaves before adding them to your drink or recipe, they will release much more of their flavor and aroma.
    • It's best to freeze mint immediately after picking it.
    • The morning seems to be the best time to harvest mint leaves; as their flavor is strongest at this point.
    • Be gentle. Mint bruises easily. Select only the best leaves with no damage, wilted leaves, pests, or any other undesirable things.

    Frequently Asked Questions

    Here are some of the more common questions about freezing mint leaves

    Q1. How long will it last?

    If you're wondering how long mint can last in the freezer versus how long mint can last in the fridge, frozen mint in it's various forms can last between 3 and 6 months in the freezer. Fresh mint, on the other hand, can only keep for 3 to 5 days in the refrigerator.

    Q2. Can I refreeze it?

    Mint does not refreeze very well at all. Also, there's not really any reason to if you follow the methods above. You should be able to only take out what you need at a time and leave the rest to stay frozen until next time.

    Q3. What can I use frozen mint for?

    Frozen mint can be used for everything that fresh mint leaves are used for with the added bonus of being extra cold. One of our favorite uses is to take a mint ice cube or two and pop them in a glass of cold water, iced tea, or even a cocktail like a mojito or vodka soda. They will melt slowly and give your beverage a cool and refreshing flavor.

    Final word

    Mint is one of the best things you can freeze at home. You have a ton of ways to do it. Every method is easy. And mint hardly loses any flavor or quality from the entire process.

    Try it yourself next time you get some mint. You won't be disappointed!

    If you need more help getting your foods frozen, check out the Ultimate Freezing Food Guide for a complete quick start reference so that you can have a well-stocked freezer.

    Access the Ultimate Freezing Food Guide Here

    Can You Freeze Cabbage?

    By MrAnimal Farm

    Can You Freeze Cabbage

    Every year around St Patrick's Day and New Years millions of people across the globe make a dash for corned beef, black eyed peas, and, of course, cabbage. Usually, the corned beef and peas don't survive a single meal, but the cabbage generally has leftovers; both cooked and unused, raw pieces. If you'd like to save them, you're in luck, because you can freeze cabbage.

    If you're all in on freezing cabbage like we are, keep on reading to learn the variety of ways it can be done!

    fresh cut cabbage on cutting board

    [ez-toc]

    Can you freeze cabbage?

    Yes, you can freeze cabbage in a variety of different ways. It can be frozen raw or cooked and as a whole head (not recommended), wedges (a little more okay), chopped (now you're getting it), and shredded (there you go!).

    Depending on the size and how you want to freeze it can be done with or without blanching. Frozen cabbage can keep for up to 18 months but is best in the first 3 to 4 months of freezing. Best of all, it doesn't need to be thawed before you throw it in a soup or stew, which cuts down on potential soggy leaves!

    Cabbage is wonderful in that there are so many different varieties like red cabbage, purple cabbage, green cabbage, and even Bok Choy. Not only can any of these (plus more) work amazingly well in recipes, they can also all be frozen using any of the techniques we discuss today.

    Though cabbage does OK frozen, other leafy vegetables (like when you try to freeze lettuce) don't tend to fair quite as well.

    Freezing Stats

    Blanchedno (full head and wedges)
    1 to 2 minutes (shredded)
    2 to 3 minutes (chopped)
    3+ minutes (wedges depending on size)
    Prep Stylewhole, wedge, chopped, shredded
    Time To Freeze12 to 24 hours
    Time to Thawa few hours in the refrigerator
    no need if adding to recipe (soups, stews, etc)
    Usesbest in soups and stews
    Freezer Life 12-18 months
    best quality in the first 3 to 4 months

    Why should you freeze it?

    Cabbage still remains favorable for a while after it has been frozen but it's best within the first 3 or 4 months of freezing. It will still remain safe to eat all the way up to 18 months but quality will severely degrade after that initial 3 to 4 month period. Generally, freezer burn is the culprit

    Frozen Vs Non-frozen

    Freezer LifeShelf Life/Fridge Life
    12-18 months
    best quality in the first 3 to 4 months
    2 to 3 weeks (wrapped and uncut)
    2 to 3 days (unwrapped and cut)
    3 to 5 days (cooked in fridge)
    1 to 2 hours (cooked & left out)

    Supplies

    • cabbage (any kind)
    • colander
    • mandolin slicer with protective gloves (for shredding)
    • knife and cutting board (for shredding if no mandolin slicer)
    • large stock pot
    • large mixing bowl
    • kitchen timer
    • Measuring cup
    • cookie sheet (for flash freezing)
    • Freezer bags
    • Sharpie or marker
    • Freezer
    whole head of cabbage

    How To Freeze Cabbage

    We have a couple of ways to freeze cabbage; whole head, chopped/wedges, and shredded. We will over each method below and which method will give you the best results.

    Need to get all your food preserved easily? Check out the Ultimate Guide To Freezing Food so that you can fill your freezer without in minimal time.

    Step One

    This step is mostly the same for any method you choose. You will want to gather all of your supplies together so they are easily accessible.

    Whole head or wedges

    To preface, we DO NOT recommend freezing an entire head of cabbage. It takes longer to freeze (which can cause freezer burn), longer to thaw (which can make your cabbage soggy and withered), is bulky and takes up more space than other methods.

    Buuuuuut....if you insist...

    Remove the outer leaves and soak the entire head of cabbage in a salt water brine. Fill a large mixing bowl or basin with warm water, add in a handful of salt, and let the cabbage soak for about 15 minutes or so, occasionally shaking the head to dislodge any insects that may be stuck.

    Wedges, chopped, and shredded

    Cut your cabbage in whichever method you choose. Wedges are not quite as bad as freezing a whole head but you still run into some of the same problems. Both chopped and shredded are much easier and yield better results.

    The easiest way to cut wedges or chop cabbage is with an old fashioned knife and cutting board. You can also use a knife for shredded cabbage but we prefer a mandolin slicer.

    Place your cabbage in a colander in your sink. Run cool water and rinse off any dirt and grime you may see. Make sure each piece gets good coverage and you should be fine.

    Step Two

    Without Blanching

    Again, we do not think skipping blanching is a good idea unless yo plan to eat the cabbage very, very soon (in which case, just put it in the fridge where it will stay fresh for up to 3 weeks if it stays wrapped).

    You can freeze any of these types of cabbage without blanching by following the cleaning and cutting methods in step one, drying everything completely, bagging them, and putting them in the fridge.

    Easy peasy, but won't give you great results.

    With Blanching

    The act of blanching your food is like a form of partial cooking. Many veggies and fruits have an enzyme that will make them continue to age even after being frozen. That means freezing will only slow the process down and your cabbage will still rot. Hence why we don't think skipping this is a good idea.

    Blanching a full head is probably technically possible, but we wouldn't try it. However, wedges, chopped cabbage, and shredded cabbage are all good candidates and will give you good results.

    How to blanch

    To blanch you will need a second colander (or at least wash the first one before reusing it), large mixing bowl, and a stock pot. Fill the pot with water and set it on your stove top to boil (remember, don't watch or it never will ๐Ÿ˜‚).

    While you are watching for it to boil, fill your mixing bowl with cold ice water and put your cabbage in the colander. Once your water is at a good rolling boil, lower the colander down into the water. Set a kitchen timer for:

    • 1 to 2 minutes for shredded cabbage
    • 2 to 3 minutes for chopped cabbage
    • 3+ minutes for wedges

    Times may vary depending on the size and amount of cabbage you are blanching. You only want to boil the cabbage long enough to kill the aging enzymes. When your timer goes off take your cabbage and dunk it in the ice bath you have waiting in the mixing bowl.

    Now that the aging process has been stopped with blanching we use an ice bath to stop the cooking process.

    chopped cabbage

    Step Three

    You will now take your cabbage and let it dry. We usually will lay it out on or pat it down with paper towels. You want to remove as much excess moisture as possible to prevent freezer burn later on.

    While your cabbage is drying pull out your your storage bags and sharpie or marker. Label them with the contents, amount, freeze date, and a best by date. You can also include an expiration date since frozen cabbage is best within the first 3 months and will go bad between 12 and 18 months.

    Your cabbage should be dry by now. Take out your cookie sheet and cover it with aluminum foil or parchment paper; we will use this for flash freezing.

    What is flash freezing?

    Flash freezing, in home food preservation, is basically a pre-freeze before the long term deep freeze. It works best with smaller foods and portions like when you freeze blueberries, freeze blackberries, freeze carrots, freeze watermelon freeze cantaloupe chunks chunks, and freeze raspberries. For example, shredded or chopped cabbage will give great results when flash frozen.

    To do this, you will make a single layer of cabbage on the cookie sheet; spread out for shredded and individual leaves for chopped. Then place the cookie sheet in the freezer for a couple of hours. When you come back, the cabbage will have started to freeze enough that you can move on to the long term storage section in step four.

    Step Four

    After you flash freeze your cabbage, put it all in your labeled storage bags. You should have removed most of the water in step three; which is the first phase of avoiding freezer burn. When you close the bags up, you want to remove as much air as you can.

    Air and moisture in the bag will lead to sublimation; the chemical reaction that results in freezer burn (check out that link if you want a more scientific explanation). It's almost impossible to stop freezer burn. However, it is not too difficult to hold off for a while.

    You can:

    • make sure the freezer stays closed until your cabbage has had time to completely freeze. Frequent opening and closing will cause the temperature to move around a lot which can make the freezing process take longer and also result in condensation.
    • use your frozen food earlier than fresh foods. The less time they spend frozen they less likely they are to become experience freezer burn.
    • make sure your freezer's internal temperature is down to at least 0ยฐ (zero degrees Fahrenheit). This will also shorten the freezing time.
    • only use containers just big enough to fit your cabbage in. Smaller containers have less space for air and thus less likely trigger sublimation as early.

    Pro tip: The best way to squeeze all of the air out of the bag is to use your sink and take advantage of water pressure. Lower the bag into a sink or bowl full of water while zipping the bag almost shut. Leave a small opening on one end and dip the bag down to that point.

    Water pressure will squeeze the bag and push all of the air out the top. Then just seal it and move to step 5.

    Step Five

    Now it's freezin' time!

    Things tend to fit better when you can lay them out flat. Shredded cabbage is the easiest to do this with chopped cabbage not far behind. Wedges are more difficult to lay flat and whole heads are nearly impossible.

    Place all of your bags in the freezer. If you have older frozen food already in the freezer, make sure to put the new frozen food behind it. This is called the "first in-first out" (or FIFO) rule. Basically, you want to make sure you use the food in the order it is frozen so nothing gets lost and goes to waste; this is why we like to include the date when labeling storage bags and containers.

    How do you defrost it?

    Cabbage is great because it is mostly used for soups and stews so you don't need to defrost it; you can add them straight into the recipe. If you are making something like coleslaw or sauerkraut (you can also freeze sauerkraut), you can leave the freezer bag in the fridge over night or even run cold water over it in the sink until it is thawed enough to use.

    Frequently Asked Questions

    Here are some of the more common questions about freezing cabbage.

    Q1. Can you pan fry frozen cabbage?

    You can but it will probably not turn out well. Most vegetation will become soggy once it thaws; especially the ones with a lot of water and moisture in them (tomatoes, lettuce, bok choy, etc). So pan frying your cabbage is not really a good idea.

    Q2. Can you freeze cooked cabbage and noodles?

    Cooked cabbage and noodles is an easy dish to freeze. Since it's already been prepared you do not need to go through all of the steps from above. All you need to do is put it into an airtight bag or container, squeeze out any remaining air, and put it in the freezer (don't forget to label and date it).

    It should stay good for a couple of months. To reheat it, just take it out, put it in a microwaveable bowl, cover it, and heat it.

    Q3. Can I freeze corned beef and cabbage?

    Corned beef and cabbage freezes and reheats pretty well. Just wrap or put them in an airtight, freezer safe bag or container and put them in the freezer. Reheat them in the microwave or in the oven and it will taste almost as good as when you cooked it.

    Final word

    So, freezing cabbage is really easy. As with any fruits and vegetables, they are never going to have the same taste, texture, and quality as when they are fresh. But, cabbage holds up pretty well when frozen. It works best when used in warm meals like soups or stews, but is definitely something that we would not hesitate to add to our food preservation list.

    If you need more help getting your foods frozen, check out the Ultimate Freezing Food Guide for a complete quick start reference so that you can have a well-stocked freezer.

    Access the Ultimate Freezing Food Guide Here

    Can You Freeze Salsa?

    By MrAnimal Farm

    Salsa is one of our favorite things to make with our garden harvest. Nothing can beat the spicy bite that comes along with fresh tomatoes, crisp peppers, and a whole host of tasty spices. We like to make large batches so it can last a long time. We usually will can it after we make it but we recently got to wondering can you freeze salsa?

    You can freeze just about any type of salsa. Salsa verde freezes the best, from what we can tell. The best results come from pre-cooking the excess moisture out of the salsa before bagging it in freezer bags for freezing. Salsa is easily defrosted in the fridge overnight, in the microwave, or on a stovetop.

    Once it thaws it is pretty watery and is best used in recipes. Freezing will extend the life of your salsa by about a month or two but should be eaten well before then for the best flavor.

    It's not all doom and gloom though. There are plenty of ways to keep your salsa tasting great even after your freeze it. Let's find out how!

    [ez-toc]

    Can you freeze salsa?

    Salsa is one of those foods that actually freezes very easily. This is because it is loaded with water and has a ton of moisture in it. While this makes it taste great, it can make the results of freezing not quite as satisfying.

    Much like other liquid or soft foods, like when freezing milk or freezing half and half, freezing apple sauce, freezing chili and Freezing sauerkraut, salsa freezes best in small portions at a time. We prefer to use quart size bags or even salsa pods frozen in an ice tray.

    Freezing Stats

    Blanchedno
    Prep Stylemake it yourself or freeze store bought
    Time To Freezewithin a few hours
    Time to Thawovernight in the fridge,
    a couple of minutes in the microwave or stovetop
    Usesrecipe ingredient
    marinades
    dip (after thickening)
    Freezer Life1 to 2 months

    Why should you freeze it?

    Probably the main reason to freeze salsa instead of canning it is the time it takes. Like with any freezing food, it is almost always the fastest way to preserve food.

    Canning is a big process and can take a while to do it properly. It also take specific canning equipment, Mason Jars, lids, rings, and some other items.

    To freeze salsa all you need are some freezer bags, a sharpie, and a freezer. It also takes less than half the time it takes to can.

    Frozen Vs Canning

    Freezer LifeShelf Life/Fridge Life (canned)
    1 to 2 months12 to 18 months

    Supplies

    • salsa
    • sauce pan
    • cookie sheet (for freezer shelf)
    • ice cube trays (for salsa pods)
    • Measuring cups
    • Freezer bags
    • Sharpie or marker
    • Freezer

    Need to get all your food preserved easily? Check out the Ultimate Guide To Freezing Food so that you can fill your freezer without in minimal time.

    How To Freeze Salsa

    Let's go over the 4 easy steps it takes to freeze salsa.

    Step One

    As we mentioned above, salsa has a lot of moisture and, once frozen and thawed, will become very runny. One way to combat that is to cook off some of the excess moisture before you start freezing.

    Put your salsa in a sauce pan and heat it on low or low-medium until it starts to simmer. Keep the heat as low as you can while still maintaining a slow simmer. What is happening is the water in the salsa is starting to evaporate. You want to do this as long as you can without the tomatoes and other ingredients breaking down.

    Once the other ingredients start breaking down the salsa will start to thin out again. Keep an eye on it and you will pick up on how long you can tow that line. While you are waiting for it to start simmering you can gather the rest of your supplies together.

    Pro tip: Add a couple cans of tomato paste to the pot with the salsa to give it some extra thickness.

    Step Two

    After your salsa has finished cooking down and you have taken it off the stove, set it to the side and let it cool for a while. You don't want to put hot salsa in the freezer. It will increase the temperature inside the freezer which can cause some condensation to form. This condensation (aka water) can then get into your salsa, watering it down, and defeating the entire purpose of cooking it down to begin with.

    While it's cooling, if you haven't already, figure out what portion sizes you are going to want to freeze. You can freeze small little snack pods using an ice tray, a whole batch in a plastic jar, or a cup at a time in plastic bags.

    Smaller portions tend to work best because they will freeze more quickly. The faster they freeze the less likely you are to experience freezer burn. Also, smaller portions are more likely to be eaten with no need to refreeze.

    Step Three

    Now that you have decided your portion size, get your freezing containers together. Your salsa is probably still cooling so you have a little more time to go.

    If you are not using a plastic jar, then freezer bags are the best route even with salsa pods. Write the contents, freeze date, and "best by" date on the outside of the bag or jar. It's important to include all of this information so you don't end up eating something that has passed it's use by date. You may remember but someone else may not and just get excited they found some salsa.

    Step Four

    At this point your salsa may be cool enough to start portioning and bagging. If not, walk away for a while and come back later.

    If you are just freezing in a jar, fill the jar up and stick it in the freezer. That's it and you're done.

    Freezer bags take a little bit longer. We like to freeze about a cup or two at a time. So we fill the bags up and squeeze as much air as we can out of them. Excess air will cause sublimation to occur. Sublimation is the process that eventually leads to freezer burn. So get that air out!

    Place a cookie sheet on a shelf in the freezer and start laying your flattened bags of salsa out on them. The cookie sheet is to keep the salsa from forming to the shelf grate and then freezing; becoming stuck in the process. Freezing them flat will make them much easier to move around if you need to rearrange your freezer later.

    If you want to make salsa pods, just fill up a couple of ice cube trays with salsa. Put the trays in the freezer for a couple of hours. Come back later and pop the salsa pods out and put them into a pre-labeled freezer bag.

    Pro tip: The most effective way we have found to remove all of the air from a bag is to zip it almost completely closed with a small opening on one end. Then submerge the rest of the bag in water. The water pressure surrounding the bag will push all of the air up and out through the small opening.

    Just be careful to not get water in the baggie.

    How do you defrost salsa?

    You can thaw salsa by leaving it in the fridge overnight or running it under cool water. Alternatively, it can also go straight into a recipe, be warmed on the stove, or nuked in the microwave.

    Unfortunately, freezing salsa will impact the firmness and texture of the vegetable ingredients. This can lead to an almost soggy consistency and texture.

    However, it will still taste good, just not quite as bright and lively as a fresh jar would taste.

    How can I use frozen salsa?

    Freezing will affect the texture and consistency of your salsa. It can become watery due to the excess moisture that comes with freezing. You will have the most success if you use thawed salsa as an ingredient in larger recipes.

    Frequently Asked Questions

    Here are some of the more common questions about freezing salsa.

    Q1. How long will frozen salsa stay good?

    Frozen salsa will keep for up to a year when frozen. However, it will start to degrade in flavor and quality pretty quickly. You can usually get a month. You'd be lucky to get two months with its flavor still at a desirable level.

    Q2. Can I freeze store bought salsa?

    Store bought salsa is just as easy to freeze. If it came in a plastic jar, all you have to do is stick the container in your freezer without opening it. If the jar is made of glass you will need to transfer the salsa into a plastic container. When the salsa freezes it will expand. This expansion will cause the glass jar to shatter making a big mess and can be dangerous.

    Final word

    So, we've learned that salsa is pretty easy to freeze. It takes a little extra effort to keep it from being too watery, but simple, none the less. It is pretty clear though that, if it's possible, canning salsa is the best route for long term preservation. But if you are just trying to keep a couple jars worth good for a month or so, freezing is a quick and easy way to do that!

    If you need more help getting your foods frozen, check out the Ultimate Freezing Food Guide for a complete quick start reference so that you can have a well-stocked freezer.

    Access the Ultimate Freezing Food Guide Here

    Can You Freeze Half and Half?

    By MrAnimal Farm

    half and half being poured into an ice cube tray

    If you take your coffee with cream you know that if you run out and can't get more before you have your morning coffee it can be devastating. Okay, maybe that's a bit dramatic, but it is pretty terrible. Fortunately, you can freeze half and half so that you always have some available.

    Keep on reading to learn the exact method we use to make sure our half and half freezes well and stays fresh for a long time!

    half and half being poured into an ice cube tray

    [ez-toc]

    Can you freeze half and half?

    Yes, you can easily freeze half and half. Just pour a container into a freezer bag or measure out portions to fill ice cube tray pods. Stick them in the freezer and you're good to go. Once frozen, they'll last another 2 or 3 months.

    If you need them for a recipe or your coffee, it's quick to thaw.

    Freezing half and half is very similar to freezing over liquids like freezing milk, and softer foods like freezing apple sauce, freezing chili and freezing salsa.

    Freezing Stats

    Blanchno
    Prep Stylebagged
    Time To Freezea few hours
    How to Thawovernight in the fridge
    under cold water in sink
    Usescoffee creamer, tea
    Freezer Life3-4 months

    Why should you freeze it?

    There are several reasons why you may decide to freeze half and half. Like when you are freezing any food, you may have found a good sale at the store and bought a ton. You stock up when you can because you don't want to be without your coffee creamer.

    Half and half has many uses outside of your coffee. It makes many recipes fluffier (like eggs), desserts creamier (like ice cream), and makes cocktails richer.

    Just like when freezing mozzarella cheese and other dairy items, you can use half and half to cook with after defrosting without any noticeable texture or quality issues.

    Frozen Vs Non-frozen

    Freezer LifeShelf Life/Fridge Life
    2 - 3 monthsup to a week

    Supplies

    • half and half
    • cookie sheet (for freezer shelf)
    • ice cube trays (for half and half pods)
    • Freezer bags
    • Sharpie or marker
    • Freezer

    Need to get all your food preserved easily? Check out the Ultimate Guide To Freezing Food so that you can fill your freezer without in minimal time.

    How to freeze half and half

    Freezing half and half is really easy. Yes go through the process.

    Step One

    First things first. Gather all of your freezing supplies together and make sure everything is accessible. This includes the half and half itself.

    Step Two

    Generally, when freezing things, whether solid or liquid, we decide on how much we want to freeze in a single container or freezer bag. Since half and half isn't something you really consume on it's own, this is a little trickier.

    Half and half is generally used in things like coffee, tea, and a variety of recipes. So generally, you are looking at portion sizes in the teaspoon and tablespoon range of things. You don't want to waste good freezer bags on such a small portion.

    We recommend considering half and half pod style freezing. Half and Half pods are when you freeze half and half in an ice cube tray in smaller, pre-measured portions. This is preferable because you won't have to thaw an entire bag when a recipe calls for a teaspoon or two or if you just want some coffee.

    pouring half and half into an ice cube tray

    Step Three

    Once you have decided if you are going to freeze large amounts at a time or if you want to go the pod route, you will want to decide on the measurements to use.

    If you are freezing a container at a time, then that's all you need to know and you can move to the next step. If you are going to freeze half and half pods, you'll need to think about how much to freeze per pod.

    Most ice cube trays can hold a little more than a tablespoon of liquid. Freezing a tablespoon per pod is a pretty good place to start. If you are using them for a recipe, you can just thaw out a single cube. You can even cut it into pieces when you don't need the whole thing.

    Step Four

    You are going to want to start labeling your freezer bags. You can use quart bags or gallon size bags depending on how much you are freezing.

    When labeling it is important to include the contents of the bag, the freeze date, and the "use by" date. You don't want to freeze everything and then not be able to tell what's in the bag or worse, eat something that was lost in the back of the freezer for years.

    Step Five

    When you're ready to make your pods this is done the same as when you freeze honey, jam or cilantro in an ice cube tray.

    Simply measure out a tablespoon (or whatever you decided) and pour it into one of the reservoirs in the ice cube tray. Do this until you run out of half and half or ice cube trays.

    Next, put the trays in the freezer and leave them for a few hours. If you do this at night and leave them in until morning they will have plenty of time to freeze. Then, all you need to do is pop the pods out of the tray, bag them, and put them back in the freezer until you need them.

    How do you defrost?

    All you need to do to thaw your half and half is leave it in the fridge for a few hours or overnight in a bowl or mug. You can also run some cool water over it if you have it sealed in a bag. This is quicker but can still take a while and you waste a lot of water.

    Once it's defrosted, you will want to take a whisk or fork to it and give it a good stirring. When half and half freezes, the cream will start to separate and can become grainy. Mixing it up should take some of that graininess away, especially if you are using it in coffee or a recipe.

    Final word

    As you can see, freezing half and half is not difficult at all. In fact, it can make life a little more convenient by always having some one hand!

    If you need more help getting your foods frozen, check out the Ultimate Freezing Food Guide for a complete quick start reference so that you can have a well-stocked freezer.

    Access the Ultimate Freezing Food Guide Here

    Can You Freeze Apple Sauce?

    By MrAnimal Farm

    apple sauce in freezer bags

    If you have a very active apple tree or just find a great deal at your local market it's almost irresistible to make yourself some homemade apple sauce. Buuuuut, if you end up with too many apples or apple sauce they can spoil pretty quickly. You should know there is a solution to them going bad that isn't throw them out or give them to your friends, family, and neighbors (again). Not only can you freeze apple sauce, but it is super easy and can keep for up to a year!

    Keep on reading to learn how to freeze your apple sauce and make it last for up to a year!

    apple sauce in freezer bags

    [ez-toc]

    Can you freeze apple sauce?

    Apple sauce is easily frozen. You can freeze it in mason jars, plastic storage containers, or, our preferred method, freezer bags.

    Frozen apple sauce will stay good for 6 months to a year after it has been frozen. You can thaw it in a variety of ways like overnight in the fridge, in cool water, or even heated up in the microwave or stovetop!

    What can you do with a lot of apples? You can make apple pie, apple cider, even chickens can eat apples as a healthy treat. But our favorite thing to do is make it into apple sauce.

    And, if you're anything like us, you get really excited and make way more than any reasonable human should try to eat. In such cases you will need a way to preserve your apple sauce or to the chickens it will go (but don't feed them apple sauce if you make it with sugar).

    So, the short answer is yes, you can freeze apple sauce. But you will need a few supplies first.

    Supplies

    • Apples or apple sauce (duh)
    • Apple peeler (if making apple sauce)
    • Apple corer (if making apple sauce)
    • Measuring cups
    • Freezer bags
    • Sharpie or marker
    • Freezer

    How To Freeze Apple Sauce

    This is really only a five step process. Let's see how you do it.

    Need to get all your food preserved easily? Check out the Ultimate Guide To Freezing Food so that you can fill your freezer without in minimal time.

    Step One

    This is the easiest step of them all. Open your store bought container of apple sauce or follow your homemade apple sauce recipe.

    Step Two

    You will need to figure out how much apple sauce you need to freeze and how you will want it portioned out (just like when you freeze chili).

    If you have a large or even medium size family, that loves apple sauce and it is something you eat with meals, it may make sense to freeze batches in large, gallon size freezer bags. However, we assume most people eat apple sauce as a quick snack or in between meals. Thus, using quart size freezer bags is best for individual portion sizes.

    Whichever size bags you decide to use, take them, along with your sharpie or marker, and label the bags. You will want to definitely add the contents and bagging date. It is also helpful to put a "best by", or "throw away by" (or "Toxic after") date so you don't accidently eat apple sauce that has been in the freezer too long.

    If it is too old, it will not likely be harmful or toxic, but it will probably have freezer burn and will absolutely lose quality. Basically, it will just not taste very good after about a year.
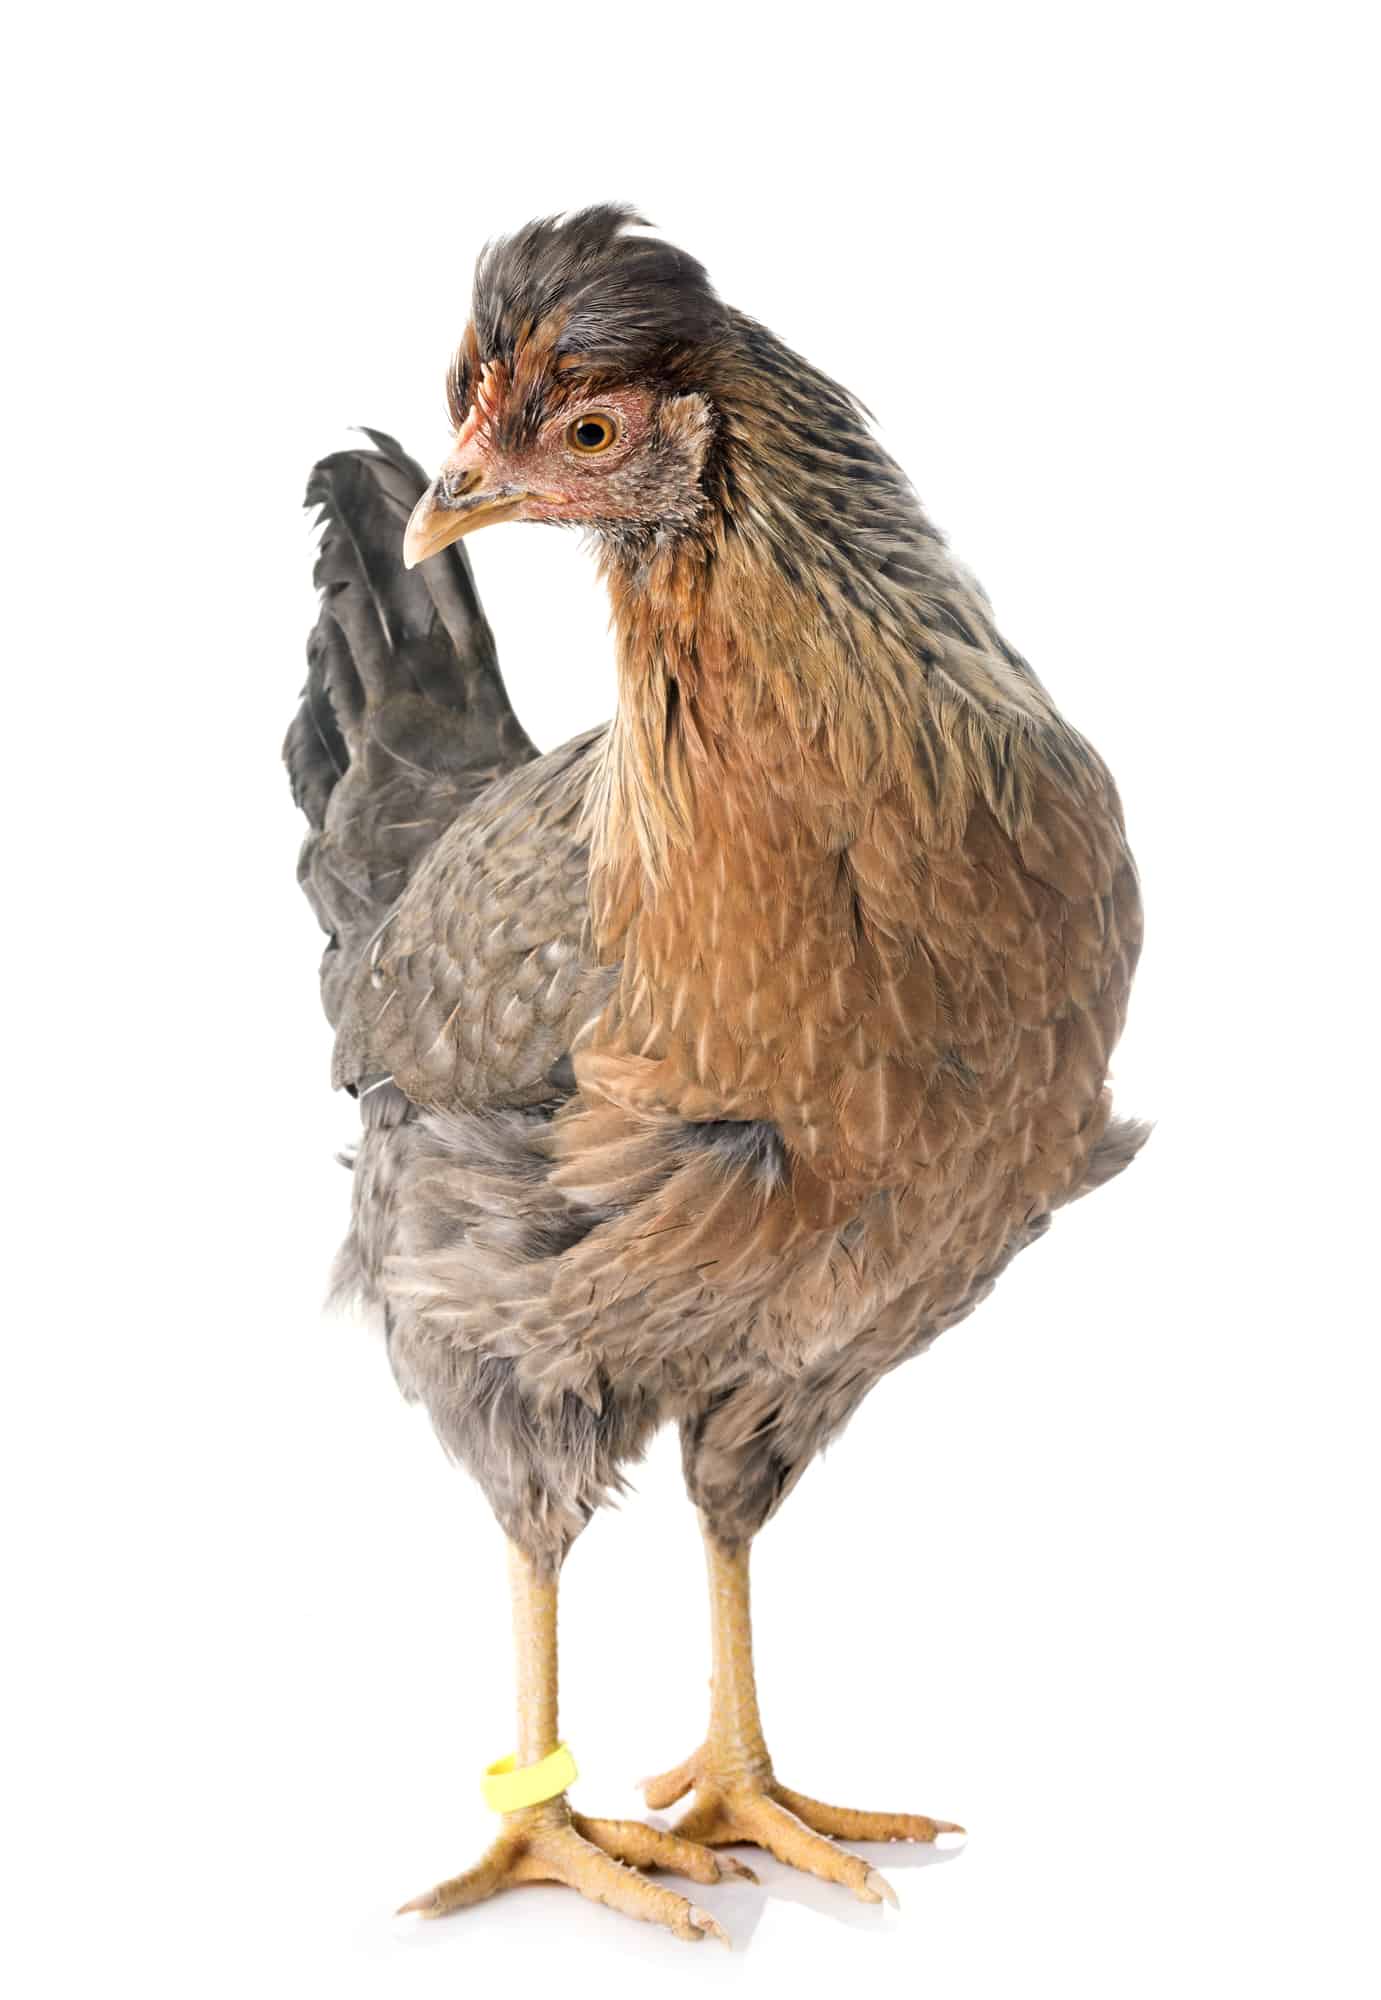
    scooping apple sauce into freezer bags

    Step Three

    If you've picked out your bags it means you've decided, at least mostly, on portion sizes. Now, we like to be very specific when making our portions. It makes doing a pantry challenge a lot easier when you can plan out your meals down to the measuring cup.

    It's much easier than it sounds. The generally recommended serving size for apple sauce is about half a cup. However, when we make ours, unlike the recipe above, we only use cinnamon and very little, if any, sugar. Since it does not have the same caloric punch as most other recipes, we double our portion size to a cup.

    Decide how much you want and use a measuring cup to scoop out your desired portion size. You can also portion it out per meal or group to save on plastic waste and space. A quart size freezer bag can hold about 4 cups while a gallon size freezer bag can hold around 16 cups.

    Step Four

    Once everything is bagged up and ready to freeze, you will want to squeeze as much of the air out of the bag as possible before you close it completely. This will help prevent freezer burn.

    Everything has some kind of moisture in it. When you are freezing something, the moisture makes it's way to the surface of what you are freezing and, through a process called sublimation. The presence of air accelerates this process.

    To keep freezer burn at bay you can:

    • only open the freezer when you need something. Frequent opening and closing will cause the internal temperature to fluctuate which can prolong the freezing process and lead to moisture build up.
    • eat your frozen food before buying more fresh food. The longer something is in the freezer and frozen the more opportunity there is for freezer burn to take effect.
    • decrease the temperature of your freezer so things can freeze quickly and give moisture less time to move to the surface of your food
    • Use containers just large enough for the food to fit and minimize "extra" air space.

    Pro tip: Close the bag most of the way with just a small opening on the end. You can then push the air out more easily.

    Double pro tip: Close the bag just like in Pro tip 1 but instead of squeezing the air out, submerge the bag in water up to the zipper. Be careful not to get water in the actual bag. The pressure of the water is even on all sides of the bag and will squeeze the air out extremely well.

    Step Five

    Finally, it's time to freeze!

    Lay the bags out flat and stack them in your freezer. Stacking and freezing them flat helps make them easier to manage while cutting down on space. Try putting a cookie sheet or even a piece of cardboard down between the bags and the shelf. Non-solids, like milk, half and half, salsa, sauerkraut, and apple sauce will mold to the grate of the freezer shelf as they freeze. Once they completely freeze they will slightly expand which can cause them to become stuck in between the bars.

    Leave them in the freezer over night and give them time to completely freeze. Once they are rock solid, you can move them to a better location if you need to or just leave them where they're at.

    FAQ

    Here are some of the more common questions about freezing apple sauce.

    How long will frozen apple sauce stay good?

    If you freeze your apple sauce, you can store it without it going bad for around 6 months to a year. For best results, follow the process from above and use a chest or deep freezer for longer times.

    Since apple sauce is an organic material, bacteria will still grow in it, unless frozen, and it will eventually go bad. You can extend the life of your apple sauce by keeping it cold in the fridge but that will only slow down the aging process and keep it fresh for a week, maybe two weeks.

    bag of apple sauce laid flat in freezer

    How should I thaw it out?

    The easiest way to defrost or thaw your frozen apples or apple sauce is to pull the bag from the freezer and put it in the fridge. Doing this overnight will usually give you enough time for it to be ready to eat by morning.

    Another, quicker, way to do this is to place it in a bowl and stick that under cool running water. It should not take too long for the apple sauce to thaw enough that you can eat it.

    If you want warm or even hot applesauce, you can thaw it on the stove or in the microwave. On a stovetop, set a burner to low or low-medium and place your frozen apple sauce in a small sauce pan. This method will probably take around 10 minutes, give or take. Just remember to keep an eye on it and stir often so you don't end up with burnt apple sauce.

    The microwave is much faster and less likely to burn. Try heating your applesauce in a microwave safe bowl or pyrex in increments of 10 to 30 seconds, depending on the power and size of your microwave. Each time you heat it, see if it is soft enough to stir. Once it is soft enough to stir, you can take it out or continue to heat it until it is at your desired temperature.

    Can I refreeze it after it's been defrosted?

    You can refreeze if it's absolutely necessary but it isn't the best idea. It will still be safe to eat but it will eventually become freezer burnt and will start to lose quality each subsequent time it is frozen.

    This is one of the reasons that we use smaller portions. That way we know we will eat it and we won't have to decide if it's worth refreezing again.

    What can I use frozen apple sauce for?

    Frozen applesauce can be a good, frozen snack. Instead of long term freezing in baggies, you can put it in ice cube trays with some miniature popsicle sticks and make apple sauce pops.

    Again, freeze them in an ice tray and use them in a glass of water to give it some extra flavor. Just be aware that they will melt pretty quickly in water and you'll end up with a pile of apple sauce at the bottom of your glass.

    We think the best uses for frozen apple sauce are the same as unfrozen. Thaw it out and eat it as a healthy snack or heat it up with some cinnamon, butter, and brown sugar for a (less healthy) dessert.

    Homemade Vs store bought

    Store bought is already in a sealed jar so it does not need to be preserved unless already opened. Homemade will need to either be eaten quickly enough before it goes bad or it will need to be frozen.

    Canning Vs freezing

    We prefer freezing for a couple of reasons. One, it's way easier and faster. Like we mention above, it's essentially scoop, bag, label, freeze. Our second reason does need some explanation.

    Whenever we buy or make apple sauce, we will usually flavor it with some cinnamon but will use very little, if any, sugar. Sugar is often used to sweeten up apple sauce and it is also a large component of canning and preservation. So, since less time and less sugar used are things we strive for, we like to stick with freezing over canning.

    Ziplock Bag Vs Mason Jars

    Mason jars are pretty durable and made to endure extreme temperature changes and a lot of pressure. You can definitely use them to freeze apple sauce, or just about any liquid, puree, or solid food. The downside of using Mason Jars is that they can be expensive and they are pretty bulky; taking up a lot of room in your freezer. The plus for Mason Jars is they are pretty much a one time investment and can be reused for future food preservation.

    Plastic zip lock baggies are what we generally use. While they can be reusable, it is usually difficult to remove frozen apple sauce from them without ripping them. Also, they will sometimes get small tears when your food is freezing and expanding; both scenarios will render them useless. We don't like to use a lot of plastic unnecessarily, but the cost, in both money and space, is just too high to use Mason Jars, in our opinion.

    Can you freeze apple slices?

    If apple sauce isn't your thing, you can also freeze chunks or apple slices. The process is similar to freezing watermelon, freezing cantaloupe, freezing blackberries, freezing blueberries, and freezing raspberries. All you need to do is cut them into slices, after washing and peeling, dip them in water and lemon juice so they don't turn brown from oxidation, and line them on a cookie sheet.

    Put the cookie sheet in the freezer for a few hours and then, once they are starting to freeze, pop them off the cookie sheet and into some freezer safe bags. Apple slices, like apple sauce, will stay good and not lose much quality for around 8 to 12 months or so.

    If you need more help getting your foods frozen, check out the Ultimate Freezing Food Guide for a complete quick start reference so that you can have a well-stocked freezer.

    Access the Ultimate Freezing Food Guide Here

    How To Freeze Carrots

    By MrAnimal Farm

    fresh cut carrots on cutting board

    If you've ever grown a garden and experienced a big harvest, you understand that you develop an attachment to the plants and their crops. So much so that you hate to see anything go to waste, even if you have eaten all you can and given a lot away to friends, family, and neighbors. But, we can put an end to any potential future food waste by learning how to freeze carrots so they never go bad again!

    fresh cut carrots on cutting board

    [ez-toc]

    Can You Freeze Carrots

    Yes, you can freeze carrots that have been cooked in most any way, or if they have been blanched. Carrots, like most vegetables, when frozen will stay good for at least 12 months.

    Some people will tell you freezing carrots is really easy because you don't have to blanch them first. We think those people are wrong. But we can explain.

    We do not disagree that carrots are easy to freeze. That part is true and we will show you exactly how soon. We disagree with the part about blanching...at least most of the time anyway.

    What happens if you don't blanch carrots before freezing?

    So, can you freeze carrots without blanching them first or not? Let's look at an example, shall we?

    Have you ever tried freezing carrots before and they all turned black? If your carrots are turning black when you freeze them, something has gone wrong in the preservation process. When your fruits or veggies turn black it means they have most likely starting to rot or have been for some time. They are not safe to eat and should be disposed of.

    Most often this is caused by freezing without blanching. Many fruits and veggies contain enzymes that allows them to continue aging even when frozen.

    This rule applies to freezing asparagus, freezing peas, freezing zucchini and many other vegetables. Some exceptions to this are when you are freezing ginger and freezing pumpkin.

    Blanching is essentially the same thing as cooking for a short period of time. This cooking is just long enough to destroy those enzymes and makes your carrots prime candidates for freezing.

    So, you can freeze carrots without blanching them first but we do not recommend it unless it is for a very brief period of time.

    Can you freeze a bag of whole or carrot slices?

    We don't recommend freezing a full bag of carrots. You run the risk of ending up with rotten carrots like we mentioned earlier. However, carrots slices are something you can freeze without blanching first (although we still think you should anyway).

    Freezing your carrots as slices would make them perfect for making these Sweet and Smoky Cast Iron Carrots. YUM!

    You'll want to cut your carrots into small slices. We like to use a mandolin slicer so they are all even and the same general width. Then, you follow the same process as when you freeze watermelon, freeze cantaloupe, or freeze raspberries.

    Cover a cookie sheet with aluminum foil or parchment paper and line the carrot slices in a single layer on top. Stick them in the freezer for a few hours. When you check on them, if they are frozen, pop the chips of the cookie sheet and put them in a freezer bag.

    They make a great, easy snack. Just make sure to eat them soon (within a week) or they will start to lose their quality.
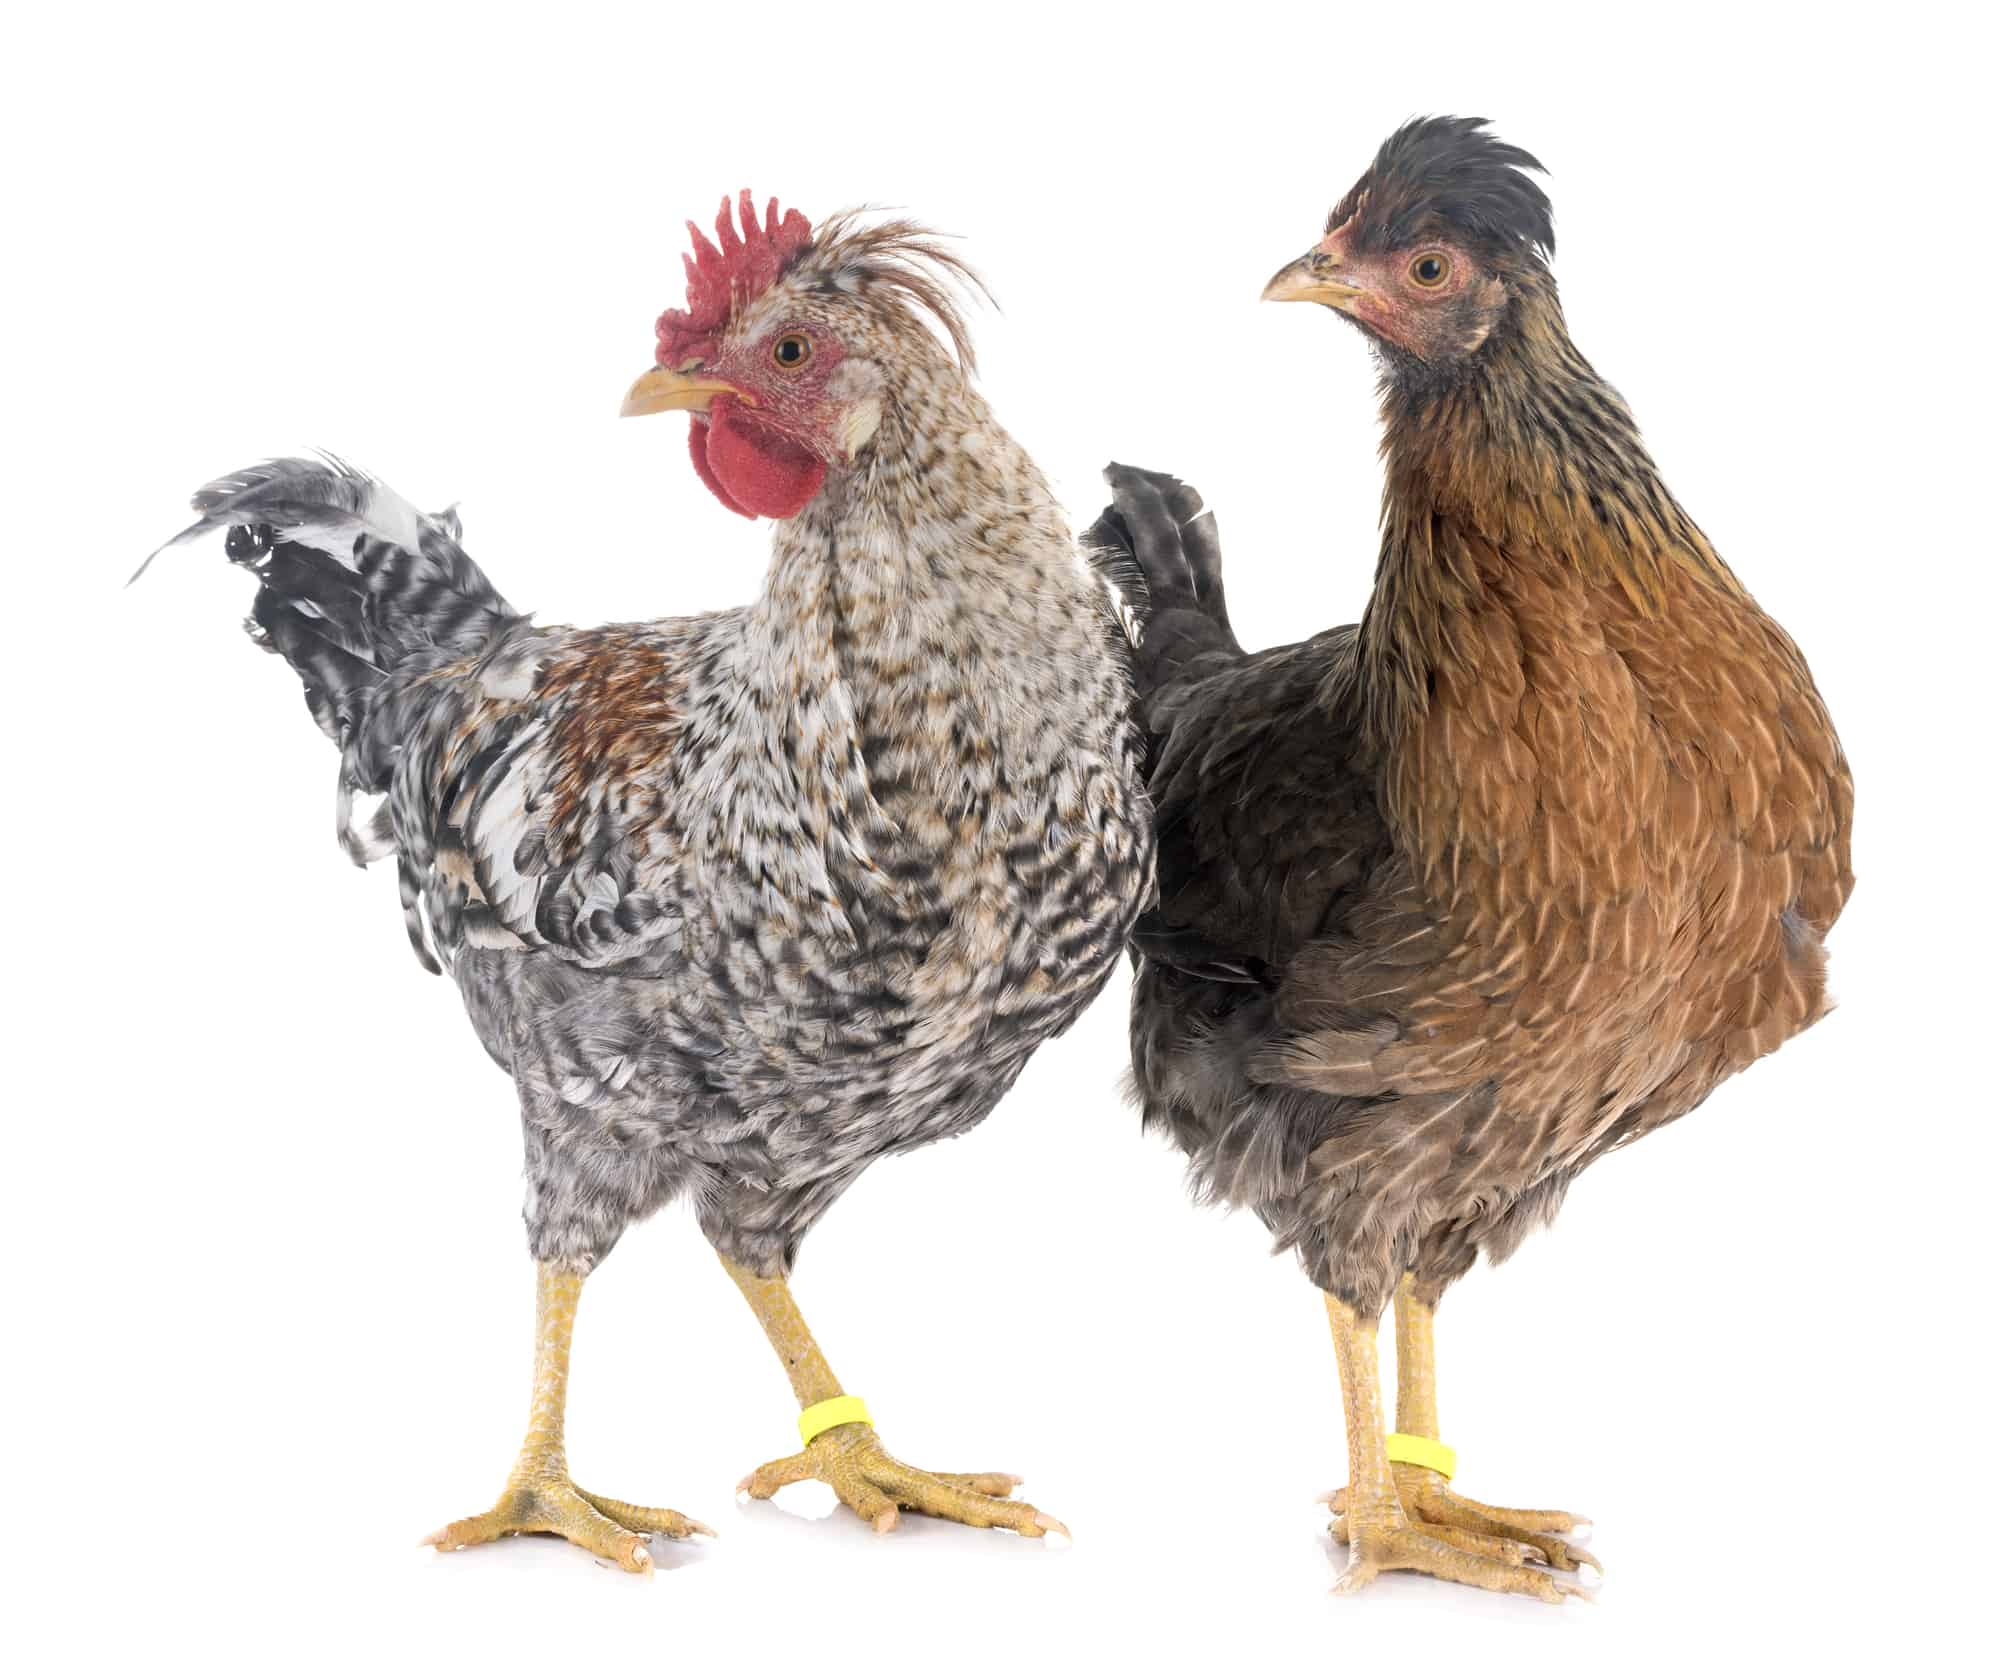
    But, let's get to the best way to freeze carrots.

    Need to get all your food preserved easily? Check out the Ultimate Guide To Freezing Food so that you can fill your freezer without in minimal time.

    Supplies

    You are going to need the following supplies:

    • carrots
    • 2 colanders
    • cookie sheet (for freezing whole)
    • mandolin slicer with protective gloves (for sliced carrots)
    • knife and cutting board (for sliced carrots if no mandolin slicer)
    • kitchen timer
    • freezer bags
    • sharpie or marker

    Freezing Carrots

    Let's learn how to freeze these vision enhancing beauties!

    Step One

    You will want to first wash all of your carrots. Whether they are store bought (where other people are picking them up. Ew!) or from your garden (covered in dirt) they will need to be cleaned. We usually just stick them in a colander and scrub them with our hands or a vegetable cleaning brush.

    Step Two

    Once they are good and clean, it's time to blanche them. First, decide if you are freezing whole carrots, baby carrot cuts, or slices. We don't recommend freezing shredded carrots. The moisture makes them clump together and very difficult to work with when thawed.

    We will move forward as if we are cutting them into slices. For this, like the freezing them raw section says, we like to use a mandolin slicer. Make sure you are safe and wearing your protective gloves (I found out the hard way).

    mandolin slicer

    If you don't have one or prefer to not use a mandolin slicer, you can, of course, always use a good old knife and cutting board.

    Step Three

    Now, it's time to blanch. This is the part that makes sure you can store your carrots for a long time. It's also easy to do, so why not use this method?

    You will want to, first, put on a stock pot of water to boil. While you are waiting, we will get the rest of your blanching supplies together.

    Pull out your second colander or wash the dirt from your first one. Put all of your carrots (or as many as you can fit) into the colander. You will also want to get a large mixing bowl and check to make sure you have plenty of ice.

    Once the water is boiling, lower your colander of carrots (Colander of Carrots would be a terrible name for a Harry Potter book, by the way) into the boiling water. Set a timer for 2 to 5 minutes. How long depends on the amount, size, and thickness of the carrots.

    While your timer is counting down, fill your large mixing bowl ยฝ full of water and then add ice until it is ยพ full. If you are freezing multiple batches of carrots or other produce, it helps to keep a few cups of ice ready to add to the bowl as it melts.

    When the timer goes off, take the colander from the boiling water, carefully, and lower it into the ice bath. The boiling water cooks your carrots long enough to stop the aging enzyme while the ice's rapid cooling stops the cooking process almost immediately.

    Step Four

    You can now start scooping the carrots out of the colander. When you scoop them out, you will want to let them drip dry as much as you can and then lay them on a bed of paper towels. You will want as little moisture as possible when freezing. Too much moisture when the carrots freeze can lead to a soft or even rubbery texture later.

    Follow the same directions from earlier and line all of your carrots on a cookie sheet lined with aluminum foil or parchment paper. Place them in the freezer for a few hours so they can harden.

    frozen carrots

    Once they have started to freeze and are solid, scoop them up and get ready to bag them. We prefer to use a 1 cup measuring cup so we can have premade portions ready to go. We will typically use quart bags but, for larger families, you can easily find gallon freezer bags for full batches.

    Step Five

    freezer bags of frozen carrots

    Once all the bags are full, flatten them out and place them in your freezer. If you are freezing a whole lot of stuff, you may want to consider grabbing a larger chest style freezer. At one point, we were using three of these along with our kitchen freezer.

    Step Five

    That's all there is to freezing carrots. Hopefully, you will never have to watch your beloved garden veggies go bad on the kitchen window sill again.

    If you need more help getting your foods frozen, check out the Ultimate Freezing Food Guide for a complete quick start reference so that you can have a well-stocked freezer.

    Access the Ultimate Freezing Food Guide Here

    How To Freeze Watermelon: The Coolest Summer Treat

    By MrAnimal Farm

    cut watermelon cubes and slices on a plate

    You can freeze watermelon in a couple of different, and easy, ways. Watermelon can be frozen in slices, chunks, cubed, or pureed. It works great as a cold snack and has the texture and consistency of a popsicle so you don't even need to thaw it unless you want to. Pureed frozen watermelon is great for making smoothies or flavoring your water.

    What else can you use frozen watermelon for and how do you freeze it in the first place? Read on to find out!

    cut watermelon cubes and slices on a plate

    [ez-toc]

    How to freeze watermelon?

    Well, even if we, you and I, are the only people who do this we now have a perfect solution for making watermelon last longer. So, you may ask, how do you preserve watermelon?

    As you can probably tell from the title above, we freeze it. But, it isn't just as simple as that (but don't worry, it still easy). You just need to be a bit specific with your freezing method. If you don't know what you're doing, you are going to just throw it in the freezer and pull out a mushy mess.

    We'll cover our two favorite ways on how to freeze watermelon which should cover any situation you may need watermelon for in the future.

    Our two preferred methods to use when freezing watermelon are in chunks or pureed. If you remember our topic on freezing Cantaloupe (or blackberries, blueberries, strawberries, or raspberries), you may remember it is very similar.

    What do you need?

    You are going to need the following supplies:

    • watermelon
    • knife or melon baller
    • cookie sheet (for freezing whole)
    • blender or food processor (for puree)
    • ice cube trays (for puree)
    • freezer bags
    • sharpie or marker

    Freezing slices or cubes

    Now, when we say you can freeze chunks of watermelon, we really mean pieces that are smaller than wedges. So you can freeze slices, cubes, balls, any shape you like. You just want to keep them small enough that they can freeze through relatively quickly. We prefer cube chunks because they are the easiest.

    Need to get all your food preserved easily? Check out the Ultimate Guide To Freezing Food so that you can fill your freezer without in minimal time.

    Step One

    Decide on your desired shape and cut your watermelon into that shape. You will then want to take out a a cookie sheet and cover it with aluminum foil or parchment paper.

    Step Two

    Line the pan with all of your cut pieces of watermelon. Keep them in a single layer and put them in the freezer for a few hours.

    frozen watermelon on baking pan wrapped in foil

    Step Three

    When you go back to check, make sure they are pretty solid, but they don't have to be completely frozen yet. Pull them off of the pan and place them in a large freezer safe ziploc bag.

    Step Four

    Write the contents and date on the outside of the bag and put them back into the freezer. That's all there is to it!

    Watermelon puree

    While researching for this method we say a lot of people asking whether you can puree watermelon and freeze it. Truth is, you can. In fact, out of the two techniques we are discussing today, this is our favorite.

    Step One

    You are going to need to cut your watermelon into smaller pieces. They don't have to be pretty though, just small enough to not gum up the blender or food processor.

    Step Two

    Place all of the watermelon chunks into the blender and fire it up. Let it run until it is completely pulverized. You do not want any solid pieces left at all.

    Step Three

    Pull out an ice cube tray and pour the pureed watermelon from the blender into the trays. Once they are all full, put the ice cube tray into the freezer for a few hours or over night.

    Step Four

    Once enough time has passed, take the tray out of the freezer and simply pop the frozen watermelon puree cubes out. Put them in a labeled (content and date) ziplock freezer bag and stick them back in the freezer.

    What to do with frozen watermelon

    So, watermelon is not featured in a wide variety of recipes. hat's probably because it is so good on its own. What we like to do with our frozen watermelon is treat it as a healthy snack. Grab a handful of these on the way to the couch to watch TV and you can avoid the handful of chips or candy.

    You can also use the chunks instead of ice cubes in your drink. They will give a glass of water a fruit juice infused flavor without spending grocery store prices on "fruit-infused" drinks that cost a fortune and are packed with sugar and preservatives.

    But our favorite is using watermelon pureed ice cubes and using them to make smoothies. The consistency of pureed watermelon is already like a smoothie and it blends so seamlessly with a wide variety of other smoothie fruits, veggies, and even some protein powders.

    Frequently Asked Questions

    Here are a few common questions about freezing watermelon.

    Is it OK to put watermelon in the fridge? How long is watermelon good in fridge? Can you chill a watermelon in the freezer?

    It is okay to put watermelon in the fridge. The fridge is a great place to protect your watermelon from pests and/or to avoid ending up with ants or some other creepy crawlies on your counter. However, be warned, low temperatures actually cause melons to go bad faster; usually within 3 to 4 days!

    That is for cut watermelon; chunks, slices, wedges, you get the idea. An uncut watermelon will last, at the absolute maximum, for maybe 3 weeks. Buuuuuut, uncut melons can harbour bacteria inside which is no bueno.

    Now, watermelon put in the freezer, whether chunks, slices, or puree, will last up to a year (8-12 months) and runs a much, much, MUUUCH, lower risk of any nasty bacterias growing on it.

    If you are planning on eating it very soon and you just want to get it cold before hand, you can chill a watermelon in the fridge or freezer with no risk of it rotting or making you sick (unless you eat the entire watermelon yourselfโ€ฆwhich is probably not a bacterial sicknessโ€ฆnevermind).

    Of course, if you are unsure about anything food related, you can always follow FDA.org guidelines to be safe.

    freezer bags of frozen watermelon in front of baking pan wrapped in foil

    How do you defrost frozen watermelon?

    You can usually just eat the watermelon straight from the freezer; especially if it's pureed. Watermelon is so easy to break apart already that, even when frozen, it is not very difficult to chew. But, if you want to thaw it first anyway, stick it in the fridge over night or run it under some cool water for a minute or so.

    If you need more help getting your foods frozen, check out the Ultimate Freezing Food Guide for a complete quick start reference so that you can have a well-stocked freezer.

    Access the Ultimate Freezing Food Guide Here

    How To Freeze Blackberries

    By MrAnimal Farm

    frozen blackberries on baking pan wrapped in foil

    We love fresh fruit! And we assume since you are here, you do too! We always end up growing more blackberries than we intend to because we over plant to begin with. Since we always end up with a huge harvest, we decided we needed to learn how to freeze blackberries.

    frozen blackberries on baking pan wrapped in foil

    Can You Freeze Blackberries?

    Yes, you can easily freeze blackberries. Simply wash them, lay them in a single layer on a baking sheet to flash freeze them. Then, once frozen, you can put them into freezer bags for long term storage.

    Blackberries are fantastic! They are delicious on their own, but you can also make jams out of them, put them in pie, in blackberry iced tea, or put them in a delicious fruit smoothie.

    Freezing blackberries is very similar to freezing other fruits like freezing cherries, freezing grapes, freezing blueberries and freezing raspberries. Just follow the steps below.

    How to freeze blackberries

    Step One

    After growing blackberries, when we harvest them, the first thing we do is washed them, especially if we're going to preserve them. Now, do you have to wash fresh blackberries before freezing? You don't have to, but you probably don't want to preserve all of the dirt and nasty stuff that can accumulate while being outside.

    What we typically do is pile all of our blackberries into a metal colander in the sink, and then just rinse them with a steady stream of cool water.

    Make sure you work you hands through all.of the blackberries and allow the water to wash over everything. This will make sure all of the dirt, bug stuff, or anything else from outdoors is washed off.

    Step Two

    After you've washed all of your blackberries and you feel like they're clean enough, you will want to give them time to dry. You can just leave them in the colander and make sure it is elevated to allow airflow to go through the holes.

    Once they are dry, you'll want to take a 9 x 13 baking pan and arrange them in a single layer. You don't need to cut them or anything. You can freeze whole blackberries.

    Put them into your freezer and allow them to freeze overnight. It should really only take a couple of hours, but if you do it overnight you won't feel the need to check on them every hour or so.

    frozen berries in bowl

    Step Three

    Now that you had a good night's rest, your blackberries should be completely frozen. Take the cookie sheet out of the freezer.

    Now you want to transfer all of your blackberries from your cookie sheets into quart size freezer bags. We like to measure them out a cup at a time. That allows us to keep decent portions and we know how much we're eating and how much we still have left. This information is important if you are ever doing a pantry inventory or taking the pantry challenge.

    If you are freezing a lot of blackberries all at one time, you can use gallon size freezer bag. It is important to use bags designed for the freezer. They're much better at keeping moisture out of the bag and avoiding frostbite.

    Need to get all your food preserved easily? Check out the Ultimate Guide To Freezing Food so that you can fill your freezer without in minimal time.

    Common Questions

    Here are some of the most frequently asked questions we have come across on this subject.

    "How long will my blackberries last in freezer?"

    Blackberries will freeze for up to 6 months without losing quality. When you're ready to eat them, take out a frozen portion and set them in a bowl of cold water until they are soft enough to eat. You may need to change out the water a time or two depending on how many blackberries you are thawing.
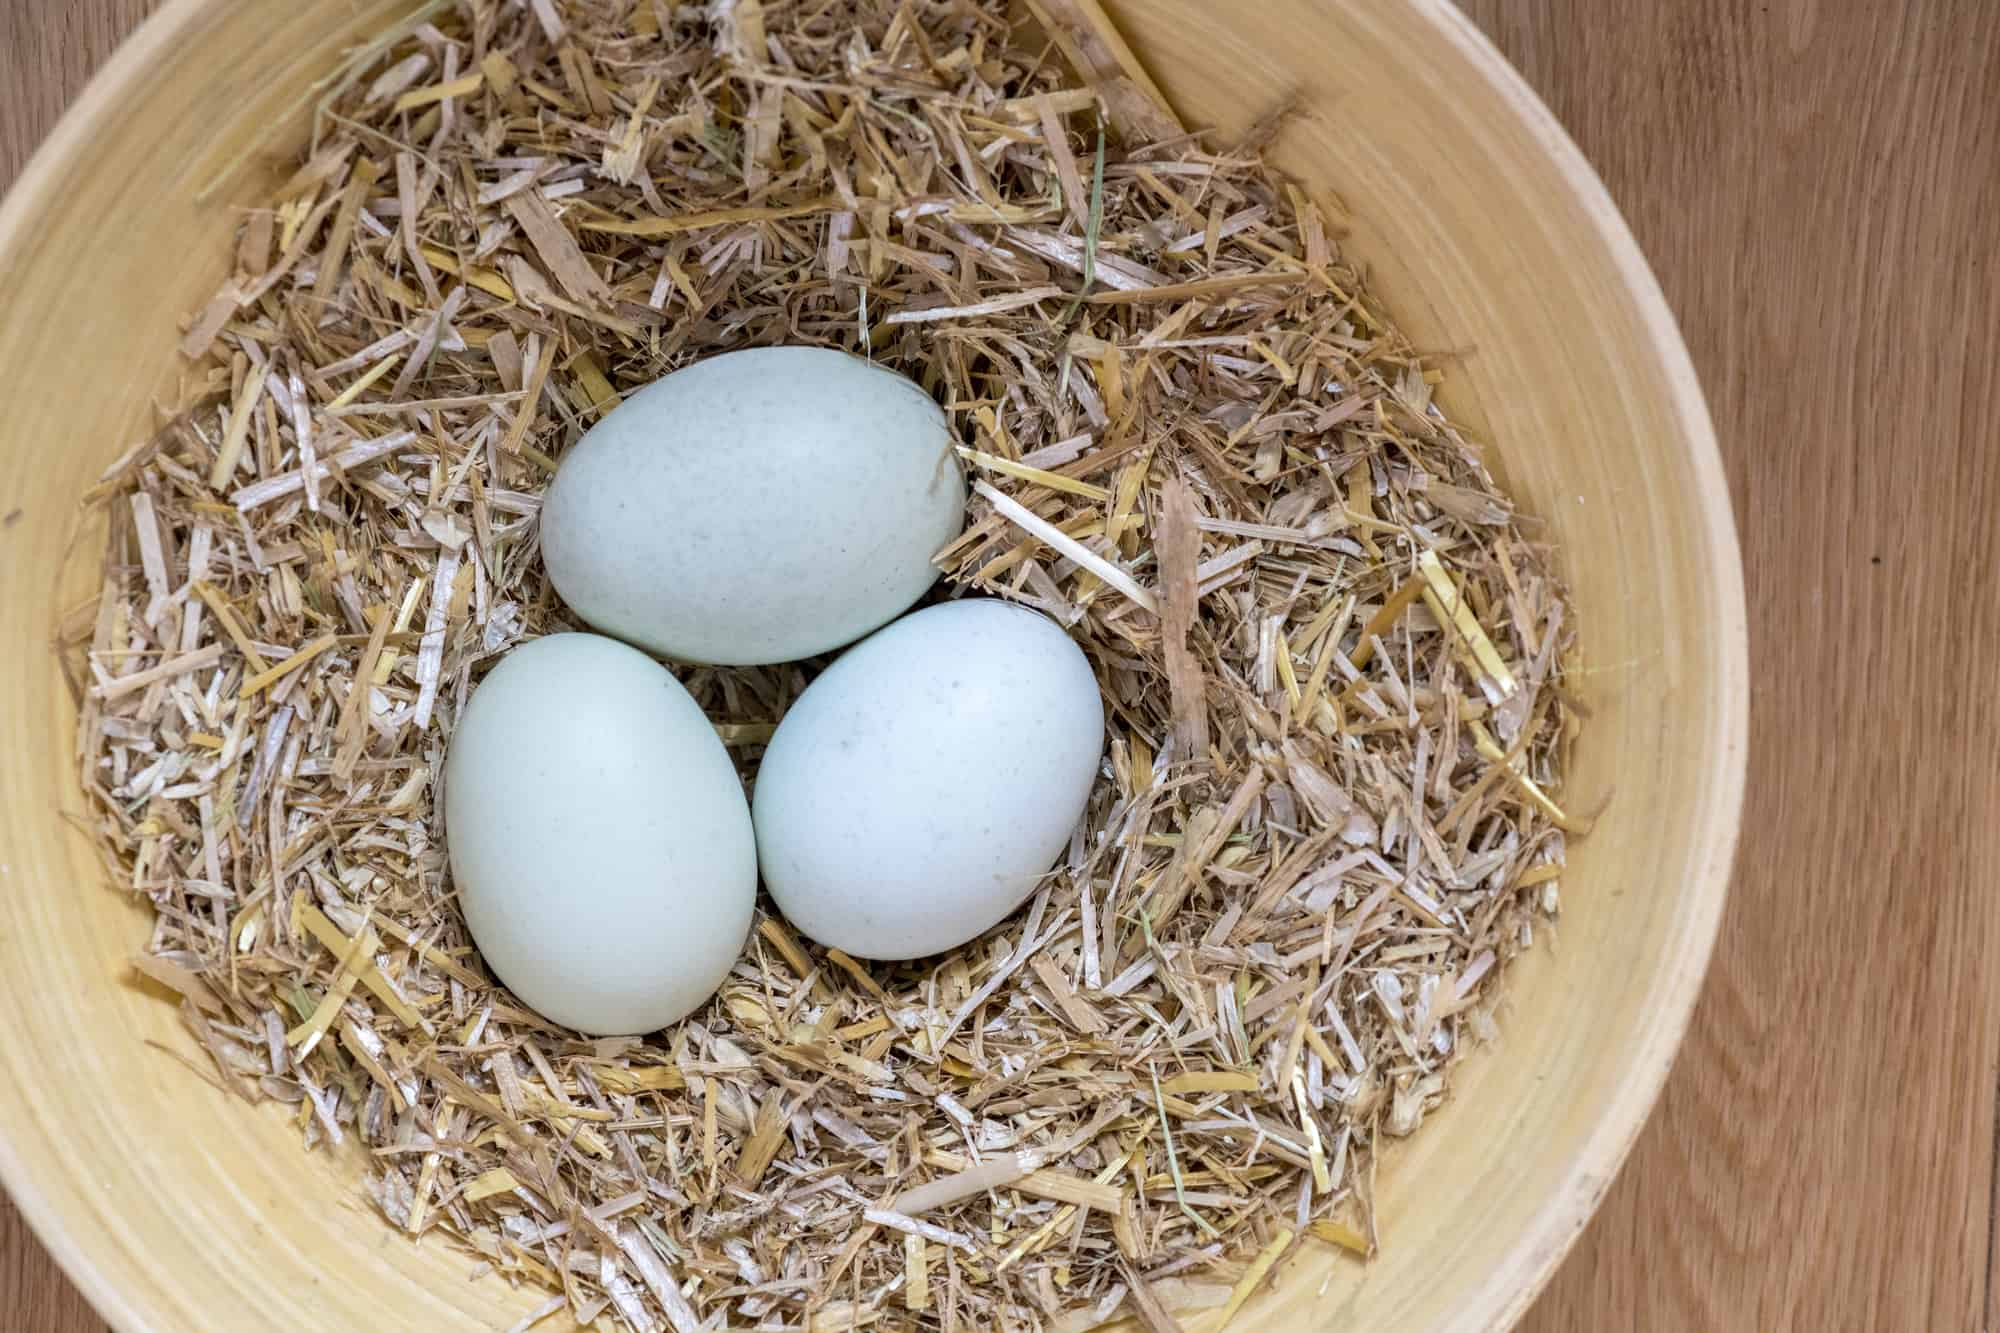
    "Should I wash blackberries before freezing to keep mold or other things from growing on them?"

    It depends on the type of berry. As a general rule, you are going to want to wash anything that comes from outside before you freeze and preserve it. Look at it this way, if you are preserving the food without washing it you are also preserving whatever dirt, microorganisms, and other random nasty outside/bug stuff, as well.

    You may even want to try a quick vinegar bath (3:1 cups ratio water:vinegar) and rinse prior to freezing to kill off any potential mold growth. Or, if you don't like vinegar you can dunk them in hot water (120ยฐ+) for around 30 to 45 seconds.

    A notable berry exception is the blueberry. Blueberries naturally have a wax over them that protects them. You can just freeze them. However, you will want to rinse them once you thaw and eat them.

    "Won't freezing destroy the antioxidants?"

    Freezing will not destroy antioxidants in any fruits or veggies. In fact, some studies show that freezing, or even just refrigerating, berries, fruits, and veggies can INCREASE their nutritional value; including antioxidants.

    "Why are my blackberries turning red after I freeze them?"

    Brace yourself, we're about to get all sciencey (is that a word?)!

    This phenomenon is known as "red cell regression". Essentially, sudden changes to a berry's environment, particularly temperature, will lead to a chemical reaction that causes an otherwise black colored blackberry to revert back to a shade of red.

    Research still continues on the exact chemical reaction but is not completely understood yet.

    The best way can avoid having your blackberries turn red is to make sure they do not experience any drastic temperature changes in a short period of time. Some good practices to follow are:
    โ— harvesting in the morning while the berries are still a lower temperature.
    โ— setting up a shade prior to picking them if you are not able to harvest in the morning.
    โ— cooling your berries in stages; like full sun to shade, shad to inside, inside room temperature to refrigerator, and finally, refrigerator to freezer.

    "Ok, they're frozen. Now, how do I defrost frozen blackberries later?"

    You may be asking yourself, "how do you unfreeze blackberries without them getting mushy?". The answer is not in how you freeze them, but in how you defrost them. A simple way to do this is to take a portion of berries and put them in a bowl on the counter top. Fill that bowl with cold water and leave them sitting for just a couple of minutes.

    Come back and check on the berries and see if they have defrosted. If they are still frozen, replace the water with fresh cold water and repeat the process until your berries are defrosted but still firm.

    If you do this too long, the berries can then start to retain some of that water and soak it in, and then they will become mushy.

    If you need more help getting your foods frozen, check out the Ultimate Freezing Food Guide for a complete quick start reference so that you can have a well-stocked freezer.

    Access the Ultimate Freezing Food Guide Here
    pinterest image of heart shaped bowl filled with frozen blackberries. text reads, "how to freeze blackberries at home"

    Bresse Chickens

    By MrAnimal Farm

    Have you heard of the queen chicken? The Bresse is known for its fantastic meat; often claimed to be far superior to your standard market bird. Bresse chickens can cost a few hundred dollars to purchase and are hard to come by. 

    Bresse chickens are large-framed birds with a unique history! They were created in a region of France called Bresse by cross-breeding some unknown breeds. The meat from these chickens has a distinct and fantastic taste, so the farmers wanted to continue this breed. 

    Because they are so unique, for a chicken to be considered a true Bresse, they MUST come from the โ€œhistoric region and former province of Bresse, in eastern France.โ€ They are relatively new to the United States, making their appearance in 2011. Bresse chickens in America are called the American Bresse. 

    The Bresse chicken has four varieties: white, blue, black, and gray. The white is the most common and typically weighs around 6 pounds. The other three kinds tend to be smaller in size. All four varieties have bright red combs and blue legs and feet.

    Bresse chickens are known for their light, thin bones and thin skin, which is one of the things that makes their meat so tasty! They are good layers, averaging around 250 eggs per year. 

    Bresse chickens are unique to French culture, but should you add them to your flock? Read on to learn more about this unique breed and see if they would make a great fit into your flock!

    Bresse Chickens

    SizeWhite:6 pounds or more; other varieties: 5 pounds
    Classlarge
    ColorWhite, black, gray, blue
    TemperamentNervous but no sign of aggression
    HardinessCold hardy
    Eggs/Yr250
    Egg Sizemedium
    Egg ColorCreamy white

    [ez-toc]

    History & Origin

    The Bresse chicken is originally from an area called Bresse in Eastern France. The breed dates back over 500 years. They were created by cross-breeding two different kinds of chickens, that are unknown, to create the Bresse. The farmers then used breed selection to keep this breed pure and unchanging due to the amazing meat quality. Cross-breeding with other breeds changes the meat taste and integrity. 
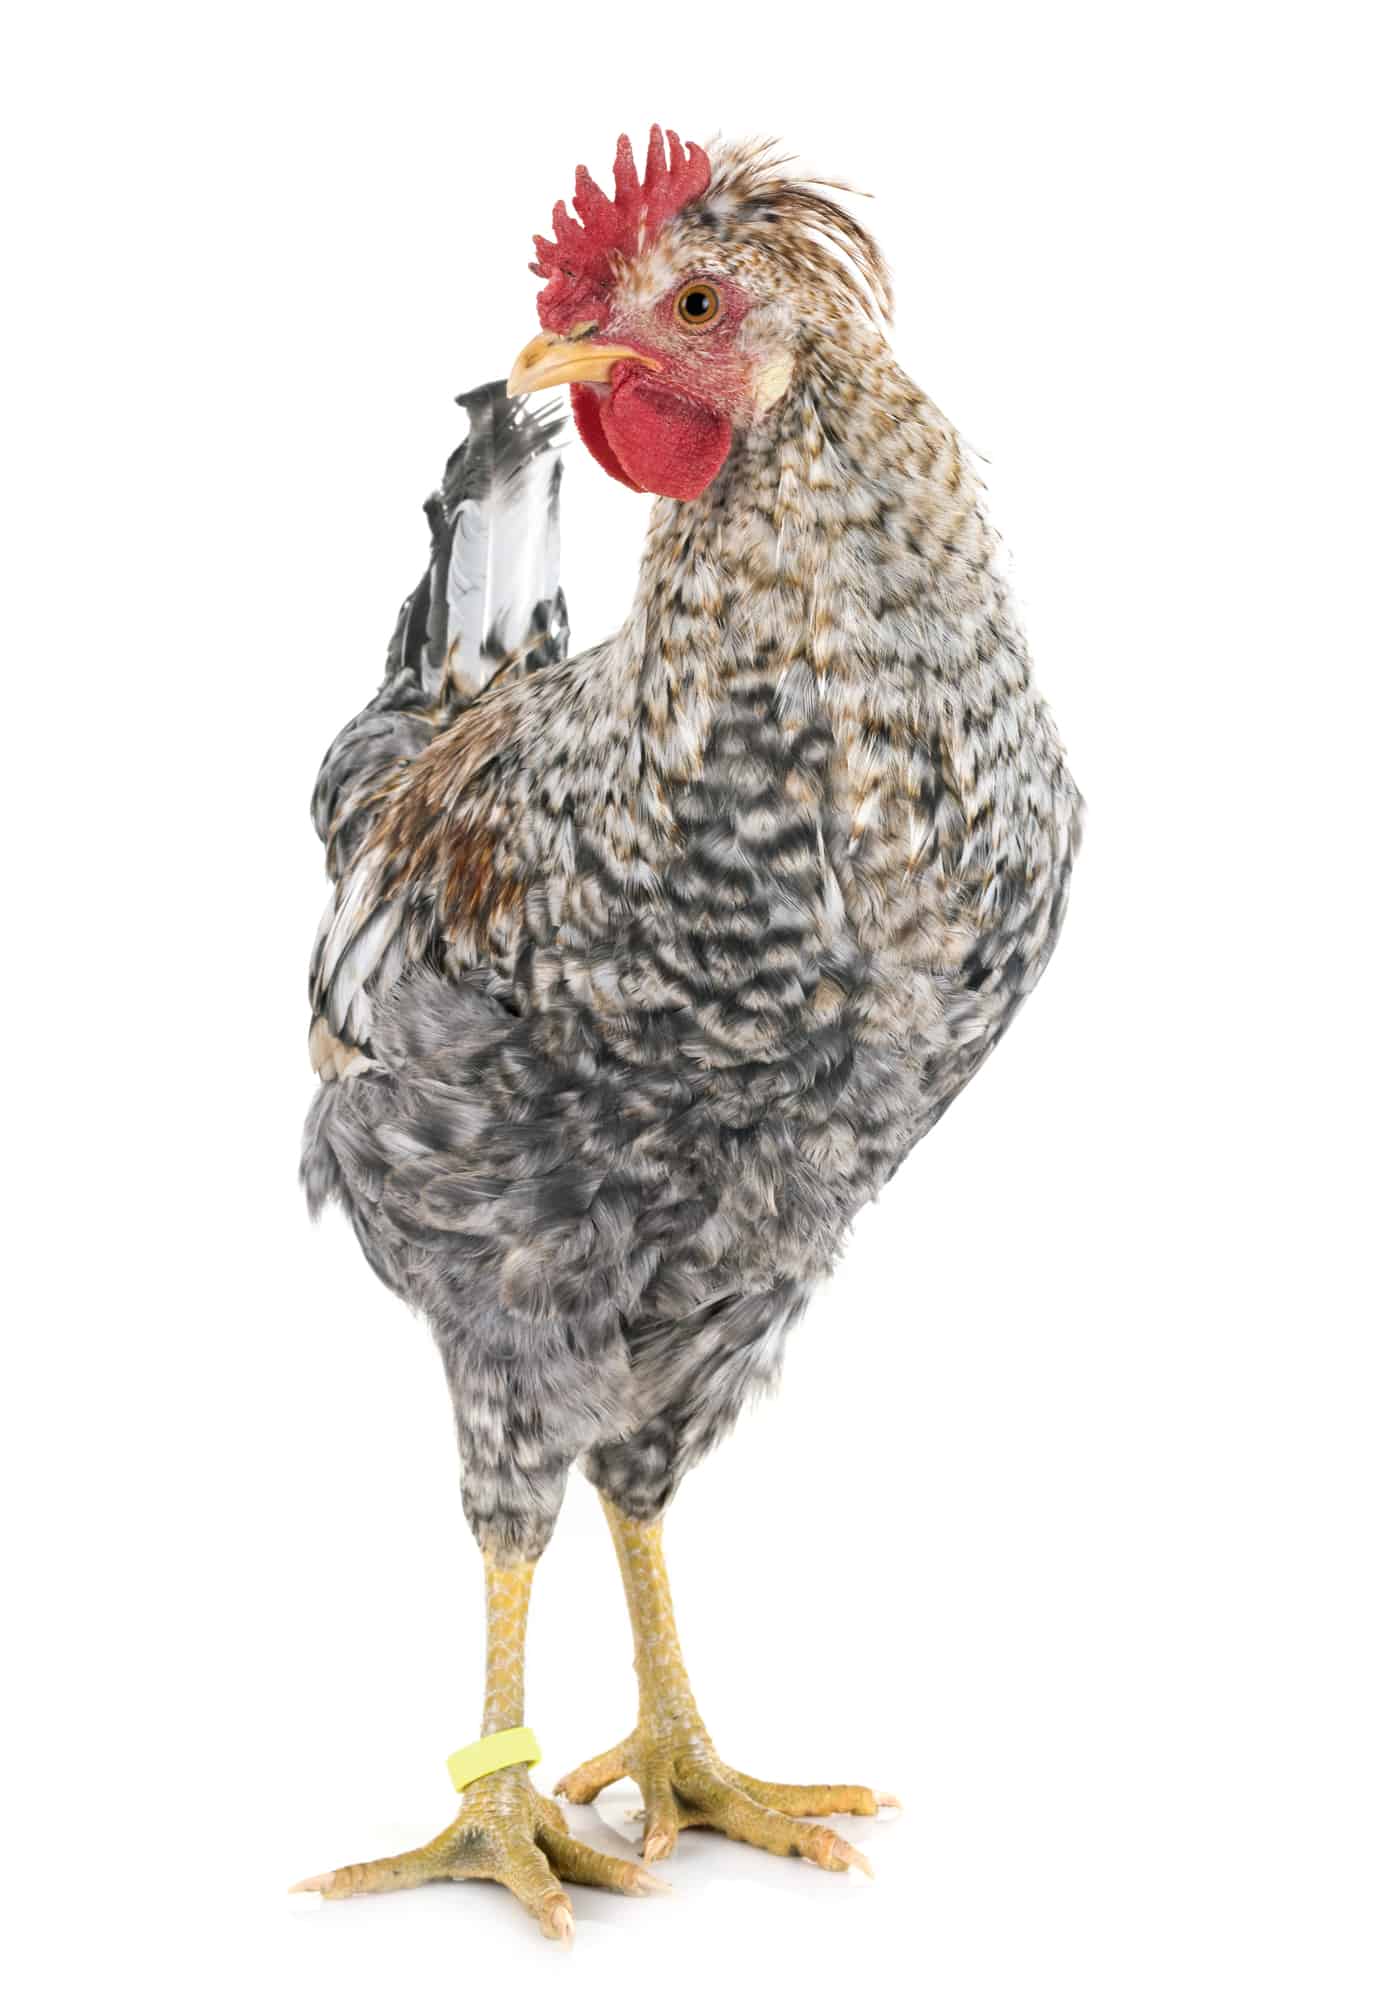
    It's a widespread understanding, if you donโ€™t get a Bresse from the Bresse region of France, you donโ€™t actually have a Bresse chicken. With that being said, you can find Bresse chickens in America but they are known as the American Bresse. 
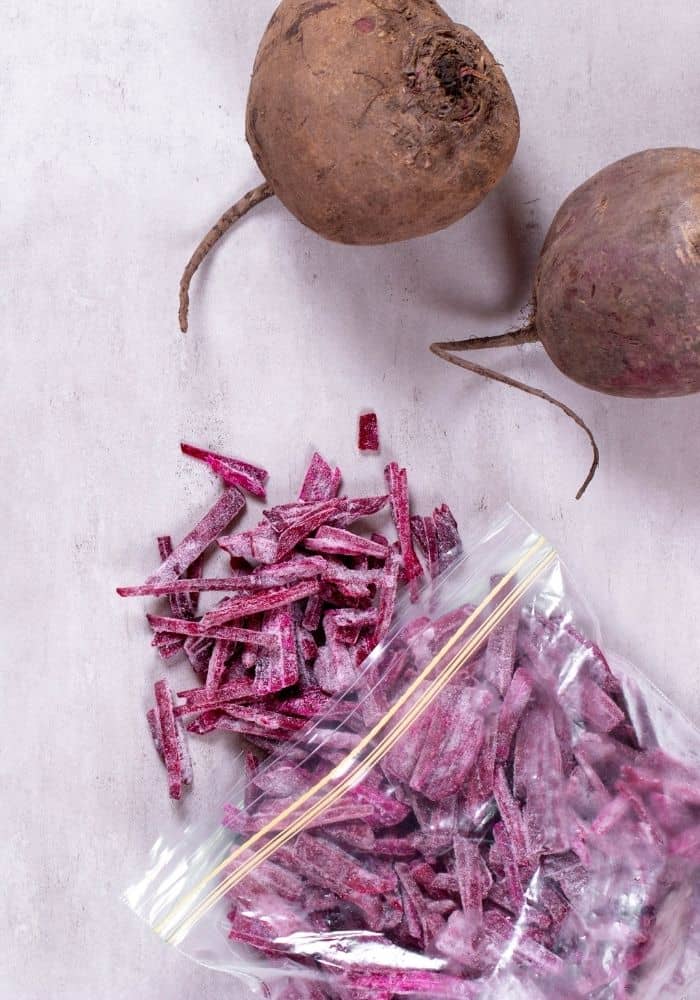
    What do they look like?

    The Bresse comes in four varieties: black, white, blue, and gray. White is the most common color. They all have a bright red single comb and blue legs and feet. The white Bresses are known for having bright white feathers. Some claim this is to represent the French flag with their red, white, and blue colorings. 

    The white Bresses weigh around 6 pounds or more, and the other varieties are smaller, weighing around 5 pounds.

    Need some help keeping your chickens health and care taken care of? Check out the Organized Chicken Keeper for an easy to follow system.

    Breed Standards

    The APA does not accept this breed, so there are no set breed standards to speak of. This means that they cannot be shown at APA chicken shows.

    Temperament

    The Bresse chicken tends to be a nervous bird. Similar to Red Rangers, they donโ€™t like to be confined and prefer to be in large pastures or free-roaming. Bresse chickens are social birds that like a large flock. They prefer little human interaction but are not generally aggressive. 

    While they may not be aggressive, they are still not the breed for a family bird. They are very independent and wonโ€™t tolerate being held and loved on by little kids. 

    What is their purpose?

    They are most known for their meat. It has a much thinner skin and lighter bones than regular chickens. Bresse chickens have a unique way to metabolize feed that makes their meat different. Their meat marbles similar to beef, so there are fat pockets throughout.

    In France, they are fed a diet of corn and foliage and then finished on a diet of milk and corn. Because they are so rare and special in France, they are actually under protection by the French government. They are the only chicken in the world with government protection. 

    Care and Health

    Bresse chickens do not have any known health problems that are particular to their breed. Although, they can get broken bones more easily since their bone density is more delicate than your average layer. They donโ€™t like to be cooped up and will flourish in a large pasture or roaming free in your yard.

    They want to forage and are happiest when they are left alone. Being confined for too long may cause personality changes and should be avoided with this breed. They require a lot of space and will eat more feed than your typical egg laying hen.

    If you are raising them for meat consumption, there are some diet guidelines to ensure the meat is the best! Start the chicks on corn, then move them to foraging for a few months. Once they hit the 3-4 month range, switch them to corn and dairy for the final step.

    FAQ

    Why is Bresse chicken so expensive?

    Bresse chickens are so expensive because of the unique genetic breeding for their delicious meat. To be an authentic Bresse chicken, it must come from the Bresse region of France and be eaten locally. The bird is also butchered on the same farm it was raised. This causes less stress on the bird, meaning a more tender meat. 

    There are Bresse chickens in America and they are called the American Bresse. You can get excellent meat from them, especially if you follow a diet similar to the French diet they are provided. You will have to find a speciality breeder to find a Bresse chicken, as they are not very common. 

    What is special about Bresse chicken?

    Bresse chickens have a delicate skin that is much thinner than your average chicken. Their bones are lighter, as well. The third thing that makes Bresse chickensโ€™ meat so special is that their meat marbles in the final stages of development. 

    Marbling in meat is when there are pockets of fat throughout the meat, not just on the outside. This is typically a trait in red meats, but the Bresse chicken is an exception. 

    Why is Bresse chicken so good?

    The meat has a distinct taste that is succulent and tender. This is due to the chicken being able to metabolize its diet differently than traditional chicken breeds. 

    The French also follow an uncommon butchering process. They wrap the meat tightly in a cloth bag with the head out of the opening. This preserves the meat and puts pressure on the fat to more evenly distribute throughout the meat. 

    What does Bresse chicken taste like?

    The flavor of the Bresse meat is quite different from commercial chicken. It is a succulent meat with intense flavor. 

    โ€œThe breast is on the large side, its juicy flavor a million miles away from supermarket blandness. The white meat is soft but firm, under a thin, brown-seared skin that lacks excessive fat.โ€ John Malathronas

    At what age do Bresse chickens lay eggs?

    Bresse hens will start laying around 4.5 months. When a chicken will start laying eggs depends on the breeds. Timing for this breed is around one month before other chicken breeds. If a Bresse hen is healthy and well-nourished, she can lay up to 250 eggs a year.ย 

    The breed is a seasonal layer, which means they will stop laying in the winter months; typically between December and February.

    Are Bresse chickens broody?

    Bresse chickens are not broody hens. 

    How much do Bresse chickens cost?

    Bresse chickens are going to be on the expensive side. There arenโ€™t a lot of breeders around and you may have to find a specialty breeder. Their prices can vary but you can typically find hatching eggs around $10, day old chicks around $30, and a breeding pair around $200. 

    As you can see, Bresse chickens are a special bird with an interesting history. The main takeaway is they like large open spaces, have fantastic meat, and would prefer to be in a large flock. And are relatively easy additions as long as you follow the steps on how to introduce new chickens.

    If you need more help with taking care of your chickens, check out The Organized Chicken Keeper for a complete system for managing their health through keeping their supplies stocked and coop clean.

    Access The Organized Chicken Keeper Here

    Red Ranger Chickens

    By MrAnimal Farm

    Are you looking for a two-in-one, dual purpose chicken? These Red Ranger Chickens might be exactly what your farm needs as they can lay eggs and provide you with good meat.ย 

    Red Rangers are a good-sized, broiler chicken mainly used for meat and can also supply a decent amount of eggs. They make a good in between of the fast growing typical meat birds like Cornish cross and the slower growing dual purpose birds.

    While there isnโ€™t much information on where they come from and how exactly they are bred, these chickens can roam around just about any farm and can offer a lot more than one might think. These chickens tend to do better with a free-range and are extremely easy to manage and care for. 

    Are these Red Ranger hybrid birds perfect for your farm? Read on to learn all about their kind temperament, where they came from, and how to care for these big meaty chickens to determine if these are going to be your next addition to your farm! 

    Red Ranger Chickens

    Size4-6 Pounds at 12-14 weeks
    ClassRed Broiler
    ColorLight Brown
    TemperamentEasy Going
    HardinessHeat and Cold
    Eggs/Yr170
    Egg SizeMedium to Large
    Egg ColorLight Brown

    [ez-toc]

    History & Origin

    Because this is a hybrid breed (like red star chickens are), there isnโ€™t a ton of information on their history. No one really knows where these birds come from and their exact origins. The poultry industry wanted a fast-growing chicken that could also lay eggs.

    But, they wanted these chickens to be able to withstand the quicker growth rate, unlike other meat birds. The Cornish Crosses tend to have weaker legs, so they made sure the Red Rangers were healthier. 

    It is said that Red Rangers are a cross of meat birds such as the Delawares and Cornish Crosses along with crosses of egg chickens such as New Hampshire chickens and Rhode Island Reds. If you are looking for a breed with a strong, well-known heritage to breed your own chickens, Red Rangers are probably not the right fit for you.ย 

    Many wanted a meat chicken that they didnโ€™t have to wait six months before they could butcher. They wanted chickens that grow faster but also had the body able to withstand the quicker growth. After breeding a variety of chickens, the Red Ranger was born! 

    What Do They Look Like?

    Since there isnโ€™t much information, these birds donโ€™t have a usual standard like other chickens. There is no recognized official standard at all. Often they get confused with other Rangers and broiler birds. 

    Red Rangers are often mistaken for Freedom Rangers, Rainbow Rangers, Dixie Rangers, amongst many others. They all are very similar, and the main differences are their trademarked names. Each of these hybrid chickens were developed by different hatcheries essentially trying to fulfill the same goal of a broiler bird that grows quickly, healthy, and is a good layer. 

    You can usually spot them with their red plumage and lighter brown bodies. They are red like their name states, but not a deep red like a Rhode Island Red, but rather a honey brown-red color. These chickens are around the same size as other broiler breeds. Usually, at 12-14 weeks, they will be an average of 4-6 pounds. 

    One of the main reasons for a hybrid breed was to make the Red Rangers legs stronger and live longer lives. Thus, these chickens have strong yellow legs and feet that are very thick. There are black highlights on the wings and tails. 

    Their bodies are usually rectangular, and their chests are smaller than most broiler breeds. Due to this, they do have less breast meat than other meat chickens. If you love breast meat, you wonโ€™t find it with Red Rangers. 

    Need some help keeping your chickens health and care taken care of? Check out the Organized Chicken Keeper for an easy to follow system.

    Temperament

    Red Ranger Chickens are very independent and act just like a chicken! They tend to be happiest when they can roam free. Because they are so active and have more energy than most birds, they do not do well when they are in a small pen. Due to their independence, you will see these chickens have more survival instincts and can be out and about without getting hurt. Their colors also help to protect and camouflage them as well. 

    That being said, they are bigger chickens, so if they live a long time, they will get slower, making it harder to fight off predators. If you plan to keep them around for a while, when your Red Rangers start to get older, be sure to watch out for hawks or coyotes, just in case. You may consider getting a livestock protection animal, like a Karakachan (just be sure they are trained as a puppy to not chase chickens).

    Most often Red Rangers are not very aggressive. They are best off when they are in smaller flocks. While temperaments can vary to a certain degree, usually, these chickens are happy and carefree. Many feel like these birds are some of the kindest, happiest chickens to raise! 

    Red Rangers are not known to be broody at all. They cannot breed true with their hybrid genes, so it works out great! 

    What Is Their Purpose?

    These chickens are mainly used for fast-growing meat. They are ready at somewhere between 12 to 14 weeks to be butchered. Even though these chickens are made primarily for meat, they can also lay a good amount of eggs, averaging 170 per year. 

    They can begin to lay eggs at 16 weeks. If you butcher before 16 weeks, you will not get any eggs. However, they can live a long time, so if you want eggs along with meat, simply wait to butcher after the 16-week mark to get the best of both worlds. 

    Because they like to roam, many organic, free-ranging, or pasture raising farms love to use Red Rangers. You can also use chicken tractors (mobile coops) if you do not have enough space to let them roam freely. 

    Because of their incredibly kind temperament, many like to keep these around longer as pets. But, you know we do not advocate eating our pets so if you go this route you will only be getting eggs and a bit of love from them.

    Care and Health

    Because these chickens are so independent, it is rather easy to care for them. You wonโ€™t have to worry too much about them, as long as they have a large area to roam and be free. You will also be able to save more money without buying them as much food as they can survive as long as they have sufficient land. This means the cost to feed these chickens is much less than average.

    However, many like to buy feed (or make fermented feed) to provide extra just in case. If you want your chickens to provide a lot of eggs and give you good meat, make sure they have plenty to feed off of. Their feed needs to have a lot of protein as well. 

    Due to them being a hybrid, you also wonโ€™t have to worry about having many health issues. This is because they were made to grow at a slower and thus healthier speed, unlike other broilers. Many broilers die because their bodies cannot handle that fast growth. The Red Ranger, however, was bred specifically to help avoid this fate.

    FAQ

    Do Red Ranger chickens lay eggs?

    Yes! Red Rangers do lay eggs. Although their primary purpose is for meat, they can average around 170 eggs per year, or 3-4 a week. If you are looking for a chicken to lay eggs primarily, Red Rangers probably arenโ€™t the best fit for you. 

    What country did the Red Ranger chicken originate from?

    There is not much information on where Red Rangers came from. They are a hybrid chicken, making it hard to determine exactly what they are and where they originated. 

    How fast do Red Ranger Chickens grow?

    These chickens were made to grow at a slower rate to help their bodies be able to keep up and stay healthy. Some Red Rangers have been able to live to two years old without having any health issues. 

    However, you can butcher these chickens between 12-14 weeks. Typically they will be between 4-6 pounds during that time period. You can wait longer and enjoy the eggs as well. 

    How long do Ranger Chickens live?

    Some Red Rangers are known to live around 2 years. This is mainly because they have such great survival skills and were bred to keep them healthy and strong. However, some state they can live further than that, up to 6 years. It really depends on how long you want to raise and feed them. The better care you give them, the longer they can live. 

    What two breeds make a Red Ranger Chicken?

    It is unknown what breeds make a Red Ranger Chicken. Many believe it is a cross between New Hampshires, Delawares, Cornish Crosses, and Rhode Island Reds. The Poultry Industry probably chose the best meat birds and egg-laying birds to provide a healthy, good-quality chicken. 

    Can you breed Red Rangers?

    You cannot truly breed Red Rangers. This is mainly because they are already hybrid birds, so they wonโ€™t be true Red Rangers when you breed them. You will see different features from a variety of chickens instead. Youโ€™ll never know what you will get!  

    If you want more value or a two-in-one kind of deal, a Red Ranger may just be the perfect chicken for your farm! 

    If you need more help with taking care of your chickens, check out The Organized Chicken Keeper for a complete system for managing their health through keeping their supplies stocked and coop clean.

    Access The Organized Chicken Keeper Here

    Can You Freeze Kiwi? Tropical Preservation Tips

    By MrAnimal Farm

    sliced kiwi next to a knife on a cutting board

    Can you freeze kiwi? We've asked ourselves that same question many, many times. We are not fortunate enough to live in a tropical paradise where kiwis grow in abundance so we have to rely on our local produce department to keep us stocked up. And we ALWAYS keep an eye out for a good sale.

    But kiwi gets soft and mushy after a week. Right? So what do you do with it if you can't eat it all that quickly?

    Simple.

    You freeze it.

    sliced kiwi next to a knife on a cutting board

    Can you freeze kiwi?

    You absolutely can freeze kiwi! It's super easy and you have a few options to do it. You can freeze kiwi whole, sliced (or diced), or as a puree.

    Kiwi is one of the easiest foods to freeze. It doesn't need to be blanched. It doesn't even need to be peeled (you can eat the skin)!

    Frozen kiwi is a wonderfully delicious, and healthy, snack. If you have any experience freezing cantaloupe, freezing blackberries, freezing blueberries, freezing strawberries, or freezing raspberries, then this will be a familiar process for you. If you haven't, don't sweat it, you'll catch up just fine!

    Frozen kiwis are perfect for making smoothies or treating yourself with a healthy, chip-like snack. The methods we use are freezing whole (with or without the skin), sliced (or diced), and pureed. Let's take a look at how it's done.

    Supplies

    You are going to need the following supplies:

    • kiwis
    • cookie sheet (for freezing whole)
    • blender or food processor (for puree)
    • ice cube trays (for puree)
    • measuring cup
    • freezer bags
    • sharpie or marker

    Freezing whole kiwis

    Freezing whole kiwis is the easiest of all three methods.

    Step One

    Put your whole kiwis in a freezer bag and stick them in the freezer.

    The end.

    For real. It's that easy.

    You can peel them first, if you like. If you do not peel them, you will want to wash it first and make sure all of the hairs are removed. But freezing whole kiwi is really easy.

    Although it is easy, this is our least favorite way to preserve kiwi. Whole kiwi takes a while to thaw and, once thawed, is extremely soggy and mushy due to all of the moisture in the fruit. The flavor is still okay but the texture experience is not nearly as good as sliced, diced, or pureed.

    Need to get all your food preserved easily? Check out the Ultimate Guide To Freezing Food so that you can fill your freezer without in minimal time.

    Freezing kiwi slices

    Kiwi slices are our personal favorites. They are quick and easy to thaw. Plus, frozen kiwi chips are really, really good. Additionally, if you want to have a kiwi smoothie, you can toss them in the blender with your other ingredients and they blend pretty easily even when still frozen.

    Step One

    If you want to leave the skin on, make sure to wash all the little hair fibers off. If not, start by peeling your kiwis.

    Step Two

    Decide if you want kiwi dice, full round kiwi circles, or half moon shaped slices. Take a sharp knife and, if you want half moon slices or dice, cut the kiwi in half first. If you want full circles, just start on one end and carefully cut thin slices.

    Half moon shapes are cut the same as full circle slices, you just cut it in half first. Kiwi dice can be cut by following the half moon shape method and then, while holding the slices together, turn the kiwi and make another line of slices perpendicular to the first slices.

    Step Three

    Whichever method you choose, the next step is the same. Line all of your kiwi pieces in a single layer on a cookie sheet (just as you would when freezing bananas slices or freezing mozzarella slices). Place the cookie sheet in your freezer and wait a few hours. We like to do it overnight but if it's earlier in the day they should be good and solid in about 5 or 6 hours.

    We freeze them on a cookie sheet first so that they do not stick together in the bag.

    frozen kiwi on baking pan wrapped in foil

    Step Four

    After the kiwi has had time to freeze, take the cookie sheet out of the freezer. Next, you will want to put all of the frozen kiwi pieces in a freezer safe bag. We always make sure to write the contents, quantity, and freeze date on the outside of the bag.

    Puree your kiwi

    If you don't want to use your kiwi for chips then puree is the way to go. Pureed kiwi is also a great base for baby food.

    Step One

    Again, wash the hairs from the skin or peel the kiwis first. The hairs come of pretty easily under a steady stream of cold water and a little bit of wiping. You can use your hands to wipe it clean.

    Step Two

    You can toss whole kiwis in your blender or food processor, if you like. We find we have better results if we cut our kiwis in half or in quarters first. Whichever you do, place them all in your blender and use the puree, or similar, function.

    If you are having trouble getting a good, smooth mix, you can start to add a little water in to help the blades mash it up a little better.

    Step Three

    After your kiwis are pureed, pour them into the reservoirs of an ice cube tray. Just like with the slices, we will do a pre-freeze before the final freeze.

    Stick the ice cube trays in the fridge overnight or for a few hours. They may take a little longer since they are now in a thicker liquid form and not a thin slice.

    Step Four

    Once frozen, remove the ice cube trays from the freezer and pop all of the kiwi cubes out. Put them all in a freezer safe bag, write the contents, quantity, and date on it and place it back in the freezer.

    Frequently Asked Questions

    Here are a few common questions about freezing raspberries.

    How long can you keep kiwis in the freezer?

    Kiwis can stay fresh in the freezer for up to a year. We always follow FDA guidelines and recommendations for food and freezing safety.

    How do you defrost frozen kiwi?

    There are 2ยฝ methods of defrosting that we recommend. We say 2ยฝ because one method isn't exactly thawing them.

    The first method for thawing frozen kiwi is to just stick the frozen kiwis in the fridge overnight. It's slow but after a few hours your kiwis will no longer be frozen. They will, however, be pretty soggy.

    The second way to unfreeze them is to place them in a bowl of cold water and set it on the counter. Check on them in about 5 to 10 minutes, depending on how thick the slices are. If they are still frozen when you check, replace the water with fresh cold water and check again in another 5 to 10 minutes. Repeat this process until your kiwis is thawed. This method will also result in soggy and mushy kiwi.

    The last, or second and a half, method is to not thaw them at all. Eat them as frozen chips or put the pieces in a smoothie. They will thaw in the liquid of the smoothie and will not have an unappetizing mushy texture.

    Why are my thawed kiwis so mushy?

    Remember, kiwis have a high moisture content so when thawed they change in texture quite a bit. Unfortunately, it is almost impossible to remove enough moisture to avoid mushy kiwis once frozen. That is why we highly recommend the sliced or pureed methods.

    If you need more help getting your foods frozen, check out the Ultimate Freezing Food Guide for a complete quick start reference so that you can have a well-stocked freezer.

    Access the Ultimate Freezing Food Guide Here
    pinterest image. text reads,

    Can You Freeze Cantaloupe? Two Easy Methods

    By MrAnimal Farm

    frozen cantaloupe on baking pan wrapped in foil

    Yes, you can freeze cantaloupe. In fact, you can freeze it whole or as a puree to use in a wide variety of different ways, like a healthy snack or in smoothies. Frozen cantaloupe can last up to a year in your freezer without losing too much of it's taste, texture, and quality.

    Keep reading to find out all details and methods.

    Chunks of cantaloupe in a freezer bag.
    [feast_advanced_jump_to]

    Why Freeze Cantaloupe?

    Cantaloupe is a bright orange, juicy and delicious fruit. It is a type of melon. It is full of lots of vitamins, minerals and water content (to help keep you hydrated).

    Unfortunately, this yummy fruit is seasonal. That means it is usually only available during certain months. Depending on the climate, peak season can be from May through September.

    So, if cantaloupe is one of your favorite snacks, then you would probably like to have access to it year round. Fresh cantaloupe uncut can only last for 3 weeks in cold storage, and for one week in the refrigerator.

    Therefore, in order to have access to cantaloupe at all times, you will need to find a way to store it long term. The best way to do this is by freezing your cantaloupe.

    Freezing slices or cubes

    Freezing cantaloupe is pretty simple when you get right down to it. Just like when freezing blackberries, freezing blueberries, freezing strawberries, freezing raspberries (and most other fruits) you don't have to bother with blanching first.

    The simplest way to freeze cantaloupe is to just cut it, bag it, and freeze it.

    Step One: Make sure you have chosen a ripe cantaloupe and washed the rind first.

    Using a knife or your melon peeler you will want to cut your cantaloupe in half. Once you do that you can pull all of the seeds from the core and scrape it clean. Don't throw away your seeds either. They make a fantastic roasted snack.

    Step Two: Decide if you want slices or balls. If you want slices you can use your melon peeler and simply cut out the slices. If you want bite sized balls just use your melon baller and scoop them out of the center.

    Slices and chunks of cantaloupe on a cookie sheet.

    Step Three: Now lay your slices or melon balls on your cookie sheet in a single layer (just like when freezing bananas or freezing asparagus slices). Put the cookie sheet in the freezer for a few hours or overnight to flash freeze. This will give them time to freeze completely and not stick together which can be a real hassle when you want to use them later.

    Chunks of cantaloupe in a freezer bag.

    Step Four: Once the cantaloupe has completely frozen, take the pieces from the cookie sheet and place them in freezer safe ziplock bags. Make sure you write the contents, quantity, and date on the outside of the bag before putting it back into the freezer.

    Cantaloupe puree

    This is our favorite method because it is so versatile. As we mentioned earlier, you can use these in smoothies, sorbets, or just eat it as a cold snack.

    First, repeat steps one and two above. In step two, make sure to cut it into chunks and not just slices.

    Step three: Place your chunks into a blender or food processor. Turn it on for a few minutes at high or until the chunks are a consistent puree.

    Step four: Pour the pureed cantaloupe into the compartments of an ice cube tray and pop it into the freezer for a few hours.

    Step five: Once the cubes of puree are frozen, pop them out of the ice cube tray and place them into freezer bags. Make sure to squeeze all of the air from the bag before sealing and labeling it.

    Need to get all your food preserved easily? Check out the Ultimate Guide To Freezing Food so that you can fill your freezer without in minimal time.

    Top Tips

    • Make sure you use a ripe cantaloupe.
    • Don't skip the flash freezing if freezing in slices or chunks.
    • Label the freezer bag or container with the contents, quantity and date.
    • Freeze in amounts that you will use later. Ie: freeze enough for a smoothie in each bag.

    How to Defrost Cantaloupe

    Defrosting or thawing cantaloupe is quite easy. The absolute best and safest way to do it is by placing it into the refrigerator overnight.

    It usually takes several hours for it to completely thaw, so overnight works best. However, do be aware that if you are looking to snack on it, the texture will be a little mushy if it is completely thawed.

    So, if you are just using it for regular snacking, you may want to just defrost it for an hour or two in the fridge. Then, take it out to eat while it is still a little frozen.

    Of note, for many of the uses listed below (like smoothies) you don't need to thaw it at all. You can simply pull it out of the freezer and use it.

    How to Use Frozen or Thawed Cantaloupe

    • Smoothies
    • Juices
    • Sorbet
    • Snack
    • Fruit Salad
    • Muffins, breads or other baked goods

    Freezing Cantaloupe FAQs

    Is frozen cantaloupe mushy?

    Yes, when you freeze and completely thaw cantaloupe it will be a little mushier than it is when fresh.

    How long can you keep cantaloupe in the freezer?

    Cantaloupe will stay good in the freezer for about 10 to 12 months. It may still be edible after this but eventually it will begin to suffer from freezer burn and the taste, texture, and quality will decline

    How do you defrost cantaloupe?

    The best way to defrost cantaloupe is in the refrigerator overnight. If you want to snack on it plain, you may want to only defrost for a few hours so it is not totally thawed.

    If you need more help getting your foods frozen, check out the Ultimate Freezing Food Guide for a complete quick start reference so that you can have a well-stocked freezer.

    Access the Ultimate Freezing Food Guide Here
    Chunks of cantaloupe in a freezer bag.

    How to Freeze Cantaloupe

    MrAnimal Farm
    Freezing cantaloupe is a super easy way to ensure you can enjoy this sweet fruit year round. You can freeze it in slices, chunks or as a puree.
    5 from 1 vote
    Print Recipe Pin Recipe
    Prep Time 10 minutes mins
    Freezing Time 1 hour hr
    Course Side Dish
    Cuisine American

    Equipment

    • Knife
    • Cutting Board
    • Cookie Sheet
    • Freezer Bags

    Ingredients
      

    • 1 whole Cantaloupe ripe

    Instructions
     

    • Wash off your ripe cantaloupe.
    • Cut the cantaloupe in half and scoop out the seeds.

    Freezing in slices or chunks

    • Cut it into slices and then cut the rind off of each slice.
    • If you want to freeze as chunks, cut each slice into chunks a few inches in size.
    • Place the slices or chunks on a cookie sheet and put them in the freezer to flash freeze. This takes an hour or so.
    • Once they are hard, remove from the freezer and package into a freezer bag or an airtight container and place back into the freezer.

    As a puree

    • Take your halved cantaloupe with the seeds removed and cut it into slices or chunks.
    • Place it into a food processor and process until it is a mushy consistency like a smoothie.
    • Pour the puree into ice cube trays and place into the freezer.
    • After an hour or two, once the cubes are frozen, remove and package into a freezer bag or an airtight container and place back into the freezer.

    Notes

    Top Tips
    • Use a fresh, ripe cantaloupe
    • Package it in amounts that will be how much you want to use when thawed.
    • Puree is best for juices, smoothies and cooking; slices are best for fruit salads and snacking.
    • Freezes well for up to one year.
    Keyword Freezing Cantaloupe
    Tried this recipe?Let us know how it was!

    How To Freeze Raspberries For Later

    By MrAnimal Farm

    frozen raspberries on baking pan wrapped in foil

    When we plant our garden we almost always plant too much. We end up with way more berries than we can eat in a single season. Fortunately, we learned how to freeze raspberries so they can last us all the way until the next berry season!

    Read below for all the details on how to preserve your raspberries before they go bad.

    frozen raspberries on baking pan wrapped in foil

    Can You Freeze Raspberries?

    Yes, you can easily freeze raspberries in a couple of ways; whole or pureed. Both food preservation techniques are pretty simple. Essentially, all the steps boil down to clean, freeze (or puree first), eat. We will, of course get into more details as we go further.

    Steps for how to freeze raspberries

    We love the versatility of berries. Regardless of if they are blackberries, blueberries, strawberries, or raspberries, they have a million and one uses. You can put them in oatmeal, on top of pancakes, blend them in a smoothie, or eat them plain, just to name a few.

    What's even better, is you can preserve them using the same techniques! That's right, you can also freeze blueberries, freeze blackberries, and freeze strawberries, You can freeze them and have garden fresh berries all year around.

    Frozen raspberries, in particular, are perfect for giving whatever you are eating a perfectly blended sweet and sour kick. The add a little more flavor to waffles and can give your breakfast smoothie the extra jump you need to get your day started.

    We will cover two methods of freezing today; freezing whole berries and freezing raspberry puree (but not the kind you find in a second hand store).

    Need to get all your food preserved easily? Check out the Ultimate Guide To Freezing Food so that you can fill your freezer without in minimal time.

    Supplies

    You are going to need the following supplies:

    • raspberries (of course)
    • colander
    • cookie sheet (for freezing whole)
    • blender or food processor (for puree)
    • ice cube trays (for puree)
    • measuring cup
    • freezer bags
    • sharpie or marker

    Freezing whole berries

    Let's start out with the easiest method; freezing whole berries.

    bowl of fresh raspberries

    Step One

    Once you have harvested your raspberries you will want to gather them into a colander large enough to hold them all. Put the colander in your sink and run cold water over them. Use your hands to move the berries around and get off any unwanted dirt, bugs, or anything else you do not want to preserve with your food.

    Step Two

    Now you want to dry your raspberries completely. You can do this by laying them out on some paper towels. You can also place them in a second colander, slightly raised to allow air flow to dry them. Whichever method you use, you will want to make sure they are as dry as possible.

    Step Three

    Take out your cookie sheet and arrange a single layer of raspberries. You can pack as many as you like into the cookie sheet just make sure that it's a single layer and they are not stacked or piled up.

    Now place the cookie sheet in the freezer and leave for a few hour (we like to do this at night so they can sit overnight).

    Step Four

    Once a few hours has passed (or you've woken up) your berries should all be frozen. Now all you need to do is portion them out however you like and add them into freezer bags. Make sure to label the bags with a Sharpie noting the contents, quantity, and date of freezing.

    freezer bags of frozen raspberries

    Puree your raspberries

    Freezing pureed raspberries is really good if you like to make smoothies, sorbets, and those sorts of snacks.

    Step One

    This is the same as freezing whole raspberries. You will want to pick them and clean them in a colander under cold running water. Make sure to massage the berries enough to allow good water coverage and remove any undesirable debris.

    Step Two

    Here is where we start to diverge. Instead of drying your berries, toss them all in a blender or food processor. Set it to the puree (sometimes they will have a smoothie setting) and let it do it's thing until they are all blended together.

    Step Three

    Pour your blended raspberries into your ice cube trays. Place the trays into the freezer and allow to sit for a few hours or overnight.

    Step Four

    Once they have all frozen simply pop the raspberry cubes out of the tray and put them in a freezer bag. When you are are ready to use them you can toss them straight into the blender for your smoothie. It's super easy and delicious!

    Frequently Asked Questions

    Here are a few common questions about freezing raspberries.

    How long can you keep raspberries in the freezer?

    You can leave frozen raspberries, both whole and pureed, in the freezer for up to a year. They may still be safe to eat after that but they will definitely start to degrade in taste, texture, and quality. Remember to always follow FDA guidelines on food preservation safety.

    How do you defrost frozen raspberries?

    When you're ready to use your raspberries you have a couple options. You can leave them in the fridge overnight to allow them to slowly thaw. This is time consuming and can also make them soggy. You can also just munch on them frozen. This is the quickest method but can be tough on your teeth and not an enjoyable experience.

    The best method is to put your berries in a bowl and fill it with cold water. Then sit the bowl on your counter and wait a few minutes. Test the berries and see if they are still frozen or if they have thawed. Replace the water and test as needed until they are completely unfrozen but still firm. Too much water or soaking for too long can make the berries water logged and soggy.

    If you need more help getting your foods frozen, check out the Ultimate Freezing Food Guide for a complete quick start reference so that you can have a well-stocked freezer.

    Access the Ultimate Freezing Food Guide Here
    pinterest image. text reads,

    Can You Freeze Radishes?

    By MrAnimal Farm

    fresh radishes in front of cutting board

    If you are one of the many types of people that over estimate what they need when planting their garden (or be prepared, as we like to say) you may find yourself with an overabundance of radishes as well as other crops. How do you make sure they do not go bad? Can you freeze radishes?

    Keep reading for all the details on how to preserve this awesome vegetable.

    fresh radishes in front of cutting board

    [ez-toc]

    Can you freeze radishes?

    Yes, you can freeze radishes! In fact, freezing radishes for long term storage is one of the best food preservation techniques you can use. Essentially, to freeze radishes is a 4 step process; clean, cut, blanch, & freeze.

    Frozen radishes may lose some taste and texture, as well as a small bit of nutrients but they will stay good for up to 6 months which is long enough to get to your next gardening season.

    Radishes are a great vegetable that is easy to grow and are packed full of valuable nutrients. They go well with many dishes as they are considered a "super food".

    With out further ado, let's get into the process.

    How To Freeze Radishes

    Freezing is one of the best methods to preserve most of your garden crops. Learning to freeze radishes is not too much different than freezing zucchini, freezing yellow squash , freezing butternut squash, and freezing green beans. If you are familiar with how to blanch then you will have no problem preserving your radishes, as well.

    Supplies

    Let's get started with our supply list. To freeze radishes you are going to need:

    • radishes
    • vegetable cleaning brush
    • 2 colanders (one for cleaning and one for blanching)
    • knife or mandolin slicer
    • large stock pot
    • large mixing bowl
    • measuring cup
    • freezer bags
    • sharpie or marker

    Need to get all your food preserved easily? Check out the Ultimate Guide To Freezing Food so that you can fill your freezer without in minimal time.

    Start by washing them

    The first step in preserving radishes, and any vegetable really, is to make sure it is good and clean. Since radishes are considered root vegetables they are going to be pretty dirty. Fortunately, cleaning them isn't too hard.

    Simply, run your radishes under cold water and gently scrub the dirt off of the radish. You can do this by hand or by using a vegetable cleaning brush. These are designed to remove excess dirt without damaging the skin or edible parts of the vegetable.

    We also recommend using a colander while cleaning to make sure your sink does not end up clogged with dirt and mud.

    Cut into slices

    Take a sharp knife or your mandolin slicer and prepare to cut your radishes. You will want to slice them into thin slices or 'medallions'. You want them to be thin but not transparently thin. About โ…›" - ยผ" should work well.

    Do make sure to remove the ends and discard them. Like with how to freeze cucumbers, squash, and other veggies, the ends contain an enzyme that will allow the radish to continue to age even when frozen. If you cut them off that enzyme is no longer an issue once you blanch.

    fresh cut radishes on cutting board

    Blanch your radishes

    Now it's time to blanch your radishes. Bring a large stock pot of water to a boil. Add all of your radish medallions to a colander small enough to fit into the pot.

    Once your pot of water is at a rolling boil, gently lower the colander of radishes into the water. Set a timer for 2 - 3 minutes. While the radishes are boiling, prepare a large mixing bowl with cold water and ice.

    Once the timer goes off, carefully remove the colander of radishes from the boiling water and put them into the ice water bath. This is to instantly cool the radishes and stop the cooking process. We cook for a short period of time to destroy the enzymes we mentioned earlier which will allow the radish to continue to age. This will stop that from happening.

    Once cooled, take the radishes out of the ice bath and dry them off. They do not have to be completely dry, just free of excess water. Patting them dry with a paper towel should do just fine.

    Time to freeze them

    Depending on how many radishes you are freezing you will want to get the appropriate amount of freezer bags. Use a sharpie or a marker to label the freezer bag with the contents, quantity, and date.

    A single serving of radish medallions is around 1 measured cup. Add a scoop or 2 to the freezer bag, label it appropriately, and stick in your freezer. It should only take a few hours for them to freeze completely.

    freezer bags of frozen radishes

    Frequently Asked Questions

    Here are some of the more common questions we came across while researching this topic.

    Q1. How do you defrost frozen radishes?

    Freezing radishes does no good if you don't know how to defrost them to use later. It's easy to thaw them though. Simply run them under cold water until you no longer see any ice crystals and they are flexible again.

    Q2. How long will frozen radishes keep in the freezer?

    Radishes will stay fresh in the freezer for up to 6 months. After that, they may still be edible but will begin to go through some flavor and textural changes. Additionally, they will start to lose some of their nutrients.

    Q3. Will freezing ruin radishes?

    Freezing will not ruin radishes. Freezing radishes is a great way to preserve their nutrients and flavor for an extended period of time. However, as we mentioned above, it is possible for them to change flavor, texture, and lose nutrients if frozen for too long.

    Q4. Can you freeze without blanching?

    It is not recommended to freeze radishes without blanching. Blanching removes the enzyme that causes the radish to age even after freezing. If frozen without blanching, your radishes will continue to age and rot, even in the freezer!

    Q5. Can you freeze radish greens?

    Let no part of your harvest go to waste! You can even freeze radish greens. Believe it or not, it's even easier than freezing radishes. All you need to do is blanch them for 10 seconds, dry them, bag them, and freeze them. Easy peasy!

    Q6. What other ways can you preserve radishes?

    If freezing isn't your thing, there are a few other ways to preserve radishes. You can pickle them, ferment them, and even dehydrate them. Each of these options requires there own process and each have their own freezer life.

    Conclusion

    Freezing radishes really is a simple food preservation technique. Now you know how to keep your radishes fresh and you can stay fully stocked in between gardening seasons.

    Happy freezing!

    If you need more help getting your foods frozen, check out the Ultimate Freezing Food Guide for a complete quick start reference so that you can have a well-stocked freezer.

    Access the Ultimate Freezing Food Guide Here

    Can You Freeze Butternut Squash ?

    By MrAnimal Farm

    two butternut squash on a wood board

    You can freeze butternut squash to preserve its freshness. There are three popular methods to do this; flash freezing, puree, and the cook & blanch method. Each method is easy to do and will ensure that your butternut squash will last until you can grow some more.

    Freezing butternut squash is the best way to preserve the flavor and important nutrients that this most loved type of winter squash contains. Follow these three different ways to freeze butternut squash. If you have wheel barrows full from your summer garden or youโ€™ve just found a great deal at the grocery store you couldnโ€™t pass up, this post is just what you need.ย 

    a pair of butternut squash

    Growing butternut squash, like growing yellow squash and growing zucchini, is by far one of the easiest crops to grow in my garden. I often grow a lot of squash great for fresh eating and freeze the rest for fall and winter. Some winter squash varieties are great for storing in your cold storage as well.

    Butternut squash will keep for a month or more when stored in a dark cool place. 

    If the squash is peeled, it should be covered and stored in the fridge for up to five days. The best way to preserve your squash for longer storage is by pickling it or freezing. In this post youโ€™ll learn the three common ways to freeze butternut squash to preserve your fresh summer harvest.

    Butternut squash is a great option for fresh eating or preserving for the fall and winter months by freezing. From roasting the squash and adding to a salad, as a side dish to a roast meal or better yet my favorite butternut squash soup with a dollop of sour cream the options for making meals with butternut squash are endless. 

    Three Ways to Freeze Butternut Squashย 

    There are three popular ways to freeze butternut squash for eating within 6 months to a year. The quickest and easiest method is flash freezing, the second is by blanching and finally making butternut squash puree. 

    All three methods actually work for most winter squashes including freezing spaghetti squash and acorn squash.

    Depending on what your meal and baking plans are for the fall and winter months will depend on the methods you consider. Flash freezing and blanching are great options for roasted squash, chilli,  stews and casseroles where as squash puree is lovely for pureed soups.

    Flash Freezing

    Flash freezing is a perfect method for freezing fresh fruits and vegetables in individual bite size pieces to make measuring and cooking much easier later on. 

    The flash freezing method is popular for freezing berries for baking or chopped vegetables for soups and stews. To flash freeze butternut squash youโ€™ll need a few tools:

    • potato peeler or knife
    • cookie sheet or baking pan
    • parchment paper
    • freezer bags

    The steps to flash freeze are also pretty simple:

    • Peel the squash using a potato peeler 
    • Cut the squash into 2 inch size cubes
    • Place in a single layer on a cookie sheet lined with parchment paper
    • Place cookie sheet flat in the freezer for a day or two or until pieces are fully frozen. 
    • Fill freezer bags with frozen pieces of squash

    The best way to enjoy your frozen butternut squash chunks is by roasting them with roasted vegetables come the winter. Itโ€™s a quick and easy side dish for any roast meal and with a little butter and herbs they taste delicious. 

    When using this method, be sure to cook and eat within 4 months due to the fact that it is not pre-cooked it will continue to age in the freezer and will go bad eventually. Freezing just slows the process down.

    If you want to store it longer, follow the baking instructions in the puree section or skip to the blanching method below.

    Need to get all your food preserved easily? Check out the Ultimate Guide To Freezing Food so that you can fill your freezer without in minimal time.

    Butternut squash puree

    This is a popular method of freezing squash for pies, soups, and baby food. 

    The first thing to do when making butternut squash puree is to wash the outside of the squash well. Then, simply slice the squash in half length wise and scoop out any seeds for later roasting or seed saving for next years garden. 

    Once squash are prepared, line a rimmed cookie sheet with parchment paper and bake the butternut squash halves flesh down for approximately 45 minutes or until quite tender. 

    After the squash has baked, remove from the oven and allow to cool. The skins will peel away from the squash easily then transfer to a large stock pot. 

    Puree the butternut squash using an immersion blender or food processor to puree the squash. 

    The immersion blender makes manual mashing or using a food processor a thing of the past. In just a matter of minutes the job is complete and super easy and quick to clean up. 

    Itโ€™s quite easy to freeze butternut squash puree. Simply fill medium sized freezer bags with 2 cups of pureed squash to easily use for recipes later on. Label the bag with the amount and the date. 

    Use your squash within 6 months to a year.

    Lay bags flat between cookie sheets until frozen then stand in freezer drawers for ultimate storage. 

    Pureed butternut squash can be used for baking, adding to soups, chilli, casserole or even pasta sauces. 

    Blanched

    Blanching is a popular method of preserving flavor and vitamins and minerals in fruits and vegetables before freezing.

    Itโ€™s also a guick and easy method to stop the ripening process of the squash and to easily remove skins. 

    Most cooks suggest blanching for three to five minutes then cooling in ice water followed immediately with freezing. The reason we blanch is it kills enzymes that continue the aging process thus retaining vital nutrients and a palatable texture.

    Isnโ€™t it exciting that you know how to easily and quickly freeze butternut squash? I mean nothing feels better than making the most of what you have and getting a good deal. Youโ€™re future self will thank you when youโ€™re tired and needing to whip up a healthy meal for your family. 

    What do you plan to use your frozen butternut squash for? Comment below and inspire more great content from MrAnimal Farm. 

    An added plus is youโ€™ll be prepared and you donโ€™t have to worry about wasting a good crop or a great deal at the store. 

    Thanks to Diana Bouchard for this tutorial contribution.

    Diana Bouchard at Wandering Hoof Ranch helps others plan to lead a homegrown healthier lifestyle without the overwhelm and burn out. People often ask her how do you grow and raise your own food and stay sane? Day by day, one thing at a time with the help of the Happy Homestead Planning System.

    If you need more help getting your foods frozen, check out the Ultimate Freezing Food Guide for a complete quick start reference so that you can have a well-stocked freezer.

    Access the Ultimate Freezing Food Guide Here

    Miniature Goats: The Ultimate Guide

    By MrAnimal Farm

    nigerian dwarf kid drinking bottle

    Who doesn't love a compact version of their favorite animals? Isn't that why toy dog breeds are so popular? The mini craze has made it's way to the homestead in a variety of miniature goat breeds.

    Miniature goats are small versions of large, or standard, sized breeds. They will generally weigh under 100 lbs and stand around 2 feet tall. Some of the more popular miniature goat breeds are Nigerian Dwarf Goats, Pygmy goats, Australian Dwarf Goats, and Kinder goats (which are actually a hybrid breed).

    nigerian dwarf goat kid drinking milk bottle

    [ez-toc]

    What Is A Miniature Goat?

    There is no set standard for a miniature goat. This is because miniature goats are not simply one breed. But rather a group of similar typed goats.

    Much like dairy goats are all bred for milk production as a common trait, miniature goats are a group of goat breeds that are bred for their smaller size.

    Miniature goats are simply goats that are bred to be significantly smaller in size (height and weight) than standard breed goats.

    For example, standard breed goats, like an Alpine, can range in size from 30 inches and 135 lbs for a doe up to 32 inches and 170 lbs for a buck. A Sanaan is even bigger with the buck growing as large as 35 inches and 185 lbs!

    In contrast, a miniature goat breed, like Nigerian Dwarf Goats, will typically get no taller than 24 inches and weigh 75 lbs or less. As you can see, miniature goats are just about half the size of their larger breed counterparts.

    Why do you want a mini goat?

    Aside from the fact that they are super adorable, there are many other reasons raising miniature goats can be preferable to standard sized goats.

    One of the most appealing reasons people keep mini goats is because they take up such little space. That means if you have a small back yard (and a not-too-strict HOA) you can fit 2 or 3 goats back there comfortably. Outside of the neighborhood scene, smaller lots of property can fit a larger herd since they won't need as much space to graze per goat.

    And since we are talking about their eating habits, miniature goats eat much less than larger breeds do. Since they eat less, they will also cost less to feed. Eating less means a field of grass will have the chance to regrow last longer and they will go through hay less quickly.

    Aside from their compact size, miniature goats are capable of the same uses as standard sized breeds. The 3 main types of goats are dairy, meat, and fiber which can all be found in mini sizes.

    Being smaller, with less feed requirements can make miniature goats easier to manage as well.

    Mini goat breeds

    If you are familiar with our farm, you know doubt know of Nigerian Dwarf Goats. But they aren't the only miniature goat breed out there. There are many others that meet the miniature requirements as well as some hybrid breeds.

    Registries

    OrganizationMiniature Breeds Accepted
    American Dairy Goat Association (ADGA)Nigerian Dwarf
    American Goat Society (AGS)Nigerian Dwarf
    Pygmy
    Miniature Dairy Goat Association (MDGA)Alpine
    LaMancha
    Nigerian Dwarf
    Nubian
    Oberhasli
    Saanen
    Sable
    Toggenburg

    Nigerian Dwarf Goats (NDG)

    Size: Around 17-20 inches tall; 40 - 75 lbs
    Personality: Very loving and fun to be around
    Lifespan: 10-15 years

    Nigerian Dwarf Goats are great milkers. They are bred to have a high butterfat content so their milk is more like cow's milk than what you would typically think of with goat's milk. You can expect to get anywhere from ยผ to ยฝ a gallon of milk a day from a doe in full production.

    They also come in multiple colors and are sometimes polled (naturally hornless). If you aren't sure what polled, disbudded and other goat terminology means - make sure you brush up on that as you're choosing your breed.

    nigerian dwarf goats

    Pygmy Goats

    Size: Around 20 inches tall; 35-60 lbs
    Personality: Energetic and love to be around people
    Lifespan: 10-15 years

    Pygmys have gained popularity all over the world for the fun personalities and ease of milking. Their size makes them perfect for a small homestead. They are also a dual purpose goat in that they are used for both dairy and meat.

    pygmy goat
    Portrait of African pygmy goat kid. Photography of nature.

    Australian Miniature Goats

    Size: Around 20 inches tall; 50-80 lbs
    Personality: Full of energy, lovable, and loyal
    Lifespan: 10-15 years

    Descendants of Australian Bush Goats, AMGs have been crossed with several other breeds, such as Cashmere, Boer, and Nubians, to get the minis we know today. Because of their size, friendly personalities, and adorable demeaner, they are primarily used as a domestic pet breed.

    Need some help to keep your goats healthy and maintained? The G.O.A.T Herd Management Binder has you covered from supplies to routine care reminders.

    Hybrids/Crosses

    A hybrid, or cross breed, miniature goat is when a traditional mini goat (NDG, Pygmy, etc) is crossed with a standard sized goat. This is typically done by breeding the buck of the miniature breed to a doe of a standard breed. Their offspring will have traits of both breeds and often a smaller size.

    Why would you want a hybrid mini goat?

    Sometimes you want a specific goat breed for one of it's traits. For example, Angora goats are known for producing the fiber angora. Breeding a standard sized Angora goat with a miniature breed will give you the chance to raise fiber goats in a much smaller area.

    Kinder (NDG & Nubian)

    Size: 28-28 inches; 115-135 lbs
    Personality: friendly and sweet disposition
    Lifespan: up to 18 years!

    Kinder goats are a cross between Pygmy goats and Nubians. Their milk is sought after for dairy products like cheese. They are also bred to be particularly muscular for meat production.

    Kinder goats
    Mini Alpine

    Size: 28-29 inches; 65-75 lbs
    Personality: Sweet, energetic and expressive personalities
    Lifespan: 8-12 years

    Mini Alpines are primarily used for milk production. Like their standard sized counterparts, their milk is preferred in making all sorts of dairy products like cheese, yogurt, and ice cream.

    Mini Saanen/Sable

    Size: 29-31 inches; 60-80 lbs
    Personality: calm and laid back
    Lifespan: 10-15 years

    Saanens are completely white in color. A Sable is a Saanen that is colored. Mini Saanens, like standard Saanens, are heavy milk producers and are raised for that purpose.

    Pygora (Pygmy & Angora) & Nigora (NDG & Angora)

    Size: 25-27 inches; 65-95 lbs; Nigora - 19-29 inches; 85-190 lbs
    Personality: Pygora - attentive, good-natured, inquisitive; Nigora - peaceful, friendly, easy going
    Lifespan: Pygora - 12-15 years; Nigora - 12-15 years

    Angora goats are raised for their angora fleece. Depending on the goat, you can yield either angora or cashmere; both highly sought after fibers. The main distinguishable difference between Pygora goats and Nigora goats is Pygoras are a little bit heavier.

    Mini Goat Comparison Table

    BreedHeightWeightPersonalityUseLifespan
    Mini Alpine28-29 inches65-75 lbs
    Sweet, energetic and expressive personalities
    Dairy8-12 years
    Australian Mini GoatAround 20 inches tall50-80 lbsFull of energy, lovable, and loyalPets10-15 years
    Kinder Goat28-28 inches115-135 lbsfriendly and sweet dispositionDairy, Meatup to 18 years!
    Nigerian Dwarf Goat17-20 inches40 - 75 lbsVery loving and fun to be aroundDairy, Pets10-15 years
    Nigora25-29 inches85-190 lbspeaceful, friendly, easy goingFiber12-15 years
    PygmyAround 20 inches tall35-60 lbsEnergetic and love to be around peopleDairy, Meat10-15 years
    Pygora25-27 inches65-95 lbsattentive, good-natured, inquisitiveFiber12-15 years
    Mini Saanen/Sable29-31 inches60-80 lbs
    calm and laid back
    Dairy, Meat10-15 years

    Frequently Asked Questions

    We came across a lot of questions about mini goats while researching for this post. Here are some of the more common ones:

    Q1. Are miniature goats good pets?

    Miniature goats are fantastic pets! Their size and quirky personalities make them non-stop fun. Keep in mind, they do need other goats to stay healthy since they are herd animals. You do not want to keep only 1 goat. You will need at least 2.

    If you want to keep them as pets and you only have a backyard or small plot of land, Nigerian Dwarf and Pygmy goats are probably your best pet options.

    Q2. Do miniature goats stay small?

    Miniature goats will stay small for their entire life. For example, a full grown Nigerian Dwarf Goat will grow to the size of a medium sized dog (think a large Labrador Retriever).

    Q3. What type of goat stays the smallest?

    Out of all the miniature goats, Nigerian Dwarf Goats will stay the smallest. Does (females) will generally stay in the 50-60 pound range and stand around 18 or so inches at the shoulders. Bucks (intact males) may weigh a little bit more and are usually an inch or two taller. Wethers goats (fixed males) will generally fall somewhere in between.

    Q4. How much is a miniature goat?

    How much a miniature goat costs is going to vary depending on a couple of different factors. The breed, pedigree, purpose, and herd name will all affect the price you will pay for a miniature goat.

    An unregistered wether that you find on Craigslist or similar marketplace can be under $100. However, these sellers often can offer no health assurances and are unlikely disease tested. It is generally better for the health of the goats and your herd to buy from a reputable breeder that disease tests their herd. (Disease testing is just one factor when deciding how to buy a goat.)

    A wether from a tested herd can average around $100 to $200 but many breeders will offer discounts for purchasing multiple goats at once.

    Registered bucks and does will cost more depending on the herd name and genetic lineage. Bucks can run anywhere from $250 up into the thousands if it is from a champion line. Does will usually start around $400 and can increase into the five figure range for champion lines.

    Look around, ask questions, and find a breeder that fits your quality and budget comfort level.

    Q5. Can you milk mini goats?

    You absolutely can milk miniature goats! In fact, Nigerian Dwarf Goats were bred specifically to have a very high butter fat content. Often times, their milk is creamier and sweeter than cow's milk.

    Q6. Do miniature goats stink?

    Goats live outside so they do have a typical barnyard or livestock smell to them. But they are not too terribly stinky. And if you are already raising other livestock, you will likely not even notice.

    The one exception to this is when bucks are in rut. Bucks will make an extra effort to draw the attention of does when they are in heat. There are several goat heat signs.

    Some of this extra effort includes urinating on themselves to the point that their coat will develop an orangish-yellow sheen to it. During this time, it is safe to say that miniature bucks are pretty stinky.

    Q7. How long do mini goats live?

    Miniature goats have a fairly long life span. Assuming they have adequate shelter (there are lots of easy goat pen ideas you can use), a healthy diet, and active parasite control, they can live up to 15 or 16 years old.

    Q8. Do miniature goats and dogs get along?

    It is not reccomended for dogs and miniature goats to mix (aside from livestock protection dogs). Domestic dogs are one of the top dangers, sometimes leading to injury or even death, to goats. It is not usually an act of aggression. Dogs are usually being friendly and want to play and they just play a bit rougher than goats are able to handle.

    Obviously, there are exceptions. But, as a general rule, it is best to keep dogs and goats seperate (again, unless you have a trained livestock protection dog).

    Q9. Are miniature goats easy to keep?

    The ease in which miniature goats are kept is relative. Goats can require a lot of work, in general. They need to have reliable shelter that stays dry, warm or cool, and has good air flow. You will need to keep their living space and grazing areas secure with quality fencing. Goats need a consistent and healthy diet as well as frequent health checks to keep parasite levels low.

    Once you have the initial infrastructure taken care of, you will start to develop a regular care routine. After that, the level of care isn't too bad. Because they are outdoors and are exposed to more threats (like parasites) they require a little more work and upkeep than a family pet, like a dog or cat.

    You will also want to make sure they have plenty of room to run and toys to keep them from getting bored and exploring for weaknesses in the fence.

    Final Word

    As you can see, miniature goats hold just as viable and important of a spot as standard sized goats. We are particularly fond of mini goats (Nigerian Dwarf, to be specific) and are thrilled that they are starting to become more commonplace.

    Hopefully you are enjoying your or are planning to get some in the future!

    If you need more help keeping your goats healthy and well taken care of, check out the G.O.A.T. Herd Management System - worksheets, calculators, supply management and more to keep your goats in tip top shape while cutting down on time.

    Access the G.O.A.T. Herd Management System Here

    Delaware Chickens: All You Need to Know

    By MrAnimal Farm

    Delaware chickens are an easy to raise chicken breed. They are used for both eggs and meat and therefore make a good breed addition for most homesteaders that are striving to be more self-sufficient.

    Delaware chickens are a heavy, dual purpose breed of chicken originally created around 1940. They are decent layers of around 210 large brown eggs per year. They are on the watch list for the Livestock Conservancy. They tend to be a calm and friendly breed that is also cold hardy making them good layers throughout the winter.

    If you are thinking of adding this chicken breed to your flock then read on to learn more about their uses, temperament and care needs.

    Delaware Chickens

    SizeMales: 7.5 - 8.5lbs; Females: 5.5 - 6.5lbs
    Bantam Size: 28-32oz
    ClassAmerican
    ColorWhite
    TemperamentFriendly
    HardinessCold Hardy
    Eggs/Yr200-220
    Egg SizeLarge
    Egg ColorBrown

    History & Origin

    This breed originated around 1940 and was created by George Ellis. They are aptly named after the state they came from, Delaware.

    They were created by breeding specific offspring of crosses from Barred Rocks and New Hampshire chickens (source). By focusing on the offspring from this cross that were white together eventually they became a standalone breed.

    While they became fairly popular when they were first developed, over time, other breeds have taken over some of their uses. This caused them to go on the Livestock Conservancy's critically endangered list. As of recently, they have been moved to the watch list.

    What Do They Look Like?

    Although not the largest chicken breed in the world, they are a heavy breed with females weighing about 5.5 lbs as pullets and about 6.5 lbs as full grown hens. Males weigh about 7.5 lbs when they are still maturing and top out at about 8.5 lbs as full grown roosters.

    In addition to the standard size, they also come in a bantam size. For bantams, they usually range from 28-32oz.

    Unlike some breeds like Orpingtons that come in a wide variety of different colors, Delaware chickens only come in one color. The color is very close to Columbian which is essentially a black and white chicken.

    They are mostly white with black barring in their hackle, tail and tips of their wing feathers. The difference between their coloring and that of the Columbian coloring is that Columbian coloring is solid black with no barring.

    One additional neat thing about this breed is their ability to create sex-linked offspring. This essentially means that you can tell if the chicks are hens or roosters based on their color at hatch. To produce these (though they won't be fully Delaware breed at this point), you mate a Rhode Island Red or New Hampshire Red Rooster with a Delaware hen. The resulting offspring all males will be have the Delaware coloring and all females will be red.

    Need some help keeping your chickens health and care taken care of? Check out the Organized Chicken Keeper for an easy to follow system.

    Breed Standards

    They were accepted into the Standards of Perfection of the American Poultry Association in 1952. To meet the standards, their weight should meet the criteria laid out above (Males: 6.5-7.5lbs; Females 5.5-6.5lbs; Bantams: 28-32oz).

    This breed should have a large single comb with 5 points. Both comb and wattles should be bright red in color. If you're not familiar with chicken terminology, combs are the fleshy parts on the chickens head and wattles and the fleshy parts under their beak.

    They should have yellow colored legs with four toes (unlike Silkies that have five toes). Additionally, their legs should be clean of feathering like Leghorn chickens.

    Their body should be elongated, and broad. And they should have moderately full feathering covering their body (source).

    Temperament

    Although temperament can vary from bird to bird, just like humans have individual personalities, this breed tends to be friendly. They are also rather calm, so they tend to be fairly easy to handle.

    Roosters have been noted to be a bit protective over their hens and the rest of the flock, but not outwardly aggressive. So, that is one thing to keep in mind.

    Their docile nature makes them a good addition to any flock. Though they are friendly, they are also independent and do not necessarily come over to ask for attention regularly much like the Swedish Flower Hen.

    What is Their Purpose?

    They were developed to be a dual purpose chicken breed meanining good to be used for both meat and eggs. And, they certainly meet that mark.

    They are a heavy breed (the standard version anyhow) and therefore produce a decent amount of meat.

    They also lay around 4 large brown eggs per week which translates to roughly 210 eggs per year. With some hens laying over that amount. Additionally, they are cold hardy which means that they will lay eggs more regularly through the winter than other breeds.

    One other quality that they have is that they are good foragers, this means that the cost to feed these chickens to produce eggs or mature to butchering age is less than some other breeds. That means that they are an economical choice.

    Care & Health

    This breed is fairly durable and easy to care for much like Deathlayers. Like any other chicken, they will need a decent chicken coop and chicken run. They will also need a chicken waterer and a chicken feeder.

    They do not really have breed specific issues like Amberlinks do with egg issues or like Marans do with leg mite issues. That is, with one exception.

    Even though they do well in cold weather by keeping up their egg laying, they do have large combs. These larger combs tend to be susceptible to frostbite due to their size. Given this, it is important to provide them with a draft free shelter during cold times. Also, keep a good eye on their combs as you may need to give them some protection in the form of applying vaseline to help with any potential frostbite issues.

    Other than that, just making sure that you do regular chicken health checks to make sure they aren't developing any common chicken issues like chicken mites, wry neck, or respiratory problems.

    FAQ

    Are Delaware Chickens good layers?

    They are decently good layers of around 4 Large brown eggs per week. That amounts to just over 200 eggs per year and they are cold hardy which means they lay well throughout the winter.

    Are Delaware chickens aggressive?

    No, in general they tend to be relatively friendly and calm. Although, some roosters have been reported to be a little protective of their girls.

    How big do Delaware chickens get?

    Males usually weigh in the 7.5 - 8.5 pound range. Females usually weigh in the 5.5 - 6.5 pound range.

    At what age do Delaware chickens start laying?

    They tend to start laying eggs around an average of 4 - 6 months which is common for most good egg laying breeds.

    Are Delaware chickens noisy?

    This can be a toss-up dependent on the specific bird. While they don't tend to be the loudest chicken, they certainly do like to cluck and crow and make chicken noises at times.

    What color egg does a Delaware chicken lay?

    They lay a Brown egg.

    How long do Delaware chickens live?

    They have a pretty average lifespan for a chicken as they don't have any breed specific health concerns. So, typically about 8 years or so.

    If you need more help with taking care of your chickens, check out The Organized Chicken Keeper for a complete system for managing their health through keeping their supplies stocked and coop clean.

    Access The Organized Chicken Keeper Here

    Swedish Flower Hen: Perfect for Your Flock?

    By MrAnimal Farm

    Wanna add a little pizazz to your flock? Try the Swedish Flower Hen (no, they aren't all hens). Their beautiful, wide variety of patterns and good egg laying abilities make them a good candidate for anyone raising chickens.

    Swedish Flower Hens (also known as Skรฅnsk Blommehรถna) are a landrace chicken originally from Sweden. They are a dual purpose bird who lay about 200 L - XL sized eggs per year. Additionally, they are very cold hardy and also are excellent foragers.

    They also tend to be very healthy and easy to take care of.

    Swedish Flower Hens are a rare chicken breed, but are growing in popularity. Before adding any to your flock read on to find out specifics about their temperament, care and other important qualities to assess if they are right right fit for you.

    Swedish Flower Hen

    SizeMales: 6 - 8lbs; Females: around 5.5lbs
    ClassLandrace
    ColorVariety with base of red, blue, black and a flower pattern
    TemperamentCalm & Intelligent
    HardinessCold
    Eggs/Yr200
    Egg SizeL-XL
    Egg ColorCream/Beige to Light Brown

    History & Origin

    Swedish Flower Hens originated in Sweden (shocker!). Their Swedish name is Skรฅnsk Blommehรถna.

    Their exact history and origin is not well documented, this is due to the fact that they are a landrace breed. Like most landrace breeds, they have a diverse genetic background this is due to the fact that the breed developed through basically natural selection rather than a human (breeder) making breeding decisions based on a particular set of traits.

    Essentially, the breed created itself by breeding together with whatever specimens tended to thrive in their area. This, in turn, created a very hardy and well-rounded breed.

    However, one downfall of this is that since no one in particular was working with the breed, over time they were used less as other breeds were introduced which almost led to their extinction. Luckily, their declining numbers were caught in time and now people are working to restore the breed.

    They were not imported into the US until around 2010. Since being introduced to the United States, they are slowly growing in popularity and more and more people are working with the breed which will help with their repopulation.

    Need some help keeping your chickens health and care taken care of? Check out the Organized Chicken Keeper for an easy to follow system.

    What Do They Look Like?

    Due to the fact that this bred developed on its own moreso than having humans selecting certain traits, they do tend to have a bit of variation in the way that each chicken looks. There are some generally accepted traits that most all in the breed will have though.

    They come in a wide variety of colors. Though they tend to have a blue, black or red base color. Most birds of this breed with have white wing tips, but not all do.

    They get their name from the flower-like pattern that almost all of the birds will have. It is a millefleur pattern. This cover of flower-like shapes all over their feathers is really quite striking and makes them a nice bird to add to your flock if you are looking for something a bit on the flashy side.

    There is one rare color called Snow Leopard in this breed that is not common at all. But is one of the more striking colors that shows up in Swedish Flower Hens.

    They are sometimes a crested chicken (like Polish Chickens) and sometimes not crested.

    They have a single red comb and red wattles, similar to a lot of other breeds such as Rhode Island Reds and Amberlinks.

    The roosters tend to weigh in the 6 - 7 pound range while hens usually are around 5.5 pounds. This makes them a medium sized breed.

    Their legs are yellow in color and do not have feathers (unlike Marans which are a feather legged breed). And they have four toes on each food (unlike Silkies which have 5 toes on each foot).

    Breed Standards

    This breed is not an accepted breed in the APA or most any other association, therefore they do not have a set breed standard. Some breeders are working to hopefully get them accepted at some time in the future.

    Temperament

    This breed tends to be calm, intelligent and friendly. They are not a lazy breed as they really enjoy foraging and moving around. But they are not super active or skiddish like Easter Eggers can tend to be.

    They are fairly easy to handle due to their calmness and friendliness. Though they aren't always the bird that will be running up to you for attention. This is due to the fact that they tend to like doing their own thing and being independent (likely a trait developed during natural selection).

    Since they are a landrace breed and spent a lot of time fending for themselves early on, they also tend to be alert and able to stay away from predators which works well during their foraging.

    What is Their Purpose?

    Though they are considered a dual purpose breed - they can be used for meat and eggs. They aren't one of the largest chicken breeds or the fastest maturing ones, so meat is not their main purpose. They can still certainly be used as a meat bird.

    They are good egg layers laying around 3 - 4 cream to light brown colored eggs per week. Their initial eggs start out on the smaller side, but as they mature their eggs get larger. By their peak, they lay a Large to Extra Large sized egg.

    In addition to eggs and meat, they make relatively good pets also. They tend to be calm and friendly which lends itself to being easy to handle.

    Care & Health

    The way that this breed was developed has created birds that are really very healthy and hardy. So, they don't really need much in the way of special care.

    They of course, should have a good chicken coop and run (if they are not allowed to free-range). As well as your typical chicken waterers and chicken feeders.

    It is rather cold where they originate from and this has made them an extremely cold hardy breed. So, great for colder climates.

    They also love to forage (just like dorking chickens), which is a great way to cut down the chicken feed bill. So, if you have the room and ability to let them free-range they appreciate having the space to roam.

    FAQ

    What color eggs do Swedish flower hens lay?

    They can lay a Cream/Beige to Light Brown colored egg.

    What age do Swedish flower hens start laying?

    They are usually ready to start laying eggs on the younger side so, in the 4 - 6 month range is pretty typical.

    Are Swedish flower hens good layers?

    Yes, they are good layers of L-XL eggs at about 3 - 4 per week. That amounts to about 156 - 208 eggs per year. Their first few eggs tend to be on the smaller size, but will get larger as the hen ages.

    How much do Swedish flower hens cost?

    They are a chicken that costs about the midrange of prices. So, for day old chicks, you'll typically see about $10 - $25 per chick, but prices can increase from there dependent on age, sex and quality.
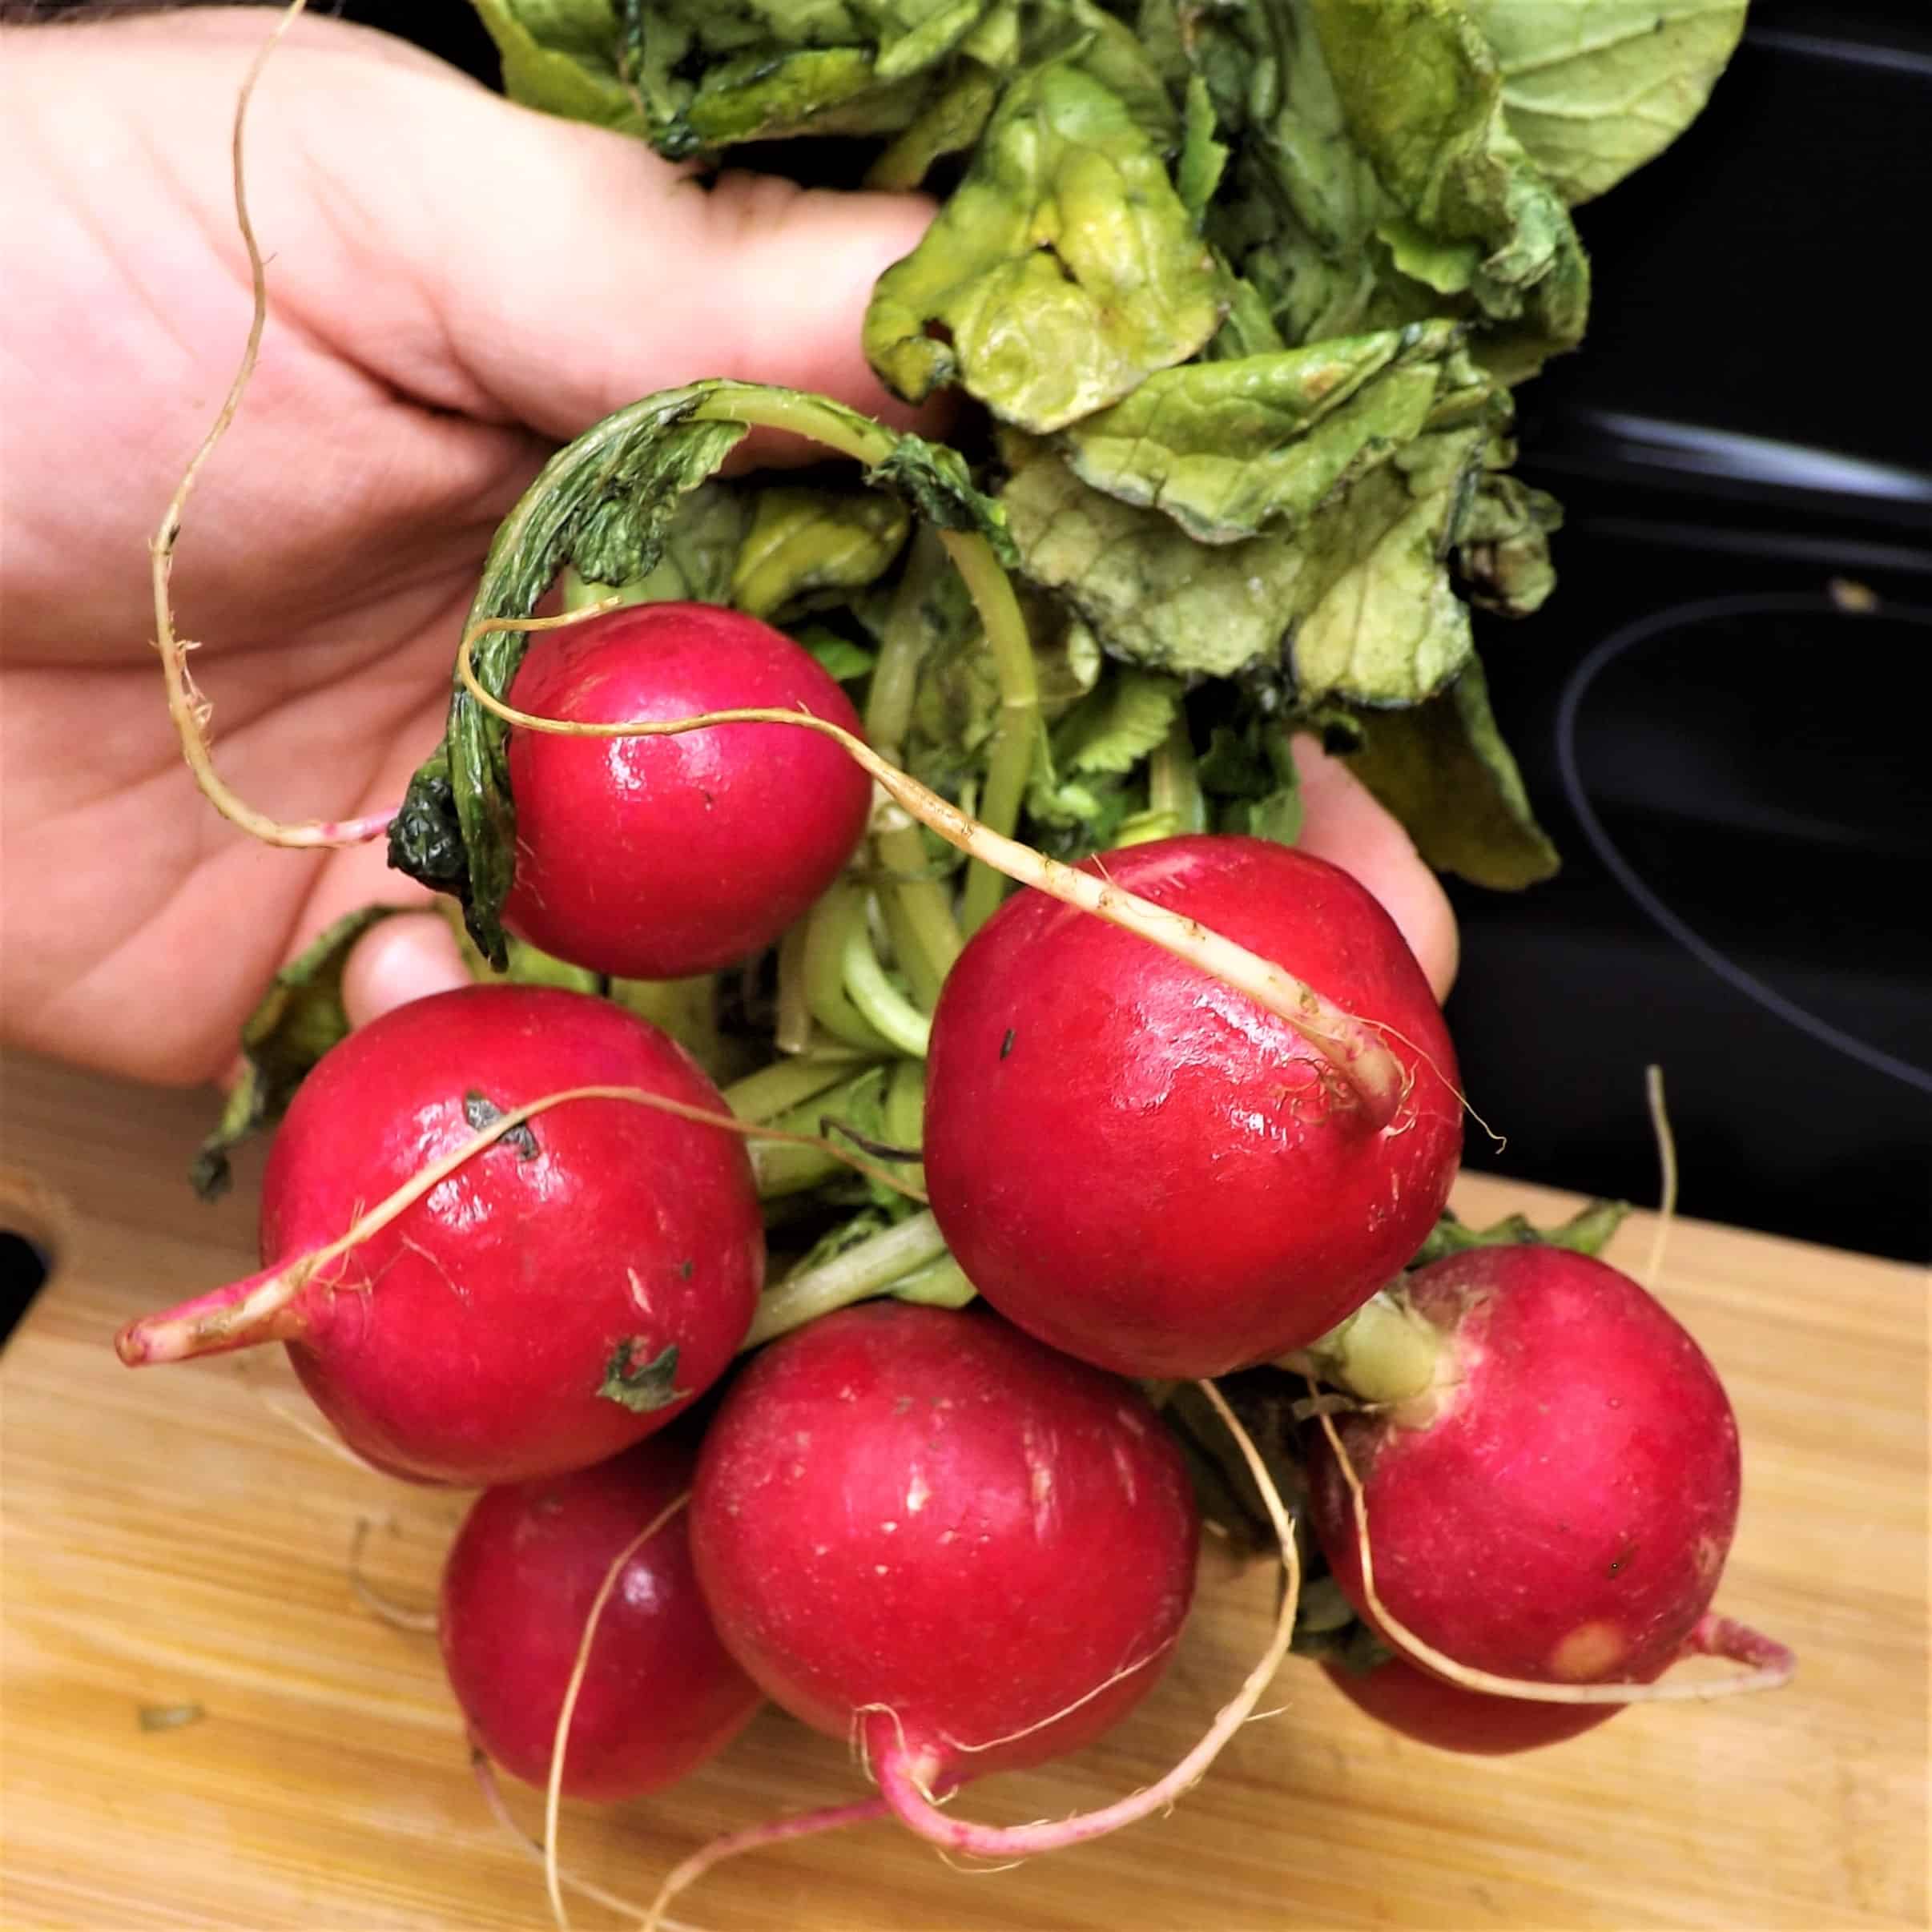
    How to tell a Swedish Flower Hen female from a rooster?

    You can follow most of the typical ways to sex a chicken when you are trying to determine if you have a Swedish Flower Hen female or rooster. Roosters will have larger combs, wattles and legs. They will also have longer, pointer hackle and saddle feathers which also typically are more colorful.

    If you need more help with taking care of your chickens, check out The Organized Chicken Keeper for a complete system for managing their health through keeping their supplies stocked and coop clean.

    Access The Organized Chicken Keeper Here

    Deathlayer Chickens: Everything You Need to Know

    By MrAnimal Farm

    Deathlayer Chickens (also known as known as Westfรคlische Totleger) are originally from Germany. They are proficient egg layers who are known to lay eggs until they die.

    If you are looking for a rare, beautiful and unique chicken breed to add to your flock, a Deathlayer chicken might be just what you need. Other than the obviously cool name, this breed is also a good egg layer that lays well into older age. They tend to be an easy to care for chicken as well.

    They are a small to medium sized bird which lays medium sized white eggs several times a week; up to 200 in a year!

    Though they may not lay quite as well as their name implies, they are a decent egg laying addition when choosing a breed for your flock.

    Is this metal named chicken going to lay to the death? Read on to find out the answer to that as well as their temperament and care needed to see if this is a breed that is right for your flock.

    gold deathlayer chicken on grass
    Photo credit: H&B Farmstead

    Deathlayer Chickens

    SizeMales: 5lbs; Females: 4lbs
    ClassN/A
    ColorSilver and Gold
    TemperamentActive
    HardinessCold & Heat
    Eggs/Yr150-250
    Egg SizeMedium
    Egg ColorWhite
    Life Span5 to 8 years

    History & Origin

    This breed is considered a rare breed and originate from Germany. There is not a ton on their history available, and some of it is questionable.

    It is said that they got the name Deathlayer through translation of their German name Totleger. And, though Tot does mean dead in German, it is more likely that the Deathlayer name came about due to slight German name variations over time (source: Wikipedia).

    As for how long chickens lay eggs, most chickens will taper production greatly at just a few years. Due to their name, they are rumored to lay eggs throughout their life until the day they die. And, while this may be true, there are no actual records of this fact.

    In any case, however the name came about, it is definitely an eye-catching, hardcore metal chicken name if there has ever been one!

    Deathlayer chickens were originally imported to the US from Greenfire Farms. Who first brought in the silver penciled and then the gold penciled coloring. Since then, they have started to grow in popularity in the US due in part to their stunning look and also in part due to their fantastic name.

    What Do They Look Like?

    This breed comes in both Silver Penciled and Gold penciled coloring. Both are stunning colors and make for a very eye catching addition to your flock.

    Penciled coloring is the pattern on the birds feathers. And then silver refers to the overall color of the bird being silver. And gold refers to the overall color being a gold deathlayer.

    Photo Credit: B&B Cheek Cheeks

    They have a rose comb which is red to match their medium sized red wattles. Their legs are slate or blue-grey with four toes on each foot. They are clean legged, unlike Marans and Silkies.

    Need some help keeping your chickens health and care taken care of? Check out the Organized Chicken Keeper for an easy to follow system.

    Breed Standards

    This breed is not accepted by the APA, so there are no set breed standards to speak of. This means that they cannot be shown at APA sanctioned shows.

    Temperament

    This breed tends to enjoy an active and energetic life. They are great foragers (which is awesome to help keep your chicken feed costs under control).

    They also tend to be hardy in both hot and especially cold environments. This combined with with their active foraging makes them a good addition for any flock, particularly if you have room for them to roam.

    Here's what some owners and breeders are saying:

    According to breeders at H&B Farmstead, "Very beautiful breed that tends to be skittish"

    Ben D at B&B Cheek Cheeks: "The roosters are one of the least intelligent out of all the different breeds we have. The girls are very talkative and curious yet always cautious or skiddish....They are very good foragers/free rangers, cold hardy."

    Mallory K at K Quarter Circle: "Mine are very friendly and my roo loves to be cuddled, but they can be skiddish as well. My chickens love to eat strawberries."

    flock of silver penciled deathlayer chickens in a coop
    Photo Credit: Mallory @ K Quarter Circle

    What is Their Purpose?

    Their main use is for their egg laying abilities. They are not a big enough breed to use as a dual purpose chicken. And, since they are not an APA breed, they can only compete in non-APA shows.

    They are good, steady egg layers. Usually this breed starts laying around 18 weeks old or so. Make sure you know the signs your chicken is ready to lay so you will know when to look out for your first eggs.

    Deathlayers average about 200 eggs per year with some flocks reporting lower numbers closer to 150 and others higher into the 250 range. So, while they are certainly not the egg laying powerhouse of a Leghorn chickens or Amberlink, they do produce a decent amount of medium sized white eggs.

    As mentioned earlier, their name insinuates that they will lay eggs regularly until the day they die. And though they may lay more steadily longer into life than other chickens, there is no actual proof for the claim that they will lay right up until death. Though, anything is possible.

    Care & Health

    Deathlayers tend to be a pretty hardy and need the typical chicken care. Making sure that they have ample room in their chicken coop and run is important due to their high level of energy and activity. Even better if they can free range during the day as they enjoy space to roam and forage.
    You'll also, of course need a standard chicken waterer and chicken feeder. But, they don't need anything special here for care.

    Due to their small rose comb and small to medium sized wattles, they tend to handle cold well. So, you don't have to do too much extra when caring for these chickens in the winter other than making sure they have a draft free coop.

    FAQ

    How many eggs do Deathlayer chickens lay?

    Deathlayer chickens can lay upwards of 150-250 eggs per year. There seems to be variations in the amounts they lay per week and per year. They are said to lay eggs throughout their life, up until the point they die. Most chickens will taper off after a few years of age.

    Are deathlayer chickens cold hardy?

    Yes, deathlayer chickens tend to be cold hardy. This is due to their smaller comb size. Most chickens with smaller combs do well in cold weather.


    What color eggs do Deathlayers lay?

    Silver or Gold Deathlayers lay a white or off white colored egg of medium size.

    How much do Deathlayer chickens cost?

    This is a rare breed, and much like the cost of other chickens, that greatly increases their price. Day old chicks can range from $25 - $100+ for this breed.

    If you need more help with taking care of your chickens, check out The Organized Chicken Keeper for a complete system for managing their health through keeping their supplies stocked and coop clean.

    Access The Organized Chicken Keeper Here

    Serama Chickens: The Ultimate Guide

    By MrAnimal Farm

    A tiny, but quite confident and assertive looking bird, the serama chicken is a fun addition to any backyard flock. Although they clearly are more of a pet or ornamental bird, due to their size, they definitely come with some fun attributes.

    Serama chickens are the smallest chicken in the world weighing in at a whopping .5 - 1 pounds. They are a relatively new breed and come originally from Malaysia. They make fantastic pets and are also bred extensively to be shown.

    Although they are decent egg layers at around 200 eggs per year, their eggs are micro sized just like them.

    Looking a bit like teeny, tiny, toy soldiers the serama certainly has a confident, commanding and even a bit of a fierce looking presence. However, they tend to be very friendly and personable birds which makes them a great candidate for being a pet. They are also used as show birds as well.

    Serama Chickens

    SizeMales: 14 - 16 oz; Females: 12 - 14oz
    ClassSCCL (single comb clean leg)
    ColorWide Variety (ABA accepted are: White, Black, Exchequer and hopefully more soon)
    TemperamentFriendly
    HardinessHeat
    Eggs/Yr200 - 260
    Egg SizeXXS
    Egg ColorCream

    History & Origin

    Seramas are a relatively new chicken breed. They originated in Malyasia in the 1970's. Like a lot of breeds, their exact history and origin is not completely known or documented.

    However, what is known, is that Wee Yean Een developed this breed by crossing Japanese Bantams with Ayam Kapans and Silkies. It is thought that he first crossed Ayam Kapans with Silkies, but many of the silkies characteristics (feather type and feathered legs were not shown in the offspring much - though these due still pop up occassionally in Serama lines).

    Once he had crossed those breeds for several generations, he added in the Japanese Bantam to add in their characteristic erect stance. After several generations of this breeding, the now commonly known Serama characteristics were locked in.

    The breed was brought to the US by Jerry Schexnayder around 2001. And he started his breeding program in Louisiana. He then started the first breed club in 2003 - the Serama council of North America. There is also a second breed club in the US - The American Serama Association - which was created in 2012.

    Need some help keeping your chickens health and care taken care of? Check out the Organized Chicken Keeper for an easy to follow system.

    What Do They Look Like?

    Standing tall and erect with a broad chest, the serama looks a bit like a toy soldier. They are a combination of confidence and pride almost mixed with a bit of humor due to their itty bitty size.

    Size

    They are a true bantam chicken breed. This means that they only come in a small, bantam size and do not have a standard sized counterpart unlike Leghorns and Rhode Island reds which come in both standard and bantam sizes.

    Not only is this breed a true bantam, but they are the smallest chicken breed in the entire world. Following the ABA and APA weight standards, females or hens should weigh 12 - 14 oz and males or roosters should weigh in at 14 - 16 oz. However, for table top showings there are a few different weight classes and some of these birds weigh in a a teeny, tiny 8 oz (which is only ยฝ of a pound!).

    Color

    While most chicken breeds will breed true to color, Seramas do not. What exactly does this mean? This means that you can't always predict the color of the offspring (chicks) based just on their parents colors).

    Though there are only a few colors that are recognized in their breed standards (which are discussed below). The color options in this breed are practically endless, in fact more than 2000 colors have been documented to exist in this breed. This is mostly due to the fact that they were bred for their size characteristics to start rather than focusing on breeding by color which is how many breeds are partially developed.

    Feather Type

    Due to the original cross involving Silkies, non-smooth or standard feather type does pop up in this breed occasionally. This can include silkie feathering, frizzled feathering and leg feathering. These feathering types are not qualities that are bred for or desired in their originating country of Malaysia. However, some breeders in the United States do find these traits desirable and will breed for them.

    Breed Standards

    According to the APA, the only accepted color at this time is white. And, according to the ABA, the only accepted colors at this time are white, black and Exchequer. Although there is work being done to try and get a wider variety of colors added to the accepted color lists.

    An important note, while to show in APA or ABA qualified shows, the chicken must, of course, meet their breed standards. This bred was also originally shown (and still is) in table top shows not sanctioned by the APA or ABA. And those shows have a separate set of breed standards both in the US, Europe and Malaysia.

    Though there are small differences (such as weights and some changes for general appearance), the main accepted standards are fairly similar across organizations. One of the main differences is that for table top shows any color is accepted.

    The main differences between the Malaysian and American standard are that the Malaysian standard tends to lean more extreme in their upright, erect stance.

    They should have a medium sized single comb and medium sized wattles. Both comb and wattles should be red in color.

    Their head is small in size and carried in a held upright and back position. Their neck and back are both short.

    They have a relatively wide, well rounded and broad chest with large wings carried almost in a completely vertical manner. And, their tail is also large and erect.

    They should have four toes on each foot with balanced and equal spacing between each. And, their legs and feet should be clean (no feathering).

    Temperament

    Despite their erect stance (which looks like they might be looking for a fight everywhere they go), they are a very friendly, tame and easy to handle breed. They have gentle and easy going personalities.

    Though, one thing to keep in mind, is that roosters can be a bit aggressive with one another so it is best to not have two roosters housed together. If you do, it is a good idea to ensure that they have a little extra space.

    They can handle being keep confined in a chicken run. However, they do enjoy free ranging and foraging also.

    Hens have a reputation of being good mothers and going broody every so often. Using a broody hen to hatch chicks is great because you don't have to take care of an incubator or anything.

    What is Their Purpose?

    They are essentially an ornamental breed. As you can probably tell, this breed is certainly no meat breed. And though they are excellent egg layers at 4 - 5 eggs per week, their eggs are miniature to match their size. So, while they certainly can be eaten, you'd have to have quite a few to make the size of one egg from a typical egg laying chicken breed like an Australorp or an Amberlink.

    They are mainly used as pets since they are gentle and friendly. They tend to enjoy having human interaction and that combined with their size makes they a perfect pet candidate.

    In addition to being used extensively as pets, they are also widely used as show chickens. They are used both in traditional shows and table top shows due to their small size and being easy to handle.

    Care & Health

    Care for Seramas is pretty on par with most other chicken breeds. Though, in order to keep them healthy, they will need a few accomodations.

    They will need your typical chicken coop and run. Though they will need much less room than standard sized breeds.

    You should choose the best chicken feeders and best chicken waterers for their small size and make sure they are at a height that they can reach easily. Due to their tiny size, eat less than full sized chickens. Which means that the cost to feed chickens on average is higher than for the cost to feed this breed.

    You will want to ensure that they have enough protection from predators as their size will make them an easy target. So, a covered and/or well secured run is important. Also, you may think about a livestock guard dog such as a Karakachan to help protect them.

    They are a fairly healthy and hardy breed, so they don't really need much in the way of special care. The only other thing specific to the breed to consider is cold weather care. If you are in an area where you get fairly cold 35 - 40 or below. You may want to consider ways to help keep the coop warmer or even bring them inside if the temperature drops too far down.

    FAQ

    How many eggs do Serama chickens lay a year?

    They are fantastic egg layers at 208 - 260 eggs per year. This amounts to about 4 - 5 eggs per week. Unfortunately, their eggs are sized proportionate to their weight, so these eggs are extra, extra small.

    Are Serama chickens friendly?

    Yes, they are a very friendly and tame breed. They make wonderful pets.

    How much are Serama chickens?

    Their initial purchase price can range quite a bit and is affected the same way that the cost for most chickens is. Young, unsexed chicks can be found for an average range of $10 - $25. Just like other breeds though, more refined and high quality show prospects may start to increase over that $25 range.

    Also, due to their size, not all breeders will ship young chicks. And, older birds and adults tend to go for higher prices than chicks do.

    However, in terms of the total cost of raising these chickens, it can be a little less than larger breeds due to less feed costs.

    What color eggs do Seramas lay?

    They lay a cream to light brown colored egg.

    Are Serama chickens noisy?

    Though noise level and amount can definitely vary from bird to bird, Serama's don't have a reputation for being particularly loud. Of course, hens will still cluck and make noise and roosters do still crow. But roosters crows tend to be downsized just like their bodies are.

    What are Serama chickens used for?

    Due to their tiny size and friendly personalities, they are typically used as pets or ornamental birds (to be used in chicken shows - both traditional and table top).

    How much space do Serama chickens need?

    They need around 1 - 2 square feet per bird inside the coop or shelter and at least 4 - 5 square feet per bird outside in their run. Though, just like any other chickens, the more space you can give them the better.

    How much do Serama chickens weigh?

    They can range anywhere from 8 oz to 16 oz which equates to ยฝ - 1 pounds. Females tend to be on the smaller weight range with males on the larger weight range (if you can consider any of their weights "larger").

    If you need more help with taking care of your chickens, check out The Organized Chicken Keeper for a complete system for managing their health through keeping their supplies stocked and coop clean.

    Access The Organized Chicken Keeper Here
    • « Go to Previous Page
    • Go to page 1
    • Go to page 2
    • Go to page 3
    • Go to page 4
    • Go to page 5
    • Interim pages omitted …
    • Go to page 9
    • Go to Next Page »

    Primary Sidebar

    kristin, justin and goat

    Hey, we are Justin & Kristin! Welcome to MrAnimal Farm where we share our knowledge on homesteading, livestock and poultry, gardening and food preservation

    More about us โ†’

    Popular Posts

    • Differences Between Ameraucana, Aracana and Easter Egger Chickens
      The Araucana Vs Ameraucana Vs Easter Egger Chicken
    • Chickens That Lay Green Eggs - What Chickens Lay Green Eggs
      Chickens That Lay Green Eggs - What Chickens Lay Green Eggs?
    • brooder box for chicks
      Chick Brooder Plans - How to Build a Brooder in 3 Steps!
    • Curled toes in Chickens
      Curled Toes in Chickens - Causes and Treatment
    • Goat Toys
      DIY Goat Toys: Cheap Toys to Keep Your Goats Busy
    • hen or roo
      How To Sex A Chicken & Tell A Hen From A Rooster

    Fall Homesteading

    • Fresh carrots and beets being held over a wooden table.
      15+ Fall Garden Crops For a Longer Harvest
    • Molting Chickens
      Molting Chickens - What, Why & How to help!
    • two butternut squash on a wood board
      Can You Freeze Butternut Squash ?
    • Goat Breeding Planning - Using ADGA to Make the Right Matches
      Goat Breeding Planning - Using ADGA to Make the Right Matches

    Footer

    Amazon Affiliate Disclosure

    We are a participant in the Amazon Services, LLC Associates Program, an affiliate advertising program designed to provide a means for sites to earn advertising and linking to Amazon.com. As an Amazon Associate we earn from qualifying purchases.

    Privacy Policy

    For details on our privacy policy click here.

    Copyright © 2026 ยท MrAnimal Farm

    Rate This Recipe

    Your vote:


    A rating is required
    A name is required
    An email is required