• Skip to primary navigation
  • Skip to main content
  • Skip to primary sidebar
  • Skip to footer
  • Site Index
  • Fall Homesteading
  • Shop
    • Profitable Homesteading System
    • Jumpstart Your Homestead
    • Organized Chicken Keeper
    • G.O.A.T. Herd Management System
    • The Ultimate Planner for Breeding Goats
    • Couponing for Beginners Planner
  • Nigerian Dwarf Goats for Sale
    • Nigerian Dwarf Goats
  • About

Mranimal Farm

All About Silkies, Nigerian Dwarf Goats & More

menu icon
go to homepage
subscribe
search icon
Homepage link
  • Site Index
  • Fall Homesteading
  • Shop
  • About
  • Contact
  • ×
    Home

    Blog

    Leghorn Chickens: Egg Laying Machines

    By MrAnimal Farm

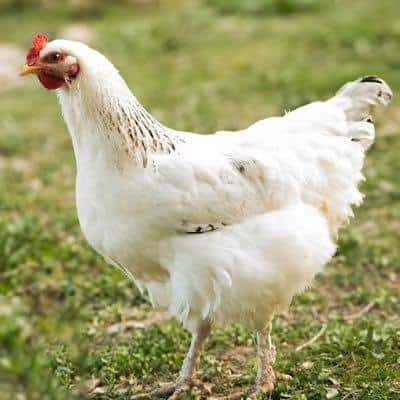
    If you are looking for an egg laying machine, look no further than Leghorn Chickens. These majestic, slender birds with their large, floppy combs are one of the best egg laying chickens that you can add to your flock.

    Leghorn chickens come in both standard and bantam size. They are a light breed with weights ranging from 4.5 -7lbs depending if they are hens or roosters. They are outstanding egg layers laying 5 - 6 eggs per week which totals 290-310 large white eggs per year.

    Although they are most commonly white or brown in color, they do come in a large variety of other colors as well.

    If you aren't sure what breed you want to add to your flock, but you know you are looking for egg production and an easy to care for chicken, then this is definitely a breed to consider. They are not one of the larger chicken breeds, however, they do churn out those eggs!

    They are such good egg layers they have been used to make hybrid chicken breeds to use as production birds such as ISA Brown and White Stars.

    Before you rush out to add them to your flock, keeping reading below to make sure you know their temperament, care needs and other important facts so that you can decide if this is the right breed for you.

    Leghorn Chickens

    SizeMales 6 - 7lbs; Females 4.5 - 5.5lbs
    ClassMediterranean
    ColorWhite and Brown most common.
    TemperamentActive & Stand-offish
    HardinessCold & Heat
    Eggs/Yr290 - 310
    Egg SizeLarge
    Egg ColorWhite

    History & Origin

    Leghorn chickens, though their exact background is not completely known, are originally from Italy (similar to the Sicilian Buttercup chicken). The Tuscany region of Italy to be exact.

    They made their way to the United States (Mystic River, CT to be exact) around the year 1855. There is some disagreement whether the White or Brown Leghorn first came to the United States, but in reality, the doesn't matter much which was here first.

    They made their way from the United States to England sometime in the late 1880's. Due to their fantastic egg laying abilities, they quickly became a popular chicken breed there as well.

    Need some help keeping your chickens health and care taken care of? Check out the Organized Chicken Keeper for an easy to follow system.

    What Do They Look Like

    In terms of size, this breed is a lighter breed. Males range from 6 - 7 lbs while females range from 4.5 - 5.5lbs in size. These weights are, of course, for the standard size. They are also found in bantam size as well.

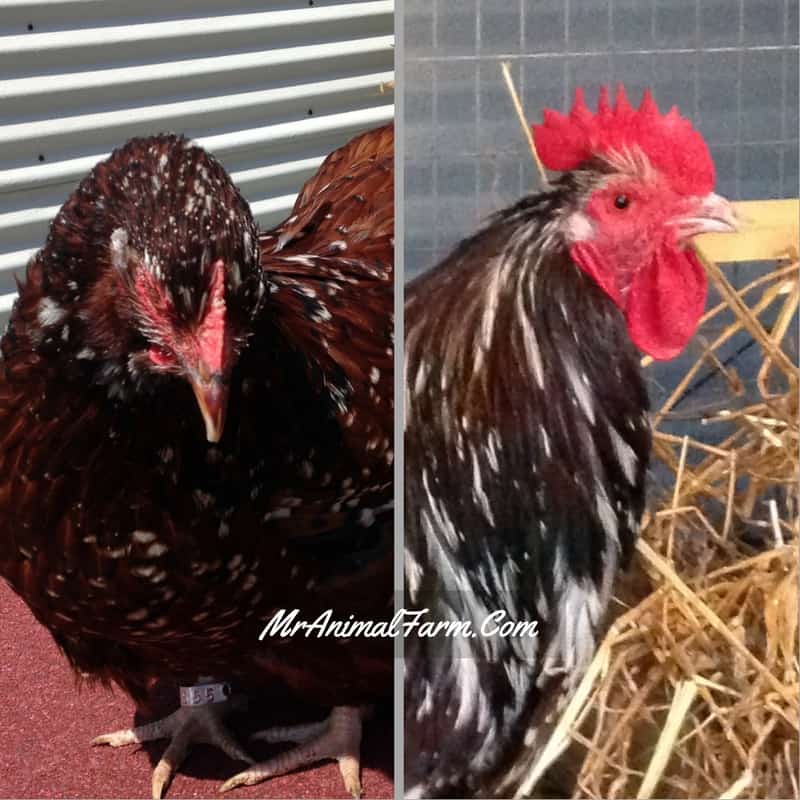
    Unlike other breeds, which typically only have one type of comb accepted in the breed. Leghorns actually have two accepted comb types which are single comb and rose comb. They are known for their big, floppy red combs. Their eyes, face and wattles are also red.

    They have white ear lobes which is an indication they will lay white eggs instead of brown eggs. There are some chickens that lay blue eggs and some chickens that lay green eggs.

    Their beaks, legs and feet are all yellow. They are a clean legged breed like Rhode Island Reds, Australorps and Wyandottes. They have four toes unlike Silkies (which have 5 toes per foot).

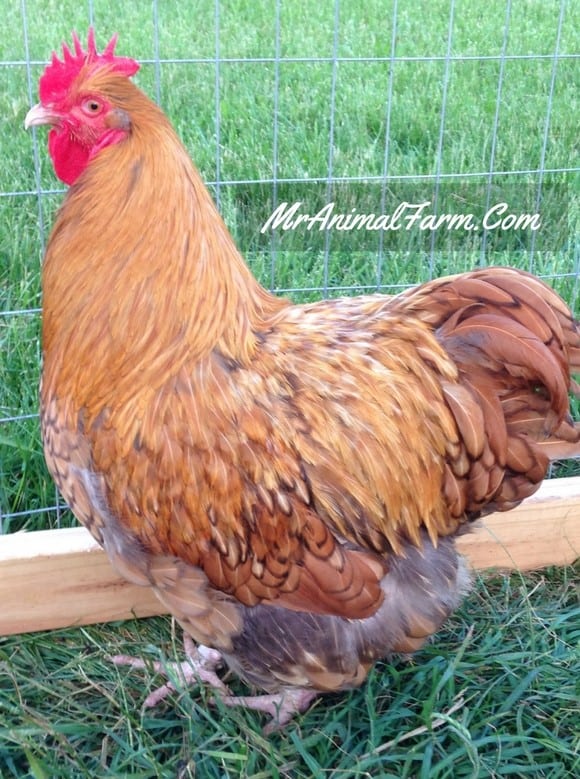
    They are a long and elegant looking bird. Their wings should be held tightly to their sides. They have a well balanced albeit slender appearance. They should have wide shoulders and a long neck.

    Breed Standard

    They were accepted into the APA's Standards of Perfection in 1874. Though they are most commonly associated with being white in color, there were three colors added to the standards. Those colors are: Black, White and Brown.

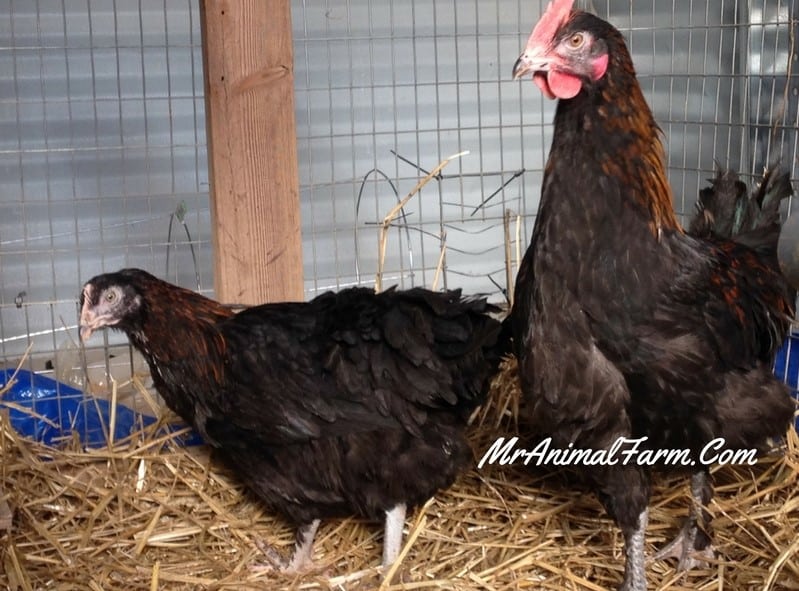
    Several additional colors have been added over the years to include: Buff, Gold Duckwing, Silver Duckwing, Columbian, Silver, Red and several others. Duckwing is not a super common color, but some other breeds like Yokohama come in this color also.

    Leghorns are in the Standards of Perfection as both Standard and bantam sized chickens. And, they are entered with two comb types: single and rose comb.

    Temperament

    Leghorns are a very active bird. They tend to be high energy and enjoy being able to run around and do their own thing.

    However, if they are kept in a coop and run rather than being allowed to free range and run around, they can adapt to that lifestyle as well, it is just not their preference.

    As they prefer to be allowed to run about doing their own thing, they are also good foragers. And, will spend their time out and about hunting for food. This is great as it helps to cut down on your chicken food bill.

    They are not aggressive birds, but most lines do tend to be flighty or stand-offish with humans. So, if you are looking for a pet that loves to be held, this may not be the perfect breed for you.

    What is Their Purpose?

    As you can probably tell from the above, this breed is mainly used for it's egg laying abilities. They are egg laying machines topping out at over 300+ eggs per year for some lines/varieties.

    Their eggs, as mentioned previously, are large white eggs. This breed is commonly used in the egg production industry.

    Due to their smaller size, they are not well suited as a dual purpose chicken since you won't get much meat from them. However, this smaller size just enhances their egg laying as they need less feed to in turn produce even more eggs.

    Adding to their egg laying purpose, they are particularly cold hard (lay eggs throughout cold weather) and also tolerate heat well. This means that you can gets eggs closer to year round with this breed whereas some breeds with decrease their egg production significantly in winter.

    Due to their flighty, stand-offish nature, they don't tend to make the best pets. However, they are easy enough to be handled, that they are also used as show chickens.

    Care & Health

    Taking care of Leghorn chickens is pretty on par with most other breeds. They need the typical chicken supplies such as a coop, run, chicken feeder and chicken waterer.

    They are not particularly fragile, but there are a few health and care concerns to be aware of.

    First, as mentioned above, this breed can tolerate confinement, but much prefers to be able to have a large area to roam since they are active with a high energy level. Therefore, whenever possible, they should have a little more room than your average chicken.

    Second, due to their large, floppy combs, they are more prone to frostbite when it gets cold out. So, make sure that you know how to take care of your chickens in winter by giving them a warm and draft-free coop among other things. And, if they are still having issues, you may need to add some Vaseline to their combs to help protect them.

    Lastly, though they are not as prone as hybrid breeds such as Amberlinks, you do need to be aware they can be more susceptible to egg laying issues such as prolapse, egg binding and peritonisis.

    FAQ

    Are Leghorn chickens friendly?

    They are not a super friendly breed. They can tend to be flighty or stand-offish. Though, aren't typically aggressive. There are several different lines and varieties and temperament can vary a bit.

    How many years do Leghorn chickens lay eggs?

    Like most chickens, they hit their peak around two years of age. However, unlike some other heavy production breeds, they have been reported to still lay fairly well into 3 and 4 years of age.

    Are Leghorn chickens cold hardy?

    Yes, they are cold hardy. Though you do need to keep an eye on their large combs to ensure that they don't get frostlbite.

    How big do Leghorn chickens get?

    For the standard size, males get about 6 - 7lbs while females get about 4.5 - 5.5. lbs. They do come as bantams also. Bantams tend to be about ⅓ - ½ the size of their standard sized counterparts.

    How long do white Leghorn chickens live?

    They tend to have slightly less of a lifespan than the average chicken. So, in the 5 - 6 year range. This is due somewhat to the extra stress and energy output that their heavy egg laying puts on their bodies.

    At what age do white Leghorns start laying?

    They start laying eggs on the early end of around 16 weeks or about 4 - 5 months of age.

    How much does a Leghorn chicken cost?

    The cost of these chickens will depend a bit on where you get them, the color, age and sex. In general, day old chicks can range from just under $3 to just over $4. The cheaper end will be roosters or unsexed chicks while the more expensive end will be for females.

    Of course, if you are looking to get pullets or adult hens, then the price will go up significantly. Though adult roosters won't be as expensive since they are typically not as high in demand.

    How do you tell the difference between a male and female Leghorn chicken?

    The main differences, like many other breeds, will be that roosters will have larger combs and wattles. They will have larger and longer tail and hackle feathers. They will have thicker legs and will have spurs. And, of course, roosters won't lay eggs.

    If you need more help with taking care of your chickens, check out The Organized Chicken Keeper for a complete system for managing their health through keeping their supplies stocked and coop clean.
    Access The Organized Chicken Keeper Here

    300+ Goat Names And How To Pick The Best One

    By MrAnimal Farm

    close up of juvenile wether

    Naming your goats is one of the most fun parts of raising goats. Of course there is no right or wrong when it comes to goat names. However, there are a few common themes that tend to get used.

    Goat names can be really elaborate or super simple. It really all depends on what you like. The only restrictions there are when it comes time to name your goats is if you are registering them. You will need to use the herd name as the first part of their name and there also may be a character limit. Otherwise, the sky is the limit for what you might name your goats.

    close up of juvenile wether

    Goat Names

    Before we get into potential specific names for individual goats, let's be sure that you know your goat names when it comes to general goat terminology.

    Definitions For Goat Names by Sex and Age

    Female Goats:

    • Doe - Mature female
    • Doeling - young female
    • Bred Doe - pregnant female

    Male Goats:

    • buck - adult male
    • buckling - young male
    • wether - fixed or castrated male

    Baby Goats:

    Kid - young or baby goat

    Then, of course there are also types of goats and goat breed names. For example, dairy goats which are goats mostly used for milk are a breed type. And then, Nigerian Dwarf Goats is the name of a specific goat breed.

    Naming Conventions

    Now that you now general names for goats, let's chat quickly about naming conventions for goats. Of course, you can call or name your goat anything that you wish.

    However, if you have registered goats, you there are a few considerations. For example, the start of any goats registered name will be the herd name of whoever bred the kids. That herd name will be followed by the specific name of that goat.

    Many people, when registering goats will have a more elaborate registered name and then will use a barn or call name that is much shorter. For example, we have a MrAnimal Farm Cordelia's Wishlist. We just call her Cordy.

    One thing to keep in mind, if you are choosing a registered name for your goats is that each registry will have a maximum characters for your name.

    Additionally, and this is certainly not a requirement, but especially if you have a larger herd you may consider themed names. So, naming kids after their dam or sire so that you can keep track of how they are all related - this can make managing your herd a little easier.

    For example, we have a CacaoMartini whos daughter is Gin-N-Juice. (Gin's sire is Vanilla Ice, so her name is actually based on both sire and dam). Gin's son is Gimlet.

    Following a familial theme makes it easy to remember who is related to who.

    Another way to follow themes is for all kids each year to follow the same theme. For example, one year we did all female wrestlers for our kids names. So, we had Dusty Rose, Miss Madness, Marlena and so on. That way we know what year all of those kids were born in.

    You definitely don't have to follow any themes, but it can be both fun and helpful.

    Need some help to keep your goats healthy and maintained? The G.O.A.T Herd Management Binder has you covered from supplies to routine care reminders.

    Goat Names - by Category

    With that said, the sky is the limit for your potential goat names, but here are several ideas to get you started. We have broken each set of names into several categories to help keep everything organized.

    Boy/Male Goats

    Here are several goat name options for if you have a buck or wether.

    • Billy
    • Vinny
    • Willy
    • Liam
    • Sammy
    • Lucas
    • Mason
    • Alexander the Goat

    Girl/Female Goats

    Here are several name options for your female goats (does and doelings).

    • Lilly
    • Diva
    • Ava
    • Sophia
    • Ella
    • Amelia
    • Harper
    • Alice

    Funny Goat Names & Punny Goat Names

    If you are looking for clever or punny goat names, here are a few to get you started.

    • Butthead
    • Billy the Kid
    • Scapegoat
    • Milky Way
    • Hard-head
    • Goat-pocalypse

    TV, Movie, Comic & Book Goat Names

    Here are several goat names based on actual goat characters in TV, Movies, Comics and Books. As well as just regular characters from those places that may suit your goats.

    For example, we have lots of 24 and Buffy the Vampire Slayer inspired names in our herd.

    TV:

    • Tabitha the Goat (The Walking Dead)
    • Lekmet (Disney's Star vs the Forces of Evil)
    • Hammerhead Hannigan (Darkwing Duck)
    • Bauer (24)
    • Chloe (24)
    • Meredith (Grey's Anatomy)
    • Targaryen (Game of Thrones)
    • Arya (Game of Thrones)

    Movies:

    • Pan (Pan's Labrynth)
    • Dumbledore (Harry Potter)
    • Doe-rothy (The Wizard of Oz)
    • Glenda the Good Goat (The Wizard of Oz)
    • Nicole Kid-man

    Books

    • Mr. Tumnus (Chronicles of Narnia)
    • Scarlett Goat'Hara (Gone With The Wind)
    • Goaticus Finch (To Kill A Mockingbird)
    • The Great Goatsby (The Great Gatsby)
    • Gandalf (Lord of the Rings)
    • Hermione (Harry Potter)
    • Goatness Everdean (Hunger Games)
    • Bilbo Baggins (The Hobbit)

    Comics

    • Dazzler
    • Bucky Barnes, The Winter Solider
    • Joker
    • Lex (Luther)
    • Ivy (Poison Ivy)
    • Harley (Quinn)

    Music Names

    Love music? Perhaps you should name your goat after your favorite singer, band or song. Here's a list to get you started.

    • Gin-N-Juice
    • Ice, Ice, Baby
    • Milkface Killah
    • Goatface Killah
    • Evil Little Goat
    • Baaaaaa-donna
    • Baby Goat Back
    • Natalie (Maines)

    Groups & Duos, & Twin Goat Names

    Perhaps you love themed names and want your whole herd to be named like a group. Or, maybe you need some twin goat names or even triplet goat names for a whole set of kids in a theme.

    • Thelma & Louis
    • Velma & Daphne
    • Shaggy & Scooby
    • Clark & Lois
    • Lucy & Ethel
    • Jack, Janet, Chrissy (Three's Company)
    • Buffy, Willow, Xander (Buffy the Vampire Slayer)
    • Luke & Leia (Star Wars)
    • Han & Chewie (Star Wars)
    • Beyonce, Kelly, Michelle (Destiny's Child)
    • Blanche, Dorothy, Sophia, Rose (Golden Girls)

    101 Disney Names for your goat

    Disney names are wildly popular for pet goats, farm goats, and show goats. Here's a good size list so you can start thinking of which one is best for your new goat.

    Note: Although, technically, both Star Wars and Marvel/Avengers are now Disney, we did not include them in this section of Disney names.

    Disney Girl/Female Goat Names
    • Alice: Alice In Wonderland
    • Abby: Chicken Little
    • Akela: The Jungle Book
    • Amber: Sofia the First
    • Anna: Frozen
    • Ariel: The Little Mermaid
    • Aurora: Sleeping Beauty
    • Babette: Beauty and the Beast.
    • Bambi: Bambi
    • Belle: Beauty and the Beast
    • Bianca: The Rescuers.
    • Briar Rose: Sleeping Beauty
    • Celia: Monsters Inc
    • Cinderella: Cinderella
    • Cleo: Pinocchio
    • Colette: Ratatouille
    • Daisy
    • Dory: Finding Nemo
    • Elena: Elena of Avalor
    • Elsa: Frozen
    • Esmeralda: The Hunchback of Notre Dame
    • Evangeline: The Princess and the Frog
    • Eve: She’s a high-tech robot from WALL-E.
    • Flora: Sleeping Beauty
    • Giselle: Enchanted
    • Hera: Hercules
    • Jane: Tarzan
    • Jasmine: Aladdin
    • Jessie: Toy Story
    • Judy: Zootopia
    • Kiara: The Lion King II: Simba’s Pride
    • Lilo: Lilo and Stitch
    • Lilo: Lilo and Stitch
    • Marian: Robin Hood
    • Mary: Mary Poppins
    • Megara: Hercules
    • Merida: Brave
    • Minnie
    • Moana
    • Mulan
    • Nala: The Lion King
    • Pocahontas
    • Rapunzel: Tangled
    • Rosie: A Bug’s Life
    • Sarafina: The Lion King
    • Sofia: Sofia the First.
    • Tiana: The Princess and the Frog
    • Ursula: The Little Mermaid
    • Violet: The Incredibles
    • Wendy: Peter Pan
    • Willow: Pocahontas
    Disney Boy/Male Goat Names
    • Abu: Aladdin
    • Baloo: The Jungle Book
    • Buzz: Toy Story
    • Chip: Beauty and the Beast
    • David: Lilo and Stitch
    • Dewey: Donald Duck's nephew
    • Donald
    • Geppetto: Pinnochio
    • Hughey: Donald Duck's nephew
    • Jiminy: Pinnochio
    • Kristoff: Frozen
    • Louie: Donald Duck's nephew
    • Marlin: Finding Nemo
    • Mickey
    • Milo: Atlantis: The Lost Empire
    • Mowgli: The Jungle Book
    • Nemo: Finding Nemo (duh)
    • Olaf: Frozen
    • Oswald: half-brother of Mickey Mouse
    • Peter: Peter Pan
    • Phoebus: The Hunchback of Notre Dame
    • Ralph: Wreck-It Ralph
    • Robin: Robin Hood
    • Roger: 101 Dalmatians
    • Timon: The Lion King
    • Aladdin
    • Eric: The Little Mermaid
    • Eugene: Tangled Ever After
    • Florian: Snow White
    • Mufasa: The Lion King
    • Naveen: The Princess and the Frog
    • Phillip: Sleeping Beauty
    • Simba: The Lion King
    • Amos: The Fox and the Hound
    • Claude: The Hunchback of Notre Dame
    • Clayton: Tarzan
    • Edgar: The Aristocats
    • Gaston: Beauty and the Beast
    • Hades: Hercules
    • Hans: Frozen
    • Jafar: Aladdin
    • John: Pinnochio & Robin Hood
    • Percival: The Rescuers Down Under
    • Pete: Mickey Mouse’s arch nemesis
    • Ratigan: The Great Mouse Detective
    • Scar: The Lion King
    • Shan Yu: Mulan
    • Sid: Toy Story
    • Tadashi: Big Hero 6
    • Te Kā: Moana

    100+ Unique and Cute Goat Names for your does, bucks, and wethers

    This whole list is made up of a ton of unisex and super cute goat names that you can give to any goat you want!

    Cute and Unique Goat Names
    • Adrian
    • Alaska
    • Angel
    • Ash
    • Aspen
    • Avery
    • Babe
    • Bailey
    • Bandit
    • Bear
    • Bentley
    • Berkeley
    • Biscuit
    • Blaine
    • Blue
    • Boo or Boo Boo
    • Boomer
    • Brownie
    • Butters
    • Butterscotch
    • Button
    • Charlie
    • Chewie
    • Chocolate
    • Chunk
    • Ciao
    • Coco
    • Colby
    • Corky
    • Cuddles
    • Cupid
    • Dakota
    • Domino
    • Dot
    • Echo
    • Elf
    • Emery
    • Espresso
    • Fluffy
    • Frankie
    • Frosty
    • Fuzzy
    • Gizmo
    • Gouda
    • Gray
    • Harley
    • Happy
    • Harper
    • Hayden
    • Hershey
    • Ivory
    • Java
    • Jazz
    • Jordy
    • Jules
    • Kai
    • Kit
    • Laika
    • Link
    • Lucky
    Cute and Unique Goat Names (cont.)
    • Maple
    • Muffin
    • Munchkin
    • Nacho
    • Nova
    • Nugget
    • Oakley
    • Onyx
    • Oreo
    • Patches
    • Payton
    • Peanut
    • Pebbles
    • Peewee
    • Pepper
    • Phoenix
    • Pinky
    • Pinot
    • Pistachio
    • Pixel
    • Pookie
    • Puffin
    • Puffy
    • Pumpkin
    • Quinn
    • Raisin
    • Rascal
    • Rebel
    • Reese
    • Riley
    • River
    • Robin
    • Rory
    • Runt
    • Sage
    • Sam
    • Sandy
    • Scout
    • Scrappy
    • Sidney
    • Shadow
    • Shaggy
    • Sky
    • Skylar
    • Snickers
    • Snowball
    • Snowy
    • Socks
    • Sparrow
    • Squat
    • Stinky
    • Squirt
    • Storm
    • Sunny
    • Twilight
    • Twix
    • Waffles
    • Wooly
    • Zen

    G.O.A.T. (Greatest of all time) Names

    Someone who is the best at their chosen sport, music or other skill is often times called the G.O.A.T or Greatest of All Time. So, why not name your goats after the G.O.A.T's?

    Of course, there is always a little debate on who should hold this title in some areas, so we have included several that are usually up for the title for some spots.

    Bucks

    • Eminem
    • Lil Wayne
    • Jay-Z
    • Jordan (Michael)
    • LeBron (LeBron James)
    • MJ (Michael Jackson)
    • Ali (Muhammad)
    • Flair (Ric Flair)
    • Messi (Lionel)
    • Gretzky (Wayne Gretsky)

    Does

    • Whitney (Houston)
    • Mariah (Carey)
    • Celine (Dion)
    • Serena (Williams)
    • Mia (Hamm)
    • Simone (Biles)

    If you need more help keeping your goats healthy and well taken care of, check out the G.O.A.T. Herd Management System - worksheets, calculators, supply management and more to keep your goats in tip top shape while cutting down on time.

    Access the G.O.A.T. Herd Management System Here

    How To Take Care of Baby Goats

    By MrAnimal Farm

    Newborn baby goat being held.

    If you are breeding your goats, then you are probably excited for all the bouncy babies you will have soon. However, before they get here, you will need to ensure you know how to take care of baby goats so that you have the most successful kidding season possible.

    Newborn baby goat being held.

    Learning how to take care of baby goats is not difficult. You need to know how to do their health check and provide any assistance right at birth. Additionally, baby goats will need to be fed milk either via nursing on their dam or via bottle for at least the first 8 weeks of their lives. Finally, there are some routine health procedures you will need to know such as banding, disbudding and CDT vaccinations.

    Proper baby goat care is essential to making sure that your kids are healthy and happy. You have likely spent time learning about goat heat cycles so that you can breed your goats. You also have probably learned about kidding supplies and goat labor signs as well. So, make sure to review all the details below on baby goat care so that you are ready for everything when your kids finally arrive.

    Baby Goat Care

    Proper care starts right at birth with a newborn check and a few other essential items. You must also decide how to feed your baby goats (leave them with their dam or put them on a bottle). Finally, there are several things you will need to know how to do such as banding (for wethers), disbudding, tattooing and giving CDT vaccinations.

    All of this is fairly easy as long as you know ahead of time what you need to do and when you need to do it. That way you are well prepared at each step and aren't surprised or miss anything along the way.

    What to do At Birth

    During kidding, if at all possible, you should be there with your doe. This will allow you to provide any assistance that she may need (for example, if she has a kid stuck).

    Additionally, being there at kidding will allow you to perform a quick check on each kid and give it any help that it may need such as getting warmed up or getting latched on to nurse.

    Clean and Dry

    Kidding season is typically late winter/early spring and often times it can be cold or a bit chilly out. Even if the weather is warmer, kids can still get chilled if they don't get dried off quickly enough.

    It is important to make sure that any birthing goo is quickly removed from the kids face - eyes, nose, mouth. You don't want them to inhale any of that as it can cause respiratory issues.

    After their face is cleaned, you can allow their dam to do most of the rest of the cleaning - this helps her bond with her new kid. However, if she is having multiple kids, or if the kid seems to be getting chilled then you may want to jump in to help her clean them up.

    If a kid does get chilled (temp should be 101.3 - 103.5), then you should act quickly to warm them to normal temp. You can do this with a blow dryer, putting them under a heat lamp or putting them in a plastic bag and submerging (not their head) in a warm water bath.

    They cannot eat until their temperature is normal or they will be unable to digest their food.

    Make sure to keep a check on them especially during the first few days to ensure that they are still staying warm. Chilled kids will be lethargic, can shiver, look hunched and have their heads hanging. (Though these can also be signs of other issues such as low blood sugar).

    Newborn Check

    As the kid is getting cleaned off, you want to do a quick check on them and make sure everything appears normal. You can check for sex (make sure boys have both testicles).

    Also check to make sure everything looks formed correctly, breathing appears normal and that they seem healthy in general. We have had issues such as bowed legs, feet that don't go flat on the ground and eyelashes that curved into their eyeballs to name a few.

    Dip Umbilical Cord

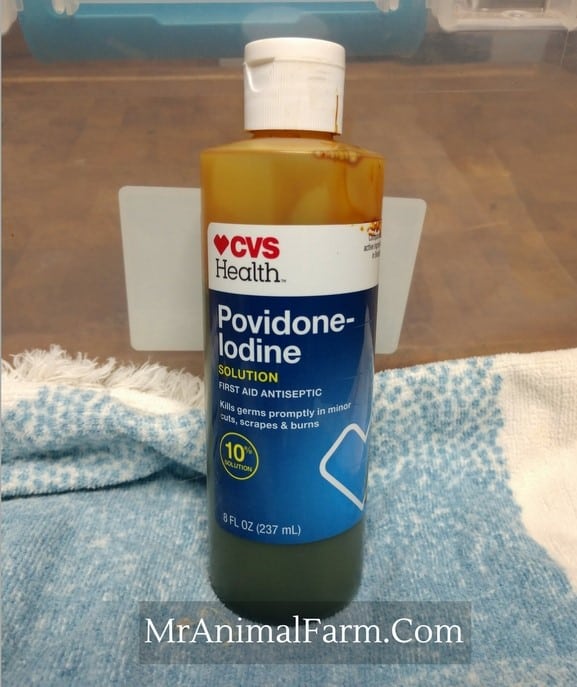
    You should have iodine and dental floss ready to take care of their umbilical cord. If the cord doesn't break on it's own, then you will tie it off with dental floss and break it.

    Then dip the babies cord into the iodine to help prevent any bacteria from getting into it before it dries and seals off.

    Colostrum

    Making sure that newborn baby goats get colostrum quickly is absolutely essential. They should ideally have colostrum within 1 - 2 hours of birth.

    Over their initial first 24hrs they should get approximately 10% of their body weight in colostrum. If they are nursing from their dam, then you won't know the exact amount. But if they are up and active, they they should be good to go.

    You can help them find their dams teat and get latched if they are having difficulty. We always make sure to see every single kid latch on their own before we leave them alone with their dam.

    If they can't seem to easily latch - make sure their is milk coming out of the teats (sometimes they get clogged). If they still can't latch with some assistance, we usually syringe or bottle some colostrum to get them going.

    Need some help to keep your goats healthy and maintained? The G.O.A.T Herd Management Binder has you covered from supplies to routine care reminders.

    Feeding Baby Goats

    There are two main ways to feed baby goats - via their dam or via a bottle. Both ways have definite pros and cons, so you should weigh each option to decide what is best both for you, the doe and the kid.

    Bottle fed kids tend to be more friendly (but this isn't 100% of the time). They are also WAY more work as you have to feed them round the clock. And, you will have to milk their dam right away. So be sure you know how to hand milk a goat.

    However, sometime bottle kids are easier to handle. Also, if you have a dam who isn't making enough milk, had too many kids, isn't a great mom, or had a stressful kidding then bottle feeding might be a great choice.

    Dam raised kids do tend to be a little less friendly overall - but this can be remedied by lots of handling. The dam gets to keep and raise her kids for a while and for most does this makes them happy.

    Dam Raised

    To feed dam raised kids, you really don't need to do much. Make sure they figure out how to latch directly after birth.

    Also, check in regularly to ensure that they are getting enough milk from their mom. They should have full bellies and be active.

    Bottle Fed

    Bottle feeding is a full time job at first. Depending how their size and how much milk they can take at once, you will be feeding them every few hours around the clock at first. After a few weeks, you can decrease the frequency.

    Weaning

    Kids can be weaned around 8 weeks of age. They will start nibbling on hay and grain when their rumen starts to develop - typically the 3 week range or so. And by 8 weeks they should be able to eat enough roughage to be taken off milk.

    However, if they are staying in a herd with their dam, then you can let her wean them when she is ready. Some does will kill them off sooner and others will let them continue to nurse for quite a while.

    If you are bottle feeding, you want to slowly wean them off their milk. So, we usually by 8 weeks are at two 16oz bottles per day, we may cut one to 8oz for a week. Then cut both to 8oz for a week. Then one to 4oz for a week and so on. Weaning doesn't have to go that long necessarily, but the longer they are on milk they tend to have better growth in their first year.

    What Do They Need - Baby Goat Supplies

    You don't need a ton of extra supplies to take care of your baby goats. However, it is important to have some things on hand to ensure they are easy to access if you do need them.

    Dry, Warm Shelter

    Your goat kids will need a dry, warm and draft free shelter to ensure that they are able to stay warm. We usually keep our does and kids in their kidding pen for the first few days. There are lots of different goat pen ideas you can use. They are then allowed into the kid goat fenced area to explore and play.

    Milk

    As you already know from the feeding information, your goat babies will need access to milk for a minimum of 8 weeks. Goats milk is the best thing to feed.

    If you don't have access to goats milk, and are bottle feeding, then you can use goat formula replacer or whole cow's milk.

    Other Food Supplies

    Once they are a few weeks old, they will need access to the same food that the adults do. You will need to know how to choose quality hay and leave that for them to eat anytime (though they won't do more than nibble it for a while). They will also need water, baking soda and minerals.

    So, their food needs are basically the same as when raising any adult goats, just at a much smaller rate and add that milk in.

    Medical Supplies

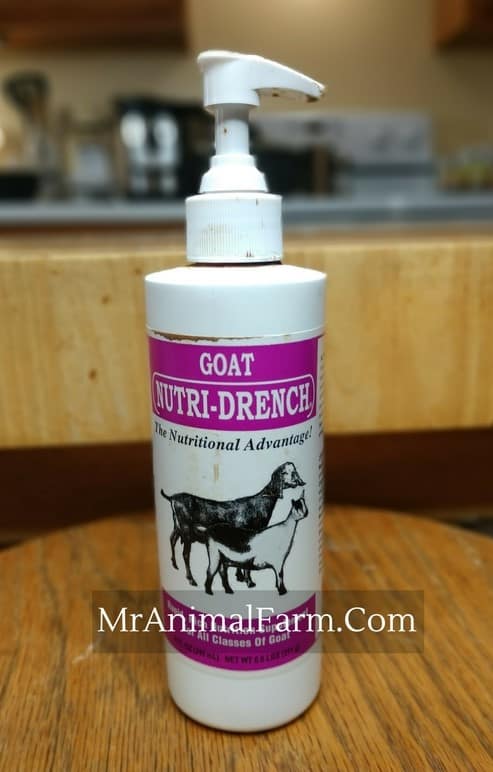
    It is good to have some general medical supplies on hand also in case you need them. Things like Probiotics, Nutridrench, Coccidia treatment and antibiotics.

    Banding - wethers

    If you aren't familiar with goat terminology, a wether is a male goat who is fixed and therefore cannot reproduce. Wethers make good pets and can be kept with bucklings or doelings.

    If you are not keeping your boys in tact, they should be banded around 8 - 12 weeks of age.

    Disbudded vs Polled vs Horned

    Most goats are born horned. However, some are born polled - this is when they are naturally hornless. At least one parent must be polled in order for kids to be polled.

    If your goat kids aren't polled then you will need to decide whether or not you will disbud (burn the horn buds so horns don't grow) them. Typically they will need to be disbudded anywhere from a week to three weeks of age depending on goat breed, sex and size of the kids.

    Tattoos

    If you will be selling your kids (or retaining them) as registered goats, then most registries require them to be tattooed.

    Typically tattooing can be done in their ears (like for Nigerian Dwarf goats) or tail webs (for other dairy goats like LaManchas).

    Vaccinations

    Baby Goats don't really need many vaccines. The most standard one is the CDT shot. They will typically get this at around 4 weeks and then 8 weeks (exact timing can vary a bit depending on what brand etc you use).

    Health Issues

    Of course there are a wide variety of potential health issues that you need to be aware of when caring for baby goats. This is not an exhaustive list, but some of the more common ones are:

    Coccidia

    Coccidiosis is an internal parasite that is quite common in goats, especially kids. It is something that is normal to have, however, they can quickly get an overload which will make them sick.

    It is important to watch out for this as it can be treated, but if left untreated can kill kids rather easily.

    Worms

    While worms are a large issue for adult goats, they are not as big of an issue for kids. But, they certainly can cause an issue for them. So, it is important to keep a Famancha check on kids to make sure they look good.

    Respiratory issues

    Respiratory issues are common in baby goats. This can be caused from temperature changes or aspiration of birthing fluids or being bottle syringe fed.

    Common symptoms are heavy, rapid breathing. As well as a fever and congestion.

    Under or Over Eating

    Kids that are not eating enough, especially young ones, can experience blood sugar drops. This is usually shown by lethargy, hanging head and standing in a hunched position. Make sure that kids stay active and have full feeling bellies to avoid this.

    Kids can actually also over eat - typically with dams who have a single or make a ton of milk or bottle kids. Overeating can cause tummy issues and diarrhea.

    FAQ

    Why do baby goats wear pajamas?

    Mostly, people put pajamas on their baby goats because it is cute. However, sometimes pajamas are used to help keep the goat kids warm.

    Do baby goats need a heat lamp?

    No, they do not need a heat lamp. Occasionally, especially if they are born when it is particularly cold or if they are having issues keeping their temperatures up they may need some supplemental heat from a heat lamp.

    Do baby goats drink water?

    Yes, baby goats do drink water. However, they mostly consume milk in their first several weeks. So, you should provide them with water, but you won't see them drinking a ton of it when they are super young.

    When can baby goats go outside?

    Baby goats can really go outside anytime. However, make sure that it is not super cold. Also, they are small and can fit through typical fencing, so you might want to keep an eye on that. Their size can also make them more prone to getting caught by predators. So, it might be good to use a livestock guard dog like a Karakachan.

    Do baby goats like to be held?

    This will vary from goat to goat. Most baby goats like being held especially if they are bottle kids or have been given a lot of human attention from a young age.

    If you need more help keeping your goats healthy and well taken care of, check out the G.O.A.T. Herd Management System - worksheets, calculators, supply management and more to keep your goats in tip top shape while cutting down on time.

    Access the G.O.A.T. Herd Management System Here

    How Much Do Chickens Cost?

    By MrAnimal Farm

    Whether you are just getting started raising chickens or if you have had your backyard flock for a while, you will want to know the answer to how much do chickens cost. Without knowing what your chicken expenses are, you won't be able to budget appropriately.

    Although the exact amount can vary greatly based on size of flock and your flock management a general average for 5 adult chickens per year is $255. The first year will cost a bit more due to one time purchases such as a coop and run and can total around $825 for a flock of 5 chickens.

    Of course, some of these costs can be cut by making some of your own supplies.

    In order to accurately calculate how much your chickens cost, you will need to know both your fixed (one time) costs as well as your ongoing (monthly) costs. Of course, the exact amounts you will spend will vary based on your area, your set up and your flock management. However, we will discuss below some general averages to give you a good idea of where to start and also give you the calculations you need so that you can input your exact costs.

    How Much Do Chickens Cost?

    Below we will break down costs by several different cateogories. And, will provide much more detail on how these costs may fluctuate depending on your flock and your situation.

    However, before the deep dive, lets look at an estimation for how much chickens cost assuming a flock of 5 common breed birds purchased as day olds.

    ItemCost
    5 Day Old Common Breed Female Chicks$20
    Brooding supplies$100
    Coop$250
    Run$150
    Metal Feeder & Waterer$50
    Non-Organic Feed for one year$135
    Bedding Material$60
    Medical Supplies$60
    TOTAL FOR INITIAL PURCHASE & FIRST YEAR
    TOTAL PER YEAR AFTER INITIAL PURCHASES
    $825
    $255

    How Much Are Chickens to Buy?

    The upfront cost of your chickens will vary dependent on several factors: what chicken breeds you choose, what age they are and if you get hens or roosters.

    Chicken Breeds

    The price to purchase your initial chickens will vary greatly dependent on what breed or breeds you decide to get. If you are getting more common chickens like Black Australorps, Wyandottes, Amberlinks, Sussex, or Rhode Island Reds you won't pay a high or premium price (with the exception of if you are getting a high quality show stock from a popular breeder. But, even in that instance, they will not be nearly as pricey as other fancy or less common breeds.)

    If you are getting breeds that are fancy, used for pets or show or a little less common such as Marans, Silkies, Salmon Faverolles then you are going to be paying a mid-price range for your initial stock purchase of birds.

    And, if you are getting a breed that is rare or highly sought after such as Ayam Cemani then you are going to be paying a high end, top dollar price even for unsexed day old chicks.

    One additional thing to keep in mind in terms of breeds and pricing. Some breeds, such as Orpingtons, will have a wide range or price based on colors. For example, buff Orpingtons will fall in the low tier price range as they are a common color. However, more rare colors such as chocolate cuckoo or gold laced will fall in the mid to high price range.

    Need some help keeping your chickens health and care taken care of? Check out the Organized Chicken Keeper for an easy to follow system.

    Age

    Age is also a large factor in how much you will pay for your initial chicken stock. You can expect to see ranges based first on what breed as mentioned above and then, generally, these age ranges will affect prices: hatching eggs, day olds (or otherwise young), 8 week to 4 months, adults.

    Hatching eggs will generally be the lower of these price ranges. Again, depending on the breed of course, but you can be looking at anywhere from $1 per egg up to $10+ per egg for fancy or rare breeds.

    Day olds tend to be slightly more expensive than hatching eggs. Low cost breeds such as Rhode Island Reds, you can usually purchase for just a few dollars $2-$4 per chick. Fancier breeds such as Silkies may be more in the $10-$15 range. And rare breeds or colors will be $15 and up. For example, young Ayam Cemani chicks can be $100 or more.

    Hens or Roosters

    Pullets or Hens (if you aren't up on your chicken terminology, these are the girls) will be more costly than a Rooster which doesn't lay eggs (male).

    Pullets (so, girls that aren't quite at point of lay yet) will be in the $10-20 range for general low cost breeds. Price, of course will increase with breed type and age. Point of Lay hen will tend to be more in the $20 - $30 range (again, more expensive breeds would be a higher price at this age and sex).

    Roosters, in general, will be less than hens or pullets. For example a rooster of the same breed and age that a female would go for $15, the rooster may only be in the $5 range or less. Roosters have less of a demand, some people aren't even allowed to have them in their zoning areas, hence the cheaper costs.

    How Much Are One Time Chicken Costs?

    When you first start your flock, you will have several one time chicken costs. Of course, if you have your flock for a very long time you may have to make repairs or replacements to some of these items due to long term wear and tear. However, it won't be something that is a regular cost.

    Depending on what age of birds you get, you may be able to cut some of these costs out. On average, if purchasing your coop and building a permanent run for around 5 birds, you can expect to spent about $550 in start up costs. Of course, more elaborate coops or larger flocks may cost more and making your own coop, and feeder could really decrease this price point as well.

    Coop

    Chicken coops can be super elaborate, premade structures that you purchase, or you can make your own with supplies that you already have. Therefore, the cost can really range from free or almost free way on up to several hundred dollars.

    The price of your coop will also depend on how many chickens you need to house and therefore how large of a coop you need. Of course, the bigger the coop, the more you will spend.

    If you are a good builder, or are handy then it might be worth trying your hand at building your own coop so that you can save some serious cash.

    In general, if you are purchasing a premade coop for around 5 chickens, you can expect to spend in the $200-$300 range.

    Run

    If you will be free ranging your flock at all times, then you won't need to worry about building a chicken run. However, most flocks will need a run for at least some times during the day.

    Again, the cost of your run will depend on the size of your flock, if they will have free range access at other times and if it is moveable or a permanent, predator proofed chicken run structure.

    We make small, moveable runs for our breeding pens of about 5 - 8 bantam chickens for around $20 - $30.

    You can purchase a premade chicken run for a few hundred dollars (depending on the size you need). Or you can buy a coop with an attached run - this will usually increase the coop price by at least an extra hundred dollars.

    You can also make a permanent chicken run with chicken wire and some t-posts and/or other wooden posts. The price will vary greatly depending on how much run space your chickens need. So, you will just take the price of the roll of chicken wire and multiply out by how many rolls you need to cover the feet you are enclosing. You can usually get 150 feet for around $80.

    Feeders

    There are also a wide variety of chicken feeder options. You can make a DIY chicken feeder for relatively cheap (sometimes free to $5). You can purchase a plastic chicken feeder for about $10 or you can purchase a metal chicken feeder for around $20.

    After raising literally hundreds of birds and trying out various feeder setups. We would highly recommend investing in a large metal chicken feeder. Yes, they are a bit more expensive right out of the gate, but not outrageously priced. And, quite frankly, they hold up A LOT longer than some of the other plastic options.

    Waterers

    Chicken waterers, like feeders can be a DIY project for relatively cheap. Or, you have a choice of plastic or metal waterers.

    Prices will be about the same, $10 - $20 for plastic and $20 - $30 for metal. Again, we would highly recommend metal as they last a lot longer.

    One additional thing to think about when making your waterer purchase is your weather. If it gets cold enough to freeze waterers where you live you may want to also invest in a heated base to keep your chicken waters from freezing.

    Brooding Supplies

    If you will be raising baby chicks then you will need brooder supplies such as an actual chicken brooder, heat lamp, pine shavings, chick feeder, chick waterer and thermometer. All of these items together you can generally get for $100 or less.

    Incubating Supplies

    Incubating chicken eggs would not be the recommended thing to start with when starting your flock. First, the supplies can be a little costly especially if you are only using them once. And, second, learning how to incubate can take a little time.

    However, if you are wanting to hatching your own eggs, you will need an incubator - they can range from $50 - over a thousand. So, make sure to assess your situation and pick the best egg incubator for your needs.

    The only other supplies you will need is an egg candler and egg cartons/holders.

    How Much Are Ongoing Chicken Costs

    In addition to the above fixed or one time costs for your flock, you will also have ongoing chicken costs that you will have to front monthly in order to keep your chickens healthy. These include costs for feed, medical supplies and bedding materials.

    On average, for a flock of 5 adult birds, you can expect about $22 per month or $245 per year.

    How Much Does it Cost to Feed Chickens?

    If you are feeding adult, full grown chickens a non-organic feed, it will cost around $2.25 per month per bird. Organically fed will cost around $4.50 per month per bird.

    Of course, your exact costs may vary based on the cost of feed in your area. Chickens eat about .25lbs per day. So you can take the actual cost of your bag of feed and plug that in to get an exact amount. Want a automatic calculator for that? Gotcha covered here with the Organized Chicken Keeper.

    And there are several ways you can decrease your chicken feed costs so that you can spend less....or just get more chickens.

    Medical Supplies

    This will vary based on how fast you use your supplies up. It is good to have things like chicken electrolytes and vitamins, e vitamin, bluekote, vet wrap, and an antibiotic on hand at all times. Different chicken health issues will call for different medical supplies.

    If you allot $5 per month, you are probably covered here. Just keeping in mind that some months you may buy some supplies and others none. Also, if you have any major things hit your flock, it may increase your costs here. We are basing that $5/month off of our actual medical expenses average for our flock from the last several years.

    Bedding Supplies

    Unless you have a super large coop, then generally one bag of pine shavings or one bale of straw (whatever your preferred bedding material is) should keep you covered for a month. Generally you can get either for $5 - $8.

    How to Decrease Costs & Make Money with Chickens

    There are a multitude of ways that you can get your chickens to either cost a little less or make money on your homestead to offset their costs.

    First, you can decrease your chicken feed bill by doing things like learning how to ferment chicken feed and using no waste feeders.

    Second, you can DIY your supplies. One of the most expensive start up costs will be your coop and run. By making them on your own, or doing a non-standard coop like a hoop coop, you can really cut down on the cost drastically.

    Third, you can make money with your chickens by selling their eating eggs or even breeding and selling your own chicks.

    FAQ

    Is it cheaper to buy eggs or raise chickens?

    It can be cheaper to buy eggs, unless you have worked to decrease your feed costs and have made sure to choose breeds which are heavy egg layers.

    How much do chickens cost monthly?

    This will depend on your flock management, but on average, a flock of 5 adult birds costs about $25 a month.

    How many chickens do you need to make a profit?

    Unfortunately, there is not a cut and dry answer for this. It will depend on what your are selling from your chickens and how much you are spending to keep them. Using these Profitable Homesteading Worksheets will allow you to plug your actual numbers in so you can get an exact answer.

    Are chickens expensive to keep?

    At just $2.25 per month per bird in feed and then minimal supply costs, no, they are not very expensive to keep.

    How do you feed chickens for free?

    Though it is not recommended to go completely free on their food (you should always offer some actual chicken feed to ensure balanced diet). You can really decrease your feed bill significantly by free ranging, fermenting feed and offering scraps from your kitchen and garden.

    Do chicken farmers make money?

    When managed properly, yes, chicken farmers can make money. It is important to understand your expenses and revenue and plan accordingly.

    If you need more help with taking care of your chickens, check out The Organized Chicken Keeper for a complete system for managing their health through keeping their supplies stocked and coop clean.
    Access The Organized Chicken Keeper Here

    Raising Goats: All You Need to Know

    By MrAnimal Farm

    Raising goats can be such a fun and rewarding experience. I mean, other than the fact that they are adorable jumping machines. They are also intelligent and personable animals that can serve many different purposes on your homestead.

    If you are interested in raising goats, it is important for you to understand their basic needs for shelter, pasture and general supplies. You should also understand what you want them for (pets, show, milk, meat etc) and be aware of their potential health issues. Additionally, you will want to know how much they will cost you to care for.

    When I first decided I wanted goats (because, well, they are SO cute!), I didn't really know all the ways they might help out around the homestead.  As I did my research, I realized that getting goats might be more beneficial than just a new source of animal love 🙂 However, there are also a lot of things you need to know about them so that you can keep a happy and healthy herd.

    Raising Goats

    If you want to be successful with your goat herd, then it is important to understand what your goats will need to stay healthy. You should also assess why you want goats so that you can make the right goat purchase decisions.

    Before you get started, make sure that you fully understand common goat terminology as that will make it a lot easier to understand what your goats need.

    When you know how to take care of your goats and you have purchased the right goats for your needs, wants and situation, then you will have a thriving herd that is very rewarding.

    What are Goats Good for?

    There are a variety of different things that goats can be used for. Though some goat breeds will be better suited for some things than others.

    In general, goats are owned for one (or a few) of the following six reasons: Pets, Milk, Meat, Show, Hair, Brush Clearing.

    Pets

    Many, many people have goats as pets - as their only reason or alongside one of the other things goats are used for. Goats are intelligent and also are attached to their owners. Although some goats are friendlier than others. They do make excellent pets.

    Often times, goats will come over to be pet or just get attention in general from their humans. They have their own individual personalities as well.

    Milk

    If you have dairy goats, then you will be able to get milk from them. Learning how to milk goats is relatively easy and though you won't get as much as a cow gives they do produce well. Especially larger breeds like Saanens.

    You can of course use the milk yourself, either raw or pasteurize the milk. But you can also use the milk to feed to your other homestead animals or to make value added products such as goats milk soap. It is a good way to really use everything on your homestead.

    Meat

    If you have meat goats, then they are (pretty obviously) used for meat products. Breeds such as Boers are very large and produce a good amount of meat for consumption.

    Show

    Goats can be taught to lead on a collar and leash. And, many people like to show their goats in 4h and also in other goat shows.

    Hair

    If you have a hair breed like a Cashmere goat, then you can sheer them and used their hair/fiber for value added products like making clothing.

    Brush Clearing

    Goats love to eat and they are foragers more than grazers. This means that although they will eat grass in a flat pasture, they much prefer to eat brush, trees, leaves and other types of browse.

    Due to this, they are often used to clear brush since they can plow through thorns and vines and thick foliage quite quickly and easily.

    Need some help to keep your goats healthy and maintained? The G.O.A.T Herd Management Binder has you covered from supplies to routine care reminders.

    How to Buy a Goat

    The first and most important thing you need to know about buying a goat is that (like Pringle's) you can't have just one. Goats are herd animals and a single goat will get very lonely. They can actually get sick from being lonely.

    When you are deciding what goat to get, you should decide what you are getting your goats for so that you can easily decide what goat breed will be best for you.

    One other thing to consider is what sex goat(s) to get. It is important to note that bucks and does should not really be kept together at all times as they can breed constantly that way. So, if you are just starting your herd, you should start with two does, a doe and a wether (fixed male), two wethers. Or, if you have separate areas for them you can do any of those combinations together and add two bucks or a buck and weather in another area.

    Goat Supplies

    Goats don't need a whole ton of supplies. However, there will be some one time start up things you need for your herd and then some regular every day supplies to have on hand.

    In addition to your basic care supplies below, you may also consider getting some goat toys to keep your herd entertained.

    Shelter

    Goats hate to get wet. They also need some protection from predators and other weather conditions like wind, snow and heat.

    There are a large variety of goat pens or shelters that you can use for your herd. The space your goats need will depend on their breed (size) and also how much time they will spend in the shelter Generally, they need anywhere from 10 - 20 sq feet of space per goat in their shelter.

    Pasture & Fencing

    Goats will also need some outdoor space. It is important to use proper goat fencing so that it holds your goats in and they don't escape.

    The more outside space they have the better. It will help keep down on health issues such as worms and will also help cut down on feed costs the more browse they have access to.

    It is also important to ensure that there aren't any poisonous plants in their pasture area for them to get into.

    General Goat Supplies

    In addition to shelter and pasture, you'll need some general goat supplies for the daily care of your goats. Things like hay feeders, waterers, hoof trimmers.

    As your herd grows and you have had your goats for a longer time, your list of supplies will probably keep increasing. However, you don't really need too much when you are just getting started for the bare essentials.

    Breed Specific Supplies

    You will also need some supplies that are specific to whatever breed you have chosen. For example, if you have dairy goats, you will need to get milking supplies. If you have fiber goats you will need supplies to sheer them.

    Medical Supplies

    You will also need medical supplies for you goats. Some basic ones that are good to have on hand are:

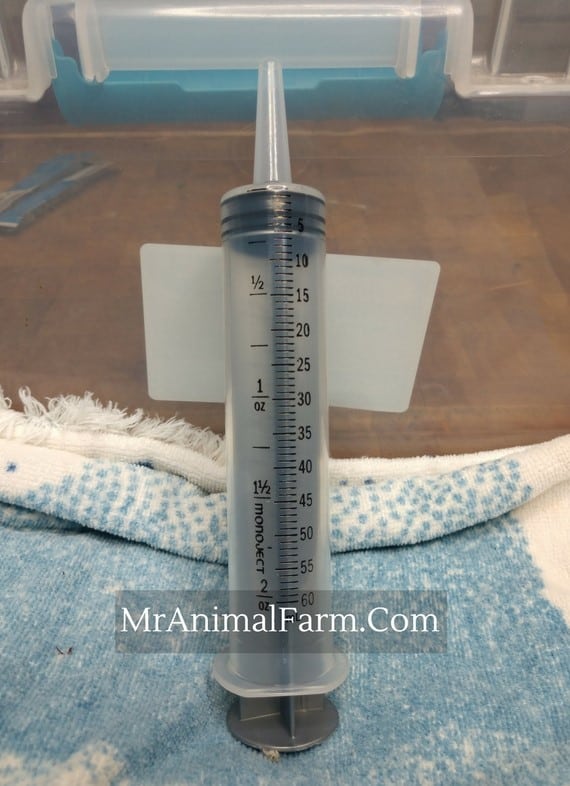
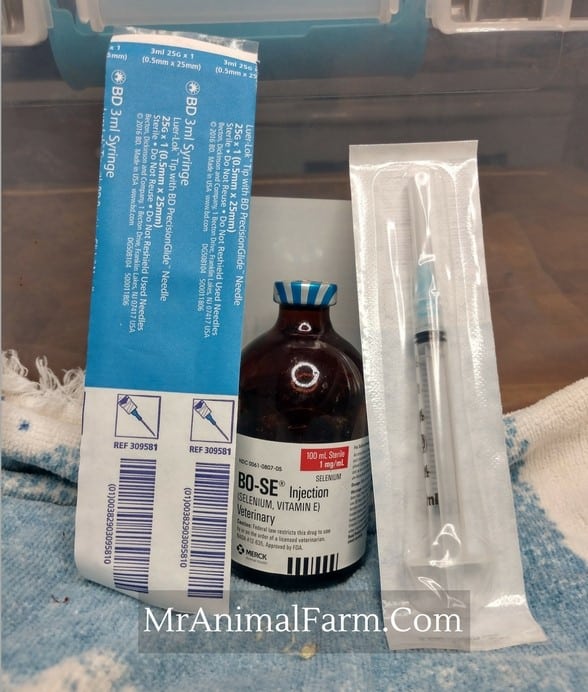
    • Needles and Syringes
    • Antibiotic (such as LA-200)
    • Dewormers
    • Copper Bolus
    • Probiotics
    • Albon or other Coccidiosis treatment
    • BOSE

    Feeding Goats

    As mentioned earlier, goats are foragers not grazers. So, they much prefer brush, vines, bushes, leaves and the like to eat during the day. But, of course, they will eat grass on pasture if that's what you have to offer.

    You will also need to offer them feed regularly as they are unlikely to get everything they need without you giving them food also.

    Hay and Chaffhaye

    They need a high quality hay to eat free choice (available at all times). Grass hay such as orchard or alfalfa is a good choice.

    You can also offer a product like Chaffhaye which is a good hay substitute.

    Baking Soda & Minerals

    Your goats will also need free choice (always available) baking soda and minerals. The baking soda is something they will eat when they need it - it helps prevent bloating issues.

    The minerals should be goat specific and should be a loose mineral not a mineral block. They will also eat those as they need them.

    Grain and treats

    Feeding your goats grain and other treats is not a necessity. It is important to know what goats eat as there are some treats that are not good for them.

    It is OK to give your goats grain or other treats in moderation, but be aware that too much of either can cause severe health issues like bloat. But as a daily treat, or for goats who need to add a little body weight it is totally fine to do in moderation.

    Cost to feed

    The cost to feed your goats will vary drastically based on your cost of hay, how much hay your goats needs (more browse will be less hay consumption) and whether or not you give them additional feed.

    As a VERY general idea, we spend about $250 on feed per goat per year. We have smaller Nigerian Dwarf goats and our hay costs about $7 per bale.

    General Cost of Goats

    The cost of raising goats can vary much like the cost to feed them.

    Your initial goat purchase cost will depend greatly on what type of goats you get, what sex, what quality, if they are registered and what area you are in. So, it can vary anywhere from $50 to thousands.

    Just for some very general cost ideas, we spend about $350 per year on each goat. But, again, that will vary from herd to herd. So, it is a good idea to price hay in your area and vet costs as those will be your major costs. That way you can get a better, more specific estimate for your situation.

    Need some help to keep your goats healthy and maintained? The G.O.A.T Herd Management Binder has you covered from supplies to routine care reminders.

    Daily Goat Care

    Goats don't actually take too much time when talking about their daily care. They will need fresh hay and clean water everyday. But with hay feeders, you probably won't even be filling hay every single day.

    It is also important to get eyes and hands on each goat regularly to ensure they are not dealing with any health issues.

    Otherwise, they will need regular hoof trimming. Milk goats will need to be milked daily when they are in milk.

    Everyone should get a CDT shot annually.

    And, then, during kidding season if you breed your goats, you will have additional things to do.

    Goat Health Issues

    Although goats can cruise along just fine most of the time, there is a whole slew of health issues that they can face. It is essential that as a goat owner, you know some of the most common health issues they can experience so that you can help keep them as healthy as possible.

    Worms

    Heavy worm loads may be one of the most critical and common health issues that goats can face. There are a wide variety of worms they can have: barber pole, liver fluke, tapeworms.

    Barber pole is the most common and can be deadly. They cause severe anemia and can cause death if not treated properly and promptly. You should do regular Famancha Checks on your herd so that you can catch them before they are too big of an issue.

    There is a lot of wormer resistance and so, you should always run a fecal (or have your vet run one) before you use chemical medications.

    Coccidia

    Coccidiosis is another internal parasite (like worms are). This is most common in kids, however, adults can occasionally have an issue with it also. This is something that is usually present in all fecals, but should only have a few.

    The issue for coccidiosis happens when the goat has an overload of them. The best way to determine if this is the health issue is to run a fecal. Your goat may present with poor Famancha score, lethargy and/or diarrhea.

    Pneumonia

    Just like humans can get pneumonia (respiratory infection), goats can get this also. This is a common health issue for them especially during weather changes. So, if you have a lot of hot, cold, hot weather (or cold, hot, cold) you may want to keep an eye out for this.

    Kids can also get aspiration pneumonia from inhaling birthing fluids or aspirating milk when they are bottle fed.

    Fever, rapid and raspy breathing and eye and nasal discharge can all be signs of pneumonia in goats.

    Bloat

    If goats eat too much grain they can bloat where essentially they have a build up of gas in their rumen. This can be deadly if not addressed promptly.

    Meningeal Worm

    Meningeal worm is a parasitic worm that is typically carried in deer. The worm can be transmitted to goats via slugs - their mucous on pasture that is then consumed by goats.

    Once ingested, the worm can then travel through the goats nerves and it lodges in their spinal cord. Once in the spinal cord it causes inflammation which can lead to issues from a slight limp to paralysis.

    Listeriosis

    This is a bacterial infection that is most commonly caused by eating moldy hay or feed. It can cause neurological issues such as being uncoordinated, walking in circles and paralysis of their face.

    Treatment of listeriosis can be difficult, but is possible. It is essential to treat it as quickly as possible.

    Breeding Goats

    If you are planning to breed your goats, then you should make sure to choose the best quality buck and does you can find for your intended purposes.

    Once you have made your goat breeding plans, you will need to understand how goat heat cycles work. Some breeds only go into heat in some seasons while others can breed year round.

    Once, you identify the signs for how to tell your goat is pregnant, it is important to know the gestation period of goats (around 145 - 150 days) so that you know when to expect kids.

    Then, you should also understand kidding signs, and know what to have in your goat birthing kit so that you are well prepared for when the kids will come.

    Raising Goats For Profit

    Once you have a good handle on your herd, you may be interested in seeing if you can have them at least pay for themselves. Or, perhaps, even make a profit for your homestead.

    There are several revenue streams that you can use such as selling babies, selling milk, selling meat products and even goat yoga.

    If you need more help keeping your goats healthy and well taken care of, check out the G.O.A.T. Herd Management System - worksheets, calculators, supply management and more to keep your goats in tip top shape while cutting down on time.

    Access the G.O.A.T. Herd Management System Here

    Can You Freeze Spaghetti Squash? A Food Preservation Guide

    By MrAnimal Farm

    Can You Freeze Spaghetti Squash

    Perhaps you are growing spaghetti squash, or maybe you found it on a banging sale. Either way, if you have more than you can eat before it goes bad, you may wonder can you freeze spaghetti squash?

    Yes, you can freeze spaghetti squash. You can freeze it raw, but it is best to blanch it or cook it before freezing to kill the enzymes that keep it aging. Like most frozen vegetables it is best quality within 6 - 8 months, but is safe to eat indefinitely as long as it has been kept in proper temperatures.

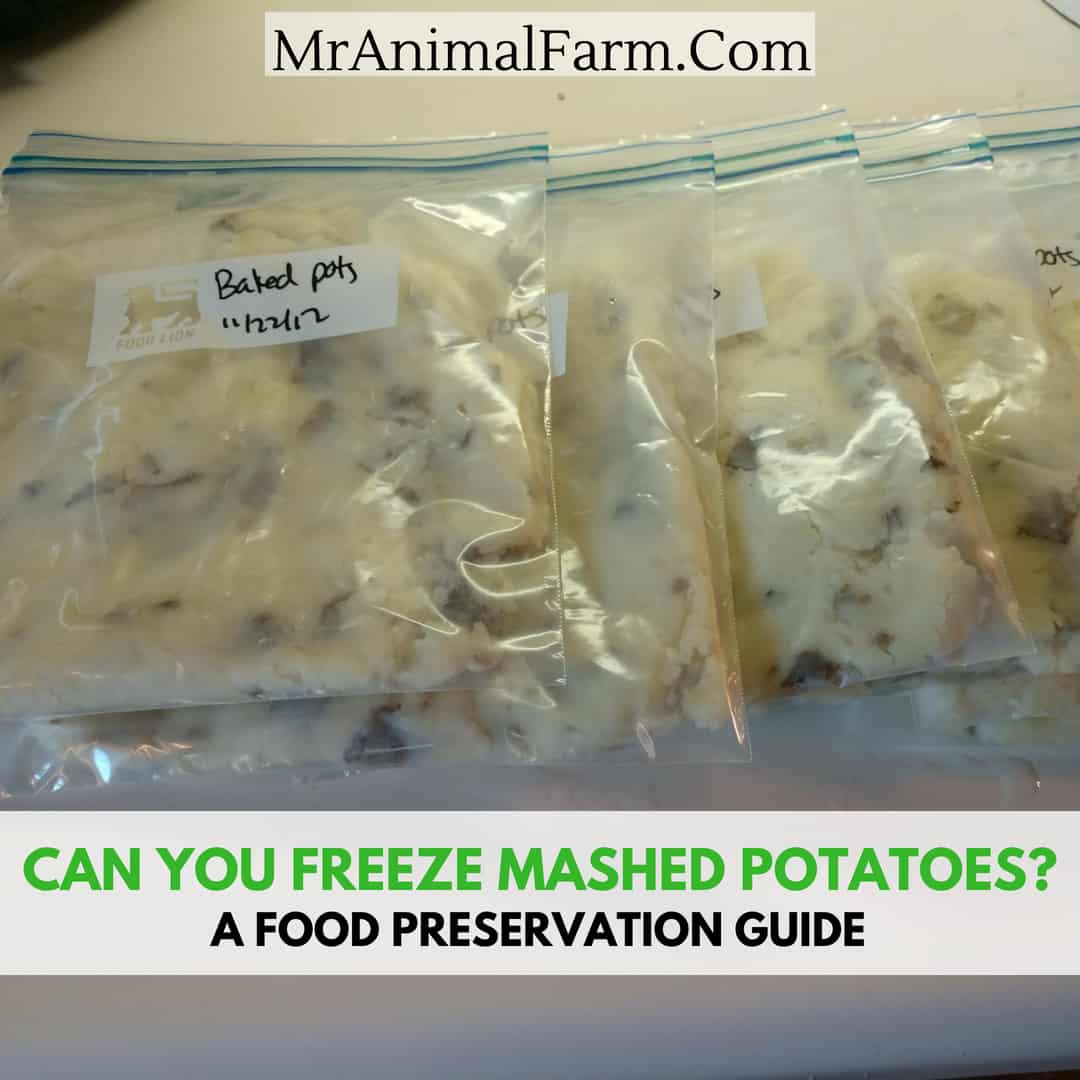
    If you can freeze mashed potatoes, and can freeze sweet potatoes then surely you can freeze spaghetti squash too! In fact, freezing spaghetti squash is super easy.

    spaghetti squash cut in half on cutting board. text reads, "can you freeze spaghetti squash? a food preservation guide"

    Can you freeze spaghetti squash?

    Like so many times before, you may notice a theme here, we found a fantastic sale on organic spaghetti squash at our local market. So, as per usual, we loaded our cart with enough spaghetti squash to garner the standard "What are you going to do with ALL of that spaghetti squash?" from curious onlookers.

    Afterall, creating a stockpile is a FANTASTIC way to save money and time.

    Preparation, Cooking & Freezing

    The first thing you need to get is get all of your spaghetti squashes ready for cooking.

    several Spaghetti Squash on a butcher block

    If you are using organic or pesticide free spaghetti squash you don't really need to wash the outside husk since it's so thick and you won't be eating it. So you really just need you have plenty of space to work with since they are so large.

    Spaghetti Squash sitting on a cutting board

    Things you will need:

    - spaghetti squash (duh)

    - cutting board

    - large knife

    - measuring cup

    - large mixing bowl

    - freezer bags

    - Sharpie

    Optional:

    - deep freezer (in case you decide to go food preservation crazy and pick up all the vegetables you can freeze)

    Preparing Spaghetti Squash

    Once your preparation area is ready, you will need to start cutting your squash. This will be very similar to the preparation and freezing of butternut squash.

    Please, be super careful when doing this part. The husks are really thick and take a good deal of effort to break through.

    cutting a spaghetti squash

    As you can see in the picture, I use the biggest and sharpest knife we have. Sometimes, I can cut straight through the squash with no problems.

    However, most times, I end up sticking the knife in the middle of the spaghetti squash all the way through, holding the blade in place, and then slamming the bottom of the spaghetti squash down.

    Again, please be EXTREMELY careful during this part. Slamming a blade down through a spaghetti squash is a great way to injure yourself if you're not paying close enough attention.

    At any rate, however you end up cutting your spaghetti squash, you should end up with two equal halves.

    Spaghetti Squash cut in half

    Now you will want to start cleaning the seeds from your spaghetti squash. Don't throw them away. We like to use everything on our homestead.

    You can roast them yourself for a nice snack, use them in your own garden, or feed them to any animals you may have around your farm. They are a great natural parasite deterrent.

    You can use a fork or a spoon for this part. Gently, scrape the seed from inside of the spaghetti squash. You don't have to be too careful, you just don't want to scrape out too much of the actual squash.

    Want to use those seeds too? You can roast them like zucchini seeds.

    Spaghetti Squash with seeds removed

    How To Cook It

    You may be wondering why you need to cook your squash. Can't you just freeze it raw? Squash contains an enzyme that will let it still go through the "aging" process even when frozen. The reason we cook it first is to destroy those enzymes and halt the decomposition process.

    Once your spaghetti squash are cut and clean, you will want to start cooking them. Place each half of spaghetti squash cut side down on the oven rack. We can fit about 3-4 full spaghetti squash or 6-8 halves per batch. Cook at 400 degrees for around 45 minutes, give or take a few depending on the oven.

    When the timer is up, carefully pull your spaghetti squash out of the oven and place it open side up on a clean surface. You may want to wait a few minutes for the outside husk to cool before handling.

    oven baked Spaghetti Squash

    When you are ready, pick up the squash or put it on a plate and begin to scrape the "spaghetti" from inside the squash. It should come out pretty easily. If the noodles do not come out easily, you may need to cook for a little bit longer.

    fork with cooked Spaghetti Squash
    scraped clean

    You will now have yourself a nice big bowl of noodles.

    bowl of  Spaghetti Squash

    You can either eat this fresh (throw some spaghetti sauce on it) or you can save it for later.

    Need to get all your food preserved easily? Check out the Ultimate Guide To Freezing Food so that you can fill your freezer without in minimal time.

    What's the best way to freeze spaghetti squash?

    We will take a measuring cup and put 2 cups of noodles in a freezer safe quart bag. 2 cups will make about 1 full meal serving or 2 side servings.

    Freezing spaghetti squash is actually pretty simple. Just put them into a ziplock bag, squeeze out the air, flatten (to save space), and toss them into your freezer!

    Spaghetti Squash in freezer bags

    It's super easy to do and, best of all, now you have a super tasty and healthy meal for any occasion! Make sure you date and label the ziplock bags. Your spaghetti squash will stay good for up to a year.

    When your ready to eat it, all you have to do is thaw it out. You can do this by sticking it in the fridge over night, reheat it in the oven (if your patient), in the microwave (if your are less patient), or in your Instant Pot.

    Do you have any Spaghetti squash recipes you love? Share them with us in the comments below.

    If you need more help getting your foods frozen, check out the Ultimate Freezing Food Guide for a complete quick start reference so that you can have a well-stocked freezer.

    Access the Ultimate Freezing Food Guide Here
    Can You Freeze Spaghetti Squash

    Can You Make Money Raising Goats?

    By MrAnimal Farm

    Can You Make Money Raising Goats

    The short answer is yes, raising goats for profit is totally possible. However, you need to be very clear in your goals, plan well, and understand where your revenue and expenses will be. Additionally, in order to turn an actual profit with goats, you should make sure to diversify your revenue streams in case one thing has a down turn for the year.

    We got our goats initially because we thought they were absolutely adorable and couldn't imagine a world without them. But they can be expensive to care for, so shortly after we started to wonder, "Can you make money raising goats?"

    So, let's go through a whole host of ideas that can help you make money with your goats so that you can turn them into more than just a hobby. This will allow you to make money with your homestead so it can fuel itself.

    Can You Make Money Raising Goats text over a baby goat on a rock

    Raising Goats for Profit

    Surely, it's a possibility. I mean, other people raise goats and seem to be doing just fine. So, you should be able to also.

    Before we get into the actual revenue streams, there are several things you need to think abut and plan for if you want to be raising goats for profit.

    Pick a Breed

    If you don't already have goats, you need to make some general decisions like which goat breed you want. Make sure to think about things like how much space you have - if you want a mini or standard size breed. As well as what basic products you might want to sell - goat meat, goat milk, goat fiber.

    You can make your own homestead profitable with these Profitable Homesteading Worksheets.

    Costs/Expenses

    You will need to plan your budget. When thinking about how much a goat costs, it can be broken down into a few categories.

    Start up costs and one time costs. These are things like the cost to purchase more goats, cost for infrastructure like shelter and fencing or one time big purchases like milk machines.

    Then you need to figure out your ongoing costs. These are things like the costs to feed your goats and cost for goat supplies.

    If you already have goats, you will want to figure out exactly what you are currently spending on your goats so that you will know what your breakeven point is.

    Revenue & Diversification

    First, decide how much profit you want to make with your goats. Profit is the difference between Revenue and Expenses. Since you already worked out your expenses above, once you decide on the profit amount you want you can easily figure out how much actual revenue you need.

    Then, you can start brainstorming and figuring out the exact ways you want to use for your revenue streams (more on those below in the next section). It is important to have more than one revenue stream. It all comes down to one simple word: Diversification.

    If you bet the farm (pun intended) on just one revenue stream, then a single miscalculation can throw off your entire budget for the year. But if you set into motion several sources of income, then a single miscalculation becomes a bump in the road but isn't catastrophic.

    For example, in one of our past kidding seasons, we had estimated a certain amount of income based on a 50/50 split of baby boys and baby girls. The girls sell for about double (sometimes 3 times or more!!!) the cost of a baby boy, especially if the boy is going to be a wether and not a buck.

    Well, in that particular season, the split was more 80/20 than 50/50 and we were overrun with baby boy goats. While it is an adorable problem to have, it could still have been a serious problem. Luckily (actually, strategically) we were able to avoid a financial catastrophe through the diversification of our income streams.

    Ideas to Make Money Goat Farming

    So, as you can see from the above example, raising goats for profit may not always be super easy, but with careful planning it is possible.

    The best way to diversify your revenue streams is to find things that work together. For instance, if you are raising dairy goats and selling milk, also use some of that milk you already have to make value added products like goat milk soap.

    This way, while you are diversifying your profit areas, you aren't having to branch into things that are totally different like raising hair goats and meat goats and dealing with completely different products and breeds.

    Also, as you are picking your revenue streams, make sure to estimate what your profit will be with each one that way you know how many of each thing you need to sell to hit your goals.

    1. Sell baby goats.

    two baby goats laying together

    As I mentioned earlier, you can sell baby goats and make a decent amount of money but you can't control nature. Sometimes, you end up with too many boys or you are growing your herd and you retain too many girls (this is a very real problem. You'll see). 

    Not sure all the details involved with breeding goats?  Check out the Ultimate Planner for Breeding Goats which will help you get started!

    The price you can get for baby goats will depend on their sex, breed, quality, if they are registered and your area. Unregistered mixed breed kids may start at $50 in most places. Whereas registered high quality doelings may start at $500 and increase into the thousands based on quality.

    For this reason, it is good to figure out how to buy the best goats when you are getting started. Yes, they cost more up front, but will also allow you to command a more premium price moving forward

    Need some help to keep your goats healthy and maintained? The G.O.A.T Herd Management Binder has you covered from supplies to routine care reminders.

    3. Sell Adult Goats.

    If you are trying to work on your herd genetics, it is important to retain doelings (plus they are super cute to raise from birth). But because no one has infinite space, you can sell adult goats for a profit and to free up some herd space.

    The nice part of selling adult goats is they have a chance to prove themselves as having good genetics and thus can increase the selling price. Sometimes you can make some more extra cash if you sell a pregnant doe. Then the buyer is getting a doe, the promise of baby goats, AND a doe that will be in milk!

    The price you can sell adult goats will vary wildly. It will depend on the breed, their quality, if they are registered and your area. As an example, ADGA registered Nigerian Dwarf Goat adults can go anywhere from $500 - over $2000 in our area based on their quality and genetics.

    3. Sell a doe in milk

    goat udder

    Maybe you want to sell the doe but want to keep the babies. If that's the case, you can sell a doe that has recently kidded to anyone looking for a milking goat. They get a goat, the goat is in milk (added value), and you can charge a little extra! It's win/win.

    Same pricing for does in milk apply as for adult goats and kids - but does in milk usually can command a slightly higher price (in comparison to what she would be worth) than an adult that is not bred or in milk.

    4. Charge a stud fee

    I know what you're thinking. No, this is not a Magic Mike reference.

    Not everyone has the space (or desire) to have a buck of their own (let's face it, they can get a little stinky). But these people still want to breed their does. Since this is the case, why not let them use your buck?

    If you have a buck with quality genetics you can put the word out that you have an available stud. The buyer simply brings their doe to your farm, you meet them in your driveway with your buck and let nature take it's course. In the goat farming business we call this "driveway breeding" (I know, not very creative).

    This isn't usually super lucrative, but it can help pay for the cost of your bucks feed for the year. Again, depending on breed, quality etc these stud fees usually start in the $50-75 range and increase from there.

    buck goat in backseat of car
    He knows where he's going.

    5. Lease your buck

    For the same reasons mentioned above (no space or aversion to stinkiness), some people are willing to lease a buck. This is usually when the breeder is not able to pay close enough attention to catch their does in heat. When they lease a buck they will likely put him in with their does for a specified period of time and he can breed any doe that comes into heat.

    This can be pretty lucrative, I just caution that you are picky about where you let your buck go and make sure the leasing farm is up to date on their disease testing.

    6. Brush goats

    Sounds like a dream job, but this does not mean charging people to brush your goats (although you are welcome to give that revenue stream a try). A brush goat is one that someone will lease for a period of time to clear an area of overgrown brush. Goats love to eat forage, so this is a great job for them.

    If you're wondering what goats can eat, the list is actually quite long. But browse and forage is some of their favorites.

    Often times, this is someone who works a lot or is no longer physically capable of clearing land themselves. In these cases, a goat can be a great solution.

    The same warning from buck leasing applies though it's not as dangerous since the leaser likely won't have goats to pass on any sicknesses. Additionally, they will need to lease at least two goats so they won't get lonely and sick.

    7. Start a petting zoo

    Maybe not a full blown petting zoo (unless you want to do that, of course). But there are plenty of kids out there who would L-O-V-E - LOVE to have some goats at their birthday party. Bonus points if you can take some bottle babies for them to feed.

    several goats in a stall

    8. Goat Photos

    For the benefit of those with flash photography (or just a phone camera) you can charge to have pictures taken with your goats. Who wouldn't want to make their own calendar with 12 months of cute baby goats?

    Another option is to rent your goats out to photographers to use as props in their photo shoots.

    9. Goat Education/Classes

    Since you are an expert on how you raise your goats, you can offer your advice and experience to others that want to follow in your footsteps. You can do this through on farm education classes.

    Plan a few things you would like to teach (basic goat care, herd maintenance, how to hand milk goats, how to trim goat hooves, etc) and put the word out. You can hang flyers at your local farm store or announce it online (Facebook groups are great for this sort of thing).

    You can't teach hoof trimming classes without a good set of hoof trimmers and picks.

    10. Milk Shares

    One way that a lot of goat farmers earn extra income is through something called herd sharing. Essentially, a herd share is when someone makes a monthly payment and purchases a share of your herd. The size of the share they purchase then entitles them to a specified amount of the goat's milk.

    glass quart jar half filled with milk

    This is a way that some people are able to sell raw milk without being a registered dairy. You will want to check your local laws for any restrictions.

    11. Sell Goat Milk Soap

    If you have excess milk you can use it for hobby type projects. A great idea for the artistic crowd is soap making. You can get creative with the designs and have a wonderful, natural soap product to use yourself or sell for profit.

    12. Goat Milk Soap Classes

    If you happen to have a flair for soap making, take one of the options above and teach classes on soap making. You can even sell milk for soap making purposes (again, check local laws for milk selling restrictions).

    13. Sell Milk for Feed

    If you sell goat babies, you usually have to wait until their mother weens them. But if you sell bottle babies, they can go as early as two weeks old (but only to experienced goat farmers, for the baby's safety).

    goat drinking a bottle of milk

    Since the baby will need milk and the buyer will have to buy milk, why not sell it directly to them? The baby will be happier because it will be milk, likely from it's own mother. The customer will be happy because it is way more convenient than buying and mixing formula. And you will be happy because you are making the money!

    You can also get licensed to sell goat milk for other animal consumption like pigs, puppies and kittens.

    14. Meat Goats

    If you have meet goats, in addition to selling kids, you obviously can also sell goat meat. You will need to raise them to butchering age and then can either sell them live weight or you can take the to the butcher and sell the prepared cuts of meat.

    15. Wool

    If you are raising goats for profit and have hair goats, you can sell their hair or you can do value added products and sell clothes, blankets and other woven items.

    16. Goat Yoga

    Goat yoga has become super popular over the last several years. It is a good, fun activity for people to participate in. And, although, it may not provide a super great yoga workout, what with the goat snuggle breaks and babies climbing all over you. It is definitely a great way to bring money in with your goats.

    The nice thing about goat yoga is that while you do have to market and make sure you get enough participants in for each class, the amount of profit you can make is not limited by factors you don't have in your control like how many kids a goat will have.

    17. Goat Services

    You can provide services for other people's goats. Things like disbudding baby goats, banding wethers or trimming hooves. These are things that not everyone feels comfortable doing on their own.

    So, if you are well versed in doing these maintenance chores for your herd, then you can get paid to do them for other peoples herds. Make sure to price your services and take into account your gas, mileage and time.

    18. Decrease Costs

    Ok, so, while this isn't necessarily a revenue stream, it will help you keep more of the money that your revenue streams generate. The definition of profit is Revenue (money in) minus Expenses (money out).

    So, if you decrease the amount of money out, you get to keep more money in and therefore your profits increase.

    Main goat costs will be feed, supplies and vet/health care. Feed costs are the ones you are most able to control as you can't exactly control accidents and illness (you can work to prevent them though).

    You can decrease feed costs by giving your goats more pasture or browse. You can rotate pasture area as well. You can buy actual feed, grain, beet pulp (or whatever other treats you buy for them) on sale and in bulk.

    FAQ

    How much profit does a goat farmer make?

    The profit that a goat farmer makes can vary greatly depending on their expenses and how much they are selling. Some goat farmers may never make a profit while others may make enough to support their family for the year.

    Raising goats for profit can be difficult to do and unless you have super top dollar breeding stock or have a very high volume production, you probably won't be making tens of thousands a year with your goats.

    How many goats do you need to make a profit?

    Technically, you could make a profit raising just a few goats. Let's look at an example. Say you have 3 does. On our farm, each goat costs about $250/year. So, three is about $750 for the year. If you decided to breed them and pay a stud service fee which averages about $150 - $200. That would be $1200 in expenses for the year.

    If each doe had twins with 50% being girls and 50% being boys. Figure that for a very average pedigree, registered Nigerian Dwarf doelings can sell for $500 each and wethers goats for $150 each. That would put your revenue for the year at $1950.

    To get the profit you made raising goats for the year take the revenue $1950 minus the expenses $1200. And you made a profit of $750.

    Of course there are so many different variable at play, it doesn't always work on to be this straight forward. But this is just a general example of how to make a profit raising goats.

    Final Thoughts

    These are just a couple of the ways on how to make money from goats. I'm sure there are many other ways. What revenue streams are you using? Let us know in the comments below.


    If you need more help keeping your goats healthy and well taken care of, check out the G.O.A.T. Herd Management System - worksheets, calculators, supply management and more to keep your goats in tip top shape while cutting down on time.

    Access the G.O.A.T. Herd Management System Here

    Goat Kidding Supplies - The Kidding Kit to Make Kidding Season Smooth

    By MrAnimal Farm

    Breeding Goats can be so much fun, but you should also be prepared! Kidding time can be exciting, but also stressful. So, it is important you know exactly what goat kidding supplies to have in your birthing kit so you will be completely prepared.

    A goat birthing kit is basically just a collection of all the supplies you need for during and right after kidding. It is important to have things like towels, iodine and lubricant for the actual birth. And to have things like colostrum, bottles and medications for right after birth in case there are any issues.

    Goats gestation period is about 145-150 days, you will want to make sure you know the goat kidding signs, so you know exactly when to expect kids!

    And also, make sure that you have a complete goat kidding supplies kit put together so that you have everything you could possibly need - that way if any issues arise, you will be ready to deal with them.

    Your new baby goats will be here and springing off of anything they think looks like a goat toy in no time!

    goat kidding supplies text over a goat and her babies

    Here is the list of essential goat kidding supplies:

    With the right goat supplies, goat medical supplies, and preparation, the excitement of baby goats can definitely outweigh any stress. Having the following supplies in your goat birthing kit will make your life easier regardless of what breed of goats your raise.

    1)  Towels

    Lots and lots of towels!  Kidding is not a clean thing.  It is gooey and messy.  And those babies will need to be dried off.  (We clean their face and airways, and let their mom clean them the rest of the way for bonding time.)

    towels
    They will not stay this pretty for very long.

    You can get these pretty cheap at a yard sale or your local thrift store. Our local Goodwill had large towels for around $1 each and smaller towels for .50 each.

    You can also use disposable puppy pads or paper towels if you don't want to be washing towels after kidding.

    2) Gloves

    This is a personal preference and I guess isn't absolutely required but, trust me, you will want these. Things will be much cleaner and you don't have to worry about anything nasty getting in a micro cut you didn't know you had on your hand. Plus, sometimes you will need to assist a doe and pull a baby or two.

    gloves

    3) Water-Based Lubrication Gel

    As we mentioned above, sometimes kidding doesn't go as easily as we would like and the doe needs some assistance. Since you already have your gloves, you will also need to use a lubrication to make things go a little more smoothly. Your doe will appreciate this item very, very much.

    Need more help for your Kidding season? The Ultimate Goat Breeding Planner has you covered!

    4) Hair Dryer

    Our kidding season generally takes place during the coldest months of the year. Because of this, it is really easy for a baby's temperature to drop minutes after being born. They are soaking wet from the birthing sack and their mom is often trying to deliver multiple kids.

    hair dryer

    We have now made it a habit of practice to immediately start blow drying a baby as soon as we have as much of the birthing goo off as we can. This ensures the baby doesn't become hypothermic and won't be wasting precious pre-colostrum calories on maintaining their temperature.

    You may also want to add a heat lamp to your goat birthing kit. You shouldn't leave a heat lamp on unattended as they are a fire hazard. However, sometimes it is good to have one for the kids if they are having issues with keeping their temperatures up. And if you have kids born early, sometimes you need one to use for a few days with a kid in the house.

    5)  Small container

    Something such as a film canister or medicine cups works great for this. You will use it to fill with the iodine.

    measuring cup

    6)  Iodine

    You will want to have this on hand to dip navels in after kids are born. This helps to prevent any yucky bacteria from getting into the opening on their umbilical cord before it seals and dries off.

    bottle of iodine

    7)  Colostrum and syringes

    It is always good to have these on hand in case the babies have trouble latching on and nursing. You can either have powdered colostrum or frozen colostrum from a previous kidding. We usually start kids that are having difficulty latching on with either 1 lm or 3ml syringes and warmed colostrum. Typically after an ounce or so they are strong enough to get eating on their own.

    60ml syringe

    It is really important that they get colostrum right away, so having some on hand or being able to milk some from mom and syringe it to them is important.

    8) Thermometer and Petroleum Jelly

    We like to keep these on hand in case we think a baby is in danger of becoming hypothermic. If we have used the blow dryer and it doesn't seem to be helping, we get a quick read and can then decide if we need to take more advanced steps in care.

    Having these easy to access in our goat birthing kit has literally made the difference between life and death for some of the kids born here.

    After they are a few days old, you may also need to do temperature checks for various reasons, so good to keep on hand.

    vaseline and thermometer

    9) BOSE or Nutridrench

    Depending on where you live, you may have a herd that is prone to selenium (or some other mineral/nutrient) deficiencies. Sometimes this is critical for a new baby goat to have. We always keep a bottle of BOSE (call your vet for availability) on hand and inject .25/cc IMMEDIATELY after the baby is dry enough to stay warm.

    bottle of bose and needles

    Babies can also experience a drop in their blood sugar. This is typically signaled by wobbly balance (not the cute kind, the scary kind) and a drooping head. If caught early, a quick dose of Nutridrench can help an ailing baby out immensely.

    You can also use Karo syrup or molasses for a blood sugar drop. Dams will also appreciate some Karo syrup or molasses in warm water after kidding to get a boost in energy.

    nutridrench

    10) Feeding Tube

    A feeding tube can be used in two ways. One, as a feeding tube for weak kids that do not have a suck reflex.

    Secondly, occasionally kids will have bloating and constipation issues and it is good to have on hand to use to give enemas. That way they can get their fecal matter out and moving again.

    11) Bottles & Pritchard Nipples

    If you are going to bottle feed your kids, you will definitely need bottles and Pritchard Nipples. But, even if you plan to dam raise, you may have kids that end up needing to be bottled for various reasons. Therefore, you should always have some on hand.

    It is also a good idea to have formula or frozen milk on hand in case you end up bottle feeding.

    12) Dental Floss

    Dental floss is important to have in case you need to break the umbilical cord. Sometimes it will break on it's own during birth or right after. Sometimes the kid or dam will stand or move and break it.

    However, it it's still in tact, you may need to break it. Tying dental floss to the umbilical cord and then breaking on the side closest to the dam helps to ensure it isn't too short and also that the kid doesn't bleed much.

    13) Milking Supplies

    These will be important especially if you have dairy goats and plan to milk your goats. However, it's good to have a milk pail at least on hand in any situation in case you need to milk colostrum from the dam at first.

    14) Various Medications

    Medications will be a necessary addition to any goat birthing kit. There are a variety of issues that can arise for both dams and kids during and right after kidding.

    So, it is always good to have things like antibiotics (LA-200 is a good all around to have on hand), probiotics (good for tummy issues and a stress pick me up), Albon (or other treatment of coccidiosis in goats, Cylence (for treatment of mites), CDT, needles and syringes.

    You might not need all of these in one kidding season, but it is a big relief to have what you need already on hand so that you can address issues quickly.

    15) Scale

    This isn't a 100% MUST have for your goat birthing kit. However, it is certainly a nice to have. Especially if you end up having to give any medications (those are usually given by weight). Or, if you have a kid that is particularly small or not eating a ton, it is good to be able to make sure that they are gaining appropriately.

    16) Vet Number

    It is always good to have your vets phone number on hand in case of an emergency. Although the majority of kiddings will go smoothly, there is always a chance of something unexpected happening.

    Knowing that you have a vet just a phone call a way can be peace of mind and can also help speed up getting help if an issue arises.

    17) Large Weatherproof Tote

    We use a large plastic tote to keep all of our kidding supplies in. It is weatherproof and stays in our hay loft all year long. Then when we need it, it is right there!

    goat kidding supplies

    18)  Patience

    This is probably the most important thing to have with your goat birthing kit (for us at least).  Kidding time is sometimes a waiting game.  So, having a good amount of patience while waiting to see those sweet new babies is always helpful 🙂

    What goat kidding supplies do you always keep on hand?

    If you need more help getting your goat breeding running smoothly, check out The Ultimate Goat Breeding Planner - checklists, record sheets, supply lists and more to keep your breeding season going so you can enjoy the baby goats without worry.

    Access The Ultimate Goat Breeding Planner Here
    goat kidding supplies

    Chicken Toys - Boredom Busters for Your Flock

    By MrAnimal Farm

    Chickens in long grass.

    If you are new to the world of chickens, you may be wondering if chickens really need toys. The answer is yes, there are some really good reasons as to why you may want to invest in some toys for your beloved poultry. Keep reading to discover how chicken toys can be true boredom busters.

    Chickens in long grass.

    Chickens can be intelligent animals and therefore, giving them toys can help them to stay busy and help keep their minds active. Additionally, the use of chicken toys such as treat dispensers, mirrors and swings can help to remove negative behaviors such as excess pecking and bullying of other members of the flock.

    If you want to have a happy, healthy and low stress flock, adding chicken toys can help a lot. Let's learn more about the benefits of adding toys and what kinds might be best for your flock.

    Chicken Toys

    As you get your chicken supplies ready like feeders, waterers, coop and run it is important to think about what things you might be able to add in order to enrich your flocks environment as well.

    Why Do You Need Chicken Toys?

    There are multiple reasons why chicken toys are an essential part to a healthy flock. Let's review some of the top reasons why they are an important addition for your chickens.

    Stop boredom

    Quite frankly, chickens are intelligent animals. Studies have shown that they have self-awareness, time perception and other markers of intelligent thought like humans and some mammals do.

    Due to this fact, chickens can be prone to getting bored if they do not have enough things to do that are stimulating and entertaining. This can be especially true if your flock is in a smaller run and doesn't have free ranging abilities.

    Providing a variety of things to do so that they are interested, engaged and stay active will help your flocks minds engaged and prevent boredom.

    Prevent pecking and bullying

    Most chicken owners know that chickens have a pecking order. Unfortunately, if your flock doesn't have other things to do, they can have a tendency to start excess pecking and bullying of their other flock members.

    Another point when there might be excessive pecking and bullying within a flock is when you are introducing new chickens. So, adding some toys especially during this time will help to provide something else for them to pay attention to rather than just picking on the new flock members.

    Stop egg eating

    Egg eating is a naughty behavior that chickens sometimes start. Boredom is one reason that they may start eating their own eggs. Chickens may also eat their own eggs if the coop is crowded or if they are low on calcium.

    Once they start egg eating, sometimes it can be really hard to break the habit. So, in addition to making sure your chickens have plenty of room and calcium be sure to provide toys for entertainment so that they don't develop this bad habit.

    Need some help keeping your chickens health and care taken care of? Check out the Organized Chicken Keeper for an easy to follow system.

    DIY Chicken Toys

    Just like anything else out there, you can totally do things yourself if you don’t want to spend the money. Here are some fun DIY chicken toy ideas. 

    Hang cabbage 

    Hanging cabbage for your chickens to peck at and eat is easy, quick and super cheap. All you need is a head of cabbage and some type of string or twine. You can hang it from the coop roof, from a tree branch or anywhere else with a little height that you can tie the string to.

    A hanging cabbage will give your flock something to do for quite a bit a time. They really enjoy pecking at it and pulling bits off to eat. Not only does it give them something to do, it also is a good and nutritious treat for them.

    If you don’t have cabbage, then use any other fruits and veggies you have on hand. 

    Dust bath

    Dust baths a great thing to help with chicken health issues such as keeping chicken lice and mites at bay as well as helping them to stay cool in the summer. But, dust baths also give your chickens something to do.

    All you need is some dirt or sand. Just pile it in a spot for your chickens to lay and roll around in. You can also add some DE to the dust bath for some extra benefits.

    Put out branches or plants 

    This one is free. You can gather some branches, plants (perhaps some things you have pulled from your garden at the end of the season even) and add them to your chickens area.

    Chickens enjoy having the places to climb on, in and through. It also gives some hiding and safe spots if you have new chickens in your flock or perhaps some bantam chickens that need spots to hide from predators.

    Ice fruits or veggies in summer 

    Do you have fruits or veggies that are going bad or perhaps just more than you need from your garden? Throw the fruits or veggies in the freezer and then throw them out to the chickens.

    Being frozen, it will take the chickens a bit more time for them to eat and it will also be a cool treat for them. The extra time it takes for them to peck at the frozen pieces will also keep them entertained.

    Mirrors

    Of course, you are not actually making your own mirror. So, if you don't have an extra hand held mirror, you may need to consider this a toy to buy.

    Mirrors are great, just a small hand held one that you can hang in their coop or run. You can even use a bigger mirror out in their run if you want (make sure it is completely secure though as you don't want it to fall and crack or hurt your flock.

    Buy Chicken Toys

    Don’t have time to mess with making your own chicken toys? That’s where it comes in handy to buy your own toys. Throw them out to the chickens and watch your poultry stay busy and happy. 

    Chicken swing

    Hey, believe it or not, but chickens love to swing. Order a chicken swing for those chickens of yours! 

    Your flock can take turns (or even share a few chickens at a time) sitting on the swing. It gives them something to do to stay active and help pass the time.

    Chicken ladder

    Yes, you can also buy a chicken ladder for a chicken toy. Put this out and your chickens will spend time climbing on them. 

    Much like chickens like to roost, they also like to climb at times. Providing a chicken ladder can help keep them active. It is a smaller toy that is perfect for a coop and run that doesn't have a ton of space - it gives your flock more room to move around and do things.

    Chicken feeder toy

    Stuck on what type of chicken toy to get your chickens? Grab this chicken feeder toy because your chickens will have fun for hours. 

    Not only does it dispense feed and treats which your chickens will love, it makes them work a little for it which will help them get their minds working. It also gets them active pecking the treat feeder around.

    Swinging hanging mirror

    If you want to get fancy and truly give your chickens something to play with, this swinging hanging mirror is awesome. 

    Studies have suggested that chickens do have some level of self-awareness. So, they sometimes do like to look into mirrors. This is another toy example that is good for low space requirements, but gives them something to do.

    Peck n play toy

    Chickens love to peck n play, but they need the right kind of toy to peck at.  You can stuff a variety of different treats into this small ball.

    One bonus feature for this toy is that it is dishwasher safe which means that you can easily keep it clean after it spends time being rolled around outside.

    Treat ball

    This is yet another treat toy.  This one is for fruits and vegetables. They lock into the plastic ball. and they can peck and push it all around.

    This treat ball is big enough to hold an entire head of lettuce or cabbage. So, it is perfect for a treat dispensing toy to use if you want multiple chickens to be able to use it at once.

    Vegetable hanger

    Need something to hang those veggies from? Check out this vegetable hanger. It’s one of the best chicken boredom busters. 

    Perhaps you want something a little more sturdy than just some string to hand your cabbage, lettuce and other vegetables with. This vegetable hanger is made of stainless steel and so it is durable and sturdy.

    Additionally, it is super easy to hang as it has metal hangers on the end of the stainless steel chain. So, you can pop it up in your coop or on a branch easily.

    Xylophone 

    Chickens love to make a little noise, this xylophone is an awesome toy to get those chickens of yours. This can keep your flock busy for hours.

    Once they discover that they can peck at the keys to make noise, they will love to keep playing. This is a great toy for keeping their minds active.

    In conclusion, bored chickens can be unhealthy, unhappy and develop bad habits such as excessive pecking and egg eating. The best toys you can provide to your flock can range from treat dispensers to things to keep them active.

    The toys that you decide on to add to your flock and coop will depend on how much space you have, how much you want to spend and what your flock set up is. Mirrors, hanging toys and ladders are great for areas that are smaller. Swings, rolling balls and other more active toys might be best set for areas that are a little larger.

    No matter which toys you pick - whether they are complex or simple, purchased or DIY adding some type of toys for your flock is a great idea.

    If you need more help with taking care of your chickens, check out The Organized Chicken Keeper for a complete system for managing their health through keeping their supplies stocked and coop clean.
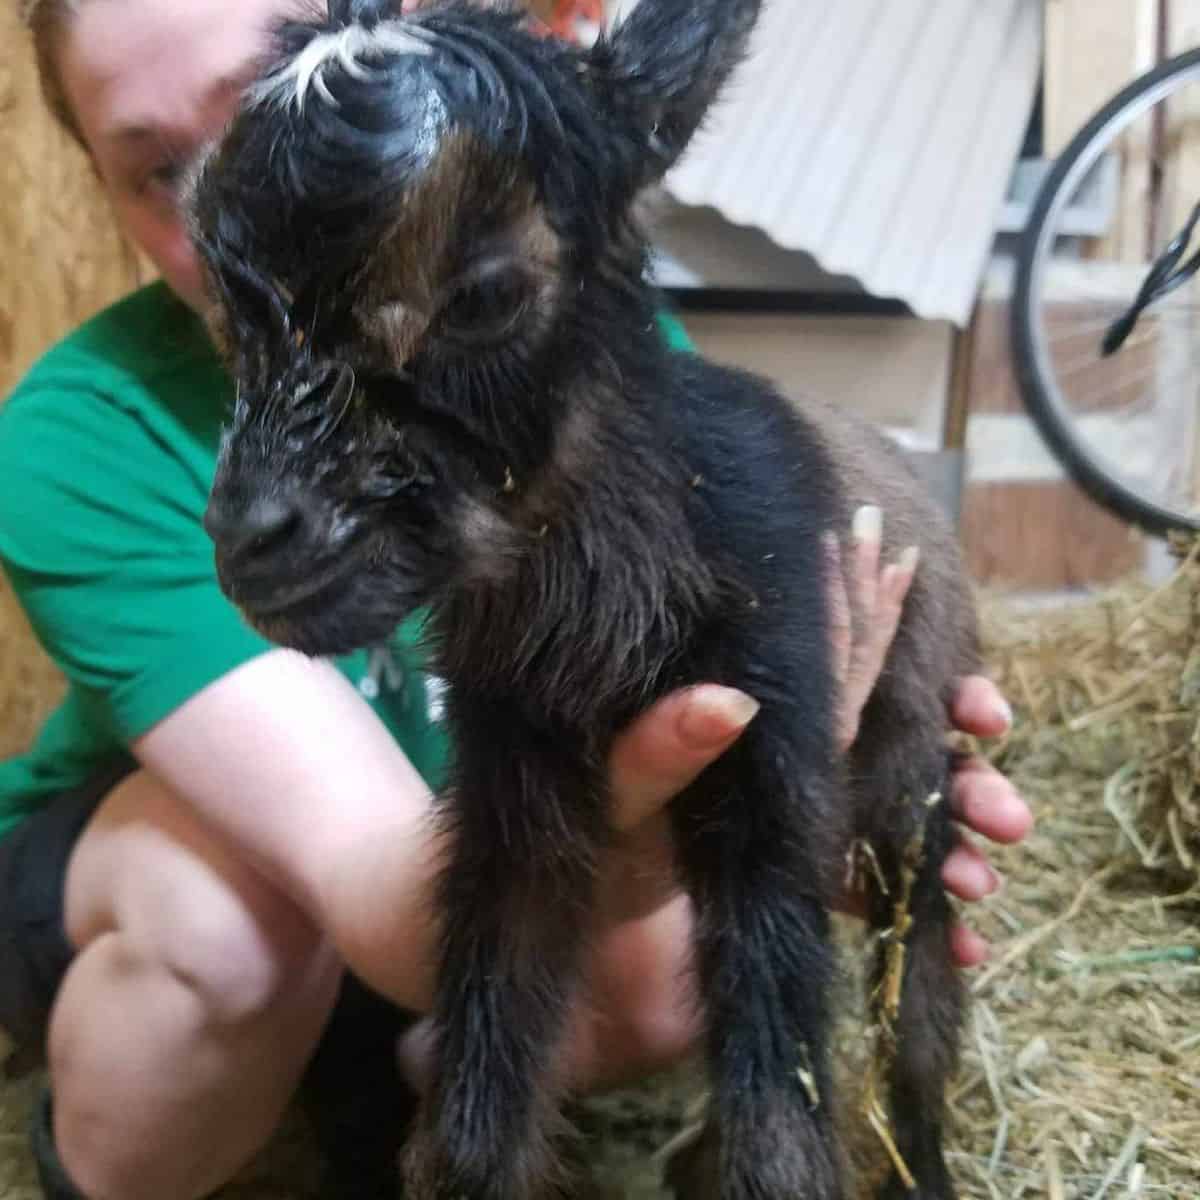
    Access The Organized Chicken Keeper Here

    When do Chickens Start Laying Eggs? -Signs Your Hen Is Ready to Lay

    By MrAnimal Farm

    3 Signs Your Hen May be Ready to Lay

    So, you're sure that you have a hen by knowing the differences between hens and roosters. You know if chickens lay eggs without a rooster or not and how long chickens live.  And now you want to know when do chickens start laying eggs?

    While there is no way to predict the exact day you will get your first egg, there are several signs and factors you can use to anticipate a general timeframe that she will start laying eggs.

    close up of Marans rooster. text reads, "ready for eggs? 3 signs your hen may be ready to lay"

    When Do Chickens Start Laying Eggs?

    Most chickens start laying eggs around 5 or 6 months old. Though some breeds lay earlier (16 weeks) or much later (8+ months).

    Breed type and season can also affect the timing of when they will start to lay eggs. Some smaller, slower producing breeds will sometimes go as long 8 months or so to start laying eggs regularly.

    Feather type (standard, frizzle chickens, etc), color, and markings, do not make a difference in the timing.

    Here are the top 3 signs your hen is ready to lay eggs:

    There are a several signs and factors you can look for to determine when you might get your first eggs. It is important to be prepared for your first eggs so that you can be providing your hens the nutrition and proper chicken care that they need to support egg laying. (More on that below also).

    1)  Age

    How long until your chickens start laying eggs for the first time can be a pretty big range among different chicken breeds.  That being said, if you know the specific breed of your chicken, age can be a helpful indicator on when your hen will be ready to lay her first egg.

    As we mentioned earlier, Heavy egg productions breeds such as Rhode Island Reds, Sex links, Amberlinks, Australorps may start laying eggs relatively young (around 16 - 18 weeks).

    However, other breeds that are bred more for show and pets and mature slowly such as Silkies can take up to a year.

    Red Pyle Silkie Hen

    There are also, of course, some breeds who fall into the middle range like Easter Eggers.  Easter Eggers chickens start to lay eggs in the 20 - 25 week age range. Which ends up being about 5 - 6 months.

    A few other breeds in the 6 month range (but that sometimes can climb into the higher 8 month range like Silkies) are large breeds like Orpingtons, Sussex chickens and Wyandottes. As well as unique breeds like the Welsummer and Salmon Faverolle.

    Easter Egger hen

    So, while you can't use one single age across the board, if you know the norms for your particular breed it can certainly help you get a good ballpark on what age your chickens will start laying eggs.

    When Do Chickens Start Laying Eggs By Breed Chart
    Chicken BreedAverage Egg Laying Age
    Amberlink18-20 Weeks
    Australorp16-18 Weeks
    Ameraucana20-25 Weeks
    Bantamsdependent on their breed
    Easter Egger20-25 Weeks
    Marans5-8 months
    Olive Egger20-25 Weeks
    Orpingtons20-25 Weeks
    Rhode Island Red16-18 Weeks
    Silkies8-12 months
    Sussex5-8 months
    Welsummer5-8 months
    Wyandotte5-8 months

    Need some help keeping your chickens health and care taken care of? Check out the Organized Chicken Keeper for an easy to follow system.

    2)  Comb/Wattles

    Although a hen will not get a huge comb and wattles like a rooster, she will get bigger, redder ones right before she starts laying eggs.

    close up of chicken with red comb and wattles

    Often times, a hen will not really have much of anything in the way of comb/wattles when she is a young pullet.  These will be extremely pale pink.

    However, as the time gets closer to when your chickens start laying eggs, your hen's comb and wattles will get significantly larger and turn a deep red. This reddening and increase in size is an indication that she is maturing. Once fully mature, the eggs will start coming.

    French Black Copper Marans rooster

    3)  Squatting

    A hen who is close to point of lay will start "squatting" behavior.  Squatting is pretty much what it sounds like, the hen will hunker down sort of spreading her wings a bit.

    Often times you can trigger her to do so by putting your hand out over her.  Hens do this to get into a mating position for a rooster. That means they won't start squatting until they are close to maturity (egg laying age). How chickens mate is a pretty simple process that all starts with squatting.

    4) Behavior Changes

    As your hen matures and gets closer to laying her first egg, you may also notice some behavior changes. She may start getting a little noiser, she may get more interested in your roosters, or more territorial with other hens.

    She may even start eating more as her body has higher energy demands ramping up egg production. These are signs you can look for when doing your daily or weekly health checks,

    5) Checking Out Nesting Boxes

    Hens know instinctively (usually) that nesting boxes are where they should go when it's egg time. This is if you're nesting boxes make them feel safe and secure anyway.

    So, as it gets closer to time to lay, your hens might start exploring the nesting boxes, checking them out and spending some time in them.

    How to Prepare

    Laying eggs is a big task and can take a lot of energy for you chickens. Therefore, you should make sure they have right things to keep them happy and healthy.

    Proper Feed

    chicken feed in feed bin with scoop

    Around 16 - 18 weeks of age, you should switch your chickens from starter and grower feed to layer feed. Once your hen is ready to lay, you will want to make sure that you are feeding a layer feed (which has more calcium in it) rather than a starter or grower feed.

    The additional calcium in the layer feed will ensure that your hen is able to properly form solid egg shells.

    If you do not provide your hen that is starting to lay eggs with the proper nutrition, you may end up with soft shelled eggs (which can break easily) or even eggs without a shell at all! You can also provide free choice oyster shells that they can eat when they feel they need an additional boost of calcium.

    Learn how to much it costs to feed chickens AND decrease chicken feed cost!

    hand holding a broken chicken egg

    Clean & Safe Nesting Boxes

    Another thing you will want to ensure that you provide your hen that is ready to lay eggs is a safe, cozy nesting box area as well as some wooden or fake eggs.

    fake and real chicken eggs in nesting boxes

    We use these fake eggs.  They help your hen to know where to go when she is ready to lay eggs for real 🙂

    The fake eggs will encourage them to start laying eggs in their nesting boxes. They have an instinct to lay where they think other eggs are since that is then perceived as a safe spot.

    Nesting boxes should be clean, slightly off the floor of the coop and in a dark place. Also, make sure they have straw or shavings in them. This will feel cozy for your chickens and also protect the eggs from breaking once laid.

    FAQ

    Can I eat the first egg a chicken lays?

    Yes, you can eat their first egg. The first egg, also called a pullet egg, is a normal egg but often times is significantly smaller than what their other eggs will be.

    How Often will my Chickens Lay Eggs?

    The frequency of egg laying depends greatly on the breed. They can average anywhere from 2 - 6 eggs per week.

    How Long Do Chickens Lay Eggs?

    Chickens' egg production is at peak between 2 - 3 years of age. Heavy layers will tend to stop egg laying much earlier while lower producers can continue to lay eggs sporadically for many years after peak egg production.

    How do I get my chickens to start laying eggs?

    While you can't force a chicken to start laying eggs, you can ensure it has the proper layer feed, clean and safe nesting boxes and is in top health so that she can be well prepared for egg production.

    Why are my 6 month old chickens not laying eggs?

    Well, first, they may just not be ready yet. But, if they are an early egg laying breed or if they aren't laying well past 6 months there may be other factors at play.

    Some things that can prevent or decrease chickens egg production are:

    • Molting
    • Decreased light - if you have chickens that hit maturity during winter, for example, they may take significantly longer than the average time.
    • Health issues such as lice and mites to name a few
    • Stress
    • Sometimes chickens start laying eggs other than in their nesting boxes

    When Will They Lay The Most Eggs?

    Additionally, you should know that when your hen starts to lay their highest volume of eggs will come from laying age to around 2 - 3 years old.  During this time, if you have several hens laying eggs you may want to think about how to freeze eggs so that they don't go bad.

    When do Australorps start laying?


    Australorps typically start laying eggs in the 5 to 8 month range. However, they are good egg layers and some may start as early as 16 - 18 weeks.

    When do Olive Eggers start laying?

    Olive Eggers typically start laying eggs between 5 and 6 months of age which is about 20 - 25 weeks old.


    When do Bantams start laying?


    Bantams lay eggs according to when their specific breed usually starts. Bantam chickens are not a breed persay, they are a size of chicken.

    When do Silkies start laying?

    Silkies usually start laying eggs between 8 and 12 months of age. They tend to start laying much later that some other breeds do.


    When do Ameraucanas start laying?

    Ameraucanas start laying eggs in the 20-25 usually which is the average laying age for most breeds.


    When do Wyandottes start laying?

    Wyandottes usually start laying eggs around 5-8 months of age. They are a little of a larger breed and those usually lay a little later than other breeds.


    When do Rhode Island Reds Start Laying?

    Rhode Island Reds usually begin laying eggs around 16-18 weeks old. They are one of the breeds that typically starts laying earlier than average.


    When do Orpingtons Start Laying?

    Orpingtons can start laying eggs by 20-25 weeks of age. However, they are a larger breed and sometimes can take up to 8 months to really start laying.


    When do Easter Eggers start laying eggs?

    Easter Eggers usually start laying somewhere between 20 - 25 weeks of age which is about 4 - 5 months old.

    When do Welsummers Start Laying?

    Welsummer usually start laying around 5-8 months of age. They are not a larger breed, but their dark eggs usually take a little longer than average to start going.


    When do Sussex Start Laying?

    Sussex typically begin to lay eggs at 5-8 months old.

    If you need more help with taking care of your chickens, check out The Organized Chicken Keeper for a complete system for managing their health through keeping their supplies stocked and coop clean.
    Access The Organized Chicken Keeper Here
    pinterest image. top image: 7 fresh eggs lined up on counter. middle box text reads, "when will your chicken finally start to lay eggs?" bottom image: hen on alert, text circle that says "3 tell-tale signs"

    Chicken Mites & Chicken Lice - How to Identify & Treat

    By MrAnimal Farm

    Chicken Pests: Lice & Mites

    We have had chickens for several years now and have read stories of people having the dreaded chicken lice and chicken mites take over their fluffy butts.  Luckily we had never had either...until this Fall.  We bought some chicks and juveniles, brought them home and then discovered they were COVERED in tiny bugs! Ew!

    There are three main types of chicken mites: Northern Fowl Mites, Red Roost Mites and Scaly Leg Mites. There are two main types of chicken lice: Biting Lice and Sucking Lice. Both of these types of external parasites can reproduce and spread quickly within your flock causing a range of issues from discomfort to death.

    It is important when you are raising chickens to understand what chicken mites and lice are, how to identify them, how to treat them and how to prevent them. This chicken care tip is an easy way you can keep your flock happy and healthy.

    Chicken Lice and Chicken Mites

    What are Chicken Lice and Chicken Mites?

    If you have never had chicken mites or lice before, you probably first want to figure out what they actually are.  They are a types of external parasites that are fairly common in flocks especially during Fall temperatures.

    While there are different types of mites and lice (which we will jump into momentarily), the main thing these little creepy crawlies have in common is that they live on and feed on your birds.

    Chicken Mites

    There are three main types of chicken mites. Although they all are similar, there are a differences in how they live and feed on your chickens. Knowing these differences will help you identify which ones you are dealing with.

    Northern Fowl Mites

    These are very small, round bugs they can range in color (grey, brown, black and red) and they have eight legs. They thrive in cooler temperatures around the mid to upper 60's (in degrees Fahrenheit).

    This type of mite spends it's entire lifecyle on the birds. And their lifecycle is from egg to reproductive adult occurs in just around a week. This means that you can go from just a few mites to hundreds of thousands of mites in a relatively short timeframe.

    Red Roost Mites

    This type of mite, again is a small round bug with eight legs. They differ from Northern Fowl Mites in that they only go onto the birds to feed. They live in bedding, walls, roosts and other places of the flocks environment. And they tend to come out to feed at night.

    Again, these chicken mites reproduce quickly and can go from just a few to hundreds of thousands in a short timeframe. Due to the fact that red roost mites do not live their entire lifecycle on their host (birds) they can survive off a bird for a much longer period. Which makes getting rid of them sometimes a more difficult chore.

    Scaly Leg Mites

    Knemidocoptes mutans, commonly known as scaly leg mites are chicken mites that, you guessed it, affect the legs and feet of birds. These mites are microscopic - so you won't visibly see them on your birds. But you will see the damage they can cause.

    Need some help keeping your chickens health and care taken care of? Check out the Organized Chicken Keeper for an easy to follow system.

    What they do is essentially bury little tunnels underneath your chickens leg and feet scales. They then live there eating off the birds skin and tissues. This can cause your chickens legs and feet to become very crusty and inflamed.

    close up of mite

    Chicken Lice

    There are two main types of chicken lice: Biting Lice and Sucking Lice. Both types of chicken lice are usually thin, long, straw colored bugs with 6 legs. They are very small and tend to move quickly, but are visible to the naked eye.

    Both types of lice live their entire lifecycle on the bird, like Northern Fowl Mites. So, while they can live a long time (several months) while on a bird, they cannot live long without being on a bird.

    They feed off of dead skin, feather particles and other debris that come off of the chickens.

    How to Identify Them

    Now that you know what they are, you probably want to know if your flock has them. There are several ways to identify mites and lice on your chickens.

    Visually Spot Them

    So, the first way to identify whether you have an external parasite infestation in your flock is to check your chickens over and visually spot them on your birds.

    Both parasites like to hang out near the base of chickens feathers. They also tend to prefer places near the vent and under the wings. So, when you are checking to see if you can find any, it is best to choose one of those places, and pull their feathers back so that you can look around where the feathers meet their skin.

    As mentioned above, mites will present as darker colored, round bugs. While lice will present as thin, light straw colored bugs. Both are very small and will move fast. So, you have to look closely and quickly as you pull their feathers back.

    You may also be able to see little white clusters of eggs at the base of your chickens feathers if they have Northern Fowl Mites or Lice.

    Feather Issues

    Since lice and mites crawl through the birds feathers and the feed on their blood and on the feather and skin debris, this can cause feather issues. So, this is one sign to be on the lookout for in your flock.

    You might see your chickens doing excessive preening - getting crawled all over and bitten can be a little irritating of course. They might also have broken and or dull feathers. And can even have feather loss. Although, do be aware that there can be other causes of feather loss such as when chickens molt.

    Anemia

    Since these external parasites are feeding off your chickens blood and skin, if this goes on for too much time they can become anemic.

    Some signs to look for are pale comb and wattles and lethargy or lack of energy.

    Blood Spatters

    Again, your chickens are getting bitten by bugs, this can cause them to bleed a little. So, you might see little fine blood spatter either on their feathers or on their roosts. Or, sometimes you will see darkened dried blood spots near their vent.

    This won't be like a ton of blood or anything, but will definitely be visible.

    Red, Raised Leg Scales

    This applies to scaly leg mites only. Though you can't see the actual mites, you can pretty easily see the damage they start to do to your chickens legs and feet.

    Their legs and feet may look really red and inflamed. Their scales may look crusty and raised as well.

    Decreased Egg Laying

    Being overrun by these creepy crawlies can put a bit of a strain on your chickens. And that level of stress can cause decreased egg laying. Of course, there are other reasons they will decrease the amount of eggs they lay as well. But this can be one sign of mites or lice.

    How to Treat Them

    (Disclaimer:  we are not vets or licensed to treat poultry in any way.  This is what worked for us, some of the products used are not labeled for use in poultry.  Use at your own risk/discretion.)

    There are a lot of different ideas and philosophies on how to treat external poultry parasites. There are also a wide variety of possible treatment options both more natural and then also chemical.

    Ultimately you need to decide what is best for your flock based on what you are comfortable with and in combination with your vets advise.

    No matter which option you choose, it is important to completely and thoroughly clean your entire coop out. Change and and replace all bedding as well. Otherwise, you will just get more mites as the eggs hatch.

    Natural Options

    1)  DE - DE or Diatomaceous Earth is a powder substance.  We dusted the chickens with the DE around their vent areas as well as adding DE to their bedding. There are definite pros and cons to DE. There is conflicting research as to whether this can cause potential respiratory issues. And, for really bad infestations, it may not be the most effective thing.

    2) Wood Ash - another natural substance that you can put onto your birds and in their bedding.

    3) Garlic or Dish Soap and water sprays.

    4) Herbs and Essential Oils

    Chemical Options

    1) Elector PSP/Spinosad - this is a spray that is approved for use in poultry for mites.

    2) Sevin Dust - although a lot of people use this, it is a pretty caustic chemical. But some people swear by it.

    3)  Frontline - this is a common flea, tick, lice medicine for dogs.  We got the dose for the smallest dog 5 - 22 pounds and then put just ONE drop on each juvenile under their wings.  After 24 hours all of the lice were gone. This is NOT approved for use with poultry, so use at your own risk.

    frontline packet
                                     Just use a single drop for your chicken.

    4) Poultry Dust/Permethrin

    How to Prevent Them

    1) Quarantine

    Before you integrate any new birds into your flock, be sure to quarantine them first. This will help to ensure that you are not adding new birds that have a parasite infestation into your flock.

    Mites are just one of the icky things you could bring into your flock without using quarantine - and that is even when purchasing from a NPIP certified source.

    2) Dust Baths

    Making sure to provide dust baths for your birds is a great way to le them naturally control mites and lice before they become an issue. You can even add a little wood ash, herbs, or DE to their dust bath for extra effectiveness.

    3) Bio-security

    Mites and Lice certainly aren't the only reasons that you should maintain good bio-security for the health of you flock, but they are two of the reasons. Bio-security is essential actions taken to prevent bringing in health issues and diseases.

    Things like cutting down on foot traffic from other people to your flocks area, not using the same shoes and clothes that you go off the farm in, preventing wild birds from mixing into your coop and run areas.

    5) Regular checks

    Although regular health checks aren't going to totally prevent an infestation, they can certainly help you catch it before your chickens health becomes too poor and before the infestation gets out of control.

    So, make sure to do daily and more thorough weekly checks on each bird to ensure they are not exhibiting any of the signs of these chicken mites or lice.

    4) Clean areas

    Make sure that you keep your chickens coop and run clean. This will help to prevent any external parasites from taking up residence there. Regular spot cleans and then more thorough deep cleans are both essential.

    Additionally, for prevention of scaly leg mites, it is important to ensure that the chickens run area is not too wet or muddy as this can be a bad environment for them.

    FAQ

    Can chicken mites live on humans?

    No, chicken mites and lice are species specific and cannot live on humans, so you need not be concerned that they are going to get on you and stay there. However, it is possible for mites to get on you for a short period of time and bite you.

    Does bathing a chicken get rid of mites?

    It can help to get the mites off of their feathers and skin and also to get rid of the eggs that have been laid at the base of their feathers.

    If you need more help with taking care of your chickens, check out The Organized Chicken Keeper for a complete system for managing their health through keeping their supplies stocked and coop clean.

    Access The Organized Chicken Keeper Here

    Want to see what it looks like to treat chicken lice?

    Watch our YouTube video below.  Don't forget to subscribe!

    Can You Freeze Oatmeal?

    By MrAnimal Farm

    bowl of oatmeal with cinnamon on top

    If your mornings are hectic and breakfast is often an afterthought, then you may wonder how to save time. This may have led you to consider the question can you freeze oatmeal?

    Oatmeal is a hearty and easy meal to make. It is also super versatile, you can add a variety of different fruits, nuts and spices to it making it taste different each time. That variety is great because you won't get bored eating it often.

    bowl of oatmeal with cinnamon on top

    Can You Freeze Oatmeal?

    You can freeze oatmeal, it is super easy to do. You can either freeze it in muffin tins or in scooped out servings and then place it into freezer bags. It can last without any degradation in quality for 6 months, but should be safe to eat longer than that.

    We like to meal plan and have our meals ready to go; only needing to be reheated. This helps to keep our food budget under control and also ensures that we are eating healthy meals whenever possible.

    Freezing foods is our favorite preservation method because it is generally super fast and easy. We like to freeze blueberries, Freeze milk, and there are lots of vegetables can freeze.

    So, of course it's good to have breakfast freezer meals ready to go also. Oatmeal is a perfect candidate for our everyday breakfast routine when we are getting tired of our frozen eggs or hash brown casserole.

    What's really great about this particular method of cooking and freezing is it opens up a variety of ways to customize each meal without adding in a ton of time. Essentially, we cook just plain oatmeal to start as a base and then, when we thaw, we can customize with whatever topping we are in the mood for that day.

    Cooking oatmeal

    bowl of precooked steel cut oats with steel cut oats container in the background

    What you will need is your oatmeal of choice, an Instant Pot/Ninja Foodi/pressure cooker, and a muffin pan. We like to use steel cut oats for the boost in nutrition but you can use any type of oatmeal. For this discussion all times will be based on Steel cut oats, times may vary depending on your chosen type of oatmeal.

    Step One

    Make sure your Instant Pot is clean and ready to cook. Pull out your measuring cups and add 5 cups of water. Finally, add 2 cups of steel cut oats. You can also add in a bit of salt to taste if you so desire.

    This will make around 6 one cup servings. Add more oats for larger batches. The water to oat ratio is a little more than double the water to oats. For example, in this recipe one cup of oats equals about two and a half cups of water.

    You may need to play around with the ratio a bit as you make more batches so your oats are not too dry or too soggy.

    Step Two

    Close your Instant Pot and seal the lid. Press the button for manual and set your timer for 4 minutes.

    This is the time that works for our climate. Depending on your elevation your time may be a little more or less. Again, play around with this until you find the perfect routine that works for you.

    You may be thinking 4 minutes is pretty short. Don't worry. It will likely take 15-20 minutes to pressurize and another 10 or so for your Instant Pot to naturally release the pressure once the timer has gone off.

    All in all, you are looking at around a 30 minute cook time.

    Step Three

    When the 4 minute cook time is up, make sure not to open the Instant Pot right away. You will want to let it do a natural release which means it slowly lets the pressure go instead of you opening the valve.

    It's important to let the Instant Pot naturally release the pressure instead of flipping the valve yourself because this time allows the oats to soak up more water and become tender and delicious.

    Need to get all your food preserved easily? Check out the Ultimate Guide To Freezing Food so that you can fill your freezer without in minimal time.

    Freezing Oatmeal

    Before you get started, you have a few options if you will be adding any flavoring ingredients to your oatmeal. You can either add them now as one big batch, add them on top after step one below or add them when you thaw and reheat your oatmeal.

    Adding various flavorings are a great way to easily customize your breakfast so you don't get tired of the same old thing every day. Here are just a few ideas:

    • Strawberries & Creme (Milk or Vanilla)
    • Blueberries & Vanilla
    • Cinnamon
    • Cinnamon & Sugar
    • Apples and Cinnamon
    • Raspberries & Creme (Milk or Vanilla)
    • Walnuts
    • Chia Seeds & Blueberries
    • Brown Sugar
    • Banana Slices & Walnuts
    • Almonds & Strawberries
    • Blackberries & Vanilla
    • Chocolate Chips & Blueberries
    • Honey

    Step One

    Now that you have a pot of cooked oats you'll want to take out your muffin pan. Once, again, you'll want to grab your measuring cups and add one cup scoops in each muffin pod (I guess that's what you would call them).

    Step Two

    Stick the entire muffin pan in a large freezer bag. A 2 gallon reusable freezer bag should work well. You want to use a freezer bag so the oats do not accumulate too much water or frost. Now, stick everything in the freezer for a few hours or overnight.

    Step Three

    Once frozen, remove your oatmeal from the freezer. Remove your oatmeal from the muffin pan and pop each puck into a large freezer bag. You can use the same one the pan was in or opt for smaller ones.

    It is a good idea to label your freezer bag with what is in it flavor of oatmeal and today's date. Oatmeal can stay frozen indefinitely, but after 6 months the quality can start to decrease.

    Step Four

    When you are ready to thaw, simply place a serving in the fridge overnight or stick it straight into the microwave.

    Reheating your oatmeal will only take a few minutes in the microwave. Exact times will vary based on portion size, your microwave and if you thawed it first. It typically takes less than 5 minutes.

    You should start with 1 minute intervals, stirring in between. Once you know how long it takes for you microwave, next time you can heat for half the time, stir once and then heat the other half of the time.

    Common questions

    Can you freeze raw oats? You can. It's pretty easy too. Just put them in a freezer safe bag. You want freezer specific bags because it is crucial that the raw oats do not have ANY condensation in the bag.

    Can I freeze any type of oatmeal? Absolutely! The above method works with freezing any kind of oatmeal. So you can freeze traditional oatmeal, steel cut oatmeal, instant oatmeal, etc.

    How long can I freeze oatmeal? Typically, we would say don't freeze any longer than six months. After that the quality starts to degrade. Anything longer then six months, we recommend observing FDA guidelines for food preservation.

    How do you thaw frozen oatmeal? The best way to thaw it it to simply remove it from the freezer the day/night before you want to use it. Stick it in a bowl in the fridge and it should be good to go the next day.

    How do you cook frozen oatmeal? You can either cook it still frozen, or you can thaw it overnight. To cook it, you can simply put it in the microwave for several minutes (stirring occasionally).

    Can you refrigerate leftover oatmeal? Yes, you can refrigerate leftover oatmeal for a few days. Be sure to store it in an airtight container.

    If you need more help getting your foods frozen, check out the Ultimate Freezing Food Guide for a complete quick start reference so that you can have a well-stocked freezer.

    Access the Ultimate Freezing Food Guide Here
    Pinterest image depicting a bowl of uncooked steel cut oats with container blurry in the background. Text overlay stating "the best way to freeze oatmeal. easy step-by-step cooking and freezing tutorial."

    DIY Goat Pen Ideas: Plans To Keep Your Goats Safe

    By MrAnimal Farm

    close up of goat and baby goat faces

    Are you trying to corral those goats into a pen? With so many DIY goat pen ideas out there, it’s tough to find which one is right for you.

    DIY goat pens can range from full, sturdy, large goat shelter plans to moveable smaller separated areas. There are many available options that range from super expensive to almost free with spare materials that you have around. Choosing the right pen or the best goat shelter for your herd will depend on size, budget, weather and predators.

    So, let's dive in and decide what type of DIY goat shelter or pen is right for you. With so many different options you'll have no problem choosing the perfect setup for your herd.

    close up of goat and baby goat faces

    DIY Goat Pen Ideas

    There’s an old saying that goes, “If it can’t hold water, it can’t hold a goat!”. Basically, goats are escape-artists, which is why a goat shelter needs to be built correctly.

    Why Do You Need One?

    When raising goats you should know, after food and water, the best goat shelter is THE most important need. It provides them with a safe spot to go so that they can relax.

    They will need a spot to get out of the weather. Too much sun, pouring rain (they HATE getting wet), to high winds, you don't want your herd left exposed all the time.

    Most of the time, your goats will spend a lot of time out grazing in their fenced area. However, they like to go into some type of shelter at night to sleep. They also like to use their shelter to get away from inclement weather.

    Additionally, they need safety from predators. Goats are prey animals and can be injured or killed by a wide variety of predators from stray dogs to coyotes.

    Of course adding in a Livestock Guard Dog like a Karakachan and good solid goat fencing helps also. It's also still good to provide your goats with a sturdy shelter for when they need to get to safety.

    Shelters also give your goats a place to rest. Whether it be just sleeping, an injury, or when you start to see goat kidding signs, having a safe place to lay around creates a good sense of security for your goats.

    If they'll be spending a significant amount of time in their shelter area, you may also consider providing them with some goat toys to keep their boredom down.

    Need some help to keep your goats healthy and maintained? The G.O.A.T Herd Management Binder has you covered from supplies to routine care reminders.

    Types of Shelters and Pens

    There are two main types of shelters or pens for your goats. Within each type there is a wide variety of different ideas you can use for your herd.

    Solid Goat Shelter

    This type is basically any bigger, larger and sturdy shelter for your goats. These are used to house an entire herd all together.

    These are usually used for everyday shelters where your herd stays regularly. They can range from super expensive and elaborate to fairly cheap and simple.

    If you have a lot of bad weather or a super large herd, you probably want to consider one of the shelters that is bigger and more sturdy since they will likely be spending more time there. However, if you have a smaller herd, lots of pasture, low predator load and/or fairly nice weather you make think about some of the less elaborate, smaller shelters as your herd is likely to spend less of their time in them.

    Here are several Solid Shelter Examples:

    Traditional Barn

    Of course, probably the first thing you imagine when you think of a DIY goat shelter or pen is a traditional barn. This is a four sided, well built solid structure with a door that can close it up totally when you want. Depending on the size of your herd and their breed will determine whether you need a small barn or a big goat barn.

    Barns are also nice because they can generally accommodate multiple goats.

    Three Sided Lean To

    Similar to a Traditional Barn, but less elaborate and has an open front (so, only three enclosed sides). Three sided lean to's are a little easier to put together than a whole barn. They can be scaled down to not be as tall and as large, especially if you have a mini breed like Nigerian Dwarf Goats.

    It is important when you are building a lean to, that you think about which way your wind typically blows and then position the open side NOT facing the wind. This will help to keep your herd warm and dry during inclement weather. This is especially important when learning how to care for goats in the winter. Other than that, these simple goat shelter plans are some of the easiest to build.

    Carport or Metal building/ Shed

    If you aren't into building your own sturdy shelter out of lumber, then you might try a pre-fab type metal carport or metal building. Depending on when you purchase, they can end up being a little cheaper than purchasing lumber.

    Additionally, though if you get a large one, it can take quite a lot of time to put together, you don't need to know HOW to build. You just need to be able to follow the instructions.

    Pallet Shelters

    Do you have a bunch of pallets lying around? Instead of using them as scrap wood, you may want to consider building a cheap goat shelter out of them. You can follow this tutorial on how to make a quick goat shelter out of pallets. This works super well and isn't too expensive.

    The pallets provide pretty sturdy walls for your goats and the tarp and cattle panel metal roof over top provides a good shelter from both summer and winter weather. You can also put a front on it either with more pallets or a cattle panel if your herd needs a little more security from predators.

    This shelter is also awesome, because you can fairly easily add to it if you end up needing more room. However, one draw back is that tarps just don't last forever. Make sure you get a high quality one, but if you are using it for a long period of time, be prepared that it will need to be replaced somewhat often.

    goat shelter made with pallets, cattle panel, and a tarp

    If you want a shelter that is a little smaller than the one above, here’s a different take on the goat pallet shelter. This shelter will help keep your goats safe. It is sturdy, but not too big. Essentially it is a three sided lean to, pallet style.

    If you want a tall pallet shelter with a solid roof, try using a carport. We have also used pallets to turn half of a carport into a full goat stall.  We just drove t-posts and sat the pallets down on them like pegs.

    You have to measure how wide each pallet is and then drive your t-posts in the proper spots. You can then use a piece of cattle panel as the entry door, or you can use a pallet - plug it over one tpost, but not over the second and you can swing it open and closed like a door.

    goat in car port pallet pen

    We like pallets for DIY goat shelter plans because they are so readily available for free or cheap and make building really easy. You don't have to do as much exact measuring and engineering as when building from scratch. And using pallets, you can easily add or subtract space from your shelter just by removing or adding pallets.

    If you prefer traditional lumber, any of these plans can work with just a little tweaking.

    Moveable Pens and Stalls

    The second main type of goat shelter or pen that you should consider are moveable pens and stalls. Now, in some herds you may need both a solid shelter and moveable pens. Or, you may need multiple moveable pens as they can play the role of both primary shelter and area to separate a goat or goats from the rest of the herd.

    For example, if you are introducing a new goat to your herd, you need to quarantine the goat for a period of time to be sure they are clear of any communicable diseases. In a case like this, it is good to have a moveable pen or shelter that you can house that goat in during quarantine period.

    Similarly, during kidding season, you will likely want kidding pens set up for when your does go into labor and a day or so after so that they can bond with their baby goats safely and stress free. And if you have dairy goats and will be milking your goats, you will also want a separate stall area to put them in during milking time.

    Using moveable pens as your goats primary shelter also has some benefits. You can easily rotate them into different pasture areas. And, it is WAY easier to clean them out if you can simply move them and then scoop the used bedding up to dispose of it.

    However, one disadvantage of smaller, moveable pens is that they aren't always as sturdy and safe.

    Here are some examples of moveable pen and stall ideas.

    Cattle Panels

    Cattle panels are easy to put up, move around and change configurations of. You can either use cattle panels as an individual pen area or you can use them to separate an area out in your bigger solid shelter.

    Pallets

    We use pallets to divide up areas in our bigger shelter for kidding time. This way we can add more sections or remove them quickly as we need. All you need is a few pallets and a few t-posts.

    2 adult goats in car port pallet pen
    Dog House or Igloo

    If you only have a few goats, you can also use a pre-manufactured dog house or dog igloo as a primary shelter. This is only a good idea if your herd is small (make sure to offer enough shelters for them to all have space). Also, make sure that your weather isn't super bad for long periods of time otherwise, your goats may not have enough space to move around if they are staying in these smaller shelters for a lot of time.

    However, these are relatively budget friendly, they are easy to move and you don't have to build anything. So, they are really great if you need a flexible and cost effective option for your goat shelters.

    Crates

    We have repurposed DIY chicken runs into a moveable DIY goat shelter or pen. This is great to add in to pasture areas where you don't have access to your main shelter. Or, if you need to separate a goat to it's own area for a while. They could also easily be used as something similar to a three sided lean to.

    They are basically solid fencing with a small wooden base and a support on the top. When we use them for the goat shelters, we turn them on their side and add plastic roofing or plywood at a slant to the top. It is also good if you can put a little siding on them instead of the fence if they will be more permanent - we simply put ours up against out pallet fence which works great to prevent rain and wind from blowing in.

    Customizable Metal Pens

    If you want something a little more sturdy than cattle panels or pallets for a goat stall area in your shelter, try out this customizable DIY goat pen. You can easily adjust the plans to fit your needs a little better. 

    goat with goat kids in car port pallet pen

    Building a DIY goat pen on your own may be easier than you thought. When you own a farm, you can never have “too” many DIY goat shelter plans to choose from.

    FAQ

    What do goats need in their pen?

    They need access to food, water, minerals and baking soda. If there is room, they also like to have things to climb on like benches.

    How big should a DIY goat pen be?

    Size depends on how big your goats are, what type of goats, how many you have and how long they spend in their shelter. In general, standard breed goats need a minimum of 20sq feet per goat and mini breed around 10sq ft.

    Should I lock my goats up at night?

    This depends on the safety of your area. If you have a high predator load and no guard dogs, then you should definitely lock them up at night for protection.

    Do goats need a shelter?

    Yes, all goats need a shelter of some type. It can be elaborate or simple, as long as it provides protection from weather and predators as well as gives them a place to rest.

    If you need more help keeping your goats healthy and well taken care of, check out the G.O.A.T. Herd Management System - worksheets, calculators, supply management and more to keep your goats in tip top shape while cutting down on time.

    Access the G.O.A.T. Herd Management System Here

    If you need more help keeping your goats healthy and well taken care of, check out the G.O.A.T. Herd Management System - worksheets, calculators, supply management and more to keep your goats in tip top shape while cutting down on time.

    Access the G.O.A.T. Herd Management System Here

    Wyandotte Chickens: Gold Laced, Silver Laced & More

    By MrAnimal Farm

    If you are looking for a friendly, dual purpose chicken that comes in a variety of interesting colors then the Wyandotte chicken might be perfect for your flock.

    Wyandotte chickens were developed in the late 1800s and accepted into the APA breed standards in 1883. They are good layers of large brown eggs averaging around 250 per year. They are also a heavy bird which makes them excellent as meat birds. They come in a wide variety of different colors including gold laced, silver laced, columbian, blue, black and more.

    If this chicken breed is one you may want to add to your flock, keep reading to find out about their history, temperament, care and more.

    Wyandotte Chickens

    SizeMales: 8-9lbs; Females: 6-7lbs
    ClassAmerican
    ColorBlack, Blue, Buff, Columbian, Gold Laced, Silver Laced, Silver Penciled
    TemperamentFriendly
    HardinessCold Hardy
    Eggs/Yr210
    Egg SizeLarge
    Egg ColorBrown

    History & Origin

    Wyandotte chickens exact history and origin is muddled. They were originally called the American Seabright. There is not a clear documentation of the exact breeds that were used when creating Wyandottes. However, it is thought that Dark Brahams and Silver Spangled Hamburgs contributed heavily.

    Wyandottes were named in part after the Wyandotte tribe of New York - which is the area where they were originally developed.

    Due to their good egg laying and meat production capabilities, they became a popular breed to own and have their own clubs in various states and countries.

    What Do They Look Like

    Wyandotte chickens are a heavy breed. The males/roosters weigh in at about 8 -9lbs and females/hens weigh in at about 6-7lbs. There is, however, a bantam version of this breed and they weigh ⅓ to ½ less than their standard sized counterparts.

    Other than adult weight, it can be difficult to sex this chicken breed much earlier than several weeks of age unless vent sexing is used.

    Need some help keeping your chickens health and care taken care of? Check out the Organized Chicken Keeper for an easy to follow system.

    Breed Standard

    In order to meet the breed standard as laid out by the APA and poultry associations around the world, Wyandottes must meet several criteria. These criteria do vary slightly from association to association.

    Wyandottes were officially accepted into the APA breed standards in 1883.

    In general, they deep bodied, broad chested and rounded looking bird - similar to Australorps. They have round and compact feathers.

    They have clean yellow legs instead of feathered legs like Marans and Silkies.

    Their comb is a rose comb. Their combs, wattles and faces are bright red in color.

    Colors

    The colors that are accepted do vary slightly by association. But, those colors which are generally accepted are:

    • Gold Laced Wyandotte
    • Silver Laced
    • Columbian (which is a great if you are looking for a black and white colored chicken)
    • Black
    • Buff
    • Blue
    • White
    • Partridge

    There are also a variety of other colors like blue laced red, red, silver penciled, buff columbian and more.

    As evidenced by the list above, there are multiple different color variations that this breed can come in. Below we will detail a little about the history of a few of the more popular colors.

    Gold Laced Wyandotte

    Lacing is seen in several breeds other than this one, including Orpingtons. Gold laced Wyandottes were the second color to be accepted to the APA as a breed standard.

    The gold laced color is essentially golden colored feathers that each have a dark black outline around their edges. It is quite stunning. Joseph McKeen is credited with creating this color in this breed.

    Silver Laced Wyandotte

    Silver Laced Wyandottes are the original color that this breed came in. Silver Laced was therefore the first color accepted into the breed standard. It is likely that the lacing originated from one of the breeds used in development of Wyandottes. There has been speculation that the Silver Seabright is the breed that introduced this lacing.

    Temperament

    This breed has a reputation for being fairly calm and friendly. They have a generally good disposition.

    They do well in multiple different environments, but are particularly cold hardy. However, they do withstand summers just fine.

    It is not uncommon for hens to become broody. They are excellent mothers if you want to leg them hatch their own chicks.

    What is Their Purpose?

    While they are termed a dual purpose breed. The fact is, that Wyandottes can serve more than just two purposes very well.

    First, they are good egg layers. They lay a large brown egg at the rate of about 210 per year. Since they are cold hardy, they can also lay well through the winter and fall.

    Second, due to their weight and size, they are an excellent meat bird.

    Third, due to their easy going temperament they make a good show chicken. They are easy to handle and don't mind being taken to various poultry shows and being groomed.

    Lastly, they make excellent pets. They have an excellent and friendly temperament. Additionally, they are well suited to a variety of environments from being kept in a run to being allowed to free range. This means that they fit in well in a variety of different flocks.

    Care & Health

    As expected, based on what we have covered with their ability to adapt and thrive in most situations and environments, Wyandottes tend to be a very hardy and healthy breed. They need the typical chicken care.

    They have a typical lifespan for chickens at an average of 8 years. Though that can vary based on potential health issues and predator problems.

    This is a breed that doesn't have any health issues they are more at risk for due to their genetics or qualities. So, of course make sure you know how much it costs to feed chickens, provide them with a safe coop and run. There are lots of chicken coop plans and DIY chicken runs you can use. And make sure to do regular health checks.

    FAQ

    Are Wyandotte chickens good layers?

    Yes, they are good layers of about 210 large brown eggs per year.

    How long do Wyandotte chickens lay eggs?

    They will lay super well until age 2 and then laying and egg production begins to slow each year. How long chickens lay eggs is based on both breed and health of the individual chicken.

    Are Wyandotte chickens noisy?

    While they will cluck and make some chicken noises especially when laying (and roosters certainly will crow). They do not tend to be a particularly noisy breed.

    Are wyandottes good meat birds?

    Yes, they are excellent meat birds due to their large size.

    At what age do wyandottes start laying?

    They are usually ready to lay eggs around 5 - 6 months old. This is pretty on par with most breeds, although some like Amberlinks and Rhode Island Reds may start laying a bit sooner.

    Can Wyandotte chickens fly?

    Due to their heavy size, they are not good at flying. They can certainly get a little bit off the ground for a small distance. But nothing like what you commonly picture when thinking of a bird flying.

    Are wyandottes friendly?

    They are extremely friendly, calm and docile birds. This makes them fantastic as pets.

    What color egg's do Golden Laced Wyandottes lay?

    They lay a brown egg - some are lighter and some are darker, but all are a brown color.

    If you need more help with taking care of your chickens, check out The Organized Chicken Keeper for a complete system for managing their health through keeping their supplies stocked and coop clean.
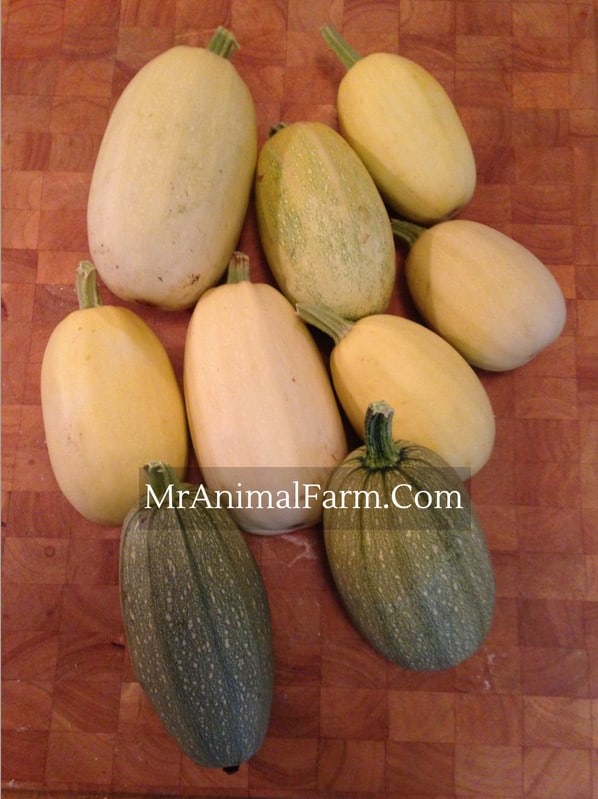
    Access The Organized Chicken Keeper Here

    Wether Goats: The Ultimate Guide

    By MrAnimal Farm

    If you are raising goats, then you will eventually have some experience with wether goats whether you are keeping some yourself or wethering them for their new owners.

    Wether goats are male goats who have been fixed or neutered. Often times this is done via banding between 8 - 12 weeks of age. However it can also be done with a burdizzo or surgically. The procedure is typically done at a few months old. These neutered boys tend to make fantastic pets.

    If you are breeding goats for profit or if you have dairy goats you breed to keep in milk, you'll inevitably end up with boys. Not all boys are suitable for breeding and those should be fixed or wethered. Additionally, if you are just looking for pets wethers fit the bill perfectly and are easy to manage within your herd.

    What is a Wether Goat

    A wether goat is a male goat who has been fixed or neutered. Essentially, their testicles are removed by one of three main methods. This, just like with dogs or cats, makes them sterile or unable to reproduce.

    Why would you wether?

    There are a few main reasons that you would not want to leave your bucks in tact. If you aren't sure on what that goat terminology means, a buck is an adult male that is capable of reproducing.

    First, not all males are suitable for reproducing. You only want to use the best genetics and characteristics in your breeding bucks. So, you only want to keep males in tact that meet all of the breed standards and are a good representation of what you want in your (or someone else's) herd.

    Second, keeping in tact bucks you have to have a separate goat pen and goat fence area for them. Otherwise they can and will breed your does anytime they go through their goat heat cycle. So, if you fix the boys, they can live alongside your does just fine.

    And in tact bucks have some gross habits when they are in rut (breeding season) like peeing on themselves. Wethers on the other hand don't tend to practice these type of behaviors.

    What are wethers good for?

    Wether goats are good for a variety of different uses. The main purpose or reason they have is to be pets. They make fantastic pets as they are generally calm and can be very friendly. They don't have the hormonal changes and mood swings that bucks in rut and does in heat will.

    They can also be used as heat detectors as they will act a little bucky and be able to notify you if your does in heat.

    Additionally, they are great as companions for other goats. They can live with in tact bucks or with does. Since goats are herd animals and need to have at least one buddy, it's great to have a wether or two in your herd in case you need a buddy for any of your other goats.

    Wethers tend to be one of the lower costing goats since they are not breeding stock. How much a goat costs can depend on the breed and area. They can go anywhere from $50 - $200. Our disease tested Nigerian Dwarf herd usually runs about $175 for a wether.

    Need some help to keep your goats healthy and maintained? The G.O.A.T Herd Management Binder has you covered from supplies to routine care reminders.

    When to do it?

    There is not an exact age when you need to wether your male goats. However, there are a few important age considerations to make.

    Especially if you are banding, you can't wait too long to perform the procedure otherwise your goat will be too big to safely do it. But, it is important to allow their systems, hormones and urethra to develop properly. When they are castrated or neutered it stops this development.

    You should aim to castrate no earlier than 8 weeks. If you can wait longer, that is best. For banding, in particular, we usually wait 10 - 12 weeks depending on the size of the goat.

    How to wether/neuter a goat

    There are three main ways to do this: Banding, Burdizzo and Surgical.

    Banding is probably the most common, it involves taking thick bands (they look like small hair elastics) and metal clamp. You stretch the band on the clamp and place the bands at the top of the testicles. This cuts off the blood supply and after some time they dry up and fall off.

    The Burdizzo also looks a bit like a metal clamp. You are essentially crushing or cutting the spermatic cords. So, while they keep their testicles, they in theory cannot have sperm leave and are sterile.

    Surgical castration is done by a vet where they actually go in and cut the testicles off just like they would in a dog or cats neuter.

    Banding Step by Step

    Banding is a little scary before you try it. Of course there are usually some nerves, and you want to be sure you do it correctly. But, once you do it a few times, it really is not difficult at all.

    Supplies

    You'll need just two things to band your boys

    • Bands
    • The actual Bander - this is the one we use. We have had it for over 5 years and it still works great.

    Process

    There aren't many steps to banding.

    1) Gather Your Supplies

    First, make sure that you have your bands and bander ready. We like to use two bands per goat that way if one pops off too early there is still one in place.

    Note: If the kid you are banding is a bottle kid, having a bottle ready for afterwards can help them feel a little better.

    2) Get Your Bands Ready

    You will place both of your bands on the small metal prongs of the bander. It is a good idea to open and close the clamp several times to kind of stretch the bands out and get them ready.

    3) Hold Kid

    This helps if you have a second person to assist. But you can also do it on your own. You will want to hold the kid securely in a way that you can easily access their testicles.

    4) Place the Bands

    Open the clamp and place the testicles into the clamp so that both bands are around them. You want to ensure that BOTH testicles are in the clamp.

    Move the bands and open clamp to the very top of the testicles close to the kids body. But, be sure you don't have their teats or skin caught in the bands.

    5) Remove the Clamp

    Carefully roll the bands off of the clamp and onto their testicles. Then, you can remove the clamp.

    6) Check the Bands

    Once you have completed placing the bands, make sure to take a good look and ensure that the bands are properly placed.

    *Important note: Once the bands have been placed they CANNOT be removed. They cut off blood supply and once that has happened for a short period of time it can be dangerous to remove them.

    7) Follow Up

    Kids react differnetly to this. Some will run around fine afterward. Some will scream and lay down (sometimes pretty dramatically). Typically with 12 - 24 hours they are all up running around acting totally normal again.

    It will take 4+ weeks for the testicles to dry up and eventually fall off.

    Potential Issues

    There are several potential issues with wethering a goat. The two main ones are infection and UC (urinary calculi).

    You should check the site no matter the method that you used while it is healing to make sur thee is no infection (redness, puss or other discoloration).

    Urinary Calculi or UC is stones in their urinary tract which can actually block their ability to pee. It is important to feed them properly and not castrate them too early to try to avoid this condition.

    FAQ

    Do wether goats make good pets?

    They make fantastic pets. They tend to be calm and friendly. They don't have the hormonal changes that bucks and does do.

    Do wether goats stink? Do wether goats pee on themselves?

    Unlike in tact bucks, wethers do not typically pee on themselves and therefore they do not stink.

    Can you wether a goat at any age?

    Surgically they can be wethered at any age. But via banding or Burdizzo the 8 - 12 weeks age range is best.

    How much does it cost to wether a goat?

    It can range from $30 - $100 or more depending if you are using a bander and doing it yourself or surgically castrating with a vet. Doing it with a bander or Burdizzo is not expensive at all.

    If you need more help keeping your goats healthy and well taken care of, check out the G.O.A.T. Herd Management System - worksheets, calculators, supply management and more to keep your goats in tip top shape while cutting down on time.

    Access the G.O.A.T. Herd Management System Here

    Australorp Chickens - The Ultimate Guide

    By MrAnimal Farm

    If you are looking for a large, gentle good egg layer to add to your flock you don't need to look any further. The Australorp fits that bill perfectly.

    Australorp Chickens, sometimes called Black Australorps, originated in the early 1900's in Australia. They are a cross of Black Orpingtons and other breeds such as Rhode Island Reds and White Leghorns. They are an friendly breed and excellent egg layer averaging 250 eggs per year.

    Before adding this chicken breed to your backyard flock, you will want to know their history, characteristics, temperament, purpose, and care so that you can make an informed decision as to whether this is the right breed for you.

    Australorp Chickens

    SizeMale 7 - 9lbs; Hen 5 - 7lbs
    ClassEnglish
    ColorBlack with Green Sheen
    TemperamentFriendly
    HardinessCold Hardy
    Eggs/Yr250
    Egg SizeLarge
    Egg ColorBrown

    History & Origin

    The Australorp breeds orginated in Australia in the late 1800's/early 1900's. Chicken breeders in Australia imported Black Orpingtons from William Cook's lines. These breeders wanted to keep some of the good qualities of the Orpingtons and improve on them.

    To do this, various breeders began breeds the Orpingtons with a few other breeds such as Rhode Island Reds, White Leghorns and Minorcas. By adding in these stellar egg layers in compounded the already good egg laying ability of the Orpingtons.

    Some of the resulting offspring set pretty high egg laying stats by averaging over 300 eggs per year.

    In the early 1920's these new crosses with stellar egg laying ability started to create some fans in countries other than Australia. And they were first imported to US and England. It is at this point that they got their own breed name, Australorp. Although, sometimes known as Australian Black Orpington and Black Australorp.

    Need some help keeping your chickens health and care taken care of? Check out the Organized Chicken Keeper for an easy to follow system.

    What Do They Look Like

    This breed is a heavy breed ranging from 5 - 9lbs (just slightly smaller than a similar breed Barbezieux. Roosters tend to be on the heavier end and Hens on the lighter end of this weight range.

    According to the APA breed standard, black is the only accepted color (though standards from other countries do allow additional colorings). Their dark black feathers have a green sheen to them.

    They are a deep and broad chested breed. Wings and tail should be compact and tight. They are soft and tight feathered and carry themselves erect.

    Their comb is a single comb, red in color. Their wattles are also red in color.

    Their legs are dark and/or black in color. They are clean legged, unlike Marans which are a feather legged breed. And they have 5 toes, unlike the Silkie which has 5 toes.

    Breed Standard

    They were accepted into the APA as part of the English class in 1929. The APA actually recognizes both Standard sized and bantam sized. Though, bantam sized are not hugely popular they do exist.

    In the APA breed standard, the only accepted color is black. However, there are a few other Poultry associations such as the Australian Poultry Standards, British Poultry Standards and even The Poultry Club of South Africa all of which do recognize additional colors.

    Some of the additional colors recognized outside the APA are: blue, white, buff and wheaten.

    Temperament

    Australorps tend to be active, but calm. They are a friendly breed that makes does well as a pet as they are fine with human attention and interaction.

    These gentle birds can handle being kept in a chicken run or free-ranging. They adapt well to whatever environment you provide - just keep in mind that they are a larger breed so if they will be in a run, give them ample room.

    The Australorps in our flock are some of our favorites. They tend to be gentle and easy going. You don't typically see them as one of the breeds running around trying to establish their spot in the pecking order. But, due to their large size, most of the flock doesn't tend to pick on them either.

    They tend to be particularly calm and are very tolerant to handling and other touching unlike some other breeds which can be a little flighty.

    What is Their Purpose

    They are considered to be a dual purpose chicken breed. They are heavy enough that they are useful as a meat bird. They also are fantastic egg layers and are very useful for egg production.

    This breed was developed to be an excellent egg layer. And, that they are. They average 250 Large brown eggs per year. How long chickens lay eggs can depend on their breed, health and other factors.

    Additionally, they are cold hardy which is chicken terminology meaning that they will lay through the winter when some other breeds may stop producing as well.

    Due to their calm and gentle temperament, they also are well suited for use as a pet or a show bird.

    They are easy to handle and happy to be held or pet. So, they are definitely good candidates to be used as pets.

    They also are good for use as a show bird in poultry exhibitions and 4h due to their calm attitude and ease of handling.

    Care & Health

    Overall, Australorps are a hearty and easy to care for breed. They are not particularly fragile in any way. They handle cold temperatures well. They don't love super hot weather, but as long as you provide some shade to get out of the direct sun they should be fine.

    Of course, make sure to provide them a clean and secure chicken coop, fresh food and water. And be sure to use the proper chicken feeder and chicken waterer. Since they are a heavier breed, they will tend to eat more than average and therefore these cost to feed these chickens is more, but not by an extreme amount.

    They are not more at risk for any of the typical chicken health issues compared to any, other breeds. Just be sure to keep an eye for everyday issues like lice and mites. You can use this chicken care checklist to help keep an eye on your birds and keep them in tip top health.

    FAQ

    What color eggs do Australorps lay?

    They lay a large light brown egg.

    How old are Australorps when they start laying?

    They are usually ready to lay anytime between 4 and 6 months of age. The exact age will vary a bit dependent on the specific bird.

    How long do australorp chickens live?

    Australorps typically have the same average lifespan of other chickens which is about 8 years. However, a variety of different factors can affect this such as environmental conditions and predators.

    Are Australorps friendly?

    Yes, they tend to be a calm and friendly breed. This makes them an excellent choice if you like your chickens to also be pets.

    Are black Australorps broody?

    They were bred to be production layers and not broody. However, some people report their Australorps to be excellent brooders. The hens we have had in our flock do not tend to get broody.

    What color egg does a black chicken lay?

    Black colored chickens can lay different colored eggs depending on their breed. For example, Australorps lay brown eggs and Ayam Cemani lay cream colored eggs.

    How long do black Australorps lay eggs?

    Like most other chickens, they can lay for several years. However, also, like most other breeds, they typically peak egg production around two years of age and then will taper off as they get older.

    How big do black Australorps get?

    Their size can range from 5 - 9lbs. Males/roosters are typically heavier at 7 - 9lbs. While Females/hens are typically lighter at 5 - 7lbs.

    Can Black Australorp chickens fly?

    Unlike smaller bantam chicken breeds, Australorps cannot fly too well due to their heavy size.

    How do you tell if a black australorp is a rooster?

    The main ways to tell a rooster vs a hen for this breed are similar to any other breed. Roosters will be larger when they are full grown. They will have larger combs and thicker legs than hens. Additionally, roosters will have more prominent (longer and more colorful - green sheen) saddle and hackle feathers.

    If you need more help with taking care of your chickens, check out The Organized Chicken Keeper for a complete system for managing their health through keeping their supplies stocked and coop clean.
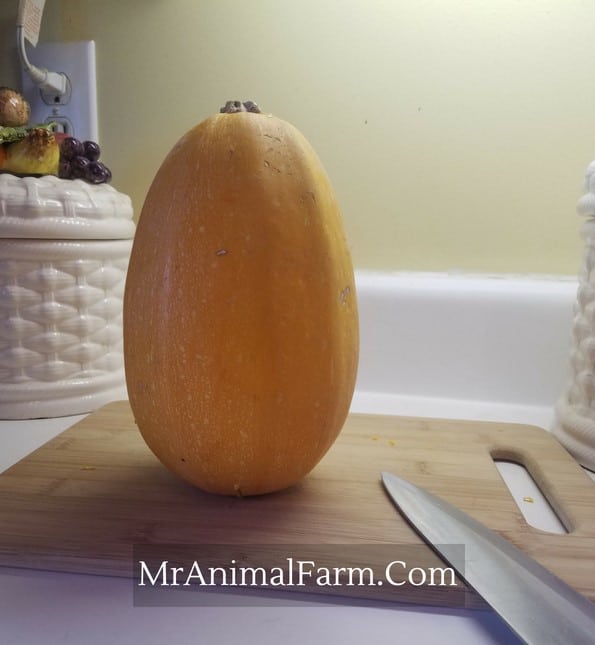
    Access The Organized Chicken Keeper Here

    The Amberlink Chicken - The Ultimate Guide

    By MrAnimal Farm

    Amberlink chicken from Hoffman Poultry

    Amberlink chickens are a hybrid chicken breed that come from Isa Hendrix genetics. They were developed in the 1970's to be heavy egg layers.

    Otherwise known as a Dekalb Amberlink, they are a cold and heat hardy breed laying up to 270 Medium to Large sized eggs in a year.

    If you are looking for a champion egg layer, the Amberlink Chicken may be just what you need.

    Below we will cover their history, size, temperament and more. So, if you are thinking of adding this chicken breed to your flock, read on to learn all you need to know.

    Amberlink chicken from Hoffman Poultry
    picture courtesy of Hoffman Poultry

    Amberlink Chickens

    SizeMale: 5 - 6lbs; Female 4 - 5lbs
    ColorMale: Red with White; Female White with Red Tint
    TemperamentFriendly
    HardinessCold and Heat Hardy
    Eggs/Yr270
    Egg SizeM/L
    Egg ColorBrown
    Amberlink Breed Characterisics

    History & Origin

    The Amberlink Chicken breed was developed originally in the United States in the 1970's. This breed, sometimes known as the Dekalb Amberlink, is one of the many egg production breeds developed by ISA Hendrix Genetics.

    They are a Hybrid breed of chicken with a similar breeding to red star chickens. A Hybrid breed is basically a chicken breed that is originally a cross of two purebred chickens.

    In this instance, a white breed and a red breed to start. However, hybrid breeds are ones that take those crosses, choose specific ones and continue with their crosses until they have developed the special characteristics that they are aiming for.

    A Hybrid Chicken Breed

    To clarify, a purebred chicken is when a single breed, for example, a Rhode Island Red is bred only to another Rhode Island Red. A simple crossbreed is when you take one chicken and breed it to a chicken of another breed.

    The difference between a crossbreed and hybrid is that the hybrid is done through generations of selective breeding to achieve an end goal. It is a much more complex breeding process.

    Pros and Cons of Raising Amberlink Chickens

    The biggest benefit to raising this breed, and hybrids in general, is that they excel, far above other chicken breeds, in whatever trait is being targeted. For example, Amberlink Chickens are amazing egg layers because they have been crossed with so other good layers to really hone in on that specific ability.

    Need some help keeping your chickens health and care taken care of? Check out the Organized Chicken Keeper for an easy to follow system.

    The biggest issues, or cons with Amberlinks, and hybrids in general, are two-fold. The first is that hybrids typically have a shorter lifespan than non-hybrid chicken breeds.

    The second reason is, unfortunately, you cannot simply breed two Amberlinks together and expect to get an actual Amberlink as the offspring. So, if you are looking to breed your own Amberlinks, it is a much more difficult process than some other breeds.

    Amberlink chicks from Hoffman Poultry
    picture courtesy of Hoffman Poultry

    What Do They Look Like

    The easiest way to tell your chickens apart is, obviously, by how they look. Let's discuss some of the physical traits of the Amberlink chicken.

    Size, Feathering, and Color

    Amberlinks appearance varies slightly based on their sex. Males, or roosters, tend to weigh 5 - 6 pounds with mostly red feathers and some white underneath.

    Females, or hens, tend to weigh in the 4 - 5 pound range and are mostly white with a reddish-brown tint to their feathers (particularly in their wings, across their shoulders and in their tails).

    Comb & Wattles

    The Amberlink chicken has both a single red comb and a pair of bright red wattles. The comb and wattles are both part of the Amberlink's way of maintaining their core body temperature.

    Differences Between Roosters and Hens

    As far as how to sex this chicken, for this breed, at hatch both males and females are the same color (they are not sex-linked), but can be wing sexed. Or, you can wait until they are several weeks old and can see the color differences developing.

    Temperament And Personality

    Amberlink chickens tend to be friendly. This means they work well in flocks where you want to be able to handle and interact with your chickens more often.

    However, they are also a very active breeds as well. They are great foragers. This means that the cost to feed these chickens can be a bit cheaper as they are happy to run around and hunt for their own food most of the day.

    They handle both cold and heat well. So, they can be happy in most any climate making them a very hardy and resilient breed.

    Egg Laying & Production

    As mentioned earlier, Amberlinks were developed specifically to be high production egg layers. So, their main purpose is as an egg laying addition to the flock.

    However, they are also friendly birds, which means that they can also adapt well as a pet in addition to their egg production.

    Amberlink chicks from Hoffman Poultry
    picture courtesy of Hoffman Poultry

    This breed is a fantastic addition, in particular to flocks that are aiming to make money with chickens by selling eating eggs. This is due to the fact that they lay upwards of 270 brown eggs a year, but also are good foragers which results in a cheaper feed to egg conversion ratio than some other breeds.

    Additionally, if you live in a climate where it gets particularly hot or cold, they serve a good purpose as an egg layer that can bridge the gaps for some other breeds that are not as hardy in these climates.

    General Care And Potential Health Issues

    Clearly, as discussed, there are several benefits to the Amberlink breed. However, with those benefits also come some drawbacks - most in terms of potential health issues.

    Hybrid breeds are raised to generate one thing, such as eggs, at a super high rate. This ramped up production can cause several health issues related to egg laying such as peritonisis, egg binding, prolapse, tumors and other egg reproductive health issues.

    In addition to the potential health issues that are directly related to egg laying, this bred can also face other issues that are indirectly related to their ramped up egg production. Laying so many eggs straight through the year puts a strain on their body and energy. This can cause them to be more susceptible to any other health issues as they are under a heightened level of stress year round.

    Therefore, ensuring that they are offered optimal nutrition, warm, comfortable and clean shelters as well as anything else to support them and decrease stress will help them to live longer.

    Amberlink chicks from Hoffman Poultry
    picture courtesy of Hoffman Poultry

    FAQ

    What color eggs to Amberlink chickens lay?

    They lay a Brown colored egg.

    Are Amberlink chickens good layers?

    They are extremely good egg layers. They were bred specifically to have an excellent laying ability. This is shown in their average of 270 eggs per year.

    What size eggs do Amberlinks lay?

    They lay a Medium to Large Brown egg.

    At what age do Amberlink chickens lay eggs?

    They tend to be ready to lay right around 4 months of age or 18 - 20 weeks which is pretty average for most egg laying breeds. Make sure to familiarize yourself with the signs a chicken is ready to start laying eggs so you know when to start looking for eggs.

    Are Amberlinks Friendly?

    They tend to be a very friendly, yet active breed.

    How long do Amberlink chickens live?

    While chicken lifespan can really depend on a number of different factors, in general, Amberlink Chickens tend to live up to a few years less than standard breeds due to their high egg production and the strain that puts on their bodies.

    If you need more help with taking care of your chickens, check out The Organized Chicken Keeper for a complete system for managing their health through keeping their supplies stocked and coop clean.
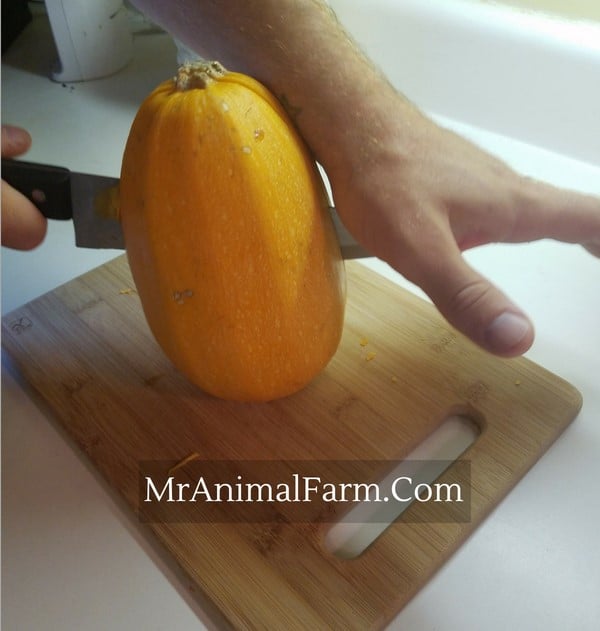
    Access The Organized Chicken Keeper Here

    What is Pasty Butt & How to Treat it - plus video!

    By MrAnimal Farm

    What is Pasty Butt & How to Treat it

    If you are raising baby chicks you will, at some point, have to deal with pasty butt in chickens.  While pasty butt can be gross, it can be easy to treat.

    Pasty butt is essentially a build up of fecal matter (poop) that gets stuck to the chicks vent. This will clog their vent to the point they cannot relieve themselves and can be deadly. However, treatment for pasty butt is fairly simple - it just takes some warm water.

    Below we will detail what pasty butt is, what causes it and how to treat and prevent it. This way you will be able to keep your chicks happy and healthy.

    close up of baby chick with pasty butt

    What is Pasty Butt in Chickens

    Pasty butt is sometimes also called pasting up or pasted butt/vent. It is basically a build up of poop on the chicks rear end that will cover it's vent. It is a common issue in chicks, but not so much as they get older.

    If you aren't familiar with all of your chicken terminology, the chickens vent is the hole where it relieves it self (poop, pee and eventually eggs if it is a hen).

    When your chick has poop that builds up back there it can pretty quickly block the vent opening. Once their vent is blocked it will prevent the chick from relieving itself. Not being able to excrete waste will lead to a build up of toxins in the chicks body. If left unattended, it can kill the chick.

    One important note is that if you have a very newly hatched chick, sometimes their umbilical cord will still be attached. It will be a dried, dark looking spot - don't confuse this with their vent area. The vent is directly under their tail feathers.

    Being able to spot and take care of pasty butt in chickens is an essential part of keeping your chickens healthy.

    What Causes Pasty Butt and How to Prevent it?

    Pasty butt can be caused by a variety of different things. Such as:

    • Stress
    • Temperature Changes
    • Feed changes/Treats

    If chicks get chilled or overheated, these temperature changes can trigger pasty butt. Therefore it is important to keep your chicks at both the right temperature and also to keep that temperature stable. If they have big swings just that change can cause pasty butt.

    Temperatures should start at 95 degrees and decrease 5 degrees per week.  Also watch chick behavior to see if they are panting and spread out (too hot) or inactive and piled on top of one another (too cold). And always adjust your temperatures based mostly on their activity.

    Stress can also be a cause for the poop to build up. So, make sure that your chicks are not getting picked on and that they have a clean and calm brooder with adequate food and water. Keeping their stress level down will help ensure they stay healthy and avoid other issues.

    Feed changes and treats can affect your chicks poop. It can cause diarrhea and other poop issues when you give your chicks a bunch of different foods and treats. This poop can then start to build up and become an issue. So, it is best to give your chicks one chick friendly feed.

    You can't always prevent pasty butt even when you try your best. However, there are a few things that you can do to help prevent it.

    • Keep Temperatures Stable
    • Do not chill or Overheat Chicks
    • Decrease Stress for Chicks
    • Provide Probiotics to help their tummies
    • Provide high quality chick feed
    • Do not give too many different types of treats

    Need some help keeping your chickens health and care taken care of? Check out the Organized Chicken Keeper for an easy to follow system.

    How to Treat Pasty Butt:

    Like other chick health issues such as curled toes and splay leg, treatment for pasty butt is really simple. It only takes a few minutes and a paper towel wet with warm water (using cold water may chill the chick and cause more pasty butt later).

    1. Identify the Issue

    You will want to regularly check your chicks to make sure that their vents are clean and clear. Usually a simple glance at their rear ends and you can see if they have poop build up on their vent area.

    However, occasionally the poop area won't be super big, or a chick will be extra fluffy and it is more difficult to see. So, it is best to gently pick each chick up once or twice a day and turn them around so you can check their vent close up.

    If they have a solid, dark spot of dried poop on their rear end, this is pasty butt and you will need to treat it.

    2. Hold the Chick

    First things first, you'll need to get a good grip on the chick with one hand. Hold it securely as it will feel a little uncomfortable during the process (I mean, wouldn't you?)

    Do this with one hand because you will need the other hand free for cleaning.

    holding a baby chick

    3. Time for the pre-soak

    cleaning pasty butt in chick

    Get a paper towel, fold it and then wet it with warm water. You want it to be fairly saturated with water, but not so much that it is dripping everywhere.

    Kinda like doing laundry only crappier (see what I did there?) Gently wipe and drip the warm water and paper towel onto it's rear end to loosen up the built up poop.

    You can also try to soak the water directly into the dried poop.

    Just make sure that you are getting the water on as small of an area as possible and that it stays warm. Chicks can get chilled easily and stress and being chilled can lead to more pasty butt.

    4. Soak

    Let the water sit for a moment to really break down the poop. After a minute or so, the poop will loosen up and wipe off.

     5. Deep cleaning

    If it is really bad and dried, you may need to try and loosen it up some with the paper towel between your fingers.

    cleaning pasty butt off chick with paper towel

    However, make sure not to pull too much as you can pull out their down and/or rip their thin skin. This part can be a little tedious, but your little chick will be super thankful later when they still have a fluffy butt.

    Make sure to be as gentle as possible. But you want to get all of the poop removed from the area and it may take a little work to get this done.

    6. Clean up

    Generally, we will just clear their vent area and leave some of the poop on if they have a lot of build up.  The reason for this is because we don't want them to catch a chill and get more pasty butt later. But make sure that their vent is completely cleared.

    We try to interfere as little as possible to let these things work themselves out on their own. But when that isn't an option, we step in to lend a helping hand.

    If you had to use a lot of water, you may want to help your chick dry off by drying them with a towel or a blow dryer (be sure to not get them too hot).

    baby chick

    7. Recheck

    You will want to check the chicks at least a few times a day (more often if possible) to make sure they don't get more pasty butt built up.  We find that it usually takes a few days for the pasty butt to clear up.

    If chicks have pasty butt, you can also add some vitamins and electrolytes and/or probiotics to their water to help them stay happy and healthy.

    Interested in how to treat other chick issues?  Check out this raising chickens eBook or this raising chickens eCourse!

    If you need more help with taking care of your chickens, check out The Organized Chicken Keeper for a complete system for managing their health through keeping their supplies stocked and coop clean.
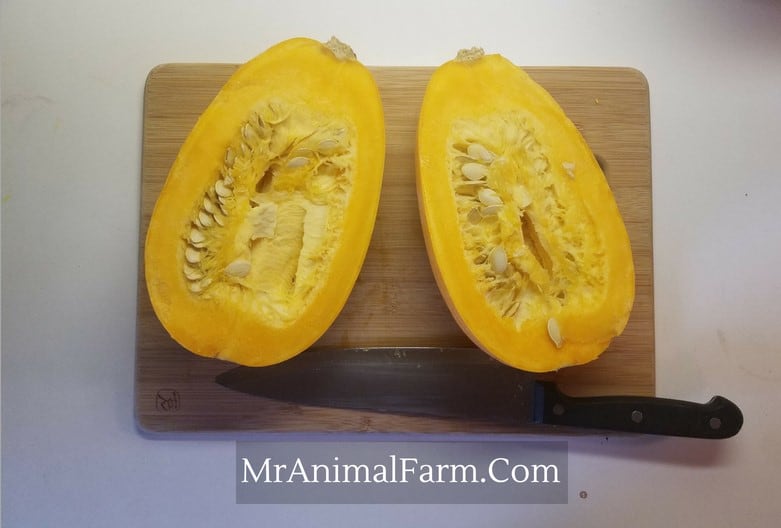
    Access The Organized Chicken Keeper Here
    Pasty Butt

    Frizzle Chickens: You NEED Some In Your Flock!

    By MrAnimal Farm

    Frizzle Chicken

    Frizzle Chicken.  The very first time I heard this bit of chicken terminology, I thought what the heck is that??

    Frizzle chickens are a variety of different chicken breeds which have feathers that curve backward away from their body instead of laying flat like the standard chicken feather does. The frizzle feather gene in chickens a dominant trait which means that just one parent has to have the trait in order to pass it to their offspring.

    With that, let's jump into all things frizzle chickens including their care, why you might want one and a few of the breeds.

    feature image of frizzle silkie rooster. text reads, "frizzle chickens. curly feathered chicken you need in your flock"

    What is a Frizzle Chicken?

    To explain what a frizzle chicken is in a simple way, they are a curly feathered chicken.  A frizzle itself is not a specific chicken breed though. Essentially, the term frizzle is a description of a feather type, and can be found across multiple different breeds.

    The frizzle breed of chicken is not actually a breed, in and of itself. There are several breeds that can be a frizzle.  Frizzle cochin, polish frizzle  and frizzle silkie (also known as a sizzle) are just a few examples. Most of these breeds can also have standard smooth feathering as well. Since frizzling is gene based and not sex based, you would use the same techniques you would normally use to tell the difference between hens and roosters.

    The history of this curly feathered trait is not well laid out, but it is thought to have possibly originated somewhere in Asia. The trait was then bred for as people found the feathering unique and used them as pets and for exhibition.

    Why Do You Want A Frizzle Chicken?

    So, what is a frizzle chicken good for? They can be good for all the same reasons that any backyard chickens are. But two of the main reasons you may get them are:

    Eye Candy

    Since they are a really unique feather type, they are most often gotten just to look at. They are an ornamental breed. And, certainly, they are a cool and fun addition to any flock.

    Pets

    Most frizzle breeds are friendly and make great pets. They tend to be calm and happy to interact with their owners.

    Frizzle Chicken Care

    Frizzle Chick

    Taking care of these curly feathered chickens is pretty similar to taking care of a "regular" chicken. They will need a secure coop, run and high quality chicken feed and clean water daily.  However, due to their different feather type there are some important points to consider.

    Extra Warmth

    The main difference or defining characteristic of a frizzle chicken is, of course, its curly or frizzle feathers. These feathers a less insulated than regular feathers so you will want them to have a nice warm coop.

    We have frizzle chickens in our flocks here in Virginia and they seem to do just fine in the cold and snow of winter. We make sure to keep the chickens warm in the winter.

    And, we do make sure that they have a very cozy, draft free chicken coop with lots of buddies to pile up with and stay warm.  Our frizzles (like our silkies) will tend to all pile up together for warmth, especially when it is cold out.

    This also goes for rain and other inclement weather, not just the cold and snow. As they may need a little extra protection from any weather that could chill them.

    If you need more help with taking care of your chickens, check out The Organized Chicken Keeper for a complete system for managing their health through keeping their supplies stocked and coop clean.
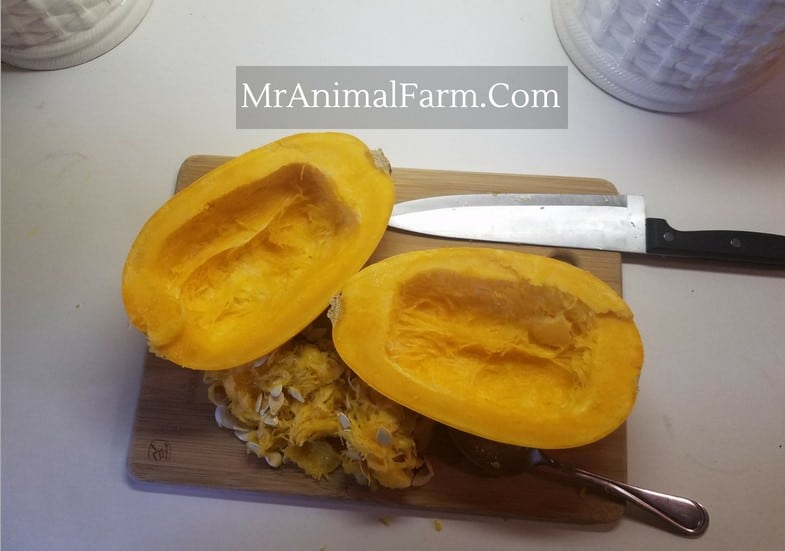
    Access The Organized Chicken Keeper Here

    Predators

    Due to the different feather type, they cannot really fly.  Their feathers are not made the same and therefore, do not have the same characteristics allowing them flight.   Therefore, they may not be as well equipped to get away from predators - so they may do better in a predator proof chicken run than being free ranged.

    Roosting

    As mentioned above, the difference in feathers makes these chickens unable to fly. So, much like bantam chickens need shorter roosts and ramps, your frizzle chickens may also need them too.

    Dirt and Vision

    The frizzle feathers look cool because they are curled and sticking out every which way. This can also potentially cause some issues if their head feathers are hanging into their eyes and face or if their leg and feet feathers gather mud and other dirt (like most feather legged breeds will have happen).

    So, you will just want to keep a close eye on them and ensure that their feet and leg feathers don't need debris cleaned out and that their head feathers are not interfering with their vision.

    group of Frizzle Chicks

    Frizzle Chicken Genetics

    So, if a frizzle is not a specific breed, what exactly causes a chicken to be a frizzle?  A frizzle is a chicken which does not have "standard" or "normal" feathers.  Instead of it's feathers laying flat, they curl up and out from their body.

    This frizzling, so to speak, is caused by an incomplete dominate gene (F).  This means that a chicken only needs to carry one copy of the frizzle gene in order to show frizzling.

    Frizzle Chicken

    Some birds will show more frizzling than others.  This is due to the fact that the frizzle gene also has a modifying factor to the gene which can control the extent to which their feathers will appear frizzled (source).

    Feathers are made up of three parts - the backbone (rachis), branches (ramus) and parts off the ramus (barbules). The frizzling gene causes changes such as thickening to all three parts of the feather thus causing them to no longer lay flat on the birds. (source).

    Frizzled Chicken Breeding Basics

    Breeding frizzled chickens is really quite fun.  They are such a unique looking chicken with their curly feathers. However, you have to take a little more care with frizzles, than when handling regular chicken mating.

    When you breed frizzle chickens, you never want to let one frizzle chicken mate with another frizzle chicken.  The result of breeding frizzle to frizzle can result in a double frizzle chicken - meaning they have two copies of the frizzling gene.  We call these frazzles.

    group of Frizzle Chicks

    Frazzles do not often live very long or healthy lives.  Having two copies of the frizzle gene makes their curled feathers very brittle.  They tend to break off.  They are often times bald in places.  And their overall health tends to suffer.

    Due to this, we recommend setting up breeding pens where you either have a frizzle rooster over normal/standard feather hens.  Or, you can set up your breeding pens to have a normal/standard feather rooster over frizzle hens.

    Frizzle chicken breeding results:

    If you breed Frizzle to Normal/standard it will result in 50% frizzle and 50% normal/standard feathered chicks.

    Whereas, if you breed Frizzle to Frizzle will result in 50% frizzle, 25% normal/standard, 25% frazzled feathered chicks. Due to issues with frazzled feather types, you do not want to breed to frizzle together.

    If you breed two frazzled together, you will get 100% frazzled chicks - this is not a breeding that you want to do.

    Frizzle Chicken

    When frizzle chicks hatch, you cannot really tell that they have a different feather type.  It is not until they are a few weeks old and have started blowing their chick fluff that you will start to see if they have feathers that have a curl.

    Frizzle Chicken Breeds

    A frizzle chicken will tend to have most of the same characteristics of the actual breed that it is.  For example a frizzle silkie will tend to have the same black skin, 5 toes and friendly personality of a typical silkie chicken. They will also come in the same colors as the standard breed. And, they tend to have the same temperament, personality and egg laying abilities.

    Many chicken breeds already have a frizzle version of their breed.  Some of the most common breeds where frizzle feathering is already established are: 

    • Frizzle Cochin - standard and bantam sized
    • Polish Frizzle - standard and bantam sized
    • Frizzle Silkie (or Sizzle)
    • Frizzle Plymouth Rock
    • Frizzle Orpington

    However, there are ways to make any breed a frizzle breed. It takes, time, patience and a lot of selective breeding. You can use an already frizzle breed that is close in characteristics to the breed you want to make frizzle.

    So, for example, if you have a Frizzle Polish rooster, you may use him over a standard Houdan hen. Then of those chicks, you find the frizzle ones that most resemble a Houdan and then breed them back to a high quality breed standard Houdan. And continue this until you have chicks that meet the breeds standards, but also have the frizzling.

    FAQ

    Are Frizzle chickens good egg layers?

    They are fair egg layers. They tend to lay eggs as good as the breeds standard feathered counterpart does. However, most frizzle breeds are not super heavy layers. For example, Silkies lay around 120 eggs a year and Polish lay around 200 eggs a year.

    Similarly to the number of eggs they will lay, they also lay the same color egg as the breed they are.

    How much does a frizzle chicken cost?

    Cost can really vary based on the specific breed, sex and where you get them from. If you purchase from a hatchery it can range anywhere from $5 - $25 depending on the sex you choose. Some of the more rare breeds and colors from a smaller breeder can go up to $50.

    What is the difference between a frizzle and a sizzle?

    A frizzle is any chicken with the gene, a sizzle is a frizzle silkie specifically.

    What is a satin chicken?

    Satin chickens are a project breed where Silkies are bred to have standard smooth feathers.

    Overall, if you are looking for a fun, unique addition to your flock, these can be a great choice.  Most frizzle chickens make great pets as most of the frizzle breeds are also friendly.

    If you need more help with taking care of your chickens, check out The Organized Chicken Keeper for a complete system for managing their health through keeping their supplies stocked and coop clean.
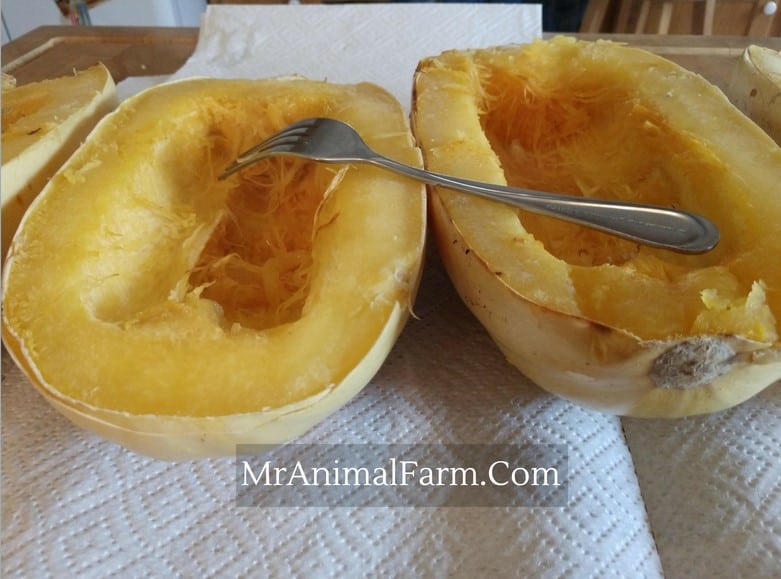
    Access The Organized Chicken Keeper Here
    pinterest image. top image: frizzle chick. middle box text reads, "what are frizzle chickens? curly feathered chicken you need in your flock!" bottom image: frizzle silkie rooster

    Feeding Chickens - How Much Does it Cost to Feed Chickens?

    By MrAnimal Farm

    Feeding Chickens

    Many people want chickens in order to have fresh eggs, but in order to know if it it worth raising chickens you should find out how much it costs to feed chickens. This way you will know how much you need to budget in order to take care of them.

    It typically can cost anywhere from .7 cents to .15 cents per day, per chicken in feed. Although the cost to feed chickens will vary based on what you are feeding your chickens as well as a few other factors which we will discuss, you should be able to come up with a ballpark figure after reading below.

    Quickly and easily assess your flocks health without missing a step by using this free download: The Chicken Care Checklist.

    chicks in brooder with text "feeding chickens how much does it cost"

    Feeding Chickens - Cost to Feed Chickens

    Before you can determine how much your chicken feed will cost you, there are a few things that you need to know and decide on first. And, keep in mind, that there are more costs to keep chickens than just their feed.

    Types of Feed

    First, you will need to decide what type of feed you will be feeding your chickens.  The cost of feed for chickens can vary quite a lot based on if you are feeding regular chicken feed or a non-GMO organic chicken feed.

    flock of chickens around a metal feeder

    In general, you can get a 50 pound bag of regular chicken feed for about $12 - $15.  Non-GMO organic chicken feed will run you about $30 per bag for 50 pounds. So, you can see that feeding chickens organically will about double your cost of feed.

    However, there are definite advantages to feeding organic, despite the cost. So you will have to decide if that is something that is important to you or not.

    Starter vs Grower vs Layer Feed

    Once you have decided if you will feed conventional or organic feed, you will also need to get the appropriate type of feed for the age of your flock. There are three main feed categories: starter, grower and layer feed.

    Starter feed should by fed from when you hatch chicks through until they are from 6 - 10 weeks in age. Starter feed has a very high protein content to help them as they grow fast and make big changes while they are young and developing.

    Grower feed should be fed from the time you switch from starter feed (around 6 - 10 weeks) until they are about ready to lay eggs which is typically in the 16 week timeframe. Grower feed is also high in protein in order to support their growth.

    Layer feed should be fed from around 16 weeks through the rest of their life. It has added calcium in it to support their shell formation and egg laying. It is important to not feed layer feed too early as too much calcium can cause leg issues, kidney issues and other health problems.

    bags of chicken feed in wooden feed bin.

    Amount of Feed per chicken per day

    Of course, how much feed your chickens will consume will depend on a few factors.  We will look at age/size as well as feed supplements as we assess how much feed per chicken you will need to provide.

    First, let's talk about adult layers.  A generally accepted layer feed consumption per day is .25 or ¼ of a pound of chicken feed per day. This is assuming that you are feeding adult layers a regular dry chicken feed as their only source of feed. Bantam chickens will eat about half that amount as they are about half the size.

    Need some help keeping your chickens health and care taken care of? Check out the Organized Chicken Keeper for an easy to follow system.

    Next, let's talk about chicks from hatch to 8 weeks of age.  Of course, a little baby chick is not going to be feed as much as an adult chicken.  From our experience raising pullet growouts, each chick will eat about 5 - 6 pounds of feed from day one to 8 weeks of age.  The first few weeks, they don't consume much feed.  But at week 4 or so, they can really start to plow through their feed.

    polish chick in someones hand

    If they are getting lots of garden scraps, scratch, mealworms or are free-ranging they will be getting nutrients from additional sources and this can decrease chicken feed costs. If you are using no-waste DIY chicken feeders or fermenting chicken feed, your chickens will be getting more of the good stuff and wasting less.  This will mean less feed per day per chicken.

    chicken feed in a plastic cup

    So, what is the Cost to Feed Chickens?

    For these calculations, we will assume we are feeding standard sized adult chickens.

    If you are feeding your chickens regular chicken feed, the cost to feed your chickens will be about 7 - 8 cents per day.

    The way to figure this out is to find the cost per pound of feed ($15/50lbs).  Regular feed costs about .30 cents per pound.

    Next, figure out how many pounds of feed a chicken will eat per month.

    To do this take .25 (amount per day) and multiply by days in the month (30).  This tells you a chicken will eat about 7.5 pounds of feed per month.

    Next, find out the cost to feed a chicken per month.

    You can do this by multiplying pounds of feed per month (7.5) by cost of feed per pound (.30).

    This tells you that the cost to feed a chicken for one month is about $2.25.  You can then divide that by 30 to find out the cost per day.

    chicken feed in a plastic bin

    If you are feeding chickens organic feed, the cost will be about double this.  The cost to feed your chickens per day will be about .15 cents.

    Organic feed costs about .60 cents per pound.  You'll still be feeding your chickens 7.5 pounds of feed per chicken per month.

    two easter eggers eating from a metal feeder

    So, the cost to feed a chicken per month on organic feed is $4.50.  

    So, how much will my entire flock cost to feed?

    To find out how much it will cost to feed your entire flock of chickens, you can just multiply the cost per month (or per day) by the number of chickens you have (or intend to have).

    If you need more help with taking care of your chickens, check out The Organized Chicken Keeper for a complete system for managing their health through keeping their supplies stocked and coop clean.
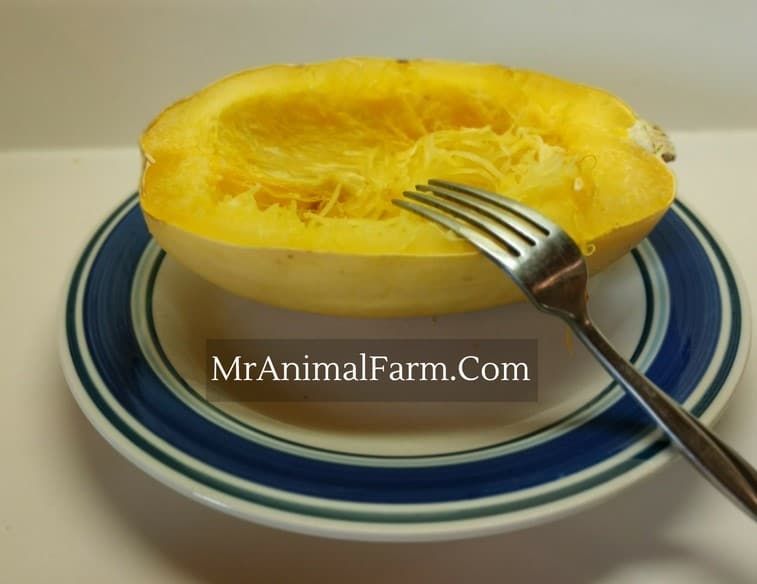
    Access The Organized Chicken Keeper Here
    cost to feed chickens

    Goat Milking - 5 Steps for How to Hand Milk a Goat (or Cow)

    By MrAnimal Farm

    how to milk a goat

    If you have dairy goats, then you will probably want to learn how to milk goats. Milking goats isn't terribly complicated, but it does take a little bit of trial and error to get the technique right.

    Learning how to milk a goat is pretty simple, you will need a few supplies first. After your supplies are ready, you will get your goat on the milk stand and begin milking by grabbing high up on her teats, creating a circle with your thumb and first finger and then capturing the milk and squeezing it down and out.

    Below we will lay out when to milk your goat, what supplies you need, and how to do the actual milking.

    goat on wooden milk stand with text " how to hand milk a goat"


    How to Milk a Goat by Hand:

    We should cover a few important things before jumping into the actual step-by-step milking process.

    When Do You Milk a Goat?

    It may seem to be a simple and straight forward answer, however, we get this question quite a lot. A goat will only produce milk once she has been bred and had kids. So, you will milk your goats after they kid.

    How Often Do You Milk?

    Most goats will need to be milked twice a day - once in the morning and once at night. However, it isn't always as cut and dry as that.

    If a doe has her kids with her and they are still nursing, then technically, you shouldn't have to milk her at all if you don't want to. In fact, if you do want to milk her, you will probably need to separate her kids so that she has enough milk for you to get a decent amount.

    The best way to handle this scenario, is to separate the kids in a separate stall or area over night and then milk the doe first thing in the morning. In this instance, you will only need to milk your doe once per day.

    If you want to be able to have all of the milk, you can totally separate the kids and bottle feed them and then milk the doe twice a day.

    If you have a doe and you sell her kids at weaning age (around 8 weeks), you will still need to milk her for at least a little while. Otherwise, she will continue to produce milk and her udder can get engorged and cause a whole slew of issues.

    Milking Supplies

    You will need several milking supplies in order to successfully milk your goat. The basics are:

    • Milk Stand
    • Milk Pail - this is the one we use and it is awesome.
    • Grain or other Treat to eat like alfalfa pellets
    • Gloves
    • Strainer
    • Containers

    Milking Process Step-by-Step

    Now that you now when, how often and what supplies you need to milk your goat you can get started with the actual milking process. We are going to cover how to milk a goat by hand here, but you can also use a milking machine.

    A milking machine is really easy in that you hook it up, put it on her teats, turn it on and are good to go. Of course, you will still need most of the same supplies and will need to clean the machine after use.

    Need some help to keep your goats healthy and maintained? The G.O.A.T Herd Management Binder has you covered from supplies to routine care reminders.

    1)  Prepare a milk stand treat

    Milk stand treats are crucial when milking your goats. This can be any mix of goodies that you know they will love and be happy to stand and eat. You can use grain, alfalfa, chaffhaye. Whatever your does will love so that they will focus on eating and hold still while you do the milking.

    Bonus tip: milk stands and treats also work great for trimming their hooves and shaving them for showing.

    2)  Get your goat on the milk stand

    This should be pretty easy if you show them their feed bucket with their milk stand treat.  They should jump right up on the stand for you.

    goat on a milk stand

    If it is their first few times, they may need a little coaxing.  Or, you may need to show them where their head should go.

    This will be easiest if you spend a little time training your goat to the stand before you are ready to milk. While they are pregnant, or even before, you can start getting them used to being on the stand.

    To do this, you can put their treats in the feed bowl and encourage them to get on the stand. Then, just let them eat the first couple of times so that they have a positive experience.

    After a few times like this, you can try doing things like their hoof trimmings, or just petting and touching them. That way, they get used to being handled while on the stand.

    It is also good to get your does used to having their udders touched before you go right to milking. So, while you are training them to the stand, it is good to touch their udder area some as well.

    3)  Get things prepared

    Before you get started with the milking, you'll want to put your gloves on (for sanitary purposes).  Then, get your milk pail ready.  

    Next, clean off your goats udder with a warm wet rag (or udder wipes of your choice). This will get all of the debris and any bacteria or other unwanted materials off her udder before you get started.

    This is not necessary, but is useful in keeping things clean and hair out of the milk. Before kidding, you may want to shave your goats udder - this will make cleaning their udder at milking time much easier.

    4)  Start Milking

    Ok, so now that everything is set up and ready you can get to the actual milking part.

    You will want to reach around your goats teat (up high on the udder if possible).

    Next, make a circle with your thumb and pointer finger "capturing the milk" into the teat.

    goat udder with hand around teat

    While holding your thumb and first finger together, squeeze your other fingers and palm around the teat to squeeze the milk down and out of the teat into your milk pail. (As seen in the photo below).  

    You want to avoid pulling down on the teat.  Therefore, it is more of capturing the milk into the teat and pressing it out (like you would a tube of toothpaste). Rather than pulling down on the teat.

    You will continue doing this until there is no milk left in your does udder. Sometimes you may need to gently massage the udder some to help her release all of her milk.

    Important Note: You should do a strip test before milking everything out. This essentially means to get one or two squirts of milk out of each teat onto the milk stand or a separate jar. This will help clear any bacteria from the teat and also allow you to examine the milk to see if there is any blood or other issues with the milk.

    how to milk a goat

    5)  Store the milk

    Once you have emptied her udder (it will feel soft and empty and not much if any milk will come out).  Next, you will want to strain the milk through your strainer into your holding container.

    how to milk a goat

    Then, get it into the fridge as soon as possible to get it cooled down.  Doing this fast helps to maintain the flavor and safety of the milk.  You can leave it raw or learn how to pasteurize milk. If your goats have started to decrease in their milk production, it's easy to figure out what's wrong.

    FAQ

    What if my goat won't stand still to be milked?

    There are usually two things a goat may do on the stand to make it difficult to milk her. The first is squatting or laying down. If your doe squats, the best thing you can do is to place a bucket under her chest. This will keep her standing up safely so that you can milk her.

    The other thing some does will do is to kick their back legs. This can make it super hard to milk them and can also result in knocking over the milk pail which is a real bummer. There are goat hobbles which are essentially a short restraint to tie their back legs together so that they can't kick.

    Do all goats need to be milked?

    No, all goats do not need to be milked. Only does who have kidded will produce milk. And only those who don't have kids on them need to be milked.

    How long does it take to milk a goat?

    It takes anywhere from 2 - 10 minutes to milk a goat. It will vary based on how fast you can milk, how much your doe produces and how cooperative the doe is.

    What are the best goats to milk?

    There are a ton of great dairy goat breeds including Nigerian Dwarf goats and Alpine goats. The best goat will depend on what your needs are.

    If you need more help keeping your goats healthy and well taken care of, check out the G.O.A.T. Herd Management System - worksheets, calculators, supply management and more to keep your goats in tip top shape while cutting down on time.

    Access the G.O.A.T. Herd Management System Here
    how to milk a goat

    Goat Gestation - How Long are Goats Pregnant?

    By MrAnimal Farm

    doe laying in stall with newborn baby goat. text reads" Goat Gestation. How long are goats pregnant? MranimalFarm.com"

    Have you bred your goats and you know how to tell the goats are pregnant, but aren't sure what to expect next? If you are breeding your goats, you should learn about goat gestation and how long goats are pregnant so that you can be prepared at when you start to see goat kidding signs.

    A goats gestation period (or how long they are pregnant) is typically 150 days for standard size breeds and 145 days for miniature breeds. So, in general the gestation period for goats is around 5 months long. Much like any other species, their gestation period is not an exact timeframe and can vary about 7 days early or late and still have a healthy, successful kidding.

    Need to know all of the information on breeding goats?  Including Checklists and Record sheets?  Check out the Ultimate Planner for Breeding Goats.

    doe laying in stall with newborn baby goat. text reads" Goat Gestation. How long are goats pregnant? MranimalFarm.com"

    Goat Gestation

    A gestation period is essentially the time during which a goat kid is in the womb - or the duration of the goats pregnancy. There are several stages during gestation, and it is good to know both the general developments at each stage as well as how long the pregnancy will last.

    This way, you are able to know what is going on with your doe and her kids development and can help take proper care of her and the kids at each stage.

    How Long Are Goats Pregnant?

    The first step in figuring out how long goats are pregnant is to know what type or breed of goat that you have. Goat gestation length does vary a bit based on breed.

    Typically miniature goats (like Nigerian Dwarf Goats or Pygmy goats) will have gestation period of 145 days.  While standard goats (like Boer and Alpine) usually have a slightly longer gestation period of 150 days.  So, speaking generally, all goats are pregnant for about 5 months with smaller breeds tending to be pregnant a little less time than larger breeds.

    5 months is quite a while for your goats to be pregnant and they need some extra care during this time since their bodies have additional stress on them. So, be sure you know how to take care of your pregnant goats to keep them in tip top shape during these months.

    mother goat and her kid

    Once you know how long are goats pregnant, you may think you will get kids exactly at 145 or 150 days. While these gestation periods will let you know approximately how long your goats will be pregnant, they do not guarantee that goats will kid exactly on these days.

    In fact, you may see your goats kid up to 7 days early or 7 days late. So, it is good to know what signs to look for so that you know when to start watching for preparing for kidding season and watching for kidding signs.

    If their gestation period goes much earlier than 7 days, you may see some health issues in the kids.  Pre-mature kids earlier than 7 days will likely need some type of incubator and often times have difficulty maintaining their own body temperature.

    They are also likely to have under-developed lungs. So, it is important to know how long your goats should be pregnant so you are prepared if one starts to kid too early. You should also know how to take care of baby goats once the kids are born.

    Not always, but often times, if a goat goes way over her due date 7+ days it can mean potential issues like improper kid positioning, dead or sick kids, and infection. Often times these issues cause a delay in the normal labor timeframe, but it is not a guarantee there will be an issue just because your doe goes over the due date.

    Even though goats may not kid exactly on day 145 or day 150 (and sometimes they do), these gestation periods at least give a good idea of when you should start keeping a closer eye on your goats.

    Also, again not always, but often certain goats will have a pattern. So, if you keep track of how long your goats are pregnant you can usually use that as a track for subsequent years.

    For example, we have one girl that almost always kids on day 145 while another girl is generally 2 days late.  If you know how long your goats are pregnant typically, then that can help you know what is normal for each specific goat in terms of gestation times.

    goat in pasture

    How to Calculate Due Dates?

    Now that you know how long goats are pregnant, how to you calculate their due date?

    If you are trying to decide when to, or have already, bred your girls and want to know their due dates you have a few options.  The easiest option is using a goat gestation calculator.

    pregnant goat

    If you aren't into Excel, but still want automatic tracking, this app will calculate how long your goats are pregnant.

    Last, the most manual way to figure out the due date is counting out the days on your calendar.  You can simply count out from their breeding date.

    This goat gestation wheel is a great tool to have if you like to manually figure out due dates.

    doe feeding two kids

    Goat Gestation Stages

    There are obviously a lot of intricacies that go into gestation of goat kids. This can be broken into 4 stages: Ovum period, Embryonic Period, Fetal Period and Birth.

    The Ovum Period lasts from fertilization of the egg to about day 11/12. During this phase the cells are going through division and creating an embryo and eventually a blastocyte.

    The Embryonic Period is about day 12 - day 59. There are some major developments during this phase. Heartbeat starts about day 20. Limb buds develop by day 30. By day 42 major organs are developing.

    The Fetal Period is day 60 - day 145. During this phase, hair develops around day 75 and continues for several weeks. By day 120 or so, teeth are developing as well.

    Birth period is about day 145 - actual birth. During this phase, the kid will drop, line up and get ready to be born through the birth canal.

    It's important to know how long goats are pregnant so you're prepared and alert when kidding time arrives.

    Any questions on goat gestation time?  Leave us a comment below!

    If you need more help getting your goat breeding running smoothly, check out The Ultimate Goat Breeding Planner - checklists, record sheets, supply lists and more to keep your breeding season going so you can enjoy the baby goats without worry.

    Access The Ultimate Goat Breeding Planner Here

    Bantam Chickens - Types, Breeds & Special Care

    By MrAnimal Farm

    Partridge silkie hen.

    If you are looking for a unique type of chicken to add to your flock, or perhaps you're a little low on coop space then you should consider one of the bantam chicken breeds. Bantam chickens are a group of chicken breeds that are significantly smaller than regular or large breed chickens.  Some might call them miniature chickens.

    So, let's dive in to all things bantams including breeds, care and why you should get some for your flock.

    Partridge silkie hen.
    [feast_advanced_jump_to]

    What are Bantam Chickens?

    Bantam chickens are not a single breed of chicken, but rather a group of chicken breeds where they are usually about ½ to ⅓ the size of regular, large breed chickens. They come in three variations: True, Made/Developed and Miniaturized.

    Their small size means that they typically don't weigh more than about 2.5 - 3 pounds. And some are as tiny as 1 pound in size.

    There is an official American Bantam Association which lists about 70 breeds (with additional color variations under each breed) which are recognized by their organization. The ABA sets forth breeds standards and organizes shows for bantams.

    Types of Bantams

    There are three types of bantams, as mentioned above. They are True, Made or Miniaturized and Developed.

    Though, the Developed category can have crossover with the other two, so the two main classifications are True or Made/Miniaturized.

    A true bantam is a chicken breed that is only a bantam breed. They have no standard sized counterpart. Some breed examples include: Silkies, Campine and Seabright.

    A made or miniaturized bantam is where a normally large chicken breed has been purposely bred smaller over time to create a miniature version. This version will keep all of the characteristics that their large breed version have, just in a smaller package. Some bred examples include: Ameraucana, Cochin and Polish.

    Developed bantams are essentially a bantam breed that has questionable origins or that has had further selective breeding done to an existing bantam breed. A breed example is the Japanese bantam.

    Why Bantam Chickens - Pros & Cons

    Besides that fact that miniature chickens are just plain 'ol adorable, bantams can be a good choice for flocks for a multitude of different reasons.  Their tiny size also means there are some disadvantages to owning this breed.

    Pros

    • Space Constraints - if you have limited space, you may want to consider bantams chickens. Since they are generally ½ - ⅓ the size of standard breeds you can house at least two bantams in the same space that you would need for one standard breed.
    • Feed Savings - they will consume less feed. This means that the cost to feed these chickens is a lot less than their full sized counterparts. If you ferment their feed, they will consume even less!
    • Show & Pets - there is an entire club dedicated to shows just for bantam chickens. Additionally, they make good pets due to their small size. They are easier to handle and can be carried around and transported easily.

    Cons

    • Smaller Eggs - they do lay smaller eggs than large breed chickens, but can still be good layers.  They will usually lay an egg that is the same percentage smaller in size as they are.
    • Predators - their small size makes them easier for predators like hawks and raccoons to pick them up and take them away. So, you do have to make sure you have a thoroughly predator proofed coop and run.
    • Mixed sized flocks - if you also have standard sized chickens, you may need to either house your bantams separately or be very careful when introducing new chickens to your flock. Their small size makes them vulnerable to the typical pecking that happens between chickens.

    Really, bantam chickens are good for all the same things that all backyard chickens are. They just do it on a smaller scale.

    If you need more help with taking care of your chickens, check out The Organized Chicken Keeper for a complete system for managing their health through keeping their supplies stocked and coop clean.
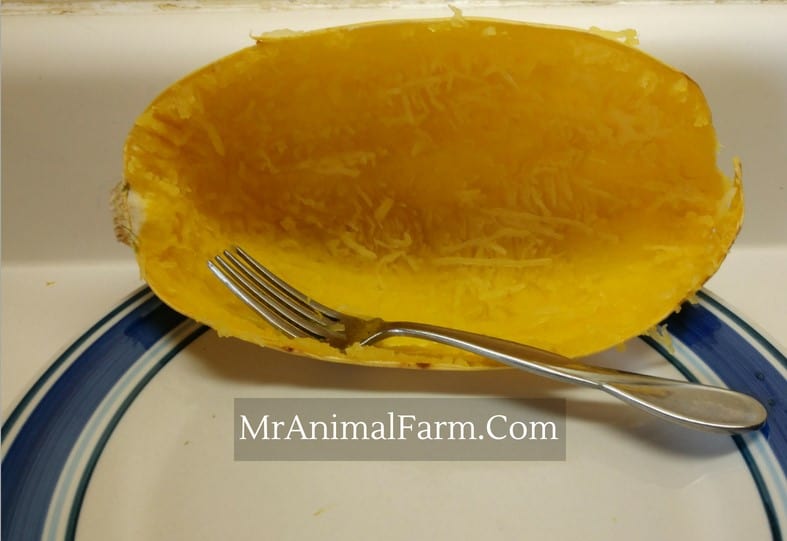
    Access The Organized Chicken Keeper Here

    Care

    While the basics of care for bantams are the same care as standard chickens. They need a chicken coop and chicken run. They need good chicken feed and clean water everyday.

    They will need a few different considerations due to their size.

    Since they are smaller, they may need some adjustments to things in the coop. The roosts are a good example. If your roosts are a bit of a high jump, they may not be willing or able to jump up on them and you may want to provide a shorter roost for your bantams. In our experience, some bantam breeds prefer to sleep in a pile together on the coop floor.

    They will be easier prey for predators. Being small, some predators will look at them as an easier snack that larger breed chickens. And smaller predators will be more easily able to take them since they are also smaller. Due to this, you will want to ensure that you have a predator proof chicken run, a secure coop and/or possibly a livestock guard dog (like a Karakachan) to help protect them.

    Lastly, due to their size, you want to be sure they are able to stay warm in the winter. This will entail making sure they have buddies to snuggle with and a good, draft free coop.

    Breeds

    There are so many different chicken breeds that also come in bantam size. The ABA lists about 70 breeds with multiple color variations within those breeds.

    The following list is by no means all encompassing, but here are a few bantam chickens.

    Breed NameType of Bantam
    AmeraucanaMade
    AndalusianMade
    AustralorpMade
    BarnvelderMade
    Belgiun D'uccleTrue
    CampineTrue
    CochinMade
    Houdan Chicken Made
    NankinTrue
    OrpingtonMade
    Polish ChickenMade
    Rhode Island RedMade
    SebrightTrue
    SeramaTrue
    SilkieTrue

    1. Silkies

    Silkie chickens are one of the most popular bantam chicken breeds, and our personal favorite. Unlike most bantam chickens, instead of your typical chicken feathers, Silkie feathers are more like fluff. Frizzle Silkie chickens look even crazier!

    Partridge silkie rooster.

    We may be a bit biased since we specialize in raising them. However, Silkies come in many different colors and patterns. They also have very domesticated personalities.

    Our Silkies get excited to see us just like our dogs!

    2. Bantam Easter Eggers

    Bantam chicken Easter Eggers, just like their larger counterparts, lay multicolored eggs!

    3. Seramas

    Seramas are the smallest of all bantam chicken breeds. They stand out due to their upright stance, often compared to toy soldiers.

    4. Bantam Orpingtons

    Orpingtons come in a variety of different colors and are typically known as a large bodied bird. However, they are also bred down to bantam chicken sizes.

    5. Sebrights

    Sebrights were bred to be ornamental bantam chickens and are characterized by their black wing lacing.

    6. Cochins

    Just like the larger Cochin chicken breed. Bantam Cochins are known for having plumage along their legs and feet.

    Bantam Chicken FAQs

    Are bantam chickens good layers?

    Yes, bantam chickens can be great layers. Of course, the amount of eggs will vary based on the specific breed. The eggs will be smaller than standard size breed eggs.

    Can bantam chickens fly?

    Yes, bantam chickens due to their small size can fly pretty decently. You're not going to see them flying around the sky like a cardinal or anything, but they can fly a little at a time.

    What is the smallest bantam?

    The Serama or Malaysian Serama is the smallest bantam. They typically weigh under one pound.

    Conclusion

    As you can see, there are so many chicken breeds that are available in a much smaller size. They can be the perfect addition to a flock that has space constraints and that is looking to add pets or show chickens.

    If you need more help with taking care of your chickens, check out The Organized Chicken Keeper for a complete system for managing their health through keeping their supplies stocked and coop clean.
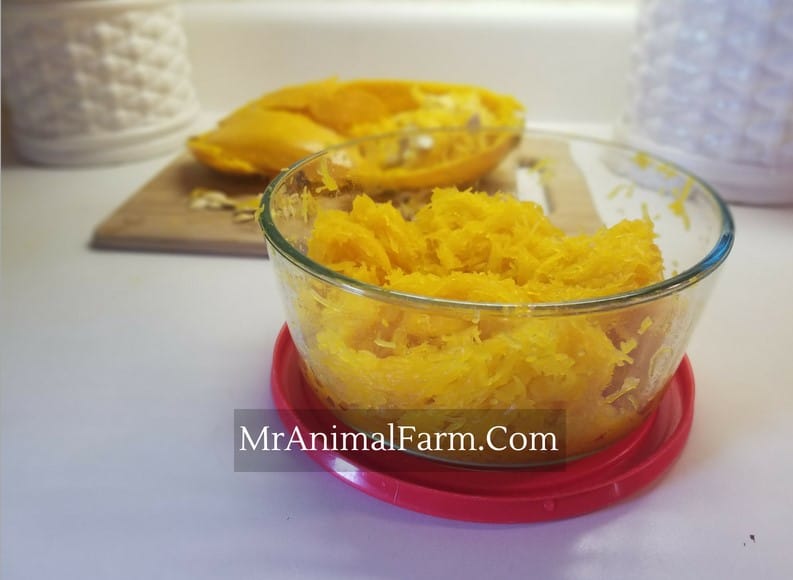
    Access The Organized Chicken Keeper Here

    Spring Farm Activities - We Are Doing & So Should You!

    By MrAnimal Farm

    Spring Farm Activities - We Are Doing & So Should You!

    With springtime brings warmer weather, blooming flowers (unfortunately allergies) and lots of baby animals. After winter farm activities, which are focused more on planning and prepping, spring is a great time to get out and get things going. There are also a slew of spring farm activities that you should do every year.

    Spring farm activities are all about life, growing, baby animals, cleaning and expanding your farm or homestead. It is important that to be completely prepared as spring on the farm or homestead is one of the biggest and busiest seasons you will have.

    Need some help getting your farm and homestead plans in order? This Homestead Goal Setting and Project Planner can help.

    Spring Farm Activities - We Are Doing & So Should You! text over basket of vegetables

    Must Do Spring Farm Activities

    Spring is a super busy time on any farm or homestead. There are gardens to plant, chicks to hatch and a plethora of other activities that you will need to preform in order to keep your homestead running smoothly.

    1. Hatching Chicks  

    Springtime is when you will want to start hatching chicks again.  So, fire up your incubators, and get some eggs set.  Or, you can always let a broody hen hatch chicks for you.  Spring is perfect for new baby chicks as your chickens should be laying well again and the weather is warming up so that it will be easier to transition your chicks outside to the rest of your flock.

    Baby chicks in grass

    2. Planting your garden

    Hopefully you took some of the downtime in winter to plan your garden.  If you are growing peppers and growing tomatoes, you should have already started the plants inside.  

    Whether you have already started plants or will be direct sowing your seeds, Spring is time to get outside and get the garden going.  You'll need to prepare the soil and then you can get to planting.

    3. Kidding season 

    This one may be one of the best spring farm activities!  Goat heat is usually in Fall, so goat kiddings typically happen in late winter to early Spring. Kidding season is fun - baby goats running around are so much fun to watch as they run and jump and play.

    However, as much fun as baby goats are, they are also a lot of time to take care of. You have bottle feedings, disbudding, health issues, bandings and sales. So, keeping everything running and organized is a lot of work.

    Baby goat in stall

    4. Start new projects  

    During the winter, the weather is not really conducive to getting outside and starting new buildings and fixing things like fencing. It is a good idea to do some homestead planning in winter so that you know exactly what projects you want to add to the docket for Spring. That way, when Spring hits, you can get started right away.

    Some projects to think about are expanding shelters and pastures like - new goat stalls, fencing or new chicken coops and runs. If you have ducks, or want to provide a water source for your livestock (either for drinking or for cooling off), you may want to think about building a small pond.

    barn addition being built

    Sometimes it is learning how to do something new like making cheese from your dairy goats. Whatever project(s) you have decided on for the year, get them started!

    5. Cleaning and Organizing

    Spring cleaning isn't just for your house. With all of the other activities going on during Spring, it is important to get everything cleaned and organized so that you have a smooth running homestead machine.

    Think things like cleaning out the barn, cleaning out the coop, stall and other animals shelters (especially if you do deep litter).

    6. Other Baby Animals

    Baby goats and baby chicks aren't the only baby animals that you should plan for and be taking care of during Spring time. Most animals will have their baby season in the Spring, so whatever animals you raise (or want to start raising) are probably birthing during this time.

    What Spring Farm Activities do you have planned this year?

    If you found this helpful check out, The Fruitful Homesteader: A Goal Setting and Project Planning System so that you can get your homestead working for you.

    Click Here to Access the Planning System

    Coupon Stockpile - What is it, Why & When You Should do it?

    By MrAnimal Farm

    Coupon Stockpile

    A coupon stockpile is, perhaps, one of the BEST things we you can have in your home.  It ensures you won't run out of things (hello, no more last minute trips to the store) and also provides a good money savings since you are only buying items at a rock bottom price.

    Essentially, a coupon stockpile is when you buy a LOT of each item when it is on sale so that you have enough of each item to last a long time. Coupon stockpiles allow you to save time (less shopping) and also save money (buying things only on sale). They do take up some space, but that space is worth the time and money savings they produce.

    Need to REALLY learn how to coupon?  The Couponing for Beginners Planner can take you from couponing newbie to experienced couponer with easy to follow steps, checklists and worksheets!

    Coupon Stockpile text over pasta in a cabinet

    Why You Should Create A Coupon Stockpile

    Creating a coupon stockpile allows you to buy items when they are at rock bottom prices.  The goal is to buy enough of each item to last you until they go on another banging sale.

    Of course, you want to be SURE you are getting the best price possible.  If you stock-up on an item at just an OK price, while you still may be saving money, are you not maximizing your savings - which is the main purpose of having a couponing stockpile.

    lots of pasta in cabinet

    Another benefit to creating a couponing stockpile is that you aren't likely to run out of things you need and use regularly.  This is particularly awesome because it ends up not only saving money, but also saving time.

    Not having to run to the store to buy toothpaste when you realize you are out, it really cuts down on the additional "quick trips" that can really add up.

    How to Build a Stockpile

    It is important to build your stockpile with a bit of a plan and strategy especially when you are just learning to coupon. Otherwise you may end up with things you don't need or not enough of things you do need. Here are some tips to build your perfect stockpile.

    Know The Right Price

    You will want to know what YOUR rock bottom price on an item is.  Here are some general guidelines on stock-up prices.  But, keep in mind that if you have a favorite brand or if you like or need certain things that are pricier, you may have a different "stock-up" price.

    Coupon inserts on counter

    Once you know what your rock bottom price for stocking-up is, then you will want to be on the lookout for a sale that meets that price. It is important to know what your target price is otherwise, it can be tempting and also confusing to know when the best time to purchase your items in large quantities.

    What to Stockpile

    First, you should make a list of the items that you use regularly and put them on your stockpile list. Any items that you use a lot of should be in your stockpile.

    Other items that are good candidates for your stockpile are ones that either do not expire or have a long shelf life. This way you can by A LOT of them when they are at your rock bottom price and you don't have to worry about them going bad. Some items that fall into those categories are: toiletries (toothpaste, toilet paper etc), pasta, canned goods.

    When in doubt for what to add, you can add things that are good for an emergency stockpile as this will cover most of your basic needs.

    closet full of toilet paper

    So, while we are calling this a coupon stockpile, if you garden you can also stockpile food for super cheap.  Growing your own food is most times much cheaper than buying it in the store.  Grow enough for a whole year and then you won't have to buy that item at the store!

    We like to freeze most things to preserve them and have worked on freezing peppers, freezing spaghetti squash, freezing sweet potatoes and much more!

    Once you have your list of what you want and need to stockpile, you should then focus on getting one or two items at a time. This allows you to not bust your budget and also stay organized and not get overwhelmed with looking for too many deals all at once.

    How Much to Buy

    In order to know how much of each item you should buy, you need to know how quickly you use that item. This way you can compare the items expiration date to how long it will take you to go through it and then figure out how many you should purchase for your stockpile.

    For example, if you go through one tube of toothpaste every 3 months then you only want to buy enough toothpaste to last until the expiration date on the tubes.  If you buy more than you will use before the item expires, you ultimately end up wasting money - this is NOT what we want to do!

    cabinet with lots of pasta and peanut butter
    We arrange our stockpile left to right, front to back, oldest to newest. That way we never end up with anything being forgotten.

    If you know you will fly through an item and/or it has either no expiration date or one that is very far out, the best way to decide how much of the item to stock-up on is by seeing how much room you have in your monthly budget.  Don't go over your budget and get into a financial hole just to stock-up.

    (If you don't have control over your budget yet, check out these budget tracking spreadsheets for all the help you need to set a stable, manageable budget!)

    Managing Your Coupon Stockpile

    So, once you have 20 tubes of toothpaste in your closet, you want to make sure they don't go to waste!  We have a few systems in place to help us manage our coupon stockpile.  And if you are making a stockpile you should think about using these (or making your own).

    First, we have a master spreadsheet that shows everything in our stockpile.  It includes how many of each item, how long it takes us to use them and then auto-calculates how long we have stocked up for.  This way we know when we are starting to get low on an item, we can start shopping for sales on that item to get stocked back up.

    Or, if we have plenty of an item, we know we don't need to purchase anymore or it may go unused - which ultimately is like wasting money instead of saving it!

    Our second system for managing our coupon stockpile is to store everything in an organized manner.  Like items all go together and they go in order of expiration date.   This does sometimes mean a little time and work when re-stocking the stockpile.  You may have to pull items out and check expiration dates etc.

    colgate toothpaste

    However, it also means that the toothpaste that you bought 6 months ago doesn't end up at the back of the pile and always get new toothpaste piled in front of it.  It is a real bummer when you end up with expired products in your coupon stockpile!

    What will you be putting in your coupon stockpile?!

    Need to REALLY learn how to coupon?  The Couponing for Beginners Planner can take you from couponing newbie to experienced couponer with easy to follow steps, checklists and worksheets!

    How To Sex A Chicken & Tell A Hen From A Rooster

    By MrAnimal Farm

    hen or roo

    Learning how to sex a chicken is a valuable skill to have as a chicken farmer. We have all battled the straight run battle.  You either buy chicks straight run (unsexed) or hatch your own chicks and aren't sure if they are males or females.

    You may live in an area where you can only have hens, or perhaps you already have too many roosters. Whatever your reasons, you will probably want to know the sex of your chickens as soon as possible.

    2 chicks being held with text "hen or roo 5 ways to tell the difference"

    How to Sex a Chicken

    Vent sexing, wing sexing, behavior, growth and color as well as DNA testins are all accurate ways you can learn how to sex a chicken. The success rate of each of these methods of determining chicken sex depends on the age, breed and your own skill level.

    One of the most common questions we get is from people wanting to know if they have male or female chicks. The fact is, there are a variety of different methods that can be used to determine this, however, not all methods work on all chicken breeds or at all ages.

    Crowing or Egg Laying

    OK, this is really a no brainer, but is one of the most obvious and clear ways to tell for sure what sex your chicken is so we felt it was important to include.

     When your chicken gets old enough (this varies by breed, but on average between 4 -5 months), it will either crow or lay an egg.

    Hens lay eggs; Roosters crow (do roosters lay eggs, too? No, they don't). This is a pretty straight forward way to tell if your chicken is a hen or roo. 

    Obviously, laying eggs and crowing are not good ways of sexing chicks. Neither male chicks nor female chicks exhibit those behaviors at such an early age. So you can only use this method once your chickens reach maturity.

    Laying eggs can happen as early as 16 weeks in some breeds, but other breeds take longer.  

    Crowing usually happens around the same timeframe as egg laying will. It is pretty easy to see that a hen is getting ready to lay eggs and some of those signs of laying maturity also help tell if you have a girl or a boy, such as squatting behavior.

    If you are looking on more information to help you get started raising chickens, check out our eCourse!

    Now, if you don't want to wait so long to tell by waiting to see who crows and who lays eggs, there are several other visual and non visual methods to use.

    Non-Visual Methods

    There are four main, non-visual methods that can be used to determine the sex of your chickens. These are vent sexing, DNA testing, wing sexing and Autosexing breeds.

    Vent Sexing

    Vent sexing is done by most hatcheries and should only be done by a trained expert otherwise you can injure your chick.  It is the process of checking a baby chicks vent to see if they have male or female parts.

    Essentially, vent sexing will have a trained sexer squeeze the vent area until they can either see the male chicks' or female chicks' reproductive parts inside. While it is not always 100% accurate, the accuracy is usually well over 90%.

    Again, vent sexing can be dangerous and seriously injure your baby chicks if not done correctly. A much safer alternative is checking your baby chicks wing feathers or buying baby chicks that are autosexing or feather sexing.

    Wing Sexing

    Wing sexing only works on certain breeds where male chicks feathers grow more slowly than the female chicks wing feathers. However, this is only true for the first 1 - 3 days after hatch and only in certain breeds.

    You may wonder why this is included in the non-visual methods section. That is because, while you are visually looking at wing feathers, the feather growth is related to sex linked genes. So, this rate of growth is actually a genetic trait.

    Auto sexing Breeds (Feather sexing)

    Another example of sexlink chicks is auto sexing breeds. This characteristic, similar to wing growth rate, is linked to sex linked genes and is only applicable to certain auto sexing breeds. In some breeds, like Sapphire Gem chickens, they may have male chicks that hatch only in one color and female chicks in another color or they may have male chicks that hatch with a lighter colored dot on their head. These traits will also stay the same whether they have standard feathering or frizzle feathering.

    Some examples are any barred or cuckoo colored breeds, Rhode Island Reds and Buckeye chickens.

    DNA Testing

    If you're willing to put out a little money and you either really want or need to know if you have males or females, then DNA testing may be the way to go. This can be done at virtually any age, so you don't have to wait long.

    Animal genetics offers DNA Testing on blood, eggshell and feathers. You can choose any of the three to send in a sample of and figure out what your baby chicks sex is.

    Need some help keeping your chickens health and care taken care of? Check out the Organized Chicken Keeper for an easy to follow system.

    Visual Methods

    Although some breeds take WAY longer to be able to sex visually (for us, Silkies chickens are still a guess until they are about 6 months old), you can make some educated guesses if you arm yourself with a little knowledge.

    Most chicken breeds, especially those with single combs have signs that can help you tell if you have a hen or rooster by about 8 weeks of age.

    Comb/Wattles

    One way to tell if you have a hen or a roo is by looking at your chickens comb and wattles.

    Roosters will develop larger comb and wattles.  Roosters comb and wattles will also develop sooner and become darker red color faster than female chicks.

    2 pictures: on the left is a hen with a small comb; on the right is a rooster with a large comb
    Hen on the left and rooster on the right.

    In most breeds that are single combed, you can start to tell if you have a hen or rooster by looking at their comb and wattles as early as 8 weeks of age.

    It becomes pretty easy if you are familiar with the breed and/or if you have several at the same age - those roosters combs and wattles will really stand out compared to the girls!

    In breeds that are not single combed, it can be much more difficult to tell at a young age.  For example, Silkies have Walnut combs and though when they are fully matured, it is clear the difference between a hen and a rooster, sometimes that can be hard to see until they are several months old.

    French black copper Marans hen compared to French black copper marans rooster
    3 month old Marans - hen on the left, rooster on the right.

    Saddle Feathers

    Saddle feathers are the feathers that lay on the chickens back/rear area (the place you might put a saddle).  Roosters will develop brightly colored, long and pointy saddle feathers.

    Hens will have duller colored, short, round saddle feathers. Female chicks will not have these right away.

    gold laced orpington rooster with saddle feathers standing in the grass
    Rooster, with beautiful, long saddle feathers.

    This can be helpful in breeds, like Easter Eggers, who don't have a single comb (but rather a pea comb) and it is much more difficult to tell which is a hen or rooster by their comb.

    Typically, before the combs are totally obvious, the roosters will start looking much prettier and flashier than the girls.

    Leg Size

    Roosters will usually have thicker, stockier looking legs than hens.  This is always one of the signs that is hard, at least for me.

    However, if you have both male chicks and female chicks of the same age and they are several weeks old, often times the male chicks will have legs that look a lot bigger than the female chicks.

    Crest Appearance

    In crested breeds (like Silkies & Polish chickens) Roosters Crests tend to be "crazier" due to having streamers in them while hens will take a more "tame" and rounded appearance.

    Behavior

    If you take some time to watch your chicks, you may notice that some of them behave differently than others. This isn't 100% accurate, but roosters do tend to be a bit more dominant and aggressive than hens.

    So, if certain chicks tend to do more picking on others or always push their way into the food and water first the aggressors may be male chicks while their targets are likely female chicks.


    If you need more help with taking care of your chickens, check out The Organized Chicken Keeper for a complete system for managing their health through keeping their supplies stocked and coop clean.
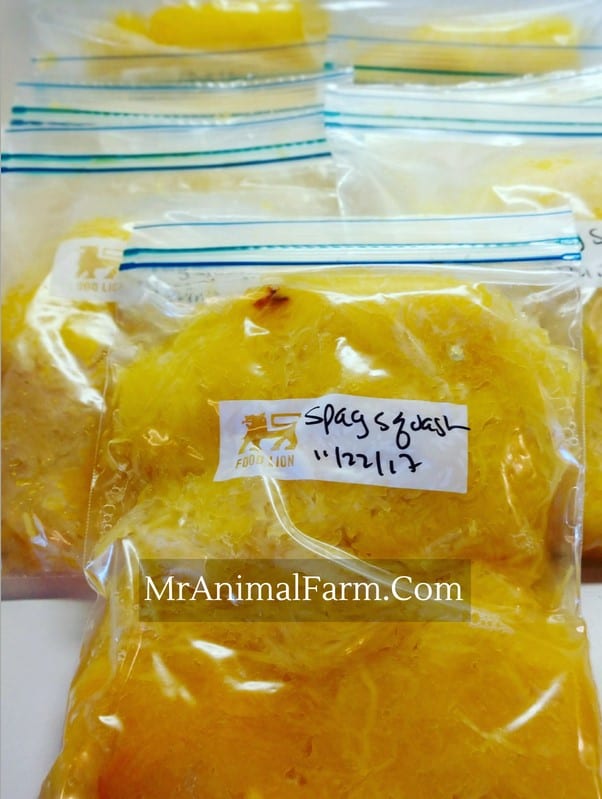
    Access The Organized Chicken Keeper Here

    9 Of THE Best DIY Chicken Feeder Ideas Your Chickens Will Love!

    By MrAnimal Farm

    diy chicken feeders

    Is a DIY chicken feeder something you need?  If you have a flock of backyard chickens and don't want to buy one of the best chicken feeders at the farm store, then the answer is probably yes.

    DIY or Do-It-Yourself chicken feeders come in many different shapes and sizes. Some are made from PVC pipe, some are made from gallon plastic buckets, some are made from metal and the list goes on. You might choose to make your own chicken feeder to reduce feed waste, or save money.

    square feature image of a rooster eating feed from a person's hand. Text reads, "diy chicken feeders. 9 designs to choose from"

    DIY Chicken Feeders

    Of course one of the main things you need to take care of your chickens is a chicken feeder.

    The fact is chicken feeders (especially the plastic ones) don't always last forever. Sure, there are some store bought chicken feeders that really do a great job.

    And, quite frankly, if you don't have a large flock or if you aren't a builder or don't have time for extra projects, the store bought feeders work quite well.

    However, if you have been raising backyard chickens for a while, you've probably made several trips to your local farm store to replace a chicken feeder that has seen better days. Not a big deal at first, but eventually, the cost of all of those feeders starts to add up.

    Why Make Your Own Chicken Feeder?

    First, they are typically going to be quite a bit less costly than a store bought expensive feeder. Store bought feeders, especially nice metal ones tend to run in the $20 - $50 range. Making your own feeder can sometimes be done for free with things you already have or as little as $10 or so depending on the type you choose.

    Homesteading and DIY projects go hand in hand. They are sometimes a little more time consuming than a simple run to the store, but they are almost always cheaper to build and last MUUUUUCH longer. In the long run, most DIY projects are more cost effective.

    If you make your own chicken feeder, you can also tailor it to fit your needs.

    For example, looking to cut chicken feed costs?  Make a no-waste feeder.  Looking to spend less time filling feeders with feed? Make one of the large 5 gallon bucket feeders you won't have to refill everyday. Looking to cut down on rodents in your coop? Make an enclosed feeder that mice can't easily get into.

    What Kinds of DIY feeders are there?

    There are all kinds of DIY chicken feeders that can be made. Really, your imagination can be the limit for what you can use to make your chicken feeder.

    Some common materials that are used are: Plastic buckets, wood, coffee cans, metal buckets, PVC pipes, Tupperware bins, and even wine bottles!

    Looking for other DIY chicken projects? Check out our DIY chicken brooder DIY Feed Bin, and DIY chicken run.

    9 of the best DIY chicken feeders your chickens will love!

    DIY No-Waste Feeder

    Let's start this list with a double money saver! On top of saving money by building a more durable and longer lasting feeder, this feeder will also save you money on your chicken feed bill.

    And we all know, the cost of feeding chickens can add up super quick!

    The $2 Five Gallon Chicken Bucket Feeder

    Meet the DIY version of the 5 gallon chicken feeder you see lining the aisles of your local farm store (and all you really need is a plastic bucket).

    If you don't like to haul chicken feed out everyday, you can try out this chicken bucket feeder one which holds a TON of food at one time.  Unless, of course, chicken math has taken over and you have a super large flock! Then maybe you should make two.

    Need some help keeping your chickens health and care taken care of? Check out the Organized Chicken Keeper for an easy to follow system.

    The No Spill PVC Feeder

    This is another no waste chicken feeder.  I love this PVC feeder! This one is a double bonus of being no spill - save money by reducing wasted chicken feed -  AND it is large enough that it can store a good amount of feed.

    If you get a feeder the right size for your flock, you can fill it once a week and your chickens will never go hungry. That kind of time savings can get you AT LEAST another cup of coffee in the morning.

    Also, making a PVC feeder shouldn't be too terribly costly as the PVC pieces are usually priced pretty reasonably.

    no spill chicken feeder
    photo credit: theartofdoingstuff.com

    The Salad Bar

    One of the more unique chicken feeder ideas! Keep your chickens from destroying their leafy greens from scratching the ground but also give them a nutritious snack!

    The DIY Wine Bottle Grit & Oyster Shell Feeder

    Grit is a necessary part of a chicken's diet. If your flock does is not able to free range, they may need a grit supplement. Here's a great way to convert an empty wine bottle into a grit dispenser. Added bonus: you can empty the bottle yourself while you do the project 😉

    Through The Wall PVC DIY Chicken Feeder

    PVC chicken feeder
    photo credit: littlehouseliving.com

    This is an alternate version of the other PVC chicken feeder. It still retains the no spill qualities but is designed for feeders that are not in an easily accessible location.

    Or, if you don't want to have to do into your chicken coop to dump feed, you can use this through the wall DIY chicken feeder.  I know that would make it a little faster and easier for us in the mornings if we didn't have to go into the coop, but could just dump the chickens food and then check on them later.

    An additional bonus to a PVC chicken feeder is there is no real "building"  the PVC pieces all fit together making it an easy project for even those of us who are not real builders.

    The Hanging Coffee Can

    No, this is not specifically for chickens who need an extra little oomph in the morning. It's for the chicken farmers who need that extra little oomph in the morning! Don't toss your coffee canisters when you empty them. They can be upcycled into a hanging DIY chicken feeder.

    Assuming that you already are drinking the coffee that you use the coffee can of, this one is essentially free!  And free is great!

    The Metal Canister Gravity Feeder

    If you want something a little more heavy duty, here's a DIY chicken feeder you can make using PVC pipes and a metal trash can.

    This feeder is good for big flocks and also if you have a need for your feeder to withstand more wear and tear.

    silkies at automatic chicken feeder
    photo credit: communitychickens.com

    Do you have any chicken feeder ideas not listed above? Let us know in the comment section below.

    If you need more help with taking care of your chickens, check out The Organized Chicken Keeper for a complete system for managing their health through keeping their supplies stocked and coop clean.
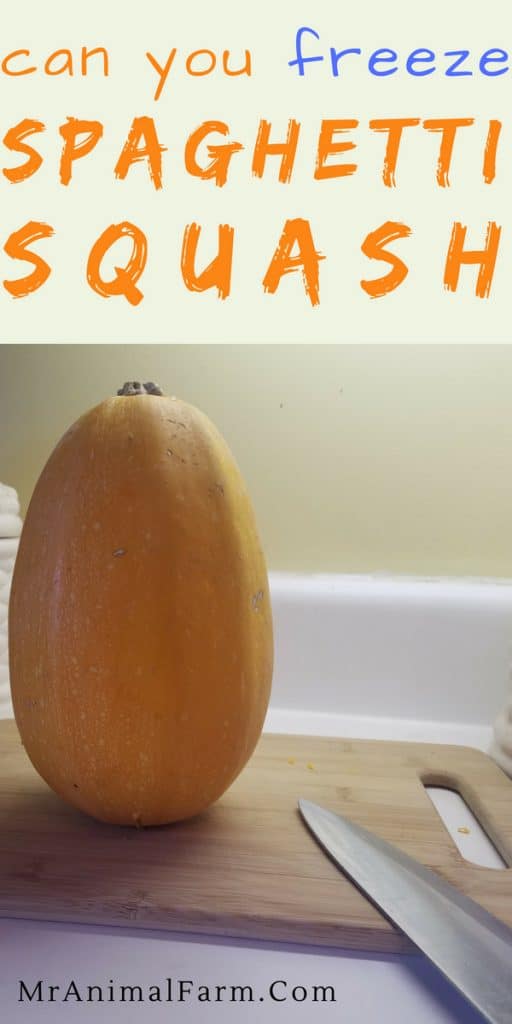
    Access The Organized Chicken Keeper Here
    pinterest pin for DIY Chicken Feeder

    Couponing Tips for Beginners - How to Get Started Couponing

    By MrAnimal Farm

    Couponing Tips for Beginners

    If you are looking to save a little (or a lot) of money, then you need to learn how to start couponing. Couponing for beginners can be a steep learning curve, but as long as you get prepared for your first trip you can be successful and save a TON of cash.

    The best couponing tips for beginners are to plan ahead, tackle just one store at a time, keep organized and don't buy things you don't use.

    Couponing Tips for Beginners text over grocery pile

    Couponing for Beginners

    My first couponing excursion was a true mess.  I was so excited to start couponing.  I had done DAYS worth of research on all the "hot deals".  I thought I was all ready to jump right in and well, I DID jump right in - head first, without looking.   

    I think we ALL know how those situations end up, right? 

    Truth is, I got to the store had my coupons all over the place, didn't know what I was looking for - the trip took FOREVER and was frustrating.

    But, try again I did and eventually got a good system down for a successful couponing trip. And you can too, but skip the frustrating first trip that I had by making sure to follow these tips before you get started.

    Why Should You Start Couponing?

    Before we jump into all the couponing tips for beginners, let's talk for a second about WHY you should be couponing!  Couponing doesn't HAVE to be super time consuming, but it does allow you to SAVE tons of money!

    You should take a bit to figure out what your goals are for couponing. Do you like a challenge? Do you have debt you need to pay off? Saving up for a big vacation? Setting solid goals in mind will help you to stay focused and be more successful on your journey.

    The amount of money that couponing has saved our family allowed me to quit my full-time job several years ago and go back to school.  Once school was over and we decided we wanted to buy our own house with enough land to start our homestead, couponing helped us to save up the money for a down payment!

    Of course, couponing alone will not help you save and hit all of your hopes and dreams.  You should make sure you understand how to make frugal decisions and that you know what your goals are so that you are working towards them.

    Want to learn everything you need to know for your first couponing trip?  The Couponing for Beginners Planner will walk you through the basics including checklists and worksheets so that you can start your first successful couponing trip!

    How to Start Couponing

    No matter your reason for couponing, whether it is to cut down on your food budget, make more room for saving money, buy your own land and house or just to create a buffer in your general budget, everyone just starting couponing should follow some basics steps.

    Learning how to get started couponing really isn't super difficult.  There is some research you need to do in order to understand all the couponing terminology, where to get your coupons, how to manage your coupon stockpile and other rules and tricks.

    Couponing for beginners can seem overwhelming and having a bad first trip when you start couponing may make you not want to keep going.

    If I had followed these 5 tips when I was learning how to start couponing my first few trips would have gone SO much smoother.  But hindsight is 20-20, isn't it?

    1) Planning

    The biggest tip for those just starting out with couponing is to plan.  This is really so important, really PLAN your trip out.

    Know what store you want to go to, what you are going to get, what aisle items are on (if possible).  If you will have multiple transactions, know what order to do them in and what items go on what transaction.

    If you will have overage, know what you are going to apply that to.

    And most importantly, write it all down. Seriously, even if you think you will remember because it is just a few things. Your first few trips can feel a little stressful just remembering the rules and all that, don't rely on your memory for your shopping list.

    Get the whole trip thoroughly planned, it will really cut down on your stress and decrease mistakes. Then map it out with pen and paper (or keyboard and computer).

    pile of toilet paper

    2) One store at a time

    Don't be like me and try massive couponing trips at FOUR different stores when you start couponing.  You are likely to get overwhelmed (I know I did!).

    freezer section of grocery store

    Every store has different rules, some allow store and manufacturer coupons, others don't. Some allow price matching others don't. The reward programs all have different names, qualifications and rules.

    So, just take the time to learn how one store works before moving on to your next one.

    3) Be Organized

    One of the biggest couponing for beginners hurdle is staying organized.  There is so much new stuff to keep track of!

    Make sure you have everything all organized before you start shopping.  There is nothing worse than getting to the checkout and not having your coupons cut.

    stack of coupons

    Make sure you have your coupons ready, in order and easily accessible.  I don't leave the house without my small coupon binder.  Make sure that you keep your inserts at home organized too.

    I LOVE this binder that I use to organize all of my inserts.

    On your trip, bring that stores sale ad (you can circle or highlight the deals you are planning to do. Have your written planned list with every transaction and coupon needed, and all of the coupons you plan to use in one section of your coupon binder.

    This way you have all your information at your finger tips, and know exactly where it is when you need to find it. This will help you stick to the plan and not get too flustered.

    4) Know your totals

    When you start couponing, be prepared for your totals.  When you are couponing, sometimes those before sales and coupon totals are SCARY!

    calculator and coupon shopping list

    Calculate them beforehand so that you know what to expect.  Also, make sure to know what your total after coupons should be so that you can make sure everything processed right.

    This way you don't have to wonder and question things at checkout.

    5) Don't buy what you don't need  

    Let me tell you a secret, probably no one needs 75 frozen tv dinners.  Ok, maybe some of you LOVE frozen tv dinners.  But on one of my first trips I bought 75 of them because they were like ten cents each - a great deal!

    Well, I don't really eat tv dinners and choking down 75 of them was painful.  So, just buy things that you like, want and need! 

    This is a huge and important tip because it really can be tempting to buy all the great deals. However, it's not a great deal if it's something you don't like, use, or wouldn't normally buy.

    You should make a list of your common purchases and then start looking for deals specifically for those items. Stock up when the prices are rock bottom.

    Some typically easy things to find and stock up on are toiletries like toothpaste and toothbrushes.

    If you are learning how to get started couponing and follow these couponing tips for beginners, the sky is the limit in your couponing journey!

    Ready for your first trip, but not sure how to plan it, what to do in the store or how to make your shopping list?  The Couponing for Beginners Planner will walk you through step-by-step!

    What was your first couponing trip like?  Drop a comment below to tell me how it went!

    pinterest pin for Couponing Tips for Beginners

    Chicken Terminology - Need to Know Chicken Terms

    By MrAnimal Farm

    Chicken Terminology

    When you are Raising Chickens, you need to get to know all of the specific chicken terminology that is used. Without this knowledge, it will sometimes be difficult to understand how to care for them, supplies they need or what their health issues are.

    Chicken terminology is the collection of words that are used when talking about chickens and their care. Some of the terms may be well known like rooster, while some may be much more obscure (for non-chicken keepers) like cloaca. It is essential to understand what the words used mean so that you can successfully take care of your flock.

    Chicken Terminology

    Chicken Terminology

    We have put together a fairly comprehensive list of important words used when talking about chickens. In an effort to make it a bit easier to scan through and digest, we have grouped the terms into buckets like chicken anatomy, chicken breeding and chicken health issues. Then, within each bucket, the terms are sorted in alphabetical order.

    So, without further ado, here are the must know chicken terms for every chicken keeper.

    Basic Chicken Terms

    Bantam - a small or miniature breed of chicken, usually about one quarter the size of a regular or standard breed chicken.

    Autosexing - breeds of chickens which you can tell their sex based soley on their color.

    Broiler - a chicken which is raised for meat.

    Chick - a young, baby chicken.

    Chicken - a type of domesticated fowl, scientific name Gallus domesticus.

    Cock - Any male chicken that is under a year old.

    Cockrel - Any male chicken that is over a year old.

    Cull - to eliminate a bird from the flock, whether by killing it or by rehoming it.

    Flock - a group of chickens.

    Free Range - this technically means that chickens have access to outside during all or just part of the day.

    Hen - this refers to a mature female chicken.

    Pasture Raised - allowing chickens to live as they would naturally. They have freedom to go wherever and do whatever they wish.

    Pecking Order - this is the hierarchy within the flock. Chickens will often times literally peck one another to establish their dominance.

    Pullet - this refers to a young female chicken.

    Rooster - this refers to a mature male chicken.

    Sex-linked breed - like a Sapphire Gem chicken, is a breed which you can tell the sex of day old chicks by their color. This is similar to autosexing breeds, the difference is that sex-linked breeds are hybrids (multiple breeds mating for a specific purpose) while autosexing breeds are purebred.

    Straight Run - this refers to chicks that are not sexed, meaning they could be boys or girls. You should learn how to sex a chicken when buying straight run chicks so that you will know later if you have hens or roosters.

    Vent Sexing - a method of sexing young chicks by looking in their vent to determine if they are male or female. It should only be done by people who are well trained.

    Wing Sexing - also known as feather sexing is a way to determine the sex of a chick based on how fast the wing feathers grow. It is only accurate in the chicks first few days of age and only for certain breeds.

    Need some help keeping your chickens health and care taken care of? Check out the Organized Chicken Keeper for an easy to follow system.

    Chicken Anatomy Terms

    Beak - this is essentially the chickens mouth, it is hard and sticks out from their face.

    Beard - a protrusion of feathers under the chickens chin.

    Clean legged - chicken breeds that do not have feathers down their legs and instead have scales (this is the most common leg type). An example would be Buff Orpingtons, Sapphire Gems and Rhode Island Reds.

    Cloaca - it is an opening on the chickens rear end where they poop, pee, mate and lay eggs.

    Comb - growths on the top of a chickens head. There are many types of combs including single, double, walnut, pea and crown.

    Crest - a protrusion of a grouping of longer feathers on top of a chickens head. Not all chickens have crests, the Polish Chicken would be an example of a crested breed.

    Crop - a round pouch that can be felt on the front of a chickens lower neck/upper breast area. It is part of the chickens digestive system.

    Down - a soft layer of feathers found under the harder primary feathers.

    Feather Legged - a chicken breed (like Marans or Silkies) which have feathers down their legs and feet.

    Frizzle chicken - a chicken with an almost crinkled texture feather. Like a cartoon's hair after touching a light socket.

    Hackle feathers - feathers that go over the back and shoulders in a chicken. In Hens they are more round and in Roosters they are pointer and more brightly colored.

    Muff - protrusions of feathers coming out the sides of a chickens face. Not all breeds have these, Easter Eggers and Silkies are examples of two breeds which do.

    Pin Feathers - the newly growing feathers on a chicken which are wrapped in a hard covering.

    Primary Feathers - the hard, long feathers that are used for flight.

    Saddle Feathers - these are pointy, colorful feathers that roosters get over their back by their tail.

    Spurs - these are sharp growths that roosters have on their legs.

    Vent - this is found on a chickens backside and is where they use the bathroom as well as lay their eggs from.

    Wattles - these are growths/sections of skin that hang down off the sides of chickens beak

    Chicken Breeding Terms

    Air Cell - space in the large end of the egg where air is. This gets larger during incubation.

    Albumen - commonly known or referred to as the egg white.

    Blood Ring - a ring of blood in a hatching egg indicating that the chick inside has died and is no longer developing.

    Broody hen - this refers to a hen that is sitting on eggs (or sometimes still sits even if eggs are removed) in an attempt to hatch them.

    Candling - his is the act of using a high power flash light to check to see if an egg has a developing chick inside.

    Clutch - a group of eggs that a hen collects as she gets ready to go broody and sit on them to hatch them.

    Hatch - when a chick comes out of the egg. If you are incubating them yourself, sometimes chicks need help hatching.

    Hatching Eggs - eggs which are fertilized and to be used in an incubator. Make sure to know some of the best egg incubators so you can get a good hatch rate.

    Incubating - incubating chicken eggs is the act of keeping fertilized eggs at a temperature and humidity in order to hatch chicks.

    Pipping - this is when a chick first starts to hatch and uses it's beak to break a small hole first in the internal egg membranes (internal pip) and then through the egg shell (external pip).

    Yolk - the yellow area in an egg. It is where a chick develops and gets it's nutrition.

    Zipping - the process during hatch when a chick breaks a line around the top of the shell so that it can come out of the egg.

    Quickly and easily assess your flocks health without missing a step by using this free download: The Chicken Care Checklist.

    Chicken Health Terms

    AI - also know as Avian Influenza or bird flu. It is a highly contagious viral infection.

    Bumblefoot - a bacterial infection, usually on the bottom of the chickens foot.

    Coccidiosis/Coccidia in chickens - this is an internal parasite that can kill chickens if not treated properly.

    Fowl Pox - a viral disease that causes lesions on your chickens skin.

    Lice - chicken lice are external parasites, similar to mites, which feed on skin and blood on a chicken.

    Mareks Disease - a viral herpes based disease that causes tumors to grow inside chickens. It is highly contagious and can be deadly for chickens.

    Mites - little pests or bugs that live on chickens skin.

    Molt - seasonal process chickens experience when they loose all or most of their feathers and grow new ones. Molting chickens tend to look like a mess, but it is a normal process they go through.

    NewCastle Disease - an extremely contagious viral respiratory disease that chickens can catch.

    NPIP - stands for National Poultry Improvement Program and is a testing program for pullorum.

    Pasty Butt - this is the build up of poop that sometimes happens over a young chicks vent.

    Scaly Leg Mites - a type of mite that buries itself under the scales of a chickens feet and legs. They will have a raised and often red appearance.

    Splay leg - also known as spraddle leg. It is a condition where the chicks legs will go straight out to the sides (looks like it is doing a split) due to tendon issues.

    Wry Neck - a condition typically caused by vitamin e deficiency where the chickens head and neck twists around and then look upside down towards the sky

    Chicken Supply Terms

    Bedding - also called litter, is the material used on the brooder and coop floor such as straw or pine shavings.

    Brooder - this is the area or container that holds baby chicks until they are big enough to go outside to a coop.

    Chicken Tractor - a chicken enclosure/shelter that is able to easily been moved and has no flooring. This allows you to move the chickens to fresh ground regularly while still being enclosed.

    Chicken Coop - a shelter or structure used to house chickens.

    Dust Bath - a sand or dirt pit/area where chickens will lay and roll around in It helps to keep them clean and free of external parasites.

    Grit - small pieces of rock, sand or other hard substance used by chickens in their gizzard to grind and digest food.

    Heat Lamp - a metal dome with a red infared bulb inside which produces heat and is used for raising baby chicks.

    Nesting Box - these are semi enclosed, private spaces where chickens will go to lay their eggs.

    Roost - also known as a perch. This is a raised area where chickens can go to especially at night to sleep.

    Run - a chicken run is a fenced in area where the chickens can be on the ground, but are still enclosed and cannot roam free.

    Scratch - type of chicken feed used as a treat (not a main feed) that is made up of corn and grains.

    If you need more help with taking care of your chickens, check out The Organized Chicken Keeper for a complete system for managing their health through keeping their supplies stocked and coop clean.
    Access The Organized Chicken Keeper Here

    How to Incubate Eggs - A Complete Guide

    By MrAnimal Farm

    how to incubate chicken eggs

    Whether you have your own flock and want to add new chicks or you are just getting started with chickens and want to hatch your own, learning how to incubate eggs can be a little intimidating.

    However, once you get started hatching, you might get obsessed with using an incubator to hatch chicks much like we have.  It is so exciting!  

    There are five main steps in learning how to incubate eggs. The whole process takes 21 days. First, you have to set up your incubator and supplies. Next, you have to gather your hatching eggs. Third, you need to load your incubator. Fourth, maintain temperature and humidity while turning eggs. And, finally, candle and lockdown where you assess which eggs developed and raise humidity for hatch time.

    how to incubate eggs text over chicks in an incubator

    How to Incubate Eggs

    There are several stages to setting up to hatch your own chicks. It doesn't really take all that long, just about 21 days in total once you get it set up. And although you will need several supplies and to make sure your incubation time follows some rules, everything can be broken down pretty easily into simple steps.

    Incubation Supplies

    Fertile Hatching Eggs

    You will need to know how to tell a chicken egg is fertilized if you want to hatch chicks. You can either use your own, or purchase them.

    If you want to use your own hatching eggs, although roosters don't lay eggs, you do need one to fertilize eggs. The chicken mating process isn't too terribly complicated and they should do the job naturally on their own.

    You will want to ensure your rooster is mature (otherwise he won't mate or won't be fertile). And you want to make sure that you have the right amount of roosters to hens - too many and they can injury your hens and not enough and you won't get as many fertile eggs.

    When you collect your own hatching eggs, be sure they are normal sized - not too big or too small. Also be sure they are clean - not too much poop or mud or other debris.

    Incubator

    Of course, unless you are using a hatching chickens with a broody hen, you need an actual incubator to hatch eggs. There are multiple different types of incubators - still air, circulated air, automatic, cabinet.

    The type of incubator that you get will be dependent on your needs, goals, space and budget. If you haven't decided what to use yet, here are some of the best incubators on the market.

    Hygrometer

    A hygrometer - which is a tool that measures humidity - is an essential piece of equipment to have when incubating eggs. Humidity plays a large roll in having a successful hatch, and so you will need an accurate way to monitor it.

    We tried multiple different hygrometers when we first started hatching. And although we now use this cabinet incubator which is fully automatic and has a built in hygrometer, when we have smaller hatches and don't use our cabinet, we still need a reliable hygrometer.

    This hygrometer/thermometer combination is THE BEST one we have found. It is accurate, but also it fits in all the incubators we have tried it in. You see, after you add your eggs in, there's not always a ton of room between the top of the incubator and the top of your eggs. So, you need to be sure to use a hygrometer that will actually fit.

    Thermometer

    Most incubators will have a built in thermometer, especially after time, they are not always easy to read or accurate. So, unless you get a fully automatic, more expensive incubator, it's recommended to get an additional thermometer.

    As mentioned above, you can get the hygrometer/thermometer combination that we recommend and you will be covered.

    Candler

    An egg candler is basically a device that is like a flashlight, but where the light is high powered and comes out of a small area.

    You use the candler right before lockdown (more on that in a moment below) to assess whether or not your eggs are developing and viable.

    This egg candler is our favorite, we have used several. It is really well made, lasts for a long time and it is very easy to use.

    Water

    This is a pretty basic supply, just regular water will be needed. You will add it to your incubator and keep the reservoir topped off during incubation. The added water helps ensure that humidity can get into the right range.

    Egg Trays

    You'll need egg trays both to store your eggs before you load them into the incubator and also to hold the eggs in the incubator (depending on what incubator you choose). Some incubators will have built in trays or other racks to hold the eggs.

    Of course, if you don't need trays for use in your incubator, you can simply use egg cartons to store the eggs before hatching.

    Chicken Brooder - for when chicks hatch

    In addition to the supplies you need for the actual incubation process, you will need the supplies for Raising baby chicks so that you are prepared to take care of them when they hatch.

    If you need more help with taking care of your chickens, check out The Organized Chicken Keeper for a complete system for managing their health through keeping their supplies stocked and coop clean.
    Access The Organized Chicken Keeper Here

    The Egg Incubation Process:

    Once you know you have fertile eggs (or have purchased some hatching eggs) and you have gathered all of the things you need to hatch the eggs you can get started with learning how to incubate your eggs.

    (Please note:  for specific humidity and temperatures you should follow the guide given for your incubator as these may vary based on type and model.  The estimates given here are for our incubators the Brinsea Eco 20. Though temperature and humidity will typically a similar/the same range for most incubators. Just make sure that you follow any deviations that your specific model has.)

    Gathering/Resting Eggs

    If you buy hatching eggs and ship them, we recommend letting the eggs rest (large end up) for several hours so that the air cell can stabilize. The air cell must be in tact (it can get a bit scrambled with all the jostling during shipping) in order for a viable chick to develop and hatch.

    The air cell will expand during incubation due to the humidity in the incubator. This air cell is where the chick will get it's oxygen from. It is also where the chick will break through the membranes and actual shell to pip the egg when it is time to hatch.

    If you have saved your own eggs, they should also be stored large end up and turned at least twice each day until they are in the incubator.

    For easy turning, we keep ours in a clean egg carton in a climate controlled room (where the temp stays over 50, but under 70) and we just put a paper towel roll under one end.  We switch sides twice a day

    Loading the Incubator

    So, once your eggs are gathered and/or rested, you can get them in the incubator.  We let ours run for at least 24 hours prior to adding eggs so that the humidity and temperature are stable.

    chicken eggs in tray loaded in incubator

    For our incubator, we run the humidity from 40 - 50 % from day 1 - 18 and the temperature around 99.6.  We use this hygrometer to gauge both temperature and humidity.

    Turning the Eggs

    You should turn the eggs a bare minimum of twice a day. We recommend doing it an odd number of times, so 3 or 5 so that they don't lay on one side all night every night.

    If you don't turn your eggs, the membranes can get stuck to the side of the shell and make it difficult to impossible for the chick to hatch when the time comes.

    You won't have to worry about the turning if you have an automatic incubator.

    flat of eggs in incubator

    Candling the Eggs

    Candle the eggs somewhere from day 7 - 10 and then again at day 18 right before you put them on lockdown (more on lockdown in step 5).  You can buy a candler or use a small flashlight.  You will want to be in a dark room and you can check each egg to see how/if it is developing.

    egg candler in hand

    What you are looking for is whether or not there is a viable, fully formed chick in the egg.

    Sometimes you will find eggs that are totally clear - did not develop at all, possibly due to not being fertile. Other times, you will find eggs with a blood ring - this means the chick started developing but died for one reason or another. You can also find eggs that are only partially developed and those won't be far enough along to hatch - they have usually stopped developing also.

    Check out some example pictures of Egg Candling here.  

    For eggs that are not developing, have blood rings or other early death you will want to remove them so that they don't go bad and explode.

    Lockdown and Hatching

    On day 18, after candling, you will put your eggs on lockdown.  To do this, you will stop turning them and crank the humidity up. For our incubator, we turn it up to the 60% range.

    incubator instruction panel

    You should start to see chicks hatching around day 21.  However, keep in mind that if your temperatures ran a little high they may hatch earlier.  If they ran a little low it may take a day or two longer.

    You may hear some peeping from inside the eggs before you see any actual hatching activity. Then, you will start to see some eggs get pips in them. A pip is basically a small hold that the chick has pecked into the side of the egg as it starts to hatch.

    Some chicks will go straight to the next hatching step after pipping, others will rest and it may take several hours or more to move to the next steps.

    After pipping, the chicks will start to zip around the shell. They start at the hole they have made and start pecking away in a line around the top of the shell (it looks like pulling back a zipper to pop the top off of the shell).

    Once they have zipped around the shell far enough, they will be able to pop the top off and fully hatch.

    It is important to note that as in the pipping stage, some chicks will hatch quickly through the rest of the process while others will take long breaks in between. As long as they are still moving and don't seem completely stall they should be ok.

    shell with pip and chick beak sticking out

    Also, during lockdown (as hard as it may be), do NOT remove the chicks as they hatch.  You want to leave the chicks in and the incubator closed until all of the eggs have hatched.  Opening the incubator can cause the humidity to plummet, shrink wrapping the unhatched chicks into their eggs. In these cases you may need to help the chick hatch.

    newly hatched chick

    The chicks that hatch first will be fine without food and water for up to 48 hours.  They are still absorbing the nutrients from the yolk.

    Once your hatch is complete, you can remove the chicks and add them to their brooder. If you will be vaccinating your chicks you should usually do so right away.

    Here is how to set an incubator:

    Now that you know how to incubate chicken eggs, are you planning to try to hatch your own chicks?  Let us know if you have any questions in the comments section!

    If you need more help with taking care of your chickens, check out The Organized Chicken Keeper for a complete system for managing their health through keeping their supplies stocked and coop clean.
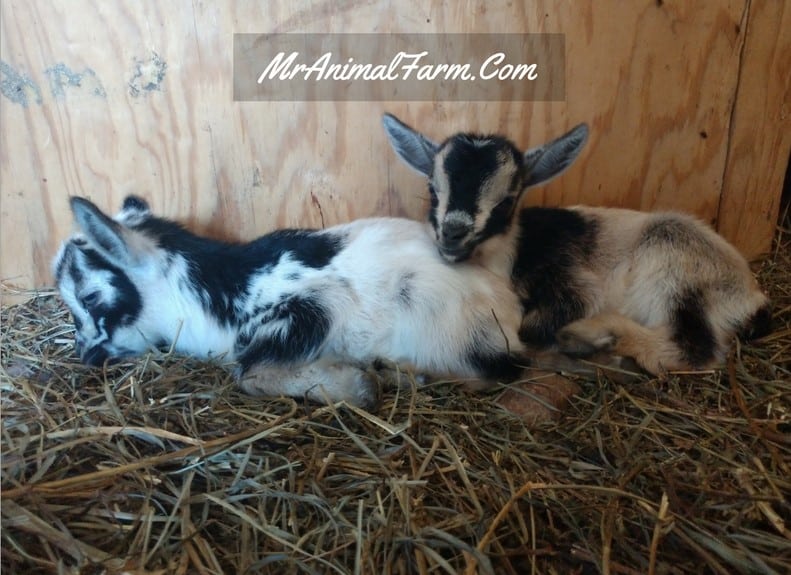
    Access The Organized Chicken Keeper Here
    pinterest pin how to hatch chicken eggs

    How to Help a Chick Hatch - 7 Easy Steps plus Video!

    By MrAnimal Farm

    help a chick hatch

    You already know how to tell a chicken egg is fertile, you know what you need to hatch chicks and how to hatch chicks with an incubator.  Now that you are incubating chicks, it is inevitable that at some point you may need to help a chick hatch.

    You should only help chicks hatch if they have been stuck for a considerable time and otherwise seem healthy. One of the main reasons a chick may get stuck is due to humidity fluctuations during hatching.

    If humidity drops, it can dry out the membrane and shrink wrap the chick. In cases such as these, you will need to slowly chip the eggshell and membrane off the chick to help it out of the shell.

    help a chick hatch text over newly hatched chick in hand

    How to Help a Chick Hatch

    Before going through the process of helping a chick hatch, let's review a few things that you need to know before you get started.

    The first thing that you should know is that if you help a chick hatch it may not be very strong and may not survive. This is because often times chicks that cannot hatch on their own are weak or have some other genetic issue which is why they can't get out of the shell on their own in the first place.

    So, be prepared if you help them hatch that they may not make it.  Or, they may need some extra attention to get going strong.

    Second, you should give the chick as much time as possible to get itself out. Sometimes they pip and start zipping, but do not fully hatch because they aren't ready (they may still have blood vessels to clear up or the yolk to absorb).

    When to Help A Chick Hatch

    You should not assist in hatch in all cases. The fact is that not all chicks will fully hatch for one reason or another. Also, some chicks take longer than others, so make sure to assess that it is the right time to help.

    Here are the time's to help you chick out of the shell.

    Shrink Wrapping

    Shrink wrapping is when a chicks membrane has dried to it. This often happens when their are humidity issues during hatch. However, it can sometimes happen if the chick pips the shell into the air cell and doesn't hatch quickly enough. Or if, for some reason, you have had to open the incubator during hatch.

    If a chick gets shrink wrapped, often times the membrane will hold it in place and it will physically be unable to move enough to zip the shell top the rest of the way off.

    This is one time to definitely assist hatching as even healthy and strong chicks can get stuck if this happens to them.

    Chick Seems Otherwise Strong

    If the chick has seemed active and strong, but otherwise is stuck, then you should try to help it out. Sometimes you will find they are shrink wrapped under the intact shell in a place you couldn't see. And sometimes, they have simply gotten themselves turned around and essentially lost in the shell.

    Either way, if the chick has been active, peeping and moving previously, it is probably a good candidate to try and help out.

    24hrs With No Progress

    This third scenario of 24hours with no progress can really be hit or miss. Sometimes you get a chick that pips and then somehow gets turned around inside the shell and can't finish hatching.

    Other times, you will get a chick that pips, but is just too weak to hatch. In this case, even with assistance their survival is not guaranteed and it sometimes is better to not help these weaker chicks as they will not make it anyway. However, you don't always know until you try.

    In general the hatching process, even for a healthy chick may take up to 24 hours. So, it is important to give them at least that amount of time without intervening. If you intervene in the hatching process too soon, they may not be fully ready to hatch and blood vessels may not be absorbed yet.

    fully zipped shell of chick that is in incubator

    How to Help a Chick Hatch

    Need some help keeping your chickens health and care taken care of? Check out the Organized Chicken Keeper for an easy to follow system.

    1)  Use a Wet Paper Towel.

    Take a standard sized paper towel. Wet it with warm water (you don't want to get it chilled).

    wetting shell of hatching chick with a paper towel

    2)  Identify the Pipped spot

    Find the spot where the chick has started to pip - the area where they have pecked a small hole in the shell with their beak.

    Slowly chip some of the shell away.  Pay attention to if you see any blood. If you do, stop. The chick needs more time before it hatches.

    3)  Keep the membrane moist

    Once you get the shell removed on part, you may need to wet the membrane with the warm water from the paper towel to start peeling it back.

    This may take quite a bit of work, especially if the chick is shrink wrapped. Because you will need to get it wet enough to peel the hardened membrane off of the chicks fluff without injuring the chick.

    Be sure you aren't dripping water into it's beak.

    chipping shell off a chick hatching

    You will also want to be slow and meticulous while doing this. Depending on how dry the membrane has become, it may have actually dried and bonded to the chicks feathers and skin.

    If this happens, don't worry. Just continue to drip warm water from your paper towel of the membrane and slowly peel it away being careful not to pull out too much chick fluff.

    Important: make sure to keep your paper towel warm - the chick can easily get chilled which will cause a whole other set of issues.

    4)  There are two membranes.  

    You want to separate and pull back the thicker top layer outer membrane first.  Sometimes, both membranes will peel off together. If so, stop if you run into any blood.

    5)  Now the second membrane.

    Once the first membrane is pulled back, you can pull back the thinner second membrane (Again, they may pull apart together).

    There are blood vessels that run through the inner membrane and are a part of the chicks developmental circulation. If they are not ready to hatch and bleed too much, they can bleed out and die.

    If you see these blood vessels, you want to just stop, wrap the chick in the wet paper towel, put it back in the incubator and wait a little more time.

    helping pull shell off of a chick

    6)  Wrap in Wet paper Towel

    Once you have freed the chick some, you can wrap the chick with the wet paper towel (again being sure not to cover it's beak).  And place it back in the incubator so that it can finish hatching.

    chick hatching in shell wrapped in paper towel

    7)  Check in and More Assistance

    If it has not made more progress after some time, you can check on it and give it some more assistance.

    Keep doing this until it either hatches on it's own, or you have been able to safely get it out of the shell.

    If the chick was trapped for a long time, it may be too tired to hatch on it's own after a certain point and may need you to help it all the way out. You can usually tell based on how much energy it is showing and how much moving it is doing.

    newly hatched chick in palm of hand

    If you need more help with taking care of your chickens, check out The Organized Chicken Keeper for a complete system for managing their health through keeping their supplies stocked and coop clean.
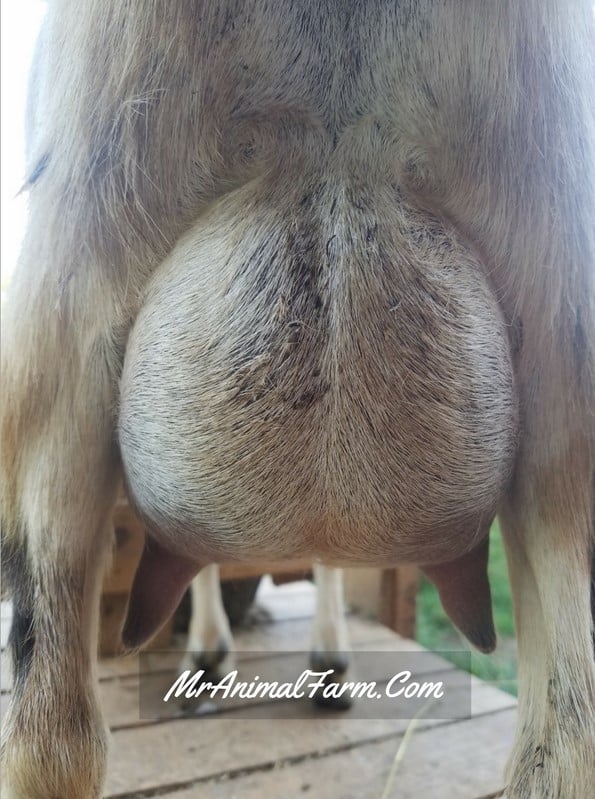
    Access The Organized Chicken Keeper Here

    How To Buy A Goat: The Ultimate Buyers Guide

    By MrAnimal Farm

    How to Choose Your First (couple) Nigerian Dwarf Goats

    So you've finally decided that you want to fulfill your dream owning and raising goats. Congratulations! It's a wonderful world and you will love it. Now, the only question you have to answer is how to buy a goat.

    How to Choose Your First (couple) Nigerian Dwarf Goats text over a goats face

    That isn't exactly the only question. But it is the most important one to get you going in the process. Today we will look at everything you need to know to choose your goats and how to buy them.

    Let's get started!

    How To Buy A Goat

    I know it's tempting to just dive right in and buy the first adorable baby goat you see. Try and restrain yourself just a little bit. You and your herd (...that's right, I said herd) will be better off in the long run.

    How To Choose Your Goats

    There are plenty of things to think about when choosing your goats. And you shouldn't base your decision soley on how much a goat costs. Here are a couple of things to think about when making your initial decisions.

    Why do you need goats?

    There are 3 main groups of goats; goats for meat, dairy goat breeds, and goats for fiber.

    Meat

    • Boers
    • Pygmy
    • Kikos

    Dairy

    • Nigerian Dwarves
    • Saanens
    • Alpines

    Fiber

    • Angora
    • Cashmere

    So, why are you getting a goat?  Will it be a pet only?  Will you want a product from your goat?  Answering that question will help you narrow down your possible breed list.

    What Size Goats Do You Want?

    Goats come in all different sizes.  Smaller (mini) breeds like Pygmy and Nigerian Dwarf can have a height range of 17 - 23 inches. Bigger (normal/standard) breeds like Alpine and Kiko and have height ranges of anywhere from 30 - 40 inches.  

    So, if you have space constraints or just want a smaller goat, you may want to look at a mini breed like Pygmy or Nigerian Dwarf.  There are also "mini" dairy goats that are a cross of Nigerian Dwarf and Alpine or Saneen that will result in smaller kids.

    Social Animals

    You will also want to remember that you can't just get one goat. Not because they are the Pringles of farm animals but because they are social animals. That means they require companionship and that means other goats. At the very least you will need two goats but they really thrive in groups.

    But, you can't just buy any two goats and stick them together. Does can live with other does or wethers (fixed males). Wethers can also live with other wethers and bucks. Bucks, of course, can also live with other bucks. You just want to make sure that you NEVER leave a doe with a buck unattended. This can lead to unintended breeding which can be an unpleasant (and unexpected) surprise in the future.

    The number of goats you can support will also depend on the amount of space you have available for them. If you have plenty of land and they will have easy access to plenty of brush and browse, you only need to worry about their shelter. They need about 10 to 15 square feet of shelter space per goat.

    If you have limited land then you will want to give them around 20 square feet of shelter space and 30 of outdoor/grazing & exercise space.

    Need some help to keep your goats healthy and maintained? The G.O.A.T Herd Management Binder has you covered from supplies to routine care reminders.

    Production

    If you are getting a dairy goat, you will likely want to look at milk production to help make your decision.  The standard size breeds can produce upwards of a gallon a day in milk while smaller breeds like Nigerian Dwarf average more like a quart a day.  

    However, keep in mind, Nigerian Dwarfs also usually have a much higher butterfat content which makes their milk taste more like cows milk.  Similarly, if you are getting a meat goat, Pygmys being a miniature goat breed will obviously produce much less meat than that of a Kiko which is a standard sized goat.

    What factors do you think are most important when choosing your first goats?  Also, don't forget to be properly prepared for your new goats buy getting the right goat supplies.

    How To Pick The Right Goat For You

    There are a lot of things to think about when it comes to getting goats.   Once you have decided on a goat type and breed, you must then decide on which specific goats you want.  But how will you choose them?  

    Although we are writing this with Nigerian Dwarf goats specifically in mind, the following can also apply to just about any goat breed. Factors to consider to help you choose your first Nigerian Dwarf (other other breed) goats:

    Registered Vs Unregistered

    This should really start to narrow down your field of potential candidates.  We suggest paying extra up front and getting registered goats.   First, with registered goats, you have the potential to see their background and production records.  

    Second, if you are getting a dairy goat to keep in milk, you will have to breed and, in theory, sell kids each year.  Unregistered goats will cut down on the number of buyers interested and also bring in less money. So, if you are looking into raising goats for profit, you probably want to get registered goats.

    Appraisal & Production Records

    If available, you should look at Linear Appraisal scores of the goat or its dam & sire.  Linear Appraisal will tell you how several of the goats characteristics stack up.

    Milk stars/production records of the specific goat or its dam and sires dam will give you an idea of the amount of milk you may get.  If the goat is ADGA registered, you can find this information on the ADGA site.

    Temperament & Personality

    If you can, meet the goat and see if you "click".  Some goats are really friendly while others can be standoffish and some can be unfriendly.

    If you want a friendly goat, but the one you are looking at is standoffish, do you have the time to work with her and get her to like you?  

    Goat's can also be quite noisy. If you live in an urban area, maybe you should look for a goat that is not too vocal.

    Disbudded Vs Horned

    Most Nigerian Dwarf goats have horns.  Many people will have their goats disbudded for safety reasons.  Some Nigerian Dwarf goats are also polled (naturally hornless).  You should think about if you want horns, disbudded or polled.

    (You might also want to familiarize yourself with important goat terminology so that you know what everything means when talking about goats.)

    We highly recommend going with a hornless goat. It may seem mean to remove a goat's horns, but they truly are safer without them. Goat herds with horns can injure each other easily. They love to headbutt and can cause some serious damage. Not to mention, if you are on the wrong end of the horns, it can be quite painful.

    Another thing to consider is goats suffer from a chronic case of "the grass is greener" syndrome. Meaning, no matter how lush the grass is in their paddock, they will almost always want to stick their head through the fence to eat that grass. Horn can get stuck in fencing and make them susceptible to predators.

    Additional Features & Considerations

    Once you decide what you need on the areas above, you should decide if you want anything "extra".  Some people love blue eyed goats, goats with wattles, goats with moonspots or goats of a particular color.  Look at some different goats and see what appeals most to you.

    We would suggest letting areas 1 - 4 weigh most heavy, but if you look and do your due diligence it is very likely you can get goats that meet all 5 criteria.

    How to find your goats

    Now you have all the information you need to select the goat type and breed. Now you need to know how to actually find a quality goat.

    The best way to start out with a nice goat is to buy them from a reputable breeder. You can find them through the American Dairy Goat Association (ADGA). Read through various goat pedigrees and decide what herd you want to base yours off of. Once you find herd names or even specific goat names you can search them online for contact information.

    You can also ask around in Facebook groups, goat forums, or visit a goat show. If a herd is placing in goat show competitions, it is likely to have quality traits.

    What to ask when buying a goat

    Asking the right questions will save you from a ton of headaches in the future.

    Basic Info

    It is important to ask some good questions when buying a goat. You will, of course, want to know the basics like their name, age, and size/weight. You will likely already know the breed and sex, but if you do not, you should ask about those things as well.

    Health

    Getting your hands on the goat is a great way to assess their body condition. You aren't likely to be able to perform a full exam, but it's good to get an accurate visual assessment. You want to make sure:

    • their eyes pas a Famacha check
    • they are not over or underweight
    • their coat is shiny and looks healthy
    • they do not have any obvious injuries, deformities, etc

    The folks over at The Open Sanctuary Project have developed a full exam that you can take notes from when buying a new goat and assessing your own herd.

    You will also want to know if the goat, and it's herd, have been tested for various goat diseases (CL, CAE, TB, Johne's, etc). As well as have they been vaccinated.

    It's also important to know if the specific goat has a history of health issues. You can also ask about their parents and their health history. For example, some goats have a higher tolerance for parasites than others.

    Other Information

    If you're getting an adult doe it's good to know if they have ever kidded before, how many times, and the average number of kids they produce. You will also want to know how much milk they produce, on average, if you are interested in dairy goats. Not only does this let you know their milk production and quality, but if you decide to breed them it will help you look for the specific goat kidding signs that they typically display.

    Bucks are a little simpler. You can ask if they have any proven kids and how many breedings they have had. They may not keep track of the number of breedings but most herd keepers will have a record of kids.

    If you are bringing home a new kid it's important to know if/when they were weaned. If they still require bottle feeding, if they are on a bottle now. You will also want to know their kidding date, parent's progeny, as well as if they have been treated for goat coccidiosis and/or selenium deficiency in goats.

    What to do when you get it home

    Once you pick out your goat and get them home you will want to quarantine the new goat for a bit. If these are your first goats, that won't be an issue. But if you are bringing a new goat home to your existing herd, they will need to be kept in a separate pen, 30+ feet away, for 30-90 days.

    Quarantining new animals is essential for stopping the spread of any infectious disease that may cross over from herd to herd.

    Final Word

    Getting goats is a truly rewarding experience. They can be a lot of work and frustrating at times but we have never regretted our decision to raise them. You are sure to love your new friends too!

    Need to know more about getting started with goats?  We wrote a book called "Getting Started with Goats" and made a course to teach what we've learned called "Getting Started Raising Goats".

    If you need more help keeping your goats healthy and well taken care of, check out the G.O.A.T. Herd Management System - worksheets, calculators, supply management and more to keep your goats in tip top shape while cutting down on time.

    Access the G.O.A.T. Herd Management System Here

    The Largest Chicken Breeds: 12 Huge Chickens!

    By MrAnimal Farm

    large rooster

    Most of us, when we picture chickens, we imagine our small flock, we raised from chicks, running around the barnyard dwarfed by our larger livestock (cow, goats, horses, etc). However, sometimes we come across some absolutely massive birds! Today we are going to figure out what some of the largest chicken breeds really are.

    large rooster

    [ez-toc]

    What Are The Largest Chicken Breeds?

    The Jersey Giant is alone at the very top of our largest chicken breeds list. In fact, they tower over any other of are the largest chicken breeds in the world today. But they are not alone. There are many, many very large chicken breeds. In fact, we are going to take a look at a dozen of them today. For the most part, we will be using weight as a deciding factor. However, there are a few others that make the list for more unique reasons.

    Let's get straight to the list!

    1. The Jersey Giant

    jersey giant hen and rooster
    a pair of Jersey Giant hen and rooster

    Let's start out big. As we said, the Jersey Giant is, by far, the largest chicken breed in the world. Fortunately for us all, this bird qualifies as a gentle giant. In fact, you'd have a hard time finding a gentler, more friendly chicken breed than the Jersey Giant..

    As their name suggests, the Jersey Giant was created in New Jersey by John and Thomas Black. The reason it is so large is they had intended to breed them as an alternative to turkeys as meat birds. However, they did not last long in the poultry industry because the Jersey Giant, despite being so big, takes a long time to reach its full size.

    They barely eked out over the Brahma because they are so tall and heavy. The roosters, on average, stand about 24 inches tall, or 2 feet, and weigh around 15 pounds. The hens alone easily grow up to 10 pounds.

    2. The Brahma Chicken

    brahma chicken
    Brahma rooster

    Barely coming in behind the Jersey Giant is the Brahma. A Brahma rooster will generally weigh around 12 pounds with the Brahma hen coming in at just under 10 pounds, on average. However, there have been recordings of them growing much larger; roosters at 18 pounds and hens at 13 pounds!

    The Brahma is an American bred bird that is a combination of many breeds imported from China, specifically Shanghai. They were the primary meat bird in the United states up until around 1930.

    As you can tell, they grow quite large and make great meat birds. While they are not as steady at egg production as the Australorp may be, they still will give you around 3 or so eggs a week.

    Need some help keeping your chickens health and care taken care of? Check out the Organized Chicken Keeper for an easy to follow system.

    3. Maline

    The Maline is a fantastic chicken breed. They make a great dual purpose breed, growing large enough for meat and laying around 150 eggs in a year. Plus, their relaxed personality makes them perfect for a backyard flock.

    It has a striking feather pattern that was derived by breeding cuckoo chickens from Antwerp in France with imported birds from China and surrounding areas. They will grow to be around 9 pounds, for a hen, and 12 pounds, for a rooster.

    4. Dong Tao

    The Dong Tao is the rarest, and possibly, most unique looking chicken on this list. Unfortunately, we were unable to find any pictures we could repost. But take note, there is no exaggeration when we learned they also are called "Dragon Legs".

    This breed is indigenous to Vietnam where they are considered a royal delicacy. They grow very large but are becoming more and more rare. Their eggs are difficult to hatch due to temperature sensitivity and because their abnormally large legs tend to crack them.

    5. Cornish

    cornish chicken

    The Cornish chicken is also known as the Indian Game. It was first brought to the US in the early 1900s where it's name was changed to Cornish Indian Game and then finally settled as Cornish around 1910. It is still, however, known as the Indian Game, throughout the majority of the world. Initially it was bred for cock fighting but did not develop the agressive temperament to do so. Eventually, it was seen more as a source of food than entertainment and is still used as a cross breed for larger boiler chickens.

    Cornish roosters will grow to be about 8 pounds while Cornish hens weigh around 6. Cornish hens are not a great choice for egg production; only laying around 80 to 100, at most, eggs per year

    6. Langshan

    The Langshan, or Croad Langshan, is thought to have originated in the Langshan region of China. They were first imported to the United States in 1878, with each color being officially recognized as US standards; black in 1883, white in 1893, and blue in 1987.

    A Langshan rooster will grow to be around 10 pounds in size with hens trailing right behind at around 8 pounds. Langshans are some of the better layers on this list, as well. You can expect to get 4 or 5 eggs a week from each hen!

    7. Orpington

    Buff Orpington chicken looks side ways

    Orpingtons are some of the most gentle and docile chicken breeds on this list. They get their name from their place of origin, Orpington, Kent in England, where they were initially bred by William Cook to be an all around dual purpose chicken.

    Eventually this breed was used, in large part due to the wide range of colors and patterns, as an ornamental, or show, bird. Although they are mostly know as a show breed, they still are raised for both meat and egg production.

    Orpingtons will grow to be about 10 punds and will lay upwards of 200 eggs in a year!

    8. Australorp

    Australorp rooster and hens

    The Australorp is an Australian, dual purpose, breed of chicken. It is easily the most prolific layer on this list. It became wildly popular starting in the 1920s specifically because of it's egg laying abilities.

    If you raise these birds you can expect to get an egg almost every day of the week. They will usually lay around 5 or 6 eggs a week or 250 eggs in a year! A flock of these guys is more than enough to feed a family.

    The roosters typically grow to be around 10 pounds with the hens just a bit lighter at around 8 pounds. You will often find them referred to as Black Australorps or the Australian Orpington.

    9. Malay

    After the Dong Tao, the Malay chicken may be the strangest looking chicken we found while researching this article. And, again, like the Dong Tao, we were unable to find any pictures we could repost.

    This is a breed that we do not really recommend for your average backyard flock. The Malay is THE most imposing chicken of all of the biggest chicken breeds on the list. Not only is it heavy, weighing around 9 pounds, but it is also very, VERY tall. In fact, Malay chickens can stand at 30 inches tall, or 2 ½ feet; making them the tallest chicken breed on this list!

    On top of their ridiculous height and weight, Malay chickens are also aggressive. Mostly, this behavior is territorial, but you probably don't want an ill tempered chicken that size roaming around your backyard. Maybe think of the Malay chicken as the evolutionary progression of the Velociraptor.

    10. Rhode Island Red

    rhode island red

    The Rhode Island Red is probably the most popular and well known of all of the largest chicken breeds we will discuss today. Their size, egg laying ability, temperament, and personality have made them an all around perfect backyard chicken.

    This breed is so great because they can thrive in just about any location. If you live in the cold, just make sure they have shelter. If you live in a hot area, give them shade and water. They are not fussy at all.

    You can expect this breed to grow to around 9 pounds and lay almost every day of the week. Similar to the Australorp, the Rhode Island Red is capable of laying almost 300 eggs a year.

    11. Cochin

    Cochin rooster

    The Cochin is one of the smallest large breeds we have on this list. We couldn't leave them off though because they just LOOK so huge. Believe it or not, but a typical rooster will grow to be around 5 pounds. They stand around 26 inches tall, or just over 2 feet. Add in their their big, puffy feathers and they appear to be even larger.

    We do recommend adding them to any flock, however. They are a very sweet bird and are safe to have around small children and pets. They are also decent layers, as well. A standard hen will probably give you 160 eggs a year.

    12. Belgian

    The Belgian is the smallest chicken on our list. Unlike the Cochin, this chicken does not appear to be larger from puffy feathers. No, this chicken is sleek, lean, and muscular.

    We included this breed on our list because it is very tall. If the Malay from above caught your attention, you will be happy to hear about these guys. They share the same spot as the tallest chicken breed on this list, standing around 30 inches tall, but are not nearly as aggressive. This breed is a bit more nervous and anxious, though.

    If you are interested in finding some for yourself, they are also known as Liege Fighter chickens.

    Breed Comparison Table

    BreedWeightEgg ProductionTemperament &
    Personality
    Unique Qualifier
    Jersey Giant15 lbs3-4/wk;
    150-200/yr
    FriendlyN/A
    Brahma12 lbs3/wk;
    150/yr
    DocileN/A
    Maline9 lbs2-3/wk;
    140-160/yr
    RelaxedN/A
    Dong Tao12 lbs2-3/wk;
    150-160/yr
    TameN/A
    Cornish10 lbs2-3/wk;
    160/yr
    DocileN/A
    Langshan10 lbs4-5/wk;
    200-220/yr
    ResilientN/A
    Orpington10 lbs3-4/wk;
    175-200/yr
    ChillN/A
    Australorp10 lbs5-6/wk;
    250/yr
    TolerantN/A
    Malay9 lbs1-2/wk;
    70-120/yr
    Meanvery tall; 30+ inches tall
    Rhode Island Red9 lbs5-6/wk;
    200-300/yr
    VersatileN/A
    Cochin5 lbs2-4/wk;
    160-180/yr
    Sweetpuffy feathers make them appear larger
    Belgian3 lbs3-4/wk;
    150-200/yr
    Timid/Anxiouslean & very tall; 30+ inches tall

    Frequently Asked Questions

    Q1. Are larger chickens more aggressive?

    Larger chickens are no more aggressive than smaller birds. The size of a chicken does not really have much affect on their personality. Aggressiveness is typically a trait that varies from breed to breed.

    Large breeds do tend to be a bit more laid back than smaller breeds, however. It is believed that is because, due to their size, they do not have to compete for their position in the pecking order. The smaller chickens tend to leave them alone.

    Q2. Do big chickens lay big eggs?

    Hen size is not always a predicter of egg size. In fact, many large breed chickens lay medium sized eggs.

    Q3. Why do you need a large breed?

    Whether you need a large breed or not depends on your intentions. They make fantastic meat birds. If you are looking for a sustainable, home grown protein source, the largest chicken breeds will obviously give you the most meat.

    As we mentioned about aggression, they also tend to be more laid back. If you want a fairly relaxed flock, adding a few of the largest chicken breeds can be a way to accomplish that goal.

    Q4. Do large breed chickens have more health problems?

    Large chicken breeds do not have any more health issues than other chickens, in general. Because they are usually meat birds, they have been bred to grow large, rather quickly. This can lead to them eating in excess.

    Chickens that overeat often become obese which can lead to related health issues like weak joints, impacted crops, and bumblefoot, to name a few. You can avoid these maladies by allowing them to free range and feed on a schedule as opposed to a free choice feeder.

    Wrap Up

    I bet you didn't realize there were so many huge chickens out there! They are all quite exquisite in their own ways too. Maybe you will consider adding some of these to your flock in the future.

    If you need more help with taking care of your chickens, check out The Organized Chicken Keeper for a complete system for managing their health through keeping their supplies stocked and coop clean.
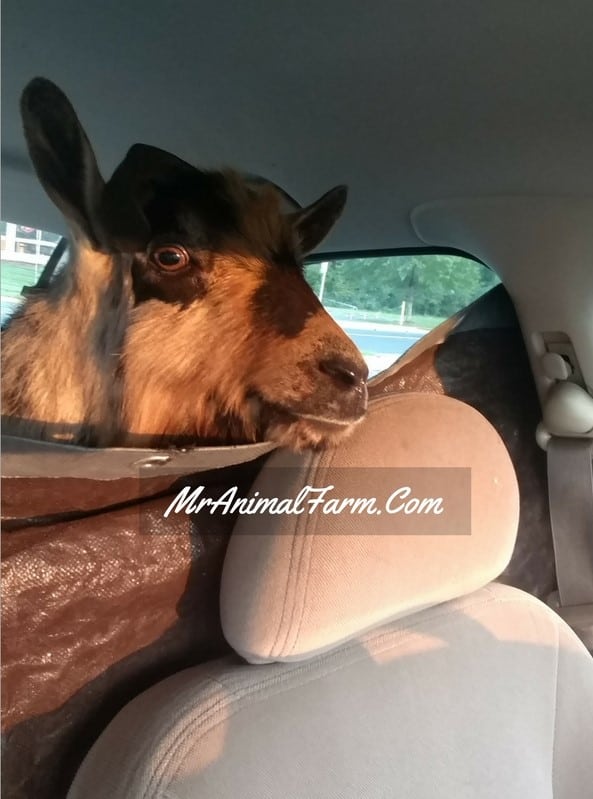
    Access The Organized Chicken Keeper Here

    How Do Chickens Mate?

    By MrAnimal Farm

    frizzle silkie rooster on top of coop

    How do chickens mate? Have you ever seen your rooster, inexplicably, just seem to attack one of your hens out of nowhere? He may pull out her feathers with his feet while tugging on her comb with his beak. It's all around seems to be a pretty terrible event. Today we are going to learn why he does that and what it means.

    frizzle silkie rooster on top of coop

    So, how do chickens mate anyway?

    Chickens mate similarly to how many other animals mate. Female chickens, or hens in this case, have an egg that needs to be fertilized. The male, or rooster, has sperm that will fertilize that egg. The rooster will mount over top the hen and push his cloaca to her cloaca, in what is known as a "cloacal kiss". Unlike many animals, there is no penetration from one partner to the other.

    During the cloacal kiss, the hen will receive the sperm into her cloaca which will then travel down the oviduct and stay in the infundibulum until it is time for the yolks to be fertilized. If you are seeing a bunch of new chicken terminology, don't worry, that section is coming up next.

    If you've seen the scene above play out in your flock you, no doubt, have wondered what was going on. It's a natural part of their life and while you can't really prevent it you can keep your hens safe from excessive damage.

    We know this all sounds scary. But, we assure you, it is all natural and part of the biological way chickens mate.

    Chicken sexual biology

    Both the hen and rooster have different sexual organs, each specific to their intended function.

    Rooster parts

    • Cloaca: you may also know this as the vent. This is the area in which the rooster expels waste as well as secretes sperm
    • Papilla: located just inside of the cloaca, this is the exit point from which the sperm enters the cloaca
    • Testes: where the sperm is made
    • Vas deferens: the tube in which the sperm is delivered to the papilla

    Hen parts

    • Cloaca: just like the rooster above, hens have a cloaca which is used for waste. It is also used to transfer sperm to an unfertilized yolk
    • Follicles: the place in which the yolk is initially produced
    • Infundibulum: section of the Oviduct in which the yolk is fertilized. sperm is also stored her prior to fertilization.
    • Isthmus: section of the Oviduct in which the shell membrane is added around the egg
    • Magnum: section of the Oviduct in which the egg white is placed around the yolk
    • Oviduct: a long tract leading from the Ovary to the Vagina in which the egg is fertilized, egg white is added, and a shell is formed
    • Ovary: the place in which the egg yolk is initially developed before becoming an egg. a hen will have two; one on each side of the body.
    • Shell Gland/Uterus: hard shell is placed around the soft membrane

    Need some help keeping your chickens health and care taken care of? Check out the Organized Chicken Keeper for an easy to follow system.

    How it all works

    What are the functions of each chicken's reproductive organs?

    Rooster

    The process starts in the rooster's testes. In the testes you will find seminiferous tubules. Here is where the sperm and semen used for transport is produced. The semen will then travel down through the vas deferens, out the papilla, and into the cloaca.

    rooster reproductive organs

    Hen

    The hen is a bit more complicated than the rooster. As you may know from reading about how long your hen will lay, hens are born with all of the eggs they will ever be capable of producing.

    Things first start in the ovaries. Yolk will start to form in the follicles. This process can take up to 10 days for a yolk to fully form. Eventually, the walls of the follicles will rupture and pass the yolk from the ovary into the oviduct.

    The first stop in the oviduct is the infundibulum. It is in the infundibulum that the sperm is stored and used to fertilize the fresh yolk. After passing through the infundibulum, the yolk moves to the magnum where it is wrapped in the egg white.

    From the magnum the egg moves to the ithmus. The ithmus is the initial shell membrane is applied to the outside of the egg. This membrane is not the hard shell. It is a soft membrane added prior to the hard shell.

    From the ithmus the eggs moves into the shell gland or uterus. This is where the hard shell is added to the egg. Finally, the egg is passed through the vagina and out through the cloaca.

    If you're thinking of raising your own chicks, you can either incubate chicken eggs yourself (we personally have had great success with the cabinet incubator which we consider one of the best egg incubators) or you can have a hatch chicks with a broody hen. You can also eat fertilized eggs. It does not change the flavor and is perfectly safe. Here's how to tell if a chicken egg is fertilized.

    hen reproductive organs

    Dangers

    As we described above, roosters can be quite aggressive when they are trying to mate. They are not intentionally trying to harm the hen, but, it is possible. Due to their larger size and weight, with the addition of long, sharp spurs, some real damage can be done to your precious hen.

    Not all chicken mating situations are this rough and dangerous. You will need to pay attention to their behavior. But a good, easy to spot sign that things are getting out of hand is if your hens start losing feathers on their back.

    The easiest, and most humane, way to fix this issue is to provide your hens with chicken saddles. It may sound funny, but these can be a life saver. They are small pieces of cloth that covers your hen's back and protects it from the roosters claws and spurs.

    You can also get them in different colors and patterns. If you need them, you may as well have fun with them!

    If you need more help with taking care of your chickens, check out The Organized Chicken Keeper for a complete system for managing their health through keeping their supplies stocked and coop clean.
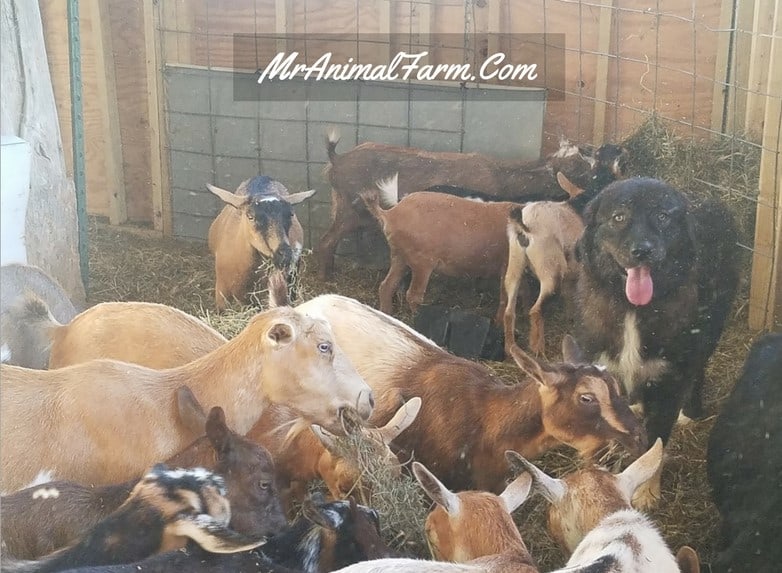
    Access The Organized Chicken Keeper Here

    Frequently Asked Questions

    Here are some of the more common questions we came across while researching for this post.

    Q1. Do chickens need to mate to lay eggs?

    Chickens do not need to mate in order to lay eggs. Chickens will produce their eggs regardless of the presence of a rooster. If they are not fertilized the hen will just lay unfertilized eggs.

    Q2. Does it hurt when chickens lay eggs?

    The size of the egg and the size of the chicken are what determines whether or not the laying process is painful for a chicken. Typically, you'll hear them make a lot of noise coming from the chicken coop but it is over rather quickly. Young birds may experience more discomfort than older hens since they are still growing and their eggs may be a bit larger than they would like. So, in those cases, it may be a bit uncomfortable when they lay eggs.

    Q3. At what age does a rooster start mating?

    Roosters will reach sexual maturity a little more quickly than a hen. Roosters will usually start attempting to mate around 5 months of age. This can vary a month or so in either direction.

    Q4. Do Roosters have balls?

    Roosters do not have balls, or testes, in the same way mammals do. While mammals have their testes on the outside of their body, a roosters' testes are internal. Other than that, they are used the same as most other animals in that they produce sperm necesarry for reproduction.

    Q5. How do farmers know if a chicken will lay fertile eggs or not?

    Unfortunately, there is no way to tell if an egg is fertilized without cracking it. If your chickens are breeding, you can probably bet that the eggs are fertilized. The only sure way to tell is to incubate the eggs and see if baby chicks hatch. If you get baby chicks, the egg was fertilized.

    Q6. Do we eat fertilized eggs?

    If your chickens are mating, you probably are eating fertilized eggs. Fertilized eggs are safe to eat and are no different than non-fertilized eggs in terms of taste.

    Q7. Why do chickens run before mating?

    Hens tend to run because roosters can be very aggressive in their mating process. Hens do not need their eggs fertilized in order to lay them so when a rooster starts the mating process then hen may see it as an aggressive attack. At that point their fight or flight instincts kick in and they run.

    Q8. Do roosters mate with their mothers?

    Animals do not often think of relatives in the same way that people do. So, when a rooster reaches maturity, he will try to mate with any hens in his flock. If his mother is a part of that flock he will not discriminate. This will not typically pose a genetic problem unless he continues to mate his offspring and subsequent generations.

    In fact, when intentionally breeding, often times breeders will mate parent to offspring or siblings together to emphasize certain traits. This is called line breeding.

    Q9. Why do roosters die after mating?

    Roosters do not die right after mating. While their mating process may look intense, it is not so vigorous that they pass away. If your roosters are dying after mating, you may have another problem on your hands.

    Wrap up

    If you've ever wondered about the chicken mating process you now have more information than you probably thought you would get. The actual act can appear to be aggressive, and at times it is, but it is a natural part of chicken life. You can help protect your hen and you can also keep an eye out for when to snatch up some eggs to incubate on your own.

    Happy chicken keeping!

    If you need more help with taking care of your chickens, check out The Organized Chicken Keeper for a complete system for managing their health through keeping their supplies stocked and coop clean.
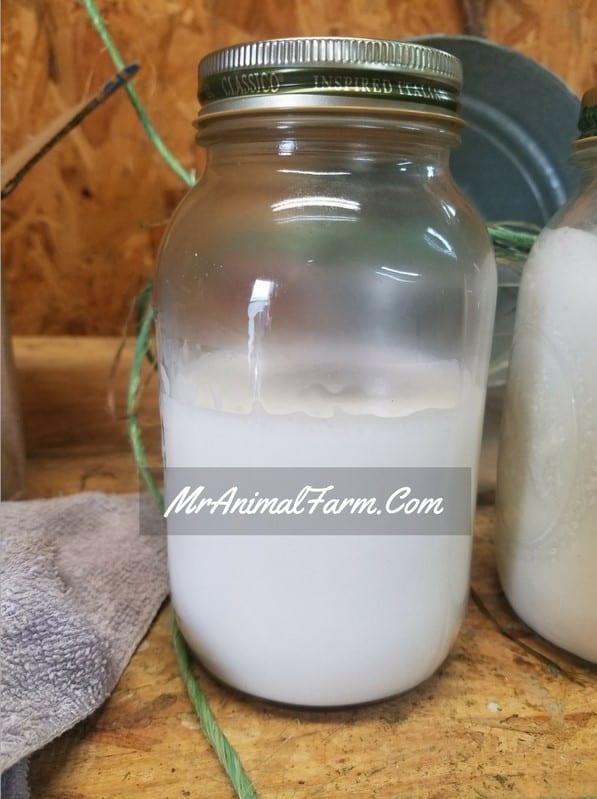
    Access The Organized Chicken Keeper Here

    Can You Freeze Cucumbers? A Food Preservation Guide

    By MrAnimal Farm

    sliced cucumbers

    Have you ever grown a ton of cucumbers in your garden and thought, "What am I going to do with all of this? Can I freeze cucumbers?"? You don't have to worry about wasting another bit of produce again. This food preservation guide will show you, not just one, but several ways in which you can freeze cucumbers.

    You can freeze cucumbers in a few different ways. We will focus on just a couple of the most efficient, popular, and of course, tasty ways; spears, sliced, puree, brine, fermentation, and good old freezer pickles.

    sliced cucumbers sitting on a cutting board
    Cucumbers

    Can you freeze cucumbers?

    Since cucumbers are mostly made of water, they freeze really easily. The problem is, if not prepared properly, they can continue to age and even rot while frozen. They can also become mushy and just kind of gross. Either of these scenarios make them unusable if you do not have the right freezing techniques.

    So, how do you freeze them?

    We're so glad you asked. As we mentioned above, there are a couple of different methods you can use, each with varying degrees of difficulty and flavor. It doesn't matter which type of cucumber you have, they can all be frozen using these methods.

    We will go in order of difficulty and time for preparation. Some of these are as simple as cut and bag, while some others can take up to a week to complete.

    You can check this handy chart to see which method lines up with your time and taste preference:

    TimeTasteDifficulty
    Spearsa few minutesplain cucumbereasiest
    Slicesup to an hourplain cucumbereasy
    Puree Cubesa few minutesplain cucumbereasy
    Brinea couple of hoursmild flavormedium
    Freezer Picklesa couple of hoursmild to strongmedium
    Fermentationup to a weekmild to strongmost difficult

    Let's get started.

    Cucumber spears

    Preserving cucumber spears is the quickest, easiest, and most low effort way you can preserve them. All you need to do is:

    • cut both ends off of your cucumbers
    • cut your cucumbers into quarters
    • put them in a freezer bag
    • put them in your freezer

    Need to get all your food preserved easily? Check out the Ultimate Guide To Freezing Food so that you can fill your freezer without in minimal time.

    Cucumber Slices

    Cucumber slices are almost as easy as spears. The only reason we rank it a little more difficult is because it involves much more cutting and about 30 to 60 minutes of time before the actual freeze.

    First, gather your supplies. You will need a cookie sheet, some parchment paper, and a sharp knife, food processor, or mandolin slicer for this.

    • using your knife, food processor, or mandolin slicer, cut your cucumbers into thin slices
    • cover your cookie sheet with parchment paper
    • lay the cucumber slices flat in a single layer on the parchment paper
    • place them in the freezer for half an hour to an hour (you want them to be stiff but not completely frozen)
    • remove from freezer and place slices in a freezer bag
    • place them back in the freezer

    The reason we do a "pre-freeze" with these slices is because of the large amount of moisture cucumbers contain. If you just slice them and put them in the freezer, they will fold over and freeze together in one big clump. By "pre-freezing" them, they stay in chip form and will retain that shape after they deep freeze.

    Puree Cubes

    This method is especially good if you like to make smoothies and things like that. You need some cucumbers, ice cube trays, and a food processor or blender.

    • stick your cucumbers in your food processor or blender (peeled or not, up to you)
    • set your device to the puree setting
    • once they are completely pureed (think baby food) you will pour the contents into ice cube trays
    • stick the ice cube trays in the freezer overnight
    • once they are frozen, pop the cubes out and put them in a larger freezer bag

    Like we said, this is great for smoothies and blended drinks. When you are ready to use them, you can either thaw them in the fridge or you can throw them in the blender with the rest of your smoothie ingredients.

    Brine

    Making a brine for your cucumbers is the first food preservation method that takes some preparation and is done in stages. You will need:

    • peeled & sliced cucumbers
    • large bowl of water
    • 2 tablespoons salt
    • ⅔ cup vinegar
    • ⅔ cup
    • vegetable oil
    • 1 teaspoon sugar
    • 1 teaspoon celery seed

    The steps to make your brine go like this:

    • add your cucumbers and 2 tablespoons of salt to a large bowl of cold water
    • let sit for 2 hours and then rinse with cold water
    • pour in vinegar, vegetable oil, sugar and celery seeds
    • stir until everything is dissolved together
    • cover and stick in the fridge to chill overnight
    • remove from fridge and add cucumbers with brine to mason jars with about an inch of headroom
    • seal and put in the freezer

    Freezer Pickles

    If you're like us, the reason you grew cucumbers to begin with was for pickles. This is an even easier way of making pickles and you don't have to boil a thing! You will need:

    • large mixing bowl
    • 4 pounds of sliced cucumbers
    • 8 cups of chopped onions
    • 2 garlic cloves
    • ¼ cup salt
    • ¾ cup water
    • 4 cups sugar
    • 2 cups apple cider vinegar

    The steps are pretty simple. You even get a 2 hour break in the middle:

    • combine all of your ingredients into a large bowl
    • let sit for 2 hours
    • pour in sugar and apple cider vinegar
    • stir until sugar has dissolved
    • add pickles to mason jars and ladle in liquid leaving an inch of headspace
    • seal and freeze

    Fermented

    This is the last method of freezing cucumbers we will cover today. We put it last because it takes the longest and requires the most ingredients. However, the extra time and effort pays off in the taste. These fermented cukes pack a ton of flavor!

    You are going to need:

    • cucumbers
    • dillweed
    • 1 tablespoon sea salt
    • 1 tablespoon mustard seed
    • a garlic clove
    • room temperature water
    • mason jars

    After you have everything you need, you just need to add everything together in the right order.

    • set out your mason jars and add dillweed to the bottom of each jar
    • cut both ends off of your cucumbers and pack them into the mason jars
    • pour in your salt, mustard seed, garlic, and some more dill weed
    • pack everything in as tight as you can get it
    • fill the jar with room temperature water leaving about an inch of headroom
    • seal the jars and stick them in a dark and cool place
    • check them in 2 days but they may need 5 to 7 days to fully ferment
    • you can then stick the jar right in the freezer

    How To Use Frozen Cucumbers

    Frozen cucumbers have several uses. As we mentioned with the puree cubes, you can toss them right into a blender with a smoothie. You can also thaw them out and add them to your favorite salsa or dipping sauce.

    Cucumber puree can also be used to make a face mask. Along with the face mask, cucumber slices can be placed on the eyes to help reduce swelling and puffiness. Both will all around help keep your face moisturized and feeling rejuvenated.

    Frozen spears are a good, healthy snack if you are someone who just likes to munch but tries to keep away from too much candy and chips. They are also good for babies who are teething.

    Additionally, pickles and fermented cucumbers are good on sandwiches or just as their own, delicious snack.

    Frequently Asked Questions

    Here are a couple questions we came across while researching this article.

    Q1. How long are cucumbers good for?/ How long do cucumbers stay fresh?

    If you bring in cucumbers from your garden or fresh from the grocery store, they should stay fresh for around a week or 2. They tend to last a little longer if you keep them cold in the fridge.

    Q2. How long are frozen cucumbers good for?

    Freezing your cucumbers will extend their shelf (or freezer) life by a ton. While fresh cucumbers only stay good for about a week or two, frozen cucumbers will stay good for up to a whole year!

    Wrap up

    You will never have to worry again about your garden harvest going to waste or missing out on a good produce sale. With these food preservation tips you know how to freeze cucumbers so they last a very long time.

    If you need more help getting your foods frozen, check out the Ultimate Freezing Food Guide for a complete quick start reference so that you can have a well-stocked freezer.

    Access the Ultimate Freezing Food Guide Here

    Karakachan Livestock Guard Dogs: The Ultimate Guide

    By MrAnimal Farm

    female brindle and white Karakachan

    Depending on where you live, you may experience problems with predators endangering your livestock. One of the easiest, and most rewarding, ways to combat these dangers is by getting a good, reliable, livestock guard dog. One such breed, that so happens to be our favorite, is the Karakachan.

    karakachan laying on the ground with tongue out.

    [ez-toc]

    What Is A Karakachan?

    The Karakachan, sometimes called a Bear Dog, is a Bulgarian dog breed bred with the intent to be a flock and herd protector. They can grow to be quite large, some males topping out at 135 lbs. They possess a delicate and gentle personality for their pack, which can include the flock they protect and their owners. Additionally, they consider their family and flock as a part of their territory and will defend them ferociously, even against much larger predators.

    Origin & History

    As we mentioned above, the Karakachan is a Bulgarian breed. They are a very close relative to many other shepherding dogs in neighboring countries such as Greece, Macedonia, Serbia, and Turkey.

    Karakachans are one of the oldest breeds of, not just livestock dogs, but canines, in general. Named after the nomadic Karakachan, also known as Sarakatsani, people of the Baltics, their strict breeding practices have ensured this breed has remained, relatively, unchanged over several centuries.

    The breed also has historical and cultural significance. It has appeared in a variety of Bulgarian literature by authors like Yordan Radichkov, Georgi Raitchev, and Yordan Yovkov. It is also seen as a sign of honor, sometimes being gifted from political figures to other leaders as a sign of respect.

    What Are They Used For?

    Despite their delightful demeanor and excellent shepherding capabilities, the Karakachan remains fairly uncommon. It is most popular is parts of Europe and the US, but is not as popular as some other herd protecting breeds.

    They excel as livestock protector dogs. They will defend your goats, cattle, horses, or any other animals you place in their charge. They have earned the nicknames "Bear Dog" and "Wolf Dog" because they are willing to attack much larger predators to keep their herd safe.

    In addition to farm use, historically they have been used as border guard dogs in Bulgaria. They also make fantastic, albeit quite large, pets.

    You can make your own homestead profitable with these Profitable Homesteading Worksheets.

    What Do They Look Like?

    Karakachans have long, muscular, and slender bodies with broad backs. Their heads are large and boxy with a rounded forehead.

    How Big Will A Karakachan Get?

    Karakachans can get to be pretty large. The males can grow to be between 25 and 30 inches at the shoulders and weigh anywhere from 90 pounds up to 135 pounds. The females are not quite as big but still large. They will usually stand between 23 and 28 inches at the shoulders and weigh between 80 and 125 lbs.

    Here is a size breakdown between males and female:

    Height At The WithersWeight
    Male Karakachan25 to 30 inches90 to 135 lbs
    Female Karakachan23 to 28 inches80 to 125 lbs

    Coat

    The Karakachan's coat comes in two lengths; short or long. Short coats are usually under 4.5 to 5 inches while long coats are anything above 5 inches. Regardless of length, their fur is straight and stiff with a thick undercoat.

    Color

    black and white male Karakachan

    Karakachans are typically dual or tricolored with some variation of spots. For example, the boy above, Angel, has very large white spots on top of a black coat. The girl in the first image on this page, Buffy, is a darker brindle color. The full list of colors are:

    • black
    • brown
    • brindle
    • sable
    • pied (white patches)

    How Is Their Character?

    So, what is a Karakachan like? How do they behave? Do they have any particular quirks you should be aware of?

    Temperament & Personality

    For the most part, this breed is pretty laid back. If their flock is safe, they will spend much of their time napping, albeit with senses that allow them to wake up at any threat.

    They are very alert when patrolling their territory. When they spot an intruder, they will let out a few, deep barks to alert the flock of potential danger as well as a warning to the stranger.

    They are gentle with their flock, as well as with their owners. They are not overtly aggressive towards people but are definitely suspicious of those they do not know. One must earn their trust before they can get near the herd.

    Like many big dogs, they do not seem to understand their size and will not think twice about trying to lay in your lap.

    How Are They With Kids & Pets?

    When given proper socialization and training as a puppy, these dogs are great with kids and pets. As we mentioned, they are gentle giants and seem to consider their owners as part of their flock.

    However, if not given adequate training, they can be overbearing at times. Even when they mean well, their sheer size can be dangerous to small children or pets.

    How To Care For Your Karakachan

    If you plan to add a Karakachan to your homestead, here are some tips on how to properly care for them.

    Food & Dietary Needs

    As you may have already guessed due to their size, these dogs can eat quite a bit. Not only are they large, but they are also working animals. Constant patrolling works up an appetite and burns a lot of calories.

    You will want to get them a high quality dog food that is specially blended for large breed dogs. Large dogs need a different balance of nutrients than small, or even medium, sized dogs. You want a recipe that is designed to accommodate their size, age, and activity level.

    Generally, there are feeding instructions right on the bag. This is usually a good starting point for your dog. When you start them on their new food, you will want to monitor their weight and body condition.

    If they are either gaining or losing weight or their body condition starts to suffer, you will want to change their portion sizes accordingly. You can always discuss the specifics of your dog with a vet. You can also use this handy body condition chart at home.

    Exercise

    If you have one of these dogs as a livestock protector, you will not likely need to go out of your way to exercise them. They will get plenty of exercise on their own while patrolling and watching over their herd.

    If you have one as a pet, be aware that they are working dogs and thus need a lot of exercise. At a minimum they will need 60 minutes a day and plenty of room to run.

    Are Karakachans Easy To Train?

    Karakachans can be stubborn when it comes to training. They are intelligent, but not always motivated to obey commands. We think that is likely due to the need to be independent while patrolling.

    However, if started at a young age and properly socialized, they can be trained. It will just take some time and a lot of patience.

    Health Concerns

    Because the Karakachan people have such strict breeding practices, the Karakachan dog has not had the same health problems that plague many designer breeds.

    They will usually only have the same issues that bother other large dog breeds. Things like elbow dysplasia, hip dysplasia, and bloat.

    How long do Karakachans live?

    Karakachans will typically live between 12 and 14 years. That is, of course, assuming they limit the number of bears they attack.

    Grooming

    Karakachans have a pretty thick undercoat. This coat helps keep them insulated and warm in even the coldest climates. However, the thick coat can lead to skin irritation and even infection if not groomed regularly.

    When the weather starts to get warmer, they will start to shed their undercoat. If not brushed out, it can mat, tangle, and knot up with their top coat. This can hold in moisture that can cause the above mentioned irritation.

    We like to use a slicker brush to brush out their undercoat. Then a good, strong, combo brush to keep their natural oils evenly spread throughout their coat. We also really like this comb to work out knots and mats, when we find them.

    Speaking of their own natural oils, you do not have to bathe them as often as you would think. Dogs create their own oils that help to nourish their coat and skin. Bathing too often will wash those oils away and can dry them out. Giving them a bath once every few months, or as needed, is all they require.

    You can get a set of nail trimmers, if you like. Depending on the terrain they may keep their nails worn down on their own.

    Fencing

    This breed is generally content to keep to their area, assuming their territory is not too small. If they do not have enough room to properly exercise and run, they may start to look across the fence.

    They do need good, strong fencing. As we mentioned, they are an intelligent breed and, if motivated, can find a way over, under, or even through a fence or gate.

    We recommend a fence that is at least 48" tall and made with woven wire. Honestly, you can use the tips for solid goat fencing and apply them to your Karakachans.

    Making sure they have plenty of room and, hopefully, proper training will help eliminate most of the fencing issues that can arise.

    Similar Breeds

    A few other similar breeds in both size and function are:

    • Caucasian Ovcharka
    • Central Asian Ovcharka
    • Landseer
    • Moscow Watchdog
    • Newfoundland
    • Saint Bernard

    Final Thoughts

    We love our Karakachans! They are honestly, some of the best dogs we have ever owned and they keep our animals safe and secure. If you are able to add one to your family, you will not regret it.

    Until next time...

    If you found this helpful check out, The Fruitful Homesteader: A Goal Setting and Project Planning System so that you can get your homestead working for you.

    Click Here to Access the Planning System

    What Is A Hen Anyway? (Hens Vs Chickens)

    By MrAnimal Farm

    hen

    What is a hen? Have you ever had that question pop into your head? You know it's a chicken, but what's the difference between a chicken and a hen? Are they the same thing? Today, we will answer all of those questions and more!

    hen on top of hay bales

    [ez-toc]

    What is a Hen?

    To put it simply, a hen is a female chicken that has reached sexual maturity. Typically, they are still within the egg laying stage of development, however, an older adult female chicken that no longer lay is still considered a hen. A hen has also grown beyond the pullet stage of their development.

    What is a Chicken?

    The word "chicken", in chicken terminology, is used for the entire chicken family as a species. When you are discussing hens, roosters, cockerel (young male chicken), pullets (young female chicken), etc, they are all chickens. Similar to the way that human is an umbrella term for all people, male, female, etc. Female chickens are generally called hens and male chickens are generally called roosters.

    Chickens are an omnivorous species. That means they will eat a variety of both plant life and animals. It is important to understand the differences between chickens, hens, roosters in order to best care for your chickens.

    Due to their ability to lay eggs, the ease in which they are raised, and their common use as a high quality and inexpensive meat/protein source, they are the most prolific bird on the planet. The global chicken population is just shy of 24 billion! With just under 8 billion people, there are almost 3 chickens for every person alive!

    Hen Vs Chicken: What is the difference between them?

    As we mentioned, in poultry terminology, chicken is a catch all term for all chickens. Hens are female chickens over a year old.

    To put it another way, all hens are chickens but not all chickens are hens. A rooster, cockerel, or pullet, as well as a hen, can all be called chicken.

    What is a Pullet?

    A pullet is a juvenile or young female chicken. While a hen is sexually mature female chicken and at, or past, the egg laying stage, pullets are still in their early development and are not yet ready to lay their first egg.

    What is the difference between a chicken and a pullet?

    Technically speaking, a pullet is a female chicken under a year old. However, due to the rise of the poultry industry, a pullet is considered any hen that has yet to start laying eggs. So once a pullet reaches the 16 to 20 week point, they are considered a hen.

    Aside from laying eggs and age, there are a few behavioral changes between the stages of pullet and laying hens. For example, after 16 weeks, or after laying age, the time spent "preening and dust bathing" had a significant increase.

    Pullets tend to eat the feather of their flock mates, likely in a struggle for dominance, while hens do not. However, while hens do show a decrease in feather eating, they have a marked increase on both "aggressive and non-aggressive" pecking and feather pulling.

    Need some help keeping your chickens health and care taken care of? Check out the Organized Chicken Keeper for an easy to follow system.

    How To Tell If You Have a Hen

    If you are trying to tell which chickens in your flock are hens and which are roosters, it is not usually very hard to tell. Hens are almost always smaller than roosters; weighing, at most, around 8 pounds. A hen will also tend to have a less pronounced set of wattles and a smaller comb.

    Obviously, if your chicken lays an egg, it is a hen. If you find them sitting on a nest of eggs, it is probably a broody hen.

    It is definitely easier to tell if you have a hen if you have a rooster to compare it to.

    What is the difference between a chicken and a rooster?

    So, how do you tell if you have a hen or a roo?

    In general, a rooster is going to much larger than a hen. They will typically have a much larger comb and longer wattles. Their primary feather color is usually the same as the hens but they will also have flashier hackle, saddle, and tail feathers.

    A rooster is also much more aggressive and territorial than a hen. While hens will fight amongst themselves to establish a flock, or pecking, order, roosters are the flock protector. It is not uncommon for them to chase other animals, pets, kids, and even full grown adults out of their territory if they don't want you there.

    Frequently Asked Questions

    As you can see, there's a whole Easter basket range of egg colors. Naturally, this spurs a whole lot of questions. Here are some of the more common ones we hear.

    Q1. What is difference between chicken and hen?/ What is a female chicken called?/ What is the definition of a hen?

    A hen is a female chicken once it has reached sexual maturity. That means they are past the juvenile (pullet) stage and either are, or have already surpassed the egg laying stage of their development. Chicken is the overall term used to describe hens, roosters, chicks, etc; just like Human is used to describe men, women, etc.

    Q2. Are chickens male or female?/ Are all chickens female?

    Chicken is used to describe the species of bird and not the biological sex. They are both chickens. The difference is roosters are male chickens and hens are female chickens.

    Q3. What are hen babies called?/ Is a chicken a baby hen?

    A baby hen is called a chick. You will sometimes here people refer to them colloquially as peeps. Once they are a bit older, biological sex plays a role in their names. For instance, a juvenile rooster is a cockerel and a juvenile hen is a pullet.

    Q4. Can a hen look like a rooster?

    Generally speaking, roosters are larger and have much more ornate and colorful feathering. That is to attract a mate. On the other hand, female chickens, like many females in nature, are typically less flashy. It is believed that is to act as a bit of camouflage while they protect their offspring.

    It is possible that a hen can start to display physical characteristics of a rooster. A study conducted at the University of Florida found that some hens are capable of not only developing the physical features of a rooster but can also, on rare occasions, produce sperm capable of fertilizing eggs!

    Q5. Does a hen need a rooster to lay an egg?

    Hens will lay eggs regardless of if there is a rooster present in their flock. Hens are born (or hatched) with all the eggs they will ever have. So they will lay them once the reach sexual maturity. A rooster is only needed to fertilize the eggs so that they can produce live chicks.

    Q6. Can a hen lay more than one egg a day?

    Hens typically lay their eggs on a schedule. It takes a lot of energy and time for a hen to produce an egg, shell and all. While it is certainly possible for a hen to lay more than a single egg in a day, it is very, very unlikely to happen.

    Q7. Can male chickens lay eggs?

    Do roosters lay eggs? Roosters, male chickens, do not possess the anatomy needed to produce eggs. Only hens can produce and lay eggs. Roosters are capable of fertilizing the eggs and hens are not.

    Q8. How do hens show signs of old age?

    The very first sign of an aging chicken is that they will either decrease egg production or completely stop their egg laying. If you have a large flock, there are some signs to tell if your chicken is still laying.

    The next sign we usually notice when a hen is starting to get old is that they will move a little slower. They may be the last to make it to the coop at night. You will also notice that they may start to decrease in weight some too. Often times, an aging hen will decrease the amount of food they are eating, if not stop eating altogether.

    The average lifespan of a chicken is around 8 years, give or take. This can vary depending on their environment, diet, and safety from predators.

    Q9. Can you eat a hen?/ What kind of meat is a hen?/ Is Hen tougher than chicken?

    Since hens are chicken you can definitely eat them. However, for a few reasons, hens are not typically the chicken of choice when it comes to meat birds. Most often, hens are raised for egg production which can cause their meat to be a bit tough and not great for eating once they no longer lay eggs.

    Most often, roosters are used for meat. This is because they are larger and are usually only one per flock. If you hatch chickens, it is not uncommon to raise the roosters exclusively for meat birds.

    Hens can be used for meat later on, depending on how they are cooked. Many people will stew them or turn them into a good chicken stock.

    Q10. What food does hen eat?

    Hens, like all chickens, eat a variety of insects, plants, rodents, and feed. If you want regular egg production with high quality eggs, you will want to provide regular access to a good layer feed. You can also provide a calcium supplement if your hen's eggshells are too thin.

    Chickens also love a variety of snacks like:

    • apples
    • bananas
    • cherries
    • grapes
    • rice
    • strawberries
    • ticks

    If you need more help with taking care of your chickens, check out The Organized Chicken Keeper for a complete system for managing their health through keeping their supplies stocked and coop clean.
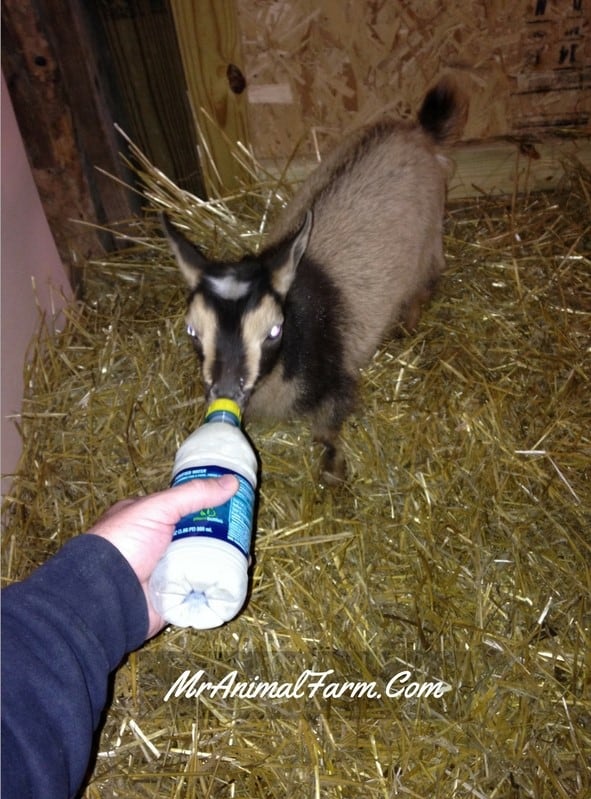
    Access The Organized Chicken Keeper Here

    The Buff Orpington Chicken

    By MrAnimal Farm

    Buff Orpington chicken looks side ways

    The Buff Orpington chicken is one of the best chickens you can raise. Whether you are experienced or just starting out, these gentle giants make wonderful additions to any flock.

    Buff Orpingtons come from a long line of Orpington chickens. They are dual purpose chickens, meaning they are both great layers and large enough to be meat birds. It is not uncommon for the roosters to grow to 10 pounds! This breed is docile; making them perfect for children who are interested in chickens.

    Buff Orpington chicken looks side ways

    [ez-toc]

    Everything About The Buff Orpington

    History and Origin

    The Buff Orpington is just one color of the Orpington line of chickens. The Black Orpington first appeared in South East England by William Cook of Orpington, Kent in 1886. He was intending to create a dual purpose chicken that would also hide the soot that plagued London at the time.

    Cook made this new breed by crossing Langshans, Minorcas, and Plymouth Rock chickens. Not too long after this, more colors came along. The original colors of the Orpington were:

    • Black
    • Blue
    • Buff
    • Splash
    • White

    What Do They Look Like?

    Orpingtons are quite noticeably large. Their bodies are bulky and stocky already and their thick plumage makes them appear even bigger. Lets dig a little deeper into the specifics of their appearance.

    Color

    The Buff Orpington is a stunning bird. Both hens and roosters are almost completely a yellowy tan color, hence the name "Buff". You will also find a bit of white along their chest and under side. The roosters hackle, saddle, and tail feathers may also have a small amount of darker brown to gold coloring.

    Feathering, Comb, & Wattles

    As we mentioned, Buff Orpingtons have a feather color of Buff with a bit of white. Their feathers are also quite fluffy. The fluff comes from a softer under coat of feathering. It is this coat that makes them so cold hardy.

    While the hens feathering is pretty tight and uniform across the body, the roosters have a bit more variety. Their hackle, saddle, and tail feathers are much longer and have a cascading look to them. Their plumage is meant to be visually appealing so they can more easily attract a hen for mating.

    The hens feature a medium sized single comb and matching, short, red wattles. Roosters still have a single comb but theirs is much larger with 5 spiked ridges. They also have longer, dangling red wattles. The combs and wattles of these birds look very similar to the Rhode Island Red.

    Size

    Orpingtons are a fairly large breed of fowl. The hens on their own are pretty big, usually weighing between 6 and 8 pounds. While the roosters can get to a massive 8 to 10 pounds!

    They often look even bigger due to how fluffy their feathers can be. A full grown rooster weighing 10 pounds can easily look like he weighs 12 to 15 pounds because of his feathering.

    There are some Bantam Orpington breeds, as well. Generally speaking, a Bantam breed is going to weigh about ⅓ of the full sized breed. So a bantam hen will weigh between 2 and 3 pounds with a Bantam rooster weighing around 2.5 and 4 pounds.

    Need some help keeping your chickens health and care taken care of? Check out the Organized Chicken Keeper for an easy to follow system.

    Breed Standard

    According to The Orpington Club in the UK, the breed standard is:

    Rooster

    Type

    The rooster should have a "broad and cobby" body with a curved back and rounded breast. Their saddle should have a bit of a rise to it with a "full hackle". Their wings should be small and held close to the body. Finally, the tail is shorter but still has a flow to it.

    Head

    The rooster should have a small head with a firm, curved beak, large eyes, and a single ridged comb. Their wattles should be rounded and of "medium length". The ear lobes should be "small and elongated".

    Hen

    The hen should possess many of the same physical characteristics of the rooster. Their features will be a bit more subtle and more "graceful" than those of the rooster.

    What Are They Like?

    We like to break this down into two sections; temperament (what they do) and personality (why they do it).

    Temperament

    These chickens are great to keep around if you live in a colder climate. They are extremely cold hardy because of their feathering. As long as they have a warm and dry place to take shelter, they will do great.

    The heat is a different story. Their feathers tend to make them overheat really easily in hotter climates. If you live in an area with extreme heat, they may not be a good match for you. They can do well in more mild climates so long as they have regular access to water and shade.

    Orpingtons enjoy to free-range and forage. A good portion of their daily nutritional needs can come just from foraging.

    If you notice a decrease in egg laying, it may be because they have gone broody. One of the biggest culprits for a broody chicken is when we leave eggs in the nest too long. Its best to pull them twice a day, if you can. When eggs collect in the nest, the hen's maternal instincts start to kick in and they go into brood mode.

    Personality

    Buff Orpingtons have the best personalities. If you want a loving and friendly chicken that doesn't mind being cuddled, you have found the right breed. They will not let you pick them up, they will sometimes come running to you when they see you.

    This characteristic is part of what makes them great with kids. They are very docile and patient. Meaning they will tolerate a lot of the playing that other breeds would find annoying. You will definitely notice a decrease in pecking with these guys.

    However, since they are so easy-going, they tend to be pretty low in the pecking order. More aggressive breeds will push them out of food and water supplies and just generally bully them. These chickens tend to do best with more gentle breeds.

    What Is Their Purpose?

    Orpingtons are recognized as a dual purpose breed. That simply means that they are both suitable for egg production and in use as meat birds. However, in recent years, they have also begun to be used as show birds.

    Up until very recently, they were considered endangered and on the American Breed Livestock Conservancy list. However, due to a combination of their size, egg productivity, and show ring appeal, many backyard breeders were able to bring them back to a healthy population number.

    Show

    Not just the Buff Orpington, but Orpingtons in general are now becoming part of the chicken show world. Their size and variety of colors makes them a fun and beautiful addition to show breeding. They join other breeds like the Polish, Ayam Cemanis, and Silkies as ornamental breeds.

    Eggs

    Buff Orpingtons are fantastic layers; laying large brown eggs. The breed was intended for high production and it really shows. A single hen can sometimes produce more than 5 eggs a week; that's 200 to 280 a year!! They are well suited to meet the needs of a full sized family.

    They join the ranks of great laying chickens alongside the The Buckeye Chicken, Sussex, or the Deathlayer.

    Meat

    Both the hens and roosters make great meat birds. The roosters average between 8 and 10 pounds full grown while the hens are a pretty big 6 to 8 pounds. This breed can more than cover your protein needs.

    Pets

    Last, but not least, these chickens make great pets. They are very gentle and peaceful birds. If you just want a few chickens in the backyard or you have young children that want to get into chickens, these guys make great companions.

    They also do well with other breeds of chickens. So, introducing new chickens to your flock is a fairly easy process.

    What Care Do They Need?

    You will definitely want to make sure you have all your bases covered in the care department. Making sure that your chickens have the right diet and a safe shelter will ensure a happy and healthy flock.

    Diet

    These chickens are pretty decent foragers. They love to silently peck around the barnyard or backyard in which they live. However, due to their laid back nature, they do tend to get picked on and pushed away from the chicken feeder .

    Because of that, they will sometimes stay close to the feeder and skip free ranging altogether. This can lead to a boost in your feed bill but also some health concerns over obesity.

    It is best to feed these guys on a schedule with a high quality layer feed. If you have a designated feeding area, make sure to spread the feed out enough that they can get their fair share.

    Other than foraging and feed, they just need access to a reliable, clean, and unfrozen waterer. Provide this by using one of the best chicken waterers you can find and knowing how to keep chicken waters from freezing if you live in a cold weather climate.

    Shelter

    Orpingtons do really well in captivity. They seem to have a "go with the flow" mentality toward life. If you were to keep a small flock of Buff Orpingtons in a contained coop and run, or a chicken tractor, they would be perfectly happy.

    The most important factors when setting up your chickens shelter are warmth, cleanliness, ventilation, and security.

    Depending on where you live, the winter can get pretty cold. Orpingtons fair pretty well, even in extremely low temperatures because of their feathering. However, it is good to make sure all of your chickens, assuming you have a variety of breeds, will stay warm in the winter.

    Chickens poop...A LOT! All of the chicken manure will build up over time if not kept clean. It is okay to let some manure build up a bit, it can actually keep the coop warmer when it composts. However, too much can become a major health hazard.

    One of those hazards can be mitigated by having good ventilation. That just means the coop will have a way for air to circulate in and out of the coop.

    No matter how large your chickens can get, they are still pretty low on the food chain. Even the biggest chicken is no match for a hungry raccoon or fox. A good shelter is one that is completely secure so that when the chickens are roosting at night, they can do so safely and without predator interference.

    Common Questions

    While researching this breed we came across a couple of reoccurring questions. Here are some of the more common ones we found.

    Q1. Are Buff Orpingtons good layers?/ What color eggs does a Buff Orpington lay?/ How many eggs do Buff Orpingtons lay?

    Buff Orpingtons are fantastic layers. You can expect to get 3 to 5 large brown eggs per week. That's between 156 and 260 eggs a year! And that's just from one hen. A flock can easily handle the needs of a family.

    Q2. Are Buff Orpingtons cold hardy?

    Buff Orpingtons do very well in the cold. Their size and dual feather coat keep them insulated and warm even in the coldest climates. On the other hand, they do not fair well in hot climates. That is likely due to the same reasons; their feathers and size keep them too warm.

    Q3. How can you tell if a Buff Orpington is male or female?

    You can tell the difference between a Buff Orpington rooster and hen in the same way you can tell most hens and roosters apart. Roosters are typically much larger than hens. Additionally, they will have larger and bright combs and wattles. Roosters tend to have bright and flashy colored hackle, saddle, and tailfeathers. Finally, roosters typically have large spurs on their feet.

    Hens are usually much smaller than roosters. They will typically be the same primary color as the rooster of the same breed just without the flashier hackle, saddle, and tail feathers. Additionally, if you see them either laying or sitting on top of an egg, it's probably a hen. You can get more details on hens here.

    Q4. How old are Buff Orpingtons when they start laying?

    You can expect to start getting eggs from your Buff Orpingtons around 6 months of age. They are generally past the juvenile stage of growing and full adults. This can vary a month or two in either direction but 6 months is the average time they will start to lay. If you're feeling impatient, you can look for some clues to when your hen will start laying.

    Q5. Are Buff Orpingtons loud?

    This is one of the more clam and docile breeds you will find. They keep to themselves, for the most part, and do not make too much noise other than the occasional rooster crow.

    Q6. What is the life expectancy of a Buff Orpington?

    Buff Orpingtons will generally live up to 8 years of age. This is assuming they live a relatively well kept life with plenty of food, water, shelter, and protection from predators.

    Q7. How much does a Buff Orpington cost?

    Buff Orpingtons are a pretty common breed of chicken. Therefore, they are not too terribly pricey. You can generally find chicks in the $3 to $5 range. Hatching eggs are even cheaper if you want to incubate your own chicks. We have had a lot of success with the large cabinet in this post about incubators.

    Q8. How high can Buff Orpingtons fly?

    Chickens, in general, are not really great flyers and Buff Orpingtons are no exception. Chickens are capable of short bursts of flight usually only a few feet above the ground. Buff Orpingtons, due to their size, are only capable of flying a couple feet high and not very long distances.

    However, keep in mind that a motivated chicken can fly higher if they need to. For example, if they see something they want to eat on the other side of your fence, they can easily fly over a 4 to 6 foot fence to get to it.

    Q9. Do Buff Orpingtons go broody?

    Buff Orpington Hens tend to go broody pretty often. You can help to keep their broodiness at bay by keeping their nesting box free of eggs as often as possible. Alternatively, if you want to try hatching eggs without an incubator, you can always try hatching with a broody hen instead.

    Q10. Are Buff Orpington Roosters aggressive?

    Buff Orpingtons are some of the more patient and calm chickens you will find. Their sweet and docile nature makes them a perfect breed for kids and beginners. All roosters can be territorial and aggressive. However, these roosters are some of the least likely to be overtly aggressive.

    Q11. Do Buff Orpingtons lay in the winter?

    Like most chicken breeds, Buff Orpingtons will show a slight decrease in laying during the winter months. This is more due to the shorter days and lack of sunlight than with the temperature.

    Conclusion

    The Buff Orpington is an all around great bird. They are gentle with you and the rest of your flock. Their egg production is right up there with some of the most productive chickens out there. Not to mention, they are gorgeous.

    If you want an all around great chicken to add to your flock, this is a great breed to go with!

    If you need more help with taking care of your chickens, check out The Organized Chicken Keeper for a complete system for managing their health through keeping their supplies stocked and coop clean.
    Access The Organized Chicken Keeper Here

    NPIP Certification - What Does it Mean & How to Get it?

    By MrAnimal Farm

    NPIP

    When we looked for our first chickens, it seemed a little strange, all the new chicken terminology. One thing we kept seeing NPIP Certification. But what in the heck does that even mean?

    NPIP stands for the National Poultry Improvement Program. Whether you just have a hobby flock, or are looking to breed learn how to ship chicks yourself it is essential to understand what this certification means so that you can make the right decisions for your flock.

    Keep on reading for the full details.

    Lots of Easter Egger chicks in a shipping box.
    [feast_advanced_jump_to]

    What is NPIP Certification?

    NPIP is short for National Poultry Improvement Program. The National Poultry Improvement Program is a program that all states partake in to help decrease the spread of disease in poultry.

    NPIP certification is a program which is voluntary for chicken breeders and flock owners. It provides testing and disease free certification for flocks.

    The diseases that can be tested for in the program are: Avian Influenza, Pullorum, Typhoid and MG. Although, you don't have to test for all of those diseases when participating in the program.

    The main disease testing in the program is Pullorum-Typhoid (both types of Salmonella).  However, participants can opt to also get tested for various types of Mycoplasm's as well as AI (Avian Influenza).

    This program applies to most all domesticated fowl: chickens, turkeys, emus, ostriches, waterfowl, gamebirds etc. Tests are only done on birds 4 months or older.

    Why Look for NPIP Certification?

    NPIP testing and certification is important to look for when you are purchasing chicks or older birds from someone.  It will not absolutely guarantee completely healthy birds, since it only tests for a handful of potential diseases.

    However, it does show that the birds are clean of these diseases.  It also shows a dedication from that breeder to produce healthy birds.

    It is also a very good idea for any chicken breeders that are planning on selling chicks.  First, it shows a commitment to potential buyers to have healthy birds.  It is also necessary in order to ship chicks into many states.

    Additionally, if your flock is certified, you need to only purchase from other certified flocks unless you fully quarantine new chickens and then test after a period of time before integrating with your existing flock.

    Need some help keeping your chickens health and care taken care of? Check out the Organized Chicken Keeper for an easy to follow system.

    How To Get Certified

    Although the actual disease testing is the same, the process for how to get NPIP certified does vary from state to state.

    Some states (like Virginia) run trainings for people to become NPIP testers.  Those testers then can test their own birds and set a price to go to other's and test their birds.

    Some states send a tester out when you request to become NPIP certified.  In order to find out about a particular states requirements you can look up your state's Department of Agriculture for specific details.

    You must have a flock of over 30 birds that are over 4 months in age. And, you must keep them separate/not introduce any non-NPIP stock (unless they are quarantined and tested first).

    How to do the Pullorum-Typhoid Testing

    If your state is one where you need to become a certified tester in order for your flock to be certified. Don't be nervous about performing the testing on your birds. It is really quite simple and is done annually to maintain your certification.

    NPIP Certification testing form.
    NPIP or Pullorum certificate

    1. You simply get a blood sample from each of the bird's on your property.  This is only done on adult birds over 4 months old.

    This is typically done with a special device with a sharp point on one side and a "blood loop" on the other.

    2. Find a vein on your chicken. It is easiest under the wing where the veins are thick and the skin is thin. Use the sharp point of the device and lightly prick one of the large veins.

    3. Use the "blood loop" to collect a small sample of blood. Use a cotton ball and apply pressure to the wound to stop the bleeding.

    4. Dip the "blood loop" into the antigen. If there is no reaction, other than color change, you're chickens are disease free. If you see what looks like large pepper flakes, you will need to report the findings and have a retest done.

    If you need more help with taking care of your chickens, check out The Organized Chicken Keeper for a complete system for managing their health through keeping their supplies stocked and coop clean.
    Access The Organized Chicken Keeper Here
    what is npip certification pinterest image

    In Conclusion

    Being NPIP certified is an important step to take for anyone who is looking to breed, sell and ship their chicks. But, it is also important for hobbyists to know about so that they can source their chickens (and other fowl) from reputable, disease free sources.

    Can You Freeze Mashed Potatoes? A Food Preservation Guide

    By MrAnimal Farm

    Can You Freeze Mashed Potatoes

    I recently asked myself, "Can you freeze mashed potatoes?" Because we found ourselves with an almost overwhelming amount of potatoes.

    mashed potaotes in freezer bags

    Can You Freeze Mashed Potatoes?

    Yes, you absolutely can freeze mashed potatoes.  They can be frozen and stored in the freezer for around a year without losing any quality.  Freezing mashed potatoes is very easy. It it also a great way to save time (all you have to do is quickly reheat them) and also money (since you can stock up when they are on sale).

    Recently, we were walking through the grocery store and we see they are having a HUUUUUGE sale on potatoes. Like a ridiculously good deal.

    So what do you do when you see a ridiculously good looking deal?

    You buy a ridiculous amount of potatoes, that's what you do. Like, to the tune of fifty pounds.

    bag of potatoes
    This times A LOT!

    We were already regularly freezing peppers, freezing rice, freezing eggs and many other foods, so we figured that you could probably freeze mashed potatoes also!

    So, why do we buy so many potatoes at one time?

    Buying in bulk is one of the easiest ways to keep a frugal lifestyle without making it feel like you are going without. If you catch a great sale, you can stock up on something you like and not pay more than you have to.

    (Here's waaaay more info on our frugal lifestyle and the benefits of a coupon stockpile)

    Another reason we buy and cook in bulk is because it will save a ton of time in the future. Sure, you have to put in some work up front, but it will save so much more time in the long run

    We worked on freezing mashed potatoes alongside freezing sweet potatoes and freezing cooked spaghetti squash. The entire process took about two days but we now have side dishes for a year!

    If you need more help getting your foods frozen, check out the Ultimate Freezing Food Guide for a complete quick start reference so that you can have a well-stocked freezer.

    Access the Ultimate Freezing Food Guide Here

    How to Cook & Freeze Mashed Potatoes

    The first thing you want to do is make sure you have everything you are going to need gathered together.  There aren't too many supplies you will need.

    What You Need:

    - potatoes (we used a bag at a time)
    - butter (we used about 2 TBS per Instant Pot batch)
    - Milk (we used between ½ - 1 cup per Instant Pot batch)
    - Instant Pot (or oven or microwave)
    - Freezer Bags (we like these - cheaper bags and non-freezer ones tend to let your food get freezer burn - yuck!)

    How to Cook & Mash Potatoes:

    1. Clean your Potatoes.

    Make sure to do this before you do anything else. It's super easy. Stick them under the faucet in your sink and scrub all the dirt off of them.

    glass bowl of washed potatoes

    2. Cut them into pieces.

    Once your potatoes are good and clean, it's time to start cutting them. Depending on the amount of potatoes you are cooking, you may need a lot of counter space for this.

    We cut each potato into four pieces. If you want to try and fit more into your Instant Pot, you can cut them smaller, but quarters worked well enough for us.

    Note: You can certainly cook them for mashed potatoes in a method other than the Instant Pot.  You can boil your potatoes then mash.  You can bake them in the oven then mash or cook them in the microwave then mash.

    Sliced Potatoes on a cutting board

    3. Prep the Instant Pot.

    After you have your Potatoes cut, put them to the side for a moment. It's time to get your Instant Pot ready.

    Just add 1 cup of water and then set the metal stand that comes with the Instant Pot in the bottom. This will keep the potatoes out of the water. You can also use a small vegetable steamer basket.

    4. Add Potatoes to Instant Pot.

    With your Instant Pot ready, you can now start adding your potatoes. I don't know if there is a recommended capacity limit, but we basically packed it as full as we could. One round could fit around 10 cut medium sized potatoes.

    Sliced Potatoes in an instant pot

    5. Set Cook Time.

    Once you are able to (just barely) get the Instant Pot lid closed, set it to 'Manual', and set the timer for 20 minutes.

    It generally takes about 10 minutes, give or take, for the Instant Pot to pressurize and then the 20 minute timer starts. Once the timer beeps do a quick release to depressurize.

    6. Remove Cooked Potatoes.

    After the steam has cleared you can safely remove the lid. Using a large spoon (or a pair of tongs or anything that's convenient) start to remove the cooked potatoes and put them in a large bowl.

    7. Mash Potatoes.

    Using a masher, start to mash the potatoes, adding in butter and milk as you go. We used 2 TBS of butter and ½ to 1 cup of milk depending on the amount of potatoes we had in each batch.

    Mashed Potatoes in a glass bowl

    This is really just a preference thing. Add as much or as little butter and milk as you like until it is at the taste and creaminess that you desire. If you like, you can start the next batch while this batch cools.

    How to Freeze Mashed Potatoes:

    1. Get freezer bags ready.

    Using a permanent marker write the date and food type on the ziplock bags.

    2. Fill Freezer Bags.

    Fill bags with 1 cup scoops of mashed potatoes.  You can certainly use bigger than quart bags and add more potatoes if you want.  We did 1 cup bags because we use 1 cup as a serving size which makes it really easy to just pull a bag out for each serving that we want to reheat to eat later.

    3. Flatten Bags.

    You'll want to make the bags easy to store.  So, once you have added your potatoes, you can flatten then out in the bag (this also helps to push any air out of the bags.  Once you have flattened them and gotten all the air out, you can seal the zipper on the bag.

    bagged mashed potatoes

    4. Stick them in the Freezer.

    Next step is to simply put them in the freezer! Easy as that.

    How to Reheat Frozen Mashed Potatoes:

    Reheating them is just as easy as cooking or freezing them.

    It is easiest to pull them out the night before you want to use them and let them defrost in the refrigerator over night.  Then when you're ready to eat them, you can pop them in a pot on the stove or into the microwave for just a few minutes until they have heated all the way through.

    But, if you forget to defrost, or don't have time, you can also reheat them straight out of the freezer.  You will just have to warm them longer.  You can still warm them in the oven at 350 degrees, in a pot on the stovetop at medium heat or in the microwave.

    Timing will depend on how much you are reheating.  With the 1 cup scoops, it takes about 5 minutes in the microwave and 10-20 on the stove and in the oven.
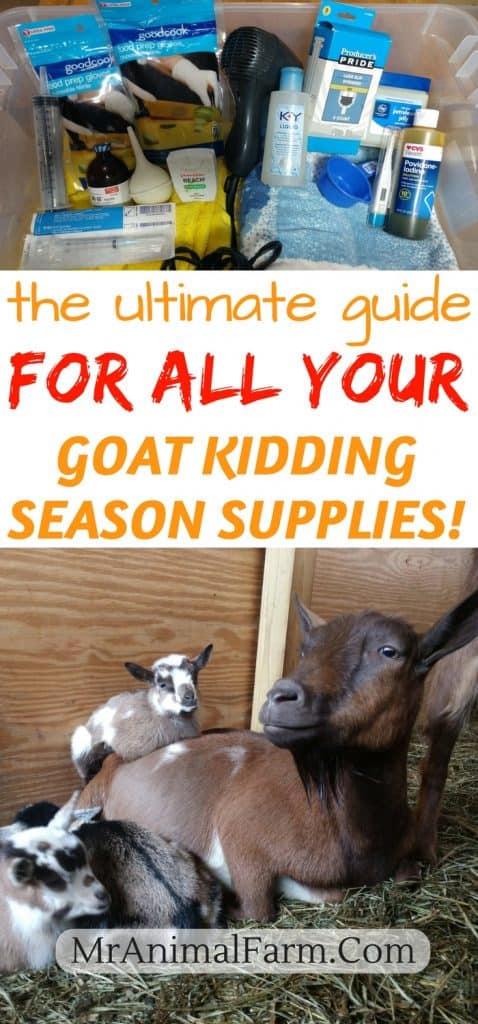
    FAQ

    How long do mashed potatoes last in the freezer?

    12 months or one year is best for optimal quality.  However, as long as they are kept properly frozen, they should stay safe to eat indefinitely.
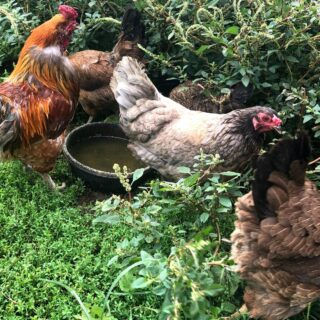
    If you need more help getting your foods frozen, check out the Ultimate Freezing Food Guide for a complete quick start reference so that you can have a well-stocked freezer.

    Access the Ultimate Freezing Food Guide Here


    Can You Freeze Mashed Potatoes  pinterest image

    Do you have any favorite meal prep routines? Let us know in the comments below.

    • « Go to Previous Page
    • Go to page 1
    • Go to page 2
    • Go to page 3
    • Go to page 4
    • Go to page 5
    • Go to page 6
    • Interim pages omitted …
    • Go to page 9
    • Go to Next Page »

    Primary Sidebar

    kristin, justin and goat

    Hey, we are Justin & Kristin! Welcome to MrAnimal Farm where we share our knowledge on homesteading, livestock and poultry, gardening and food preservation

    More about us →

    Popular Posts

    • Differences Between Ameraucana, Aracana and Easter Egger Chickens
      The Araucana Vs Ameraucana Vs Easter Egger Chicken
    • Chickens That Lay Green Eggs - What Chickens Lay Green Eggs
      Chickens That Lay Green Eggs - What Chickens Lay Green Eggs?
    • brooder box for chicks
      Chick Brooder Plans - How to Build a Brooder in 3 Steps!
    • Curled toes in Chickens
      Curled Toes in Chickens - Causes and Treatment
    • Goat Toys
      DIY Goat Toys: Cheap Toys to Keep Your Goats Busy
    • hen or roo
      How To Sex A Chicken & Tell A Hen From A Rooster

    Fall Homesteading

    • Fresh carrots and beets being held over a wooden table.
      15+ Fall Garden Crops For a Longer Harvest
    • Molting Chickens
      Molting Chickens - What, Why & How to help!
    • two butternut squash on a wood board
      Can You Freeze Butternut Squash ?
    • Goat Breeding Planning - Using ADGA to Make the Right Matches
      Goat Breeding Planning - Using ADGA to Make the Right Matches

    Footer

    Amazon Affiliate Disclosure

    We are a participant in the Amazon Services, LLC Associates Program, an affiliate advertising program designed to provide a means for sites to earn advertising and linking to Amazon.com. As an Amazon Associate we earn from qualifying purchases.

    Privacy Policy

    For details on our privacy policy click here.

    Copyright © 2026 · MrAnimal Farm