• Skip to primary navigation
  • Skip to main content
  • Skip to primary sidebar
  • Skip to footer
  • Site Index
  • Fall Homesteading
  • Shop
    • Profitable Homesteading System
    • Jumpstart Your Homestead
    • Organized Chicken Keeper
    • G.O.A.T. Herd Management System
    • The Ultimate Planner for Breeding Goats
    • Couponing for Beginners Planner
  • Nigerian Dwarf Goats for Sale
    • Nigerian Dwarf Goats
  • About

Mranimal Farm

All About Silkies, Nigerian Dwarf Goats & More

menu icon
go to homepage
subscribe
search icon
Homepage link
  • Site Index
  • Fall Homesteading
  • Shop
  • About
  • Contact
  • ×
    Home

    Blog

    Growing Strawberries

    By MrAnimal Farm

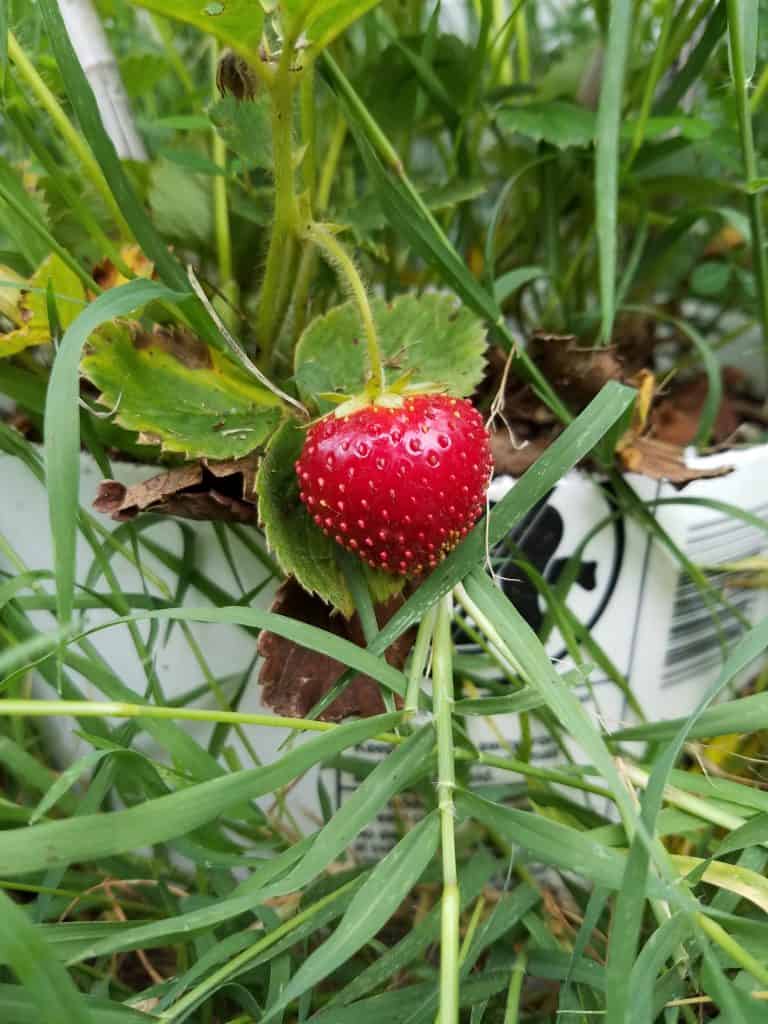
    growing strawberries featured image. close up of strawberry on plant

    I cannot tell you how excited we get when we find a great deal on fresh organic strawberries at our local grocery store (can you say BOGO?)! So we decided that we would probably be even more excited if we started growing strawberries in our very own strawberry patch!
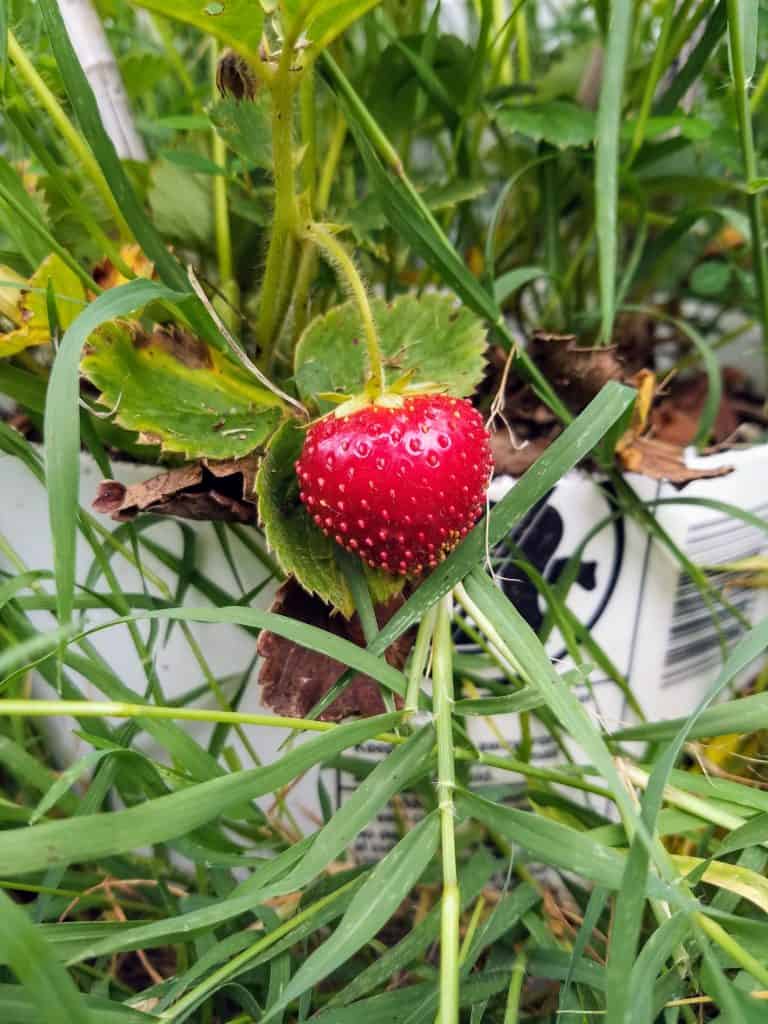
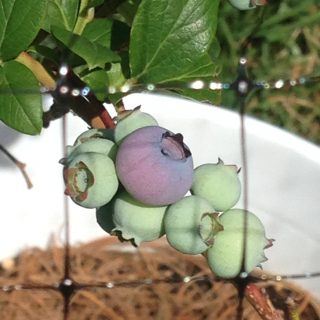
    growing strawberries featured image. close up of strawberry on plant
    ...

    Read More

    How To Plant Blueberries

    By MrAnimal Farm

    featured image for how to plant blueberries. closeup of blueberry bunch still on the bush.

    We love pretty much anything blueberry in our house; pancakes, smoothies, even just frozen or fresh blueberries for snacking. We knew that in order for us to continue our fruit addiction and not go broke, we just HAD to learn how to plant blueberries.

    How to grow blueberries?

    Blueberries is one of our favorites fruits. They are delicious, not too terribly difficult to grow, and the actual berry is too cute. Plus, you can use them in all sorts of recipes and freeze blueberries for use in the off season. They are similar in difficulty and process as growing strawberries.

    If you're new to gardening use the Ultimate Gardening for Beginners to find out about compost, planting times and so much more.

    They are portable, so you can grow them in a movable planter or use them as one plant in your much larger edible landscape. There are several different varieties of blueberries with many different strains within those varieties. We have a few Jerseys and Hurons which are part of a group called Northern High Bush Blueberries.

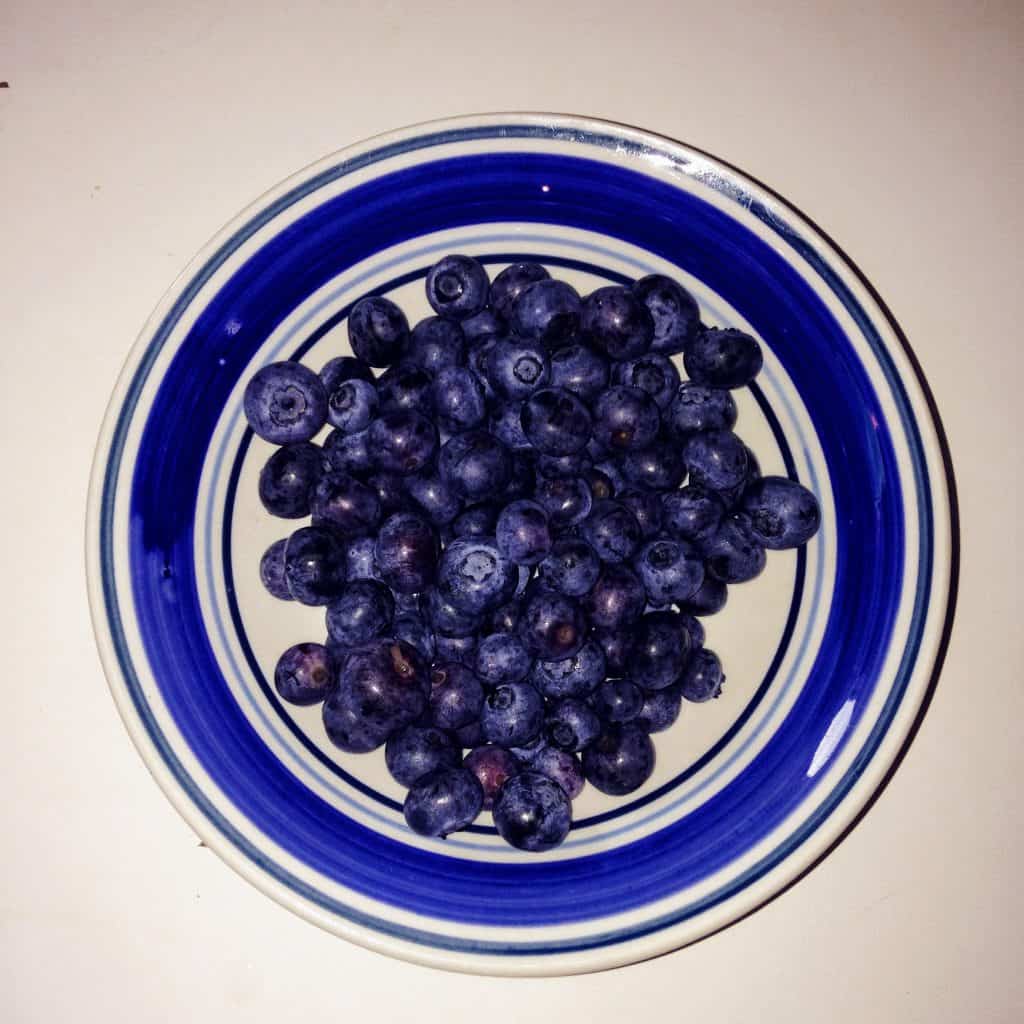
    bowl of blueberries

    How to plant blueberries

    Blueberries actually take many years to develop, mature, and produce fruit. Typically, you will start seeing berries after 3 to 4 years in age. You can start them on your own and grow them from seeds if you are willing to make that kind of time investment.

    What we have always done, and is not too terribly uncommon, is to purchase a started plant that is already around 2 years old. We prefer using this method because we are able to have the confidence that we are getting a strong and healthy plant that will start to produce fruit in about a year (also, we are impatient when it comes to our harvest).

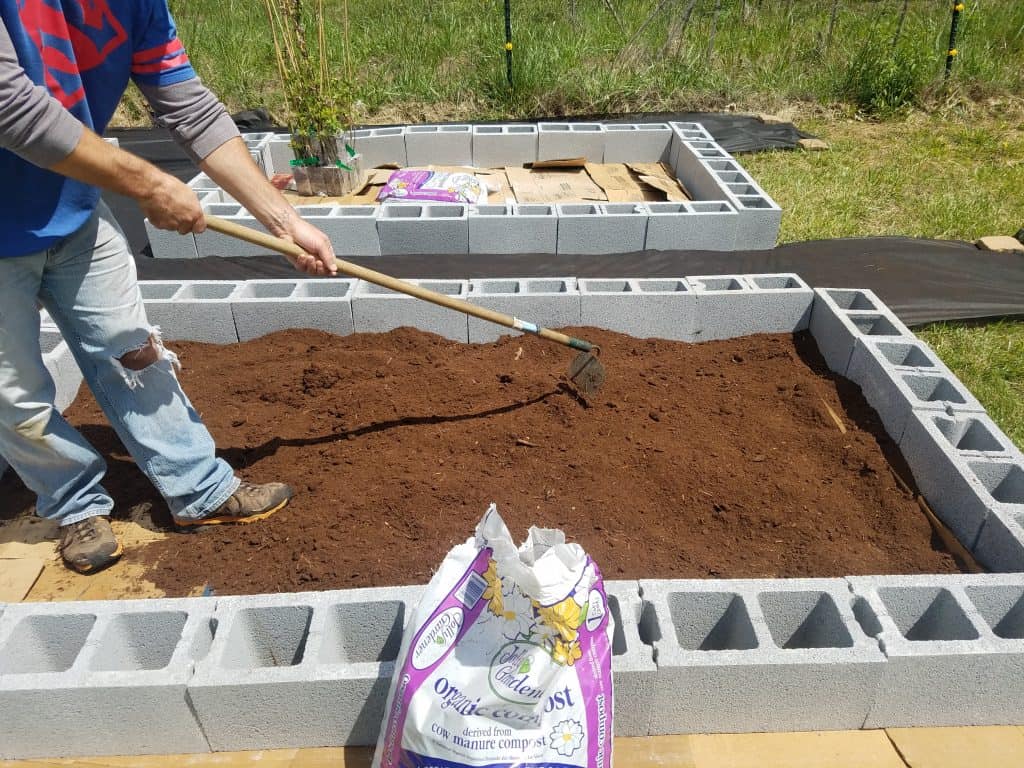
    adding and working soil in raised bed

    Where to plant blueberries

    Like we said, we like to order a started plant and transplant it directly into a container. Container gardening is perfect for these as you can then move them around. You can use a specially made fruit or vegetable container. We just used a food grade 5 gallon plastic bucket.

    If you go the bucket route, make sure it has plenty of room for drainage. We drilled holes throughout the bottom of the container so that water would not pool.

    In order to start your blueberries in a container, you will need a good healthy soil for it. Similar to when we learned how to grow blackberries and how to grow tomatoes, blueberries like a lot of acidity, so you will want a pH level of around 5.5. If your soil is not very acidic, you can add peat moss, or a peat alternative, to bring the level up.

    When we potted our bushed, we used a recommended soil mixture of ⅓ peat moss, ⅓ perlite, and ⅓ compost from our own compost pile. We have also, in the past, used an organic potting soil if we did not have a compost pile that was ready for planting.

    You can leave your plant in it's container permanently or you can move it into a more permanent planting location if you like. If you want to leave it in a container, be aware that your bush can become root bound. That just means, the roots have grown to a point that they can no longer fit the container. The bush growth will also start to decline.

    Once this happens, simply remove the plant from the container, gently and prudently trim the roots, and replant with fresh soil. Your plant will be back to normal in no time.

    Once the bush is strong enough we like to move it into one of our raised beds. Transplanting a blueberry bush is pretty simple. You will use the same soil mixture as if you were putting it into a container.

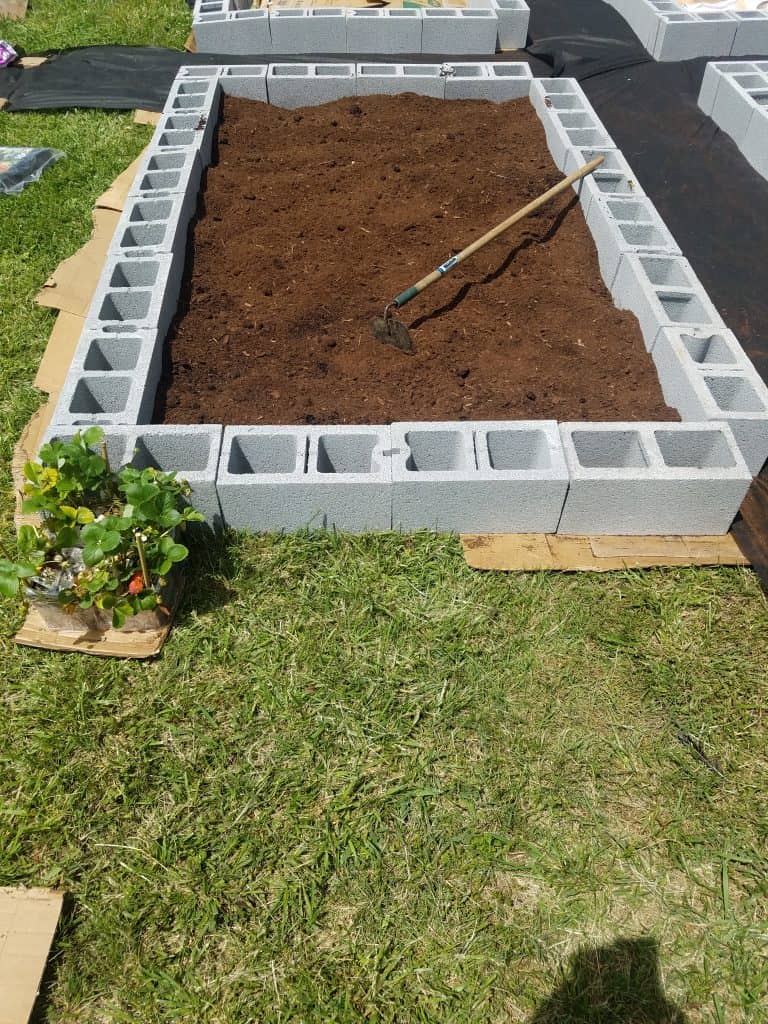
    raised bed ready to plant

    When you have a spot picked out, you will want to dig a hole that is about a foot wider and 6 inches deeper than the root ball. When then take the plant, gently squeeze the soil around the root ball to break it up and allow it to more easily spread in its new home, and place it into the hole. Cover the root ball with soil and gently pat the dirt to push out any air pockets.

    Follow this same process for each of your plants. We like to keep about 4 feet of distance for our blueberry bush spacing. This is a little close but if you keep them pruned, which we'll discuss later, they should be okay.

    How much sun do blueberries need?

    Blueberries are native to northern, more cool environments. Depending on your gardening zone, you will need to decide how much sun exposure your plants will need. In warmer climates, they will need shade in the heat of the day. In cooler zones, closer to their native climate, they can handle full sun throughout the day.

    When to plant blueberries

    You will want to wait until your blueberry bushes are in a dormant state before attempting to transplant them. This is typically in the colder months of the year. Typically, we like to wait until AFTER the last frost of the season. That way, they will become active pretty soon and they won't have to deal with any cold snaps.

    Blueberry bush care

    As we mentioned earlier, we plant our bushes a bit close but like to keep them pruned. Blueberries do not require a lot of pruning. Each new season, blueberry bushes will grow new branches from their base. The new branches will then start production, typically for the following two seasons.

    After the third season, you will see a decrease in production while younger branches have an increase. Take note of this cycle when planning your pruning strategy.

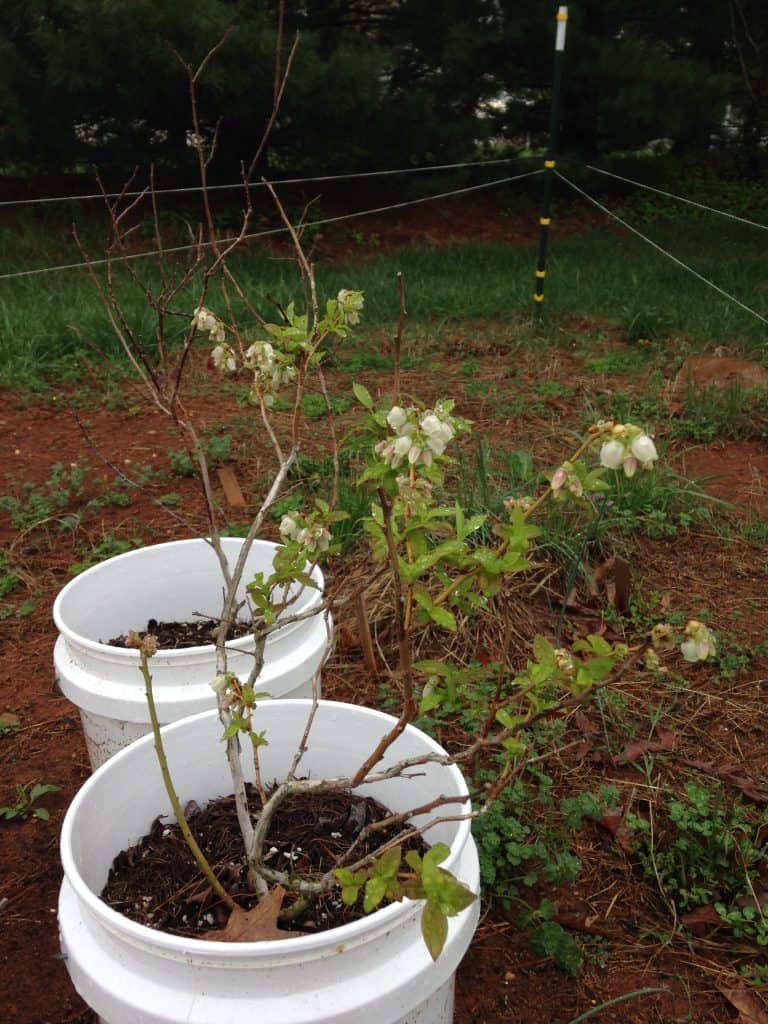
    blueberry bushes planted in buckets

    Essentially, you will want to prune the older, less productive branches, and leave the younger, more productive ones. Just be frugal with your pruning so that you don't prune any active buds.

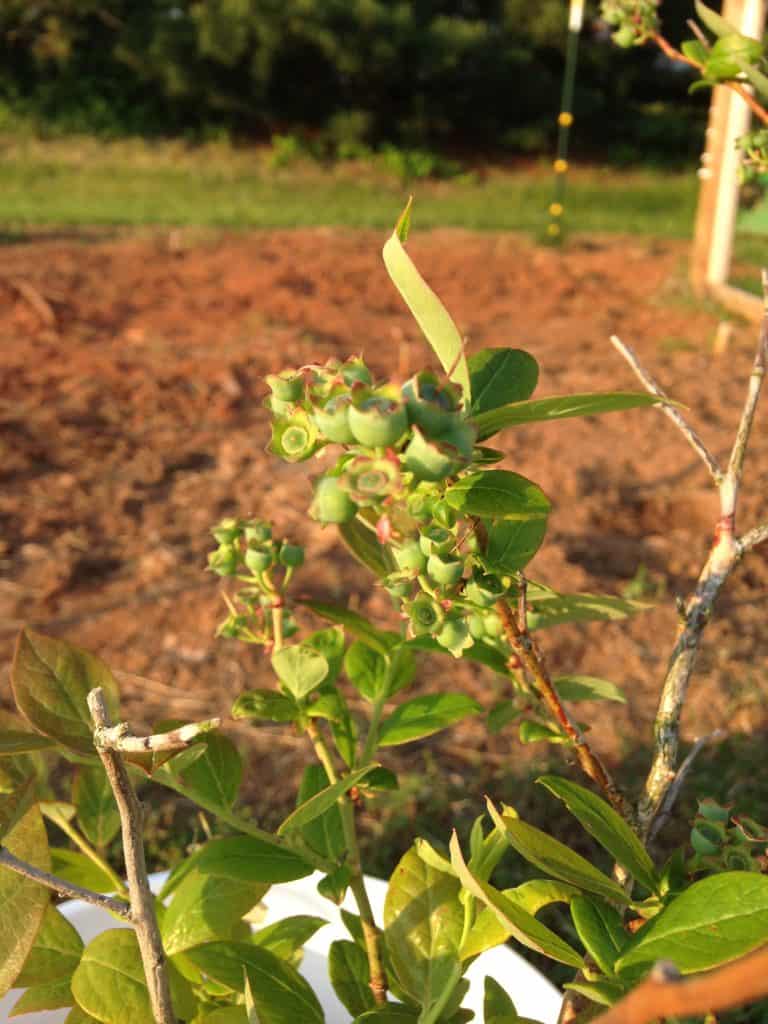
    close up of blueberries starting to bud on bush

    How long do blueberries take to grow?

    As we mentioned above, a blueberry bush will typically take about 3 or 4 years to mature and start producing fruit.

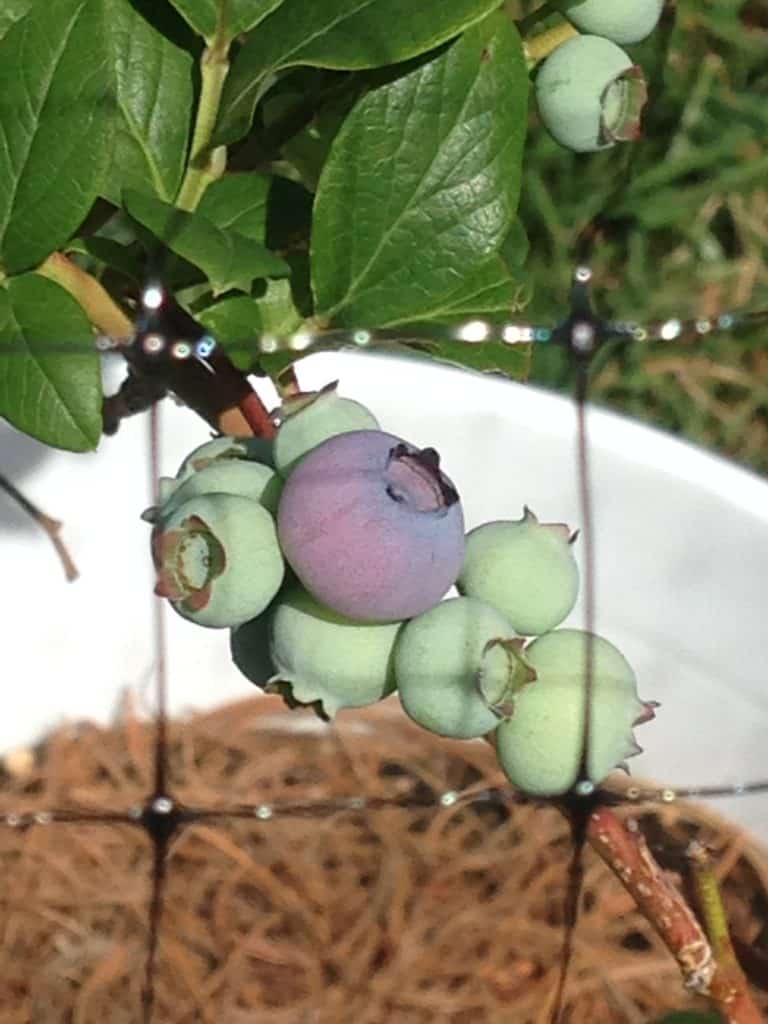
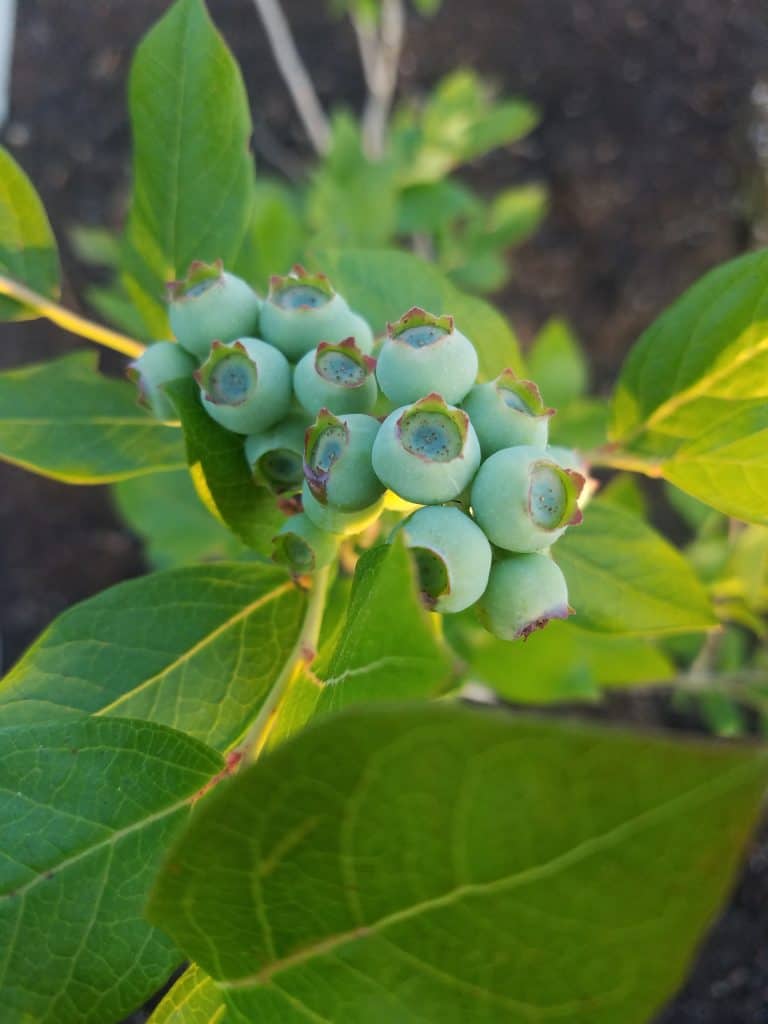
    close up of blueberry bunch on bush

    When to pick blueberries

    Wait until the berries are a deep color blue. you should be able to gently pull them from the plant without having to use much pressure at all.

    If you're ready to get your gardening off the ground you need to try out these easy and productive crops for beginner gardeners.

    pinterest image of bluberrie bush. Text reads, "how to plant blueberries in your own backyard!"

    For more gardening tips

    [pt_view id="5f37129sdf"]

    How To Grow Peppers

    By MrAnimal Farm

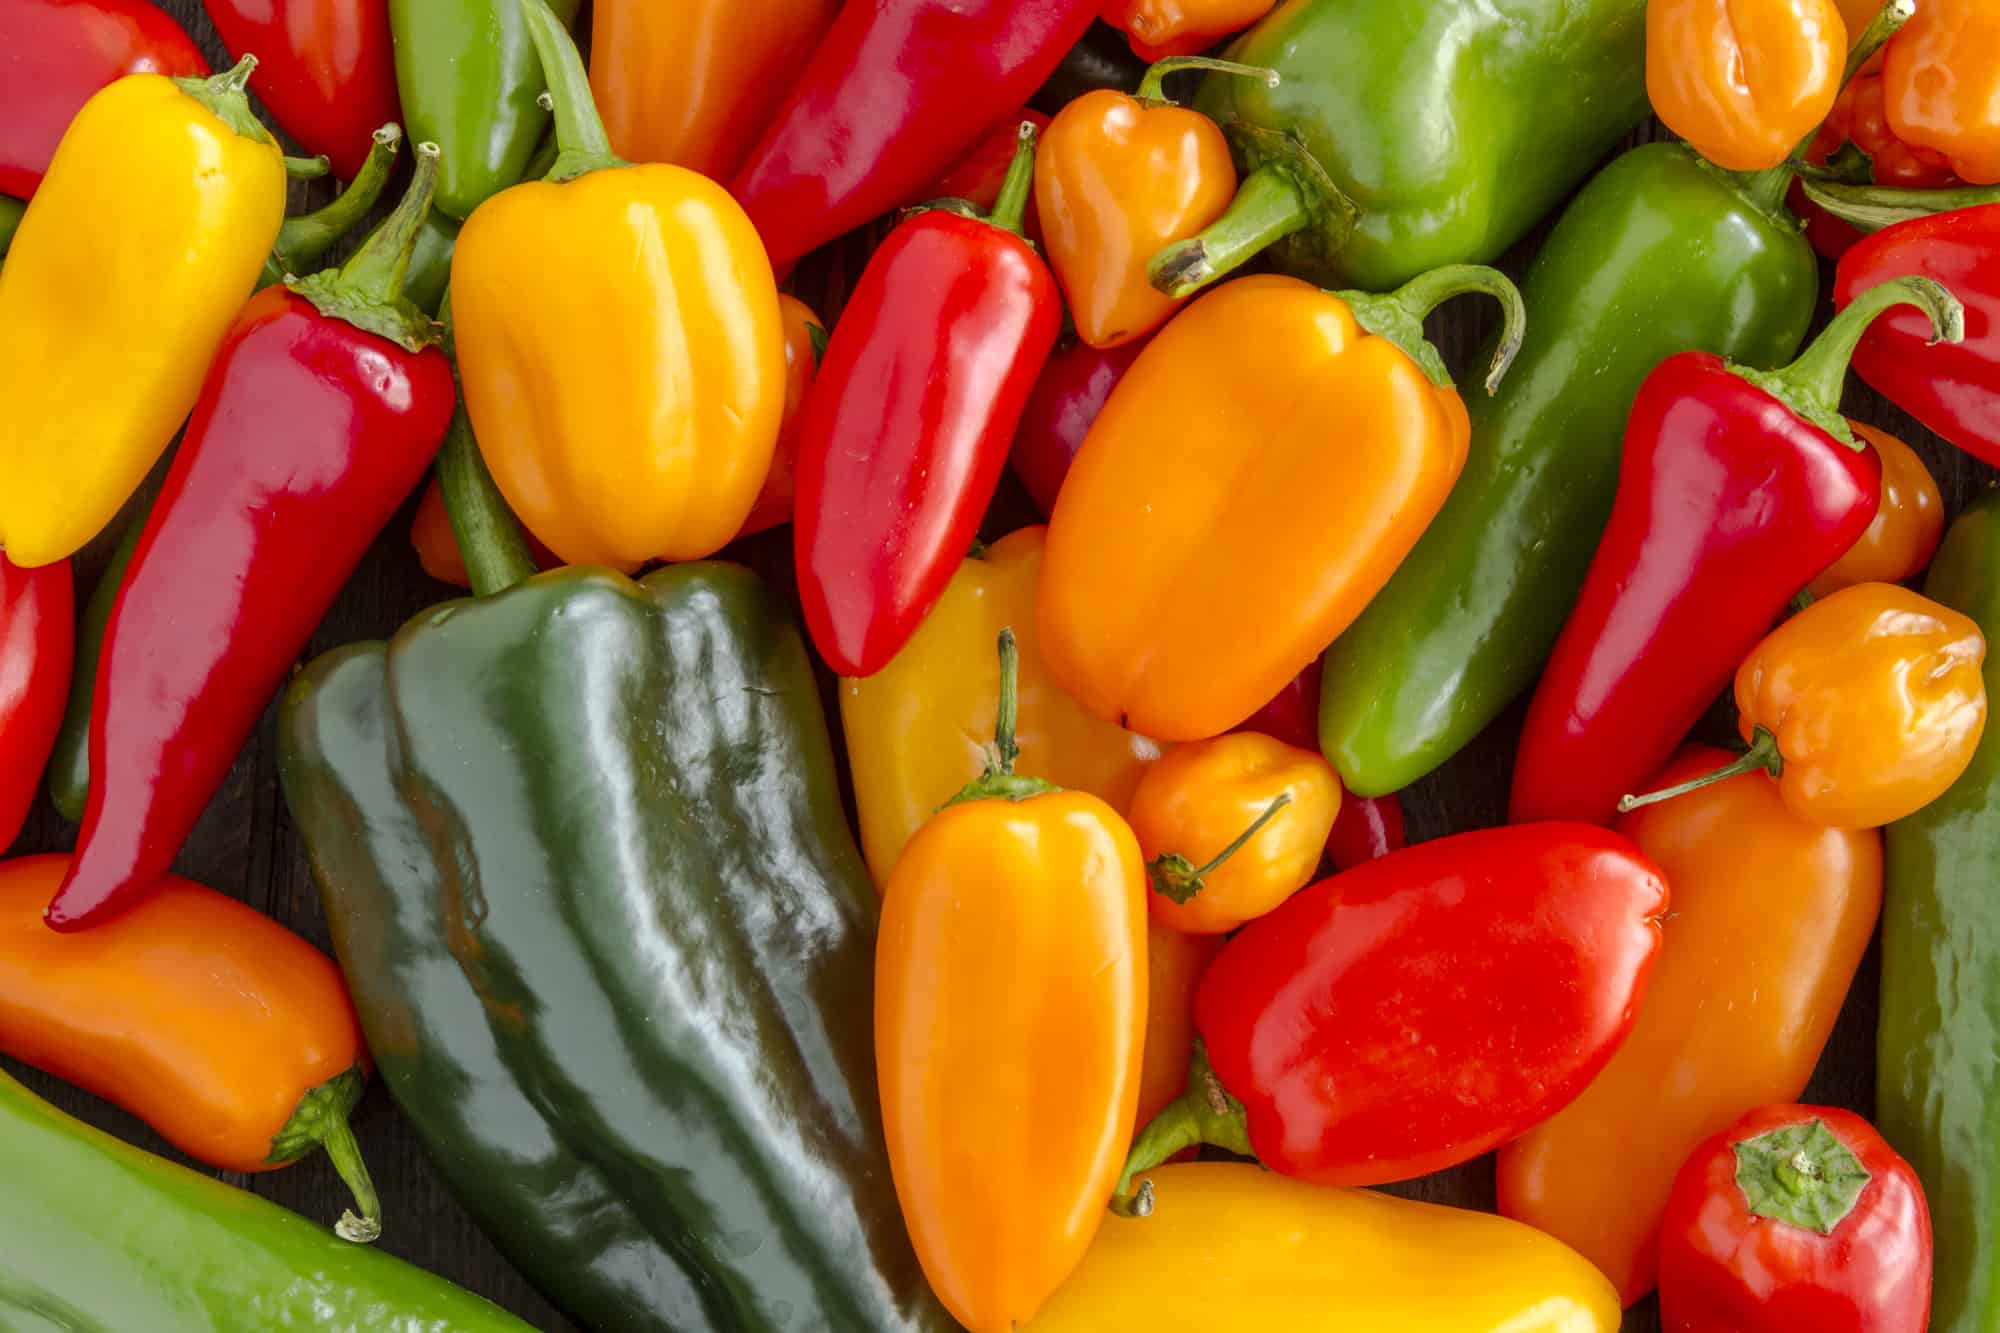
    Assorted colorful varieties of hot and sweet peppers

    If you love to have a little extra kick in your homemade foods then you have GOT to learn how to grow peppers! They are delicious, prolific, and easy for gardeners at any level of experience and skill.
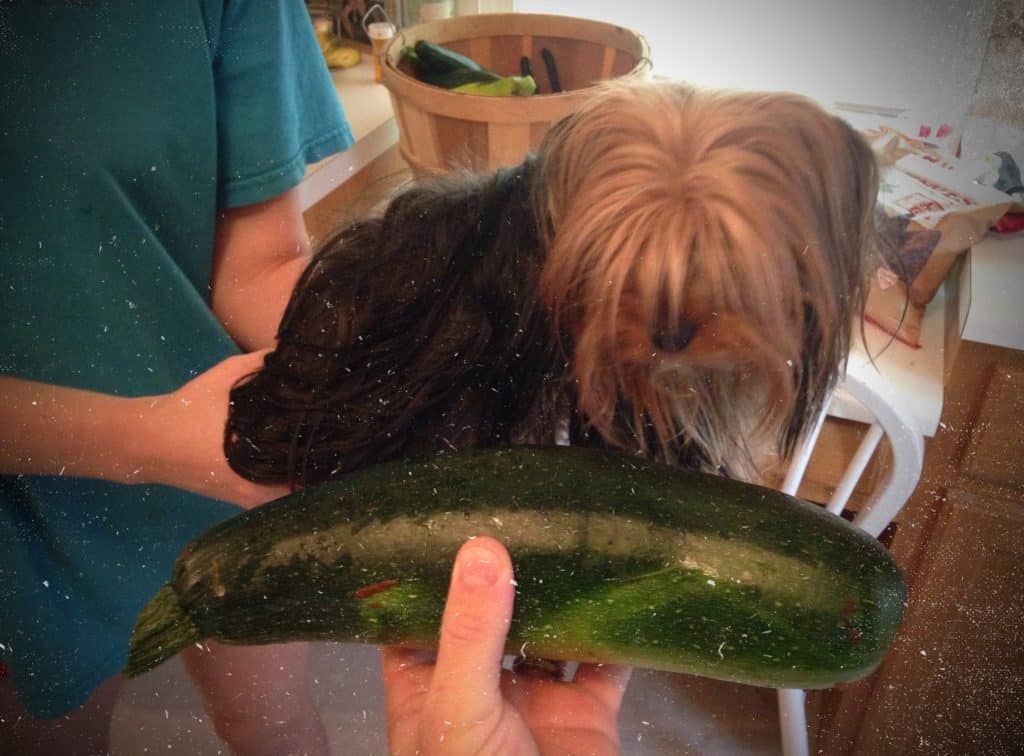
    Assorted colorful varieties of hot and sweet peppers
    Assorted colorful varieties of hot and sweet peppers piled on top of wooden table from above

    How easy is it to grow peppers?

    Peppers are probably the easiest plants we have ever grown. Growing peppers does not require anywhere near the attention it takes when growing green beans. And they are even easier than growing zucchini or growing yellow squash.

    This is what makes them an easy and productive crop for novice gardeners. They are a ton of fun, fast growing vegetable, and some types even qualify for our unusual vegetables category.

    They don't need a trellis. They love sunlight. They can handle a lot of heat. They don't even require a ton of water. If there was ever a "set it and forget it" type of crop, in our opinions, it would absolutely be peppers.

    One thing that is up for debate: are peppers a fruit or a vegetable? But that doesn't really affect how they are grown.

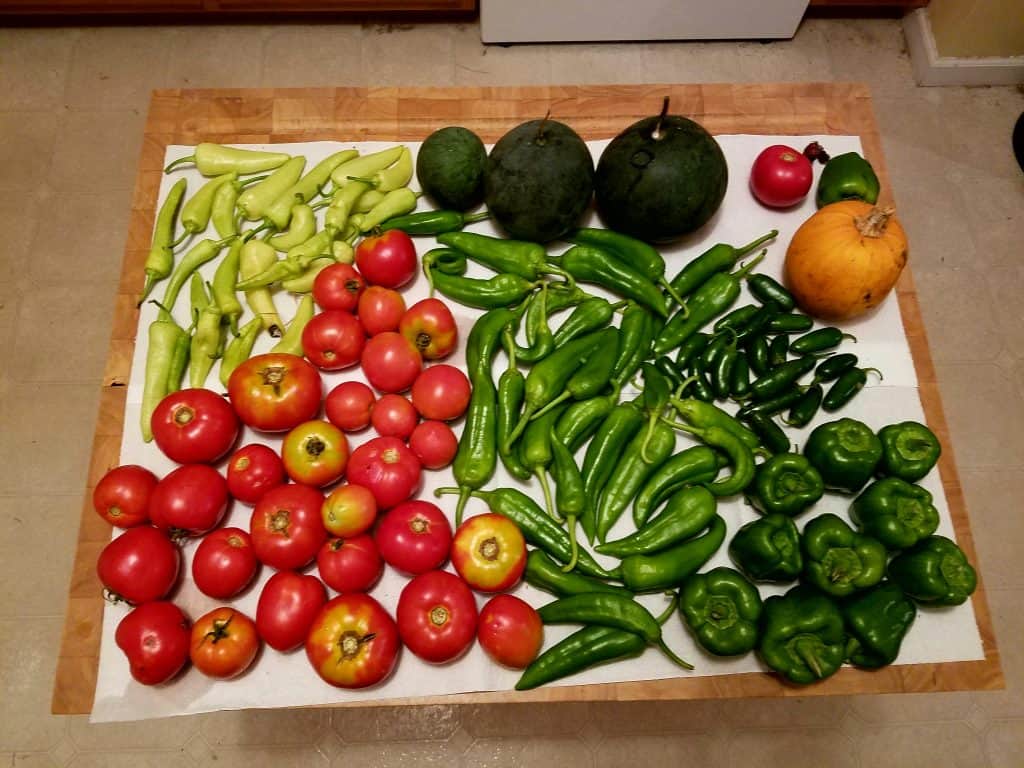
    a variety of harvested peppers, tomatoes, winter squash, and a pumpkin

    How to grow peppers

    So, how do you grow peppers at home? First you will need to figure out what types of peppers you want to grow. The techniques used in planting peppers are mostly universal with only a few variations. That means you can use this guide whether you want to learn how to grow bell peppers, how to grow green peppers, or how to grow hot peppers.

    We were able to find all of our seeds online. We like to only grow organic and non-GMO plants so we find it easier to shop online for our seeds. You may also be able to find organic and conventional seeds at your local farmer's market, farm store, and sometimes even the grocery store.

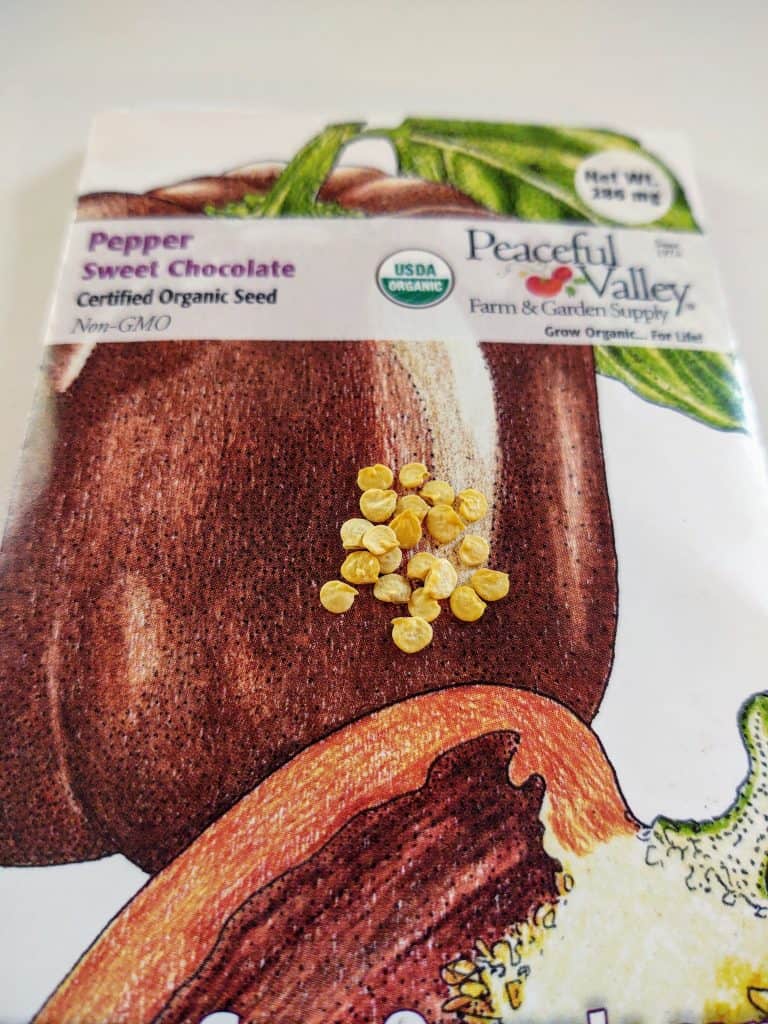
    sweet chocolate bell pepper seed packet with seeds on top

    When to plant peppers and how to plant peppers

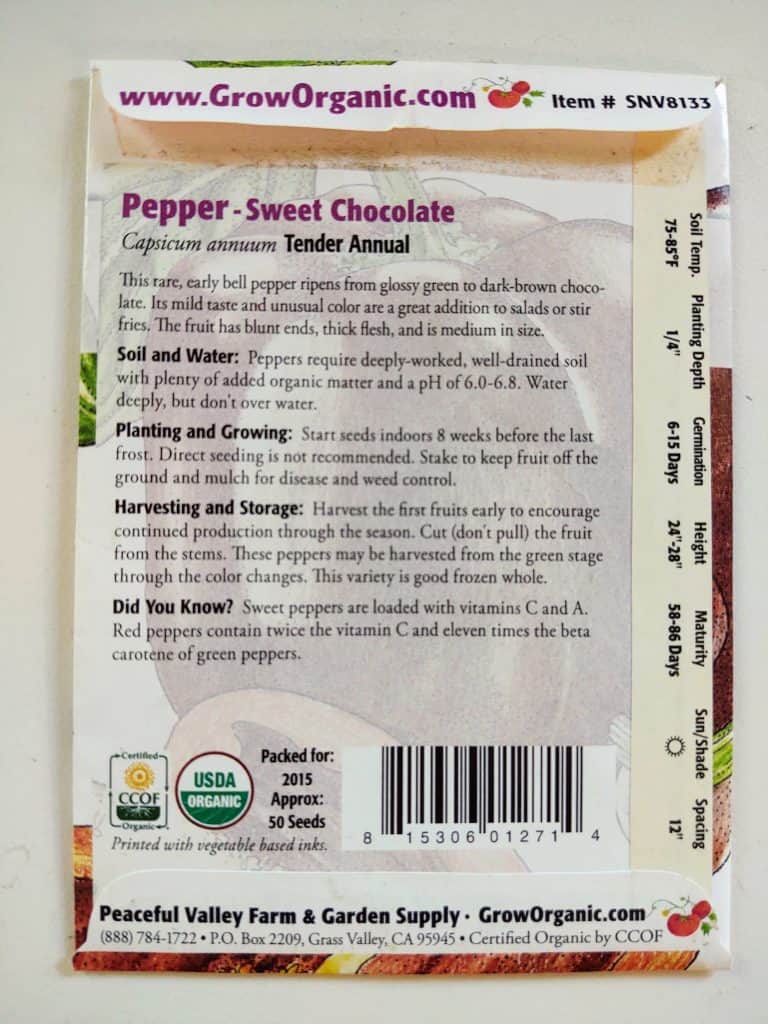
    You can almost always find planting and care instructions on the back of your seed packet. If you don't have them, you can always bookmark this handy guide.

    back of seed packet with instructions

    First thing to do is figure out your gardening zone so you can make a full gardening plan. This will help you determine when to plant your peppers. The reason you will want to know your gardening zone is so that you can start your peppers 8 weeks BEFORE the last frost of the season.

    It is best to start plants inside and transplant started plants later. Starting inside is pretty simple. All you really need is a light source like a window or hanging lamp, organic potting soil and starting trays. It is not recommended to direct sow peppers.

    How far apart to plant peppers

    When you bring your plants outside, you will want to stake them. This will keep your peppers off of the ground and help the plant grow tall, healthy, and help in disease control. Bell pepper spacing and jalapeno pepper spacing are both about 1 foot apart. Anaheim peppers are about 1 to 2 feet apart.

    Square foot gardening for peppers

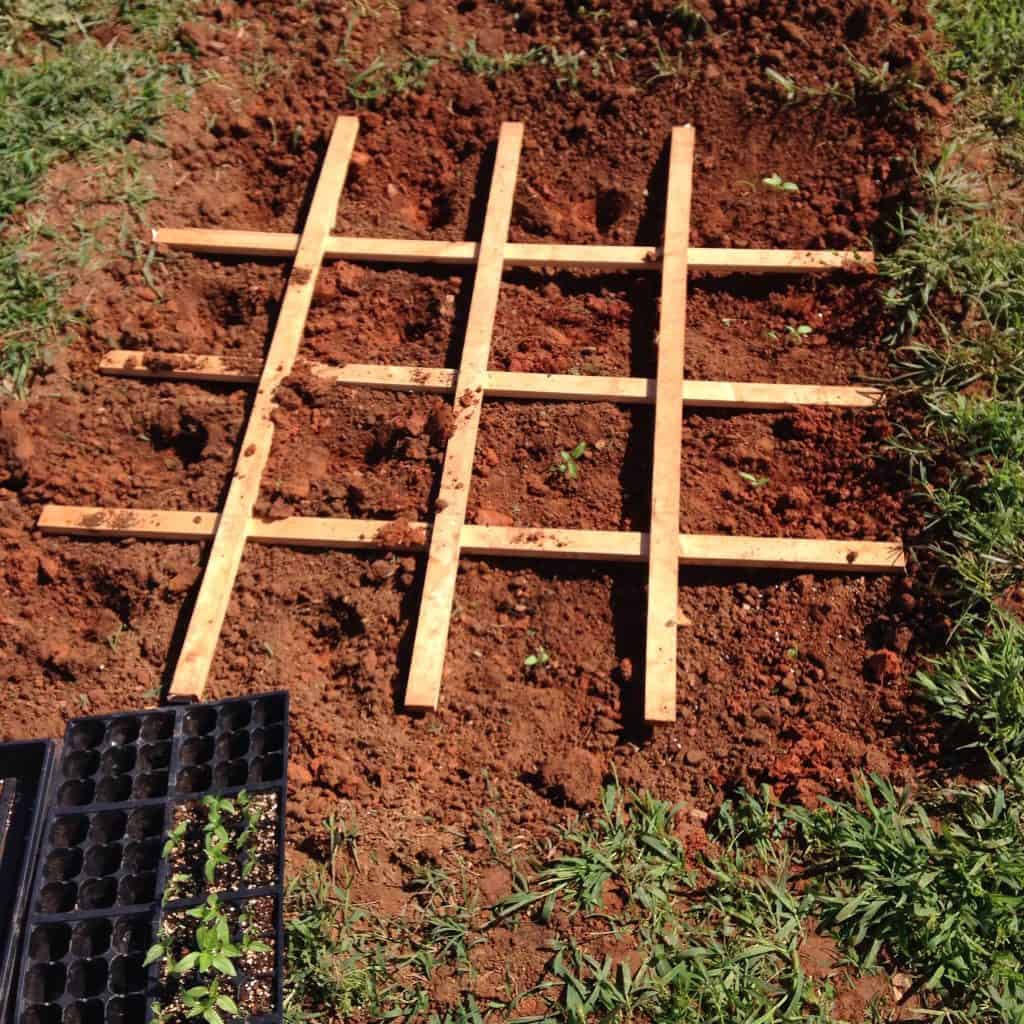
    We use square foot gardening for peppers to make the spacing really easy. Each box in our grid is 1 square foot. That means when we are planting, we just put 1 plant in the center of each box for bell peppers or jalapenos. For Anaheims, you can do the same or simply skip a box if you go with 24 inch spacing.

    square foot gardening grid

    You will want to make sure that you have deeply watered soil but you do not want to over water your peppers. Peppers typically come from arid climates and don't need much overhead watering.

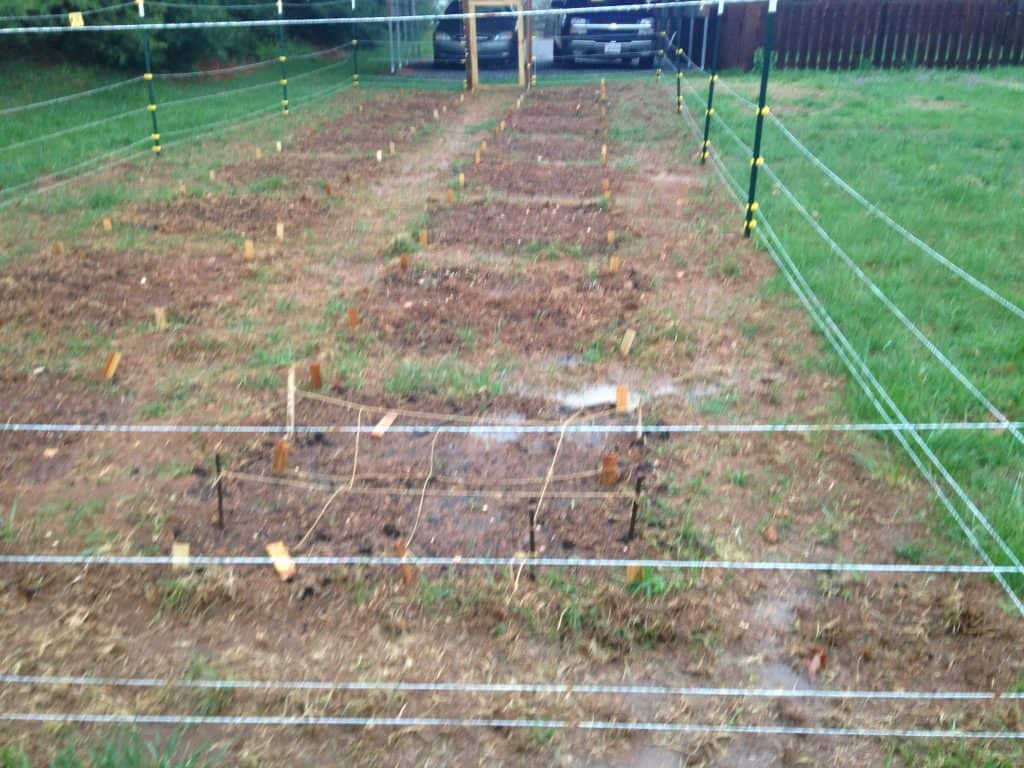
    garden tilled and ready for planting

    How long does it take to grow bell peppers?

    The germination time for bell peppers and jalapeno peppers is about 6 to 15 days or 1 to 2 weeks. Anaheims are a little slower growing and they range from 2 to 3 weeks.

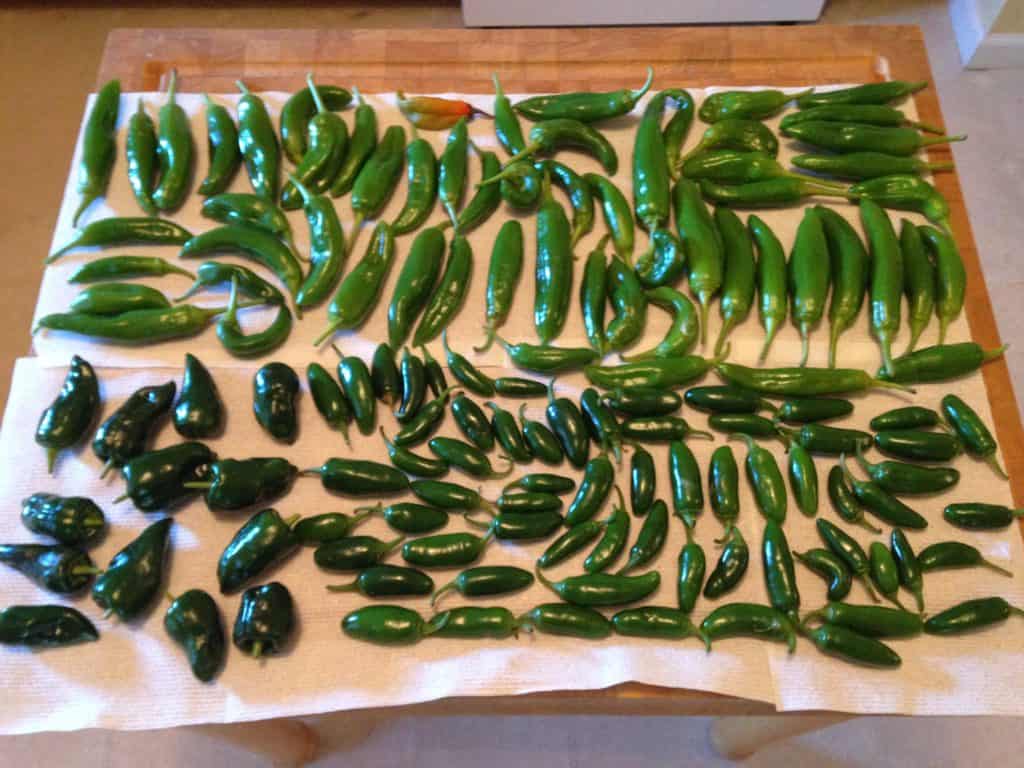
    a variety of harvested peppers; including anaheim, jalapeno, poblano, and banana peppers.

    When to harvest peppers

    The best part of having peppers is when you can finally harvest them. Each plant will have a slightly different maturity time frame.

    Bell peppers will reach maturity between 58 and 86 days. Jalapeno peppers will reach maturity around 72 days. And Anaheim peppers will reach maturity as long as 80 days.

    You will notice they are ready by their size and color. Bell peppers will typically grow to be about the size of a tennis or baseball. Jalapeno and Anaheim peppers can both be harvested and eaten in their green stages but will become hotter as they mature into a bright shade of red. This is especially true for jalapeno peppers.

    Once you bring them inside, you can use them to make all sorts of recipes. You can even try out freezing peppers and preserve them for later.

    Do peppers regrow after picking?

    The varieties of peppers in this guide are great because they will regrow after they have been picked. The secret to this happening though is in the way in which they are harvested. It really is easy to do, so don't worry.

    When you notice your peppers are ready to pick, simply grab the pepper and snap them off of the stem. But make sure the stem stays attached to the plant. This will encourage your plants to regenerate another pepper in its place.

    pinterest image of anaheim, jalapeno, and chocolate pepper seed packets. Text reads, "How to grow peppers the easy way. Start now."

    For more gardening tips

    [pt_view id="5f37129sdf"]

    Growing Green Beans

    By MrAnimal Farm

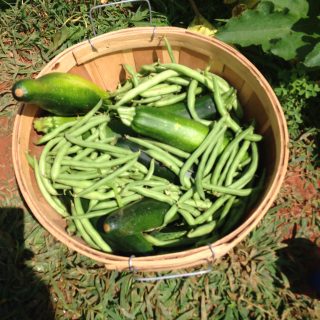
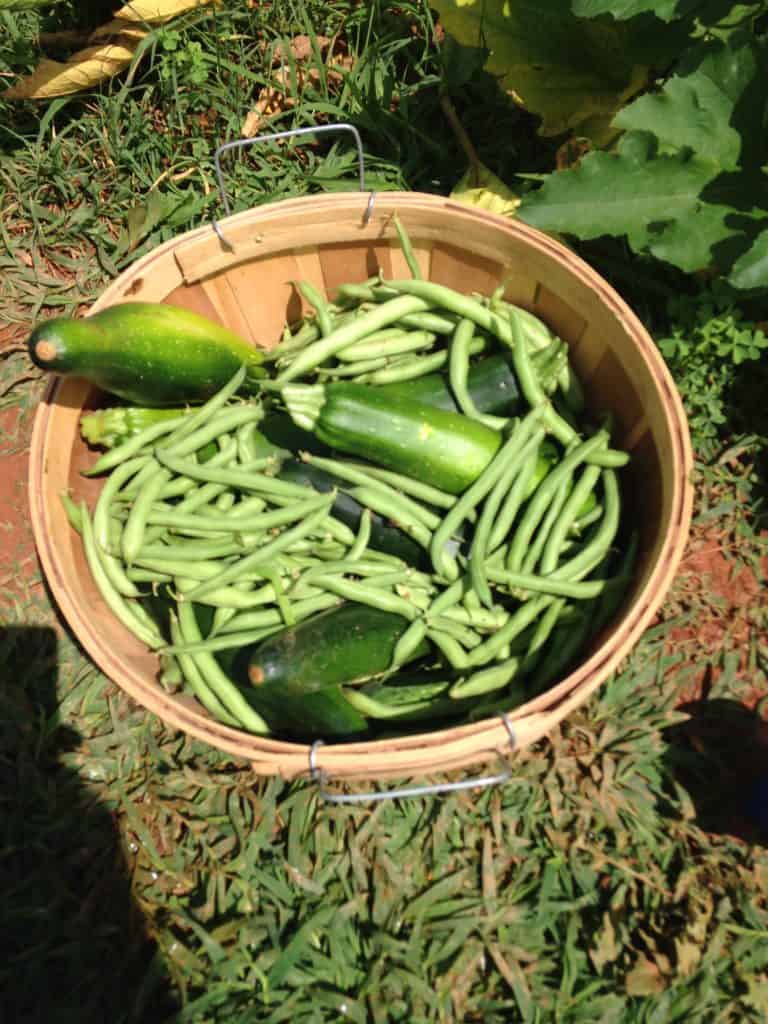
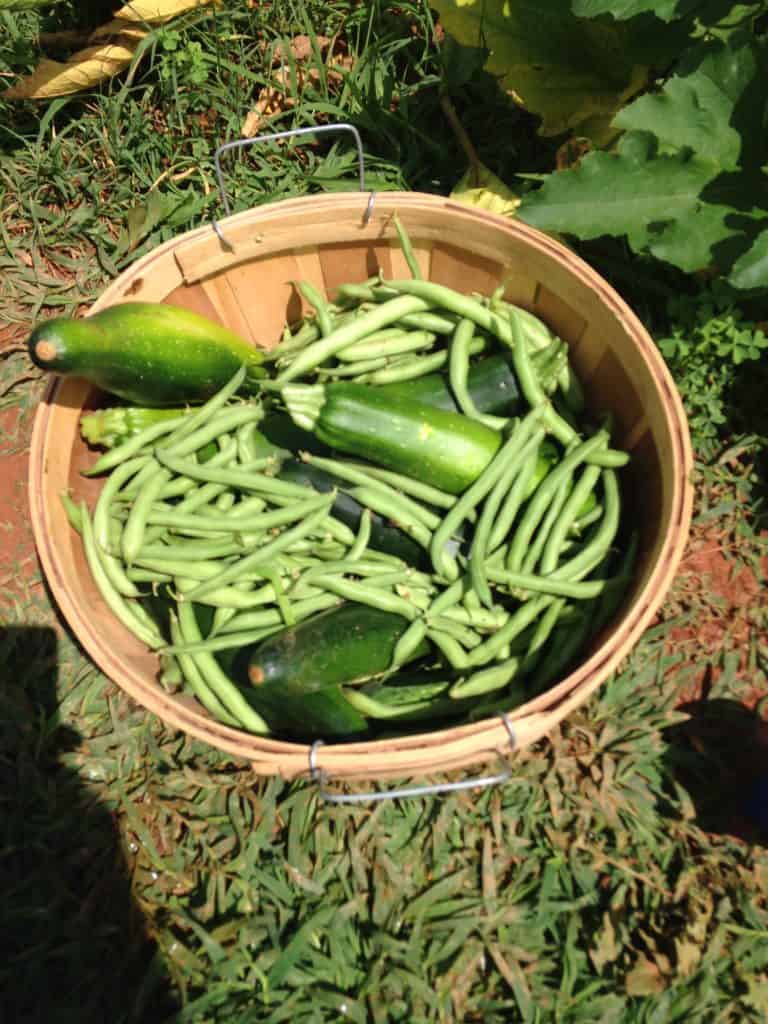
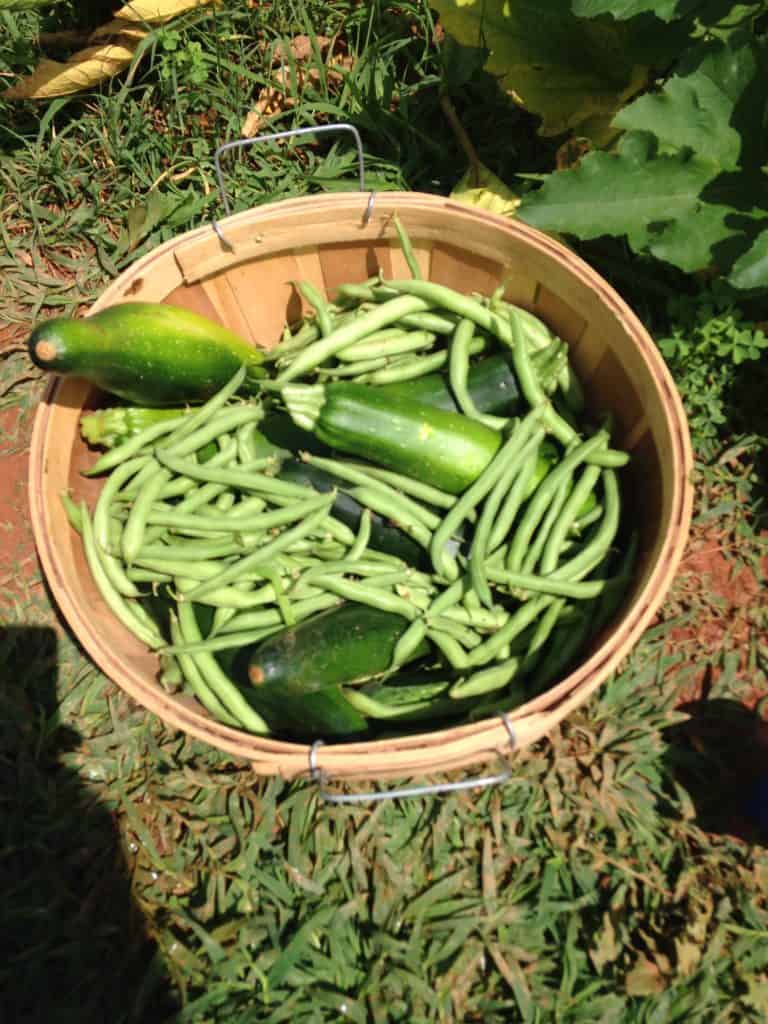
    featured image for growing green beans. harvest basket full of green beans with a few zucchini.

    If there is one staple in almost every large dinner we, or our families, make it is some form of dish involving green beans. So, naturally, we wanted to learn everything we can about growing green beans.

    featured image for growing green beans. harvest basket full of green beans with a few zucchini.

    Green beans are a bit different than growing zucchini or growing yellow squash. For one, there are several different varieties that vary in plant size and growth. For instance, there are many types of green beans that extend vines. These green beans need a trellis.

    The specific green beans we like to grow are called bush beans. They are a bit more compact and do not require a trellis.

    Are green beans easy to grow?

    Like all gardening, there is a good amount of physical labor involved. There is also an alternating watering pattern that is a little different than other crops.

    Green beans require light watering when you plant them. You then increase that to a moderate amount of water when you notice them starting to flower. And then you change once again to heavy watering while you are harvesting. You also want to make sure you are not watering them overhead as that can promote disease within the plants.

    Also, with green beans, you are planting, watering, harvesting, and replanting several times throughout the season. This may sound like a lot of work. It isn't super difficult, but it does require a bit more attention and planning than other "set it and forget it" type of crops like these easy & productive crops.

    Like with any of your crops, you will need to have a plan to deal with pests. One big pest for green beans is beetles. You will want to learn how to get ride of beetles.

    If we had to rank difficulty of growing green beans, we would say the are maybe a medium level of difficulty. But still definitely something a beginning gardener can handle with some attention.

    Plus, you can likely get a large enough yield that you will want to learn how to freeze green beans and preserve them for off season. We like to stock up to make yummy things like Green Bean casserole year round.

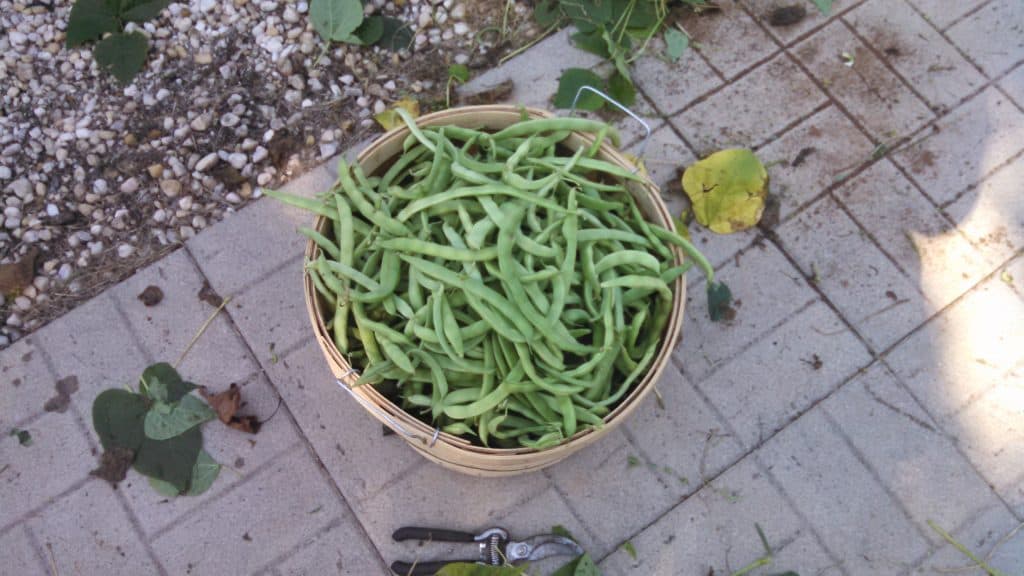
    harvest basket full of green beans

    How to grow green beans

    You will first need to get your seeds. You can do this at pretty much any farm store, some grocery stores, farmer's markets, or online. We prefer to grow organic so we almost always order organic seeds online.

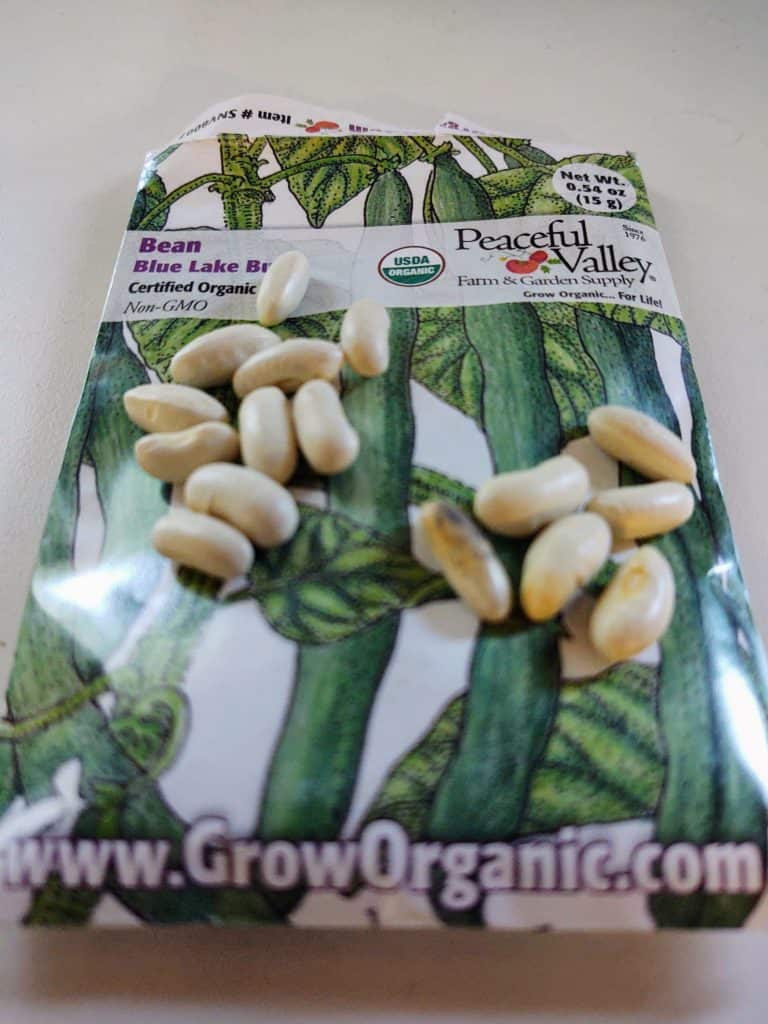
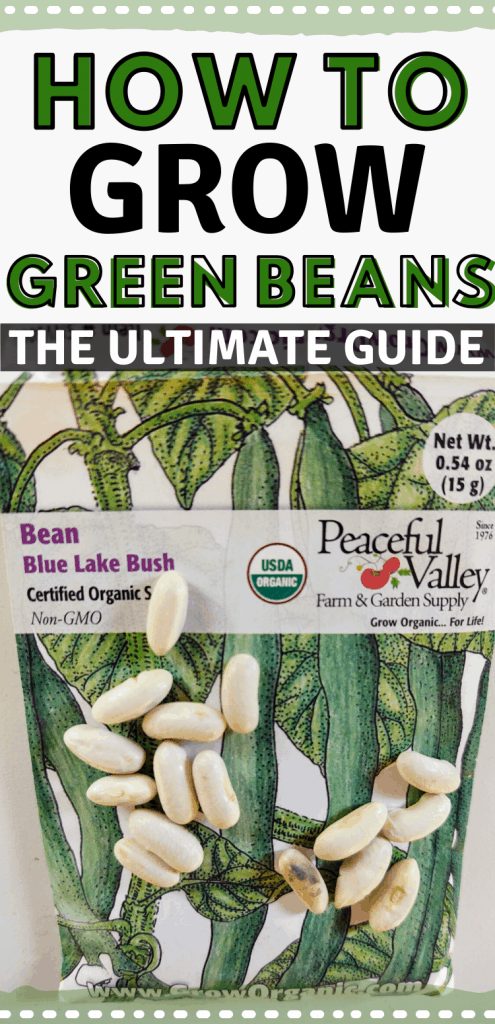
    packet of green bean seeds with seeds on top

    How to plant green beans

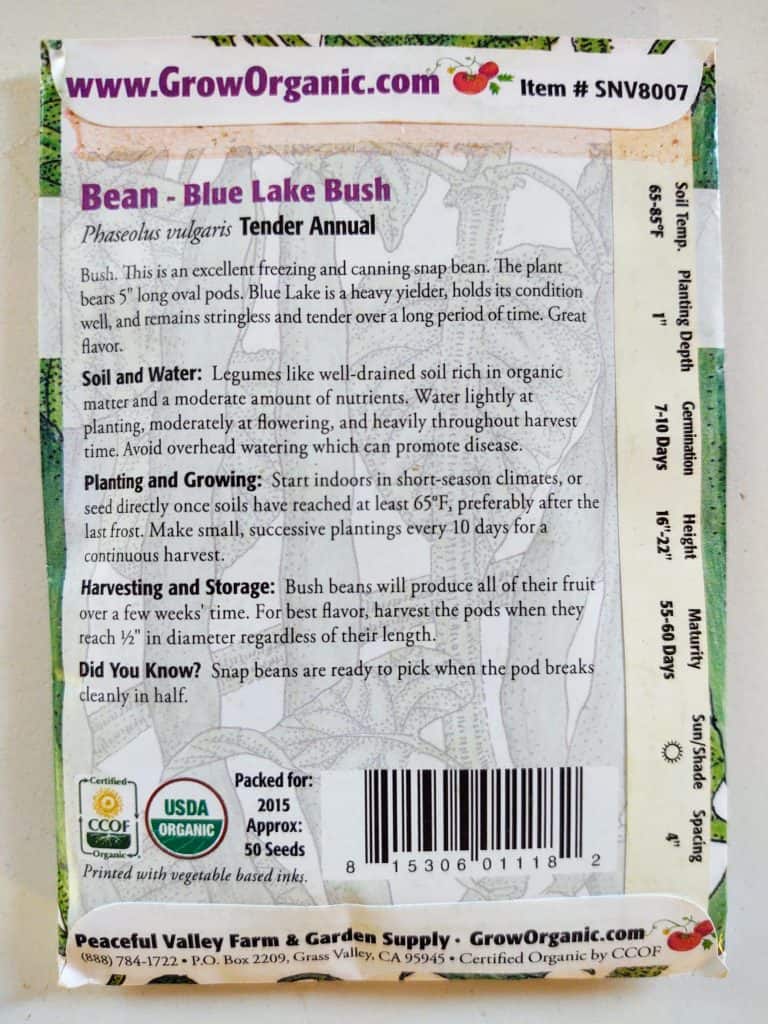
    You can most likely find specific planting and care instruction on the back of the pack. If for some reason your seeds do not, you can always use this guide as a great reference.

    back of seed packet with planting and care instructions

    You will want to figure out what gardening zone you live in. That will definitely help you when making your gardening plan as well as help you determine if you should try to start your green beans inside or directly sow them into your garden.

    It is only recommended to start green beans inside if you live in a short-season climate. If you are able to start inside, all you need is a light source, organic potting soil and starting trays. If you do not, then you will want to wait until after the last frost and sow once your soil is above 65 degrees in temperature.

    How far apart to plant green beans

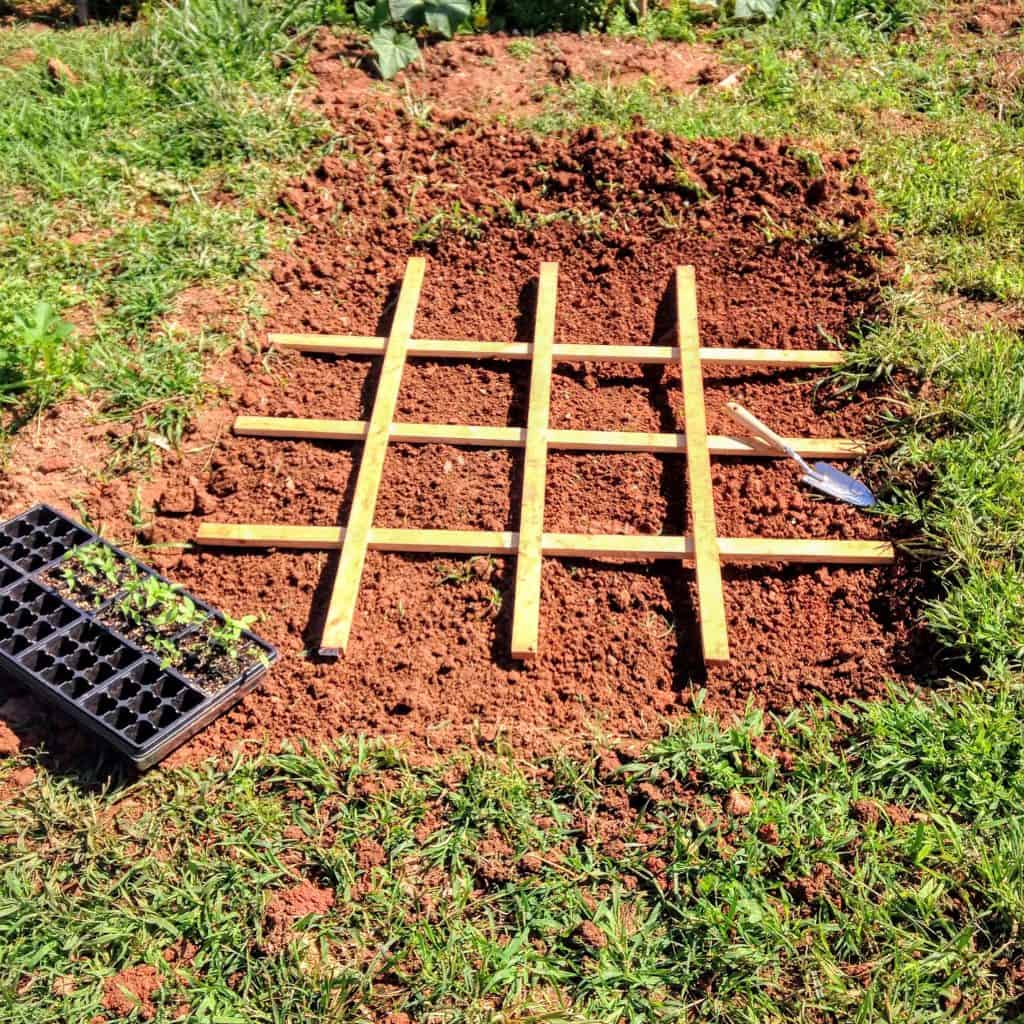
    Our garden is set up for square foot gardening. That just means we use planting boxes instead of rows and we base our planting sections in a 4 x 4 grid. Each section of the grid is a square foot, hence the name. Our boxes are 4 x 4 ft. But you can easily make them 3 x 3 ft and use a 3 x 3 grid if you want to use less space.

    square foot gardening grid

    Green beans should be planted 4 inches apart. We will typically plant a few seeds together to give us better chance at something coming up. In our 4 x 4 grid we are able to plant 4 spots within each grid at a depth of about 1 inch or roughly the depth up to your first knuckle past your fingernail.

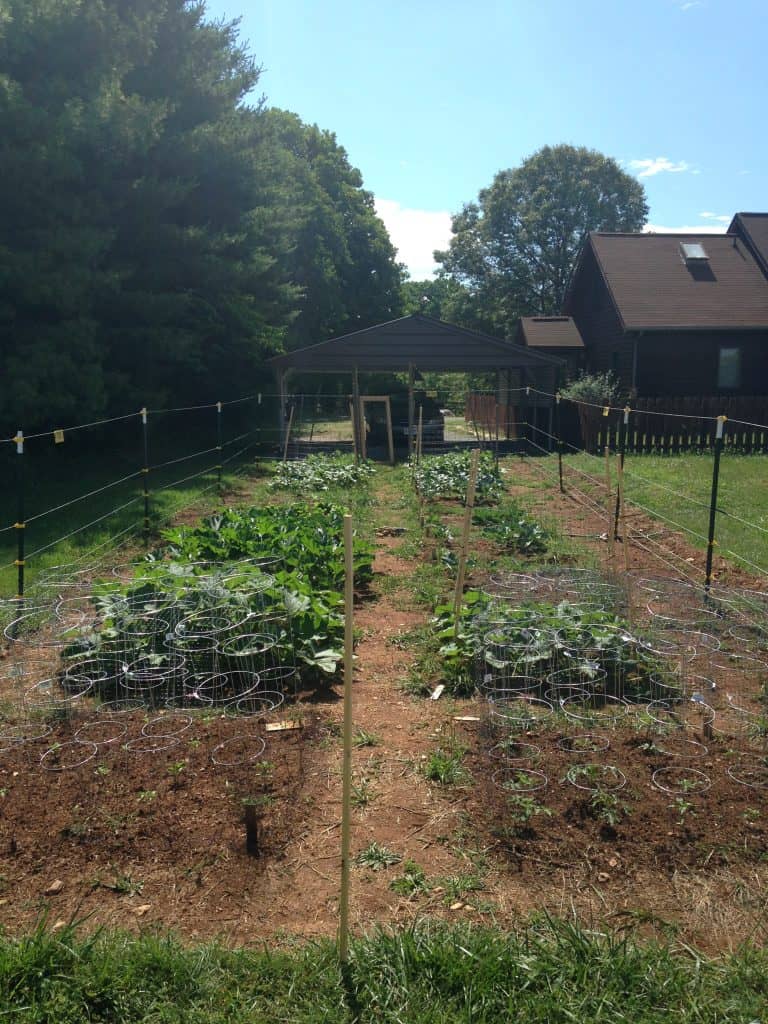
    image of full garden

    How long does it take for green beans to grow?

    Green beans have a relatively quick turnaround time. Green bean germination time can vary from plant to plant but with these bush beans germination is between 7 and 10 days.

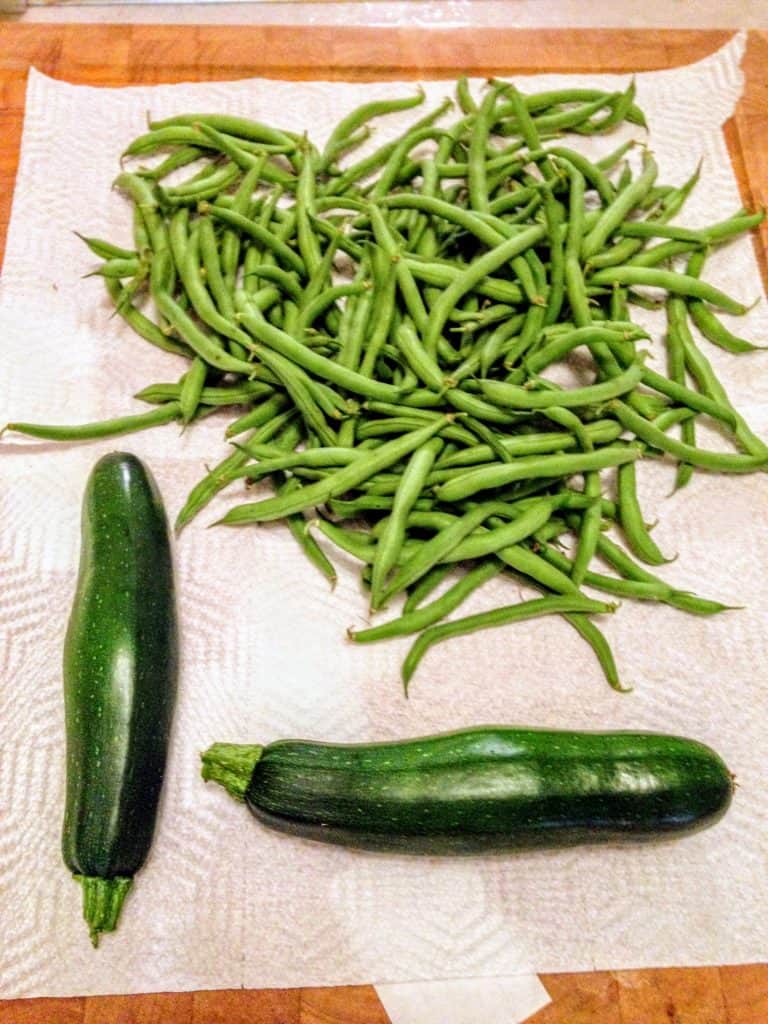
    green beans and zucchini sitting on counter

    When to harvest green beans

    Green beans are actually one of the fastest growing vegetables we grow and will reach maturity between 55 and 60 days, or right around 2 months. The recommended harvesting size is when the bean is ½ inch in diameter no matter how long it is. You can also tell if they are ready when they snap cleanly in half.

    Do green beans regrow after picking?

    They will regrow to a point but not for an extended period of time. Most plants will complete their entire production cycle within a few weeks. It is recommended that if you want a larger and longer harvest, set a continuous planting schedule for every 10 days.

    pinterest image of green bean seed packet with seeds on top. Text reads, "How to grow green beans. The ultimate guide."

    For more gardening tips

    [pt_view id="5f37129sdf"]

    Growing Yellow Squash

    By MrAnimal Farm

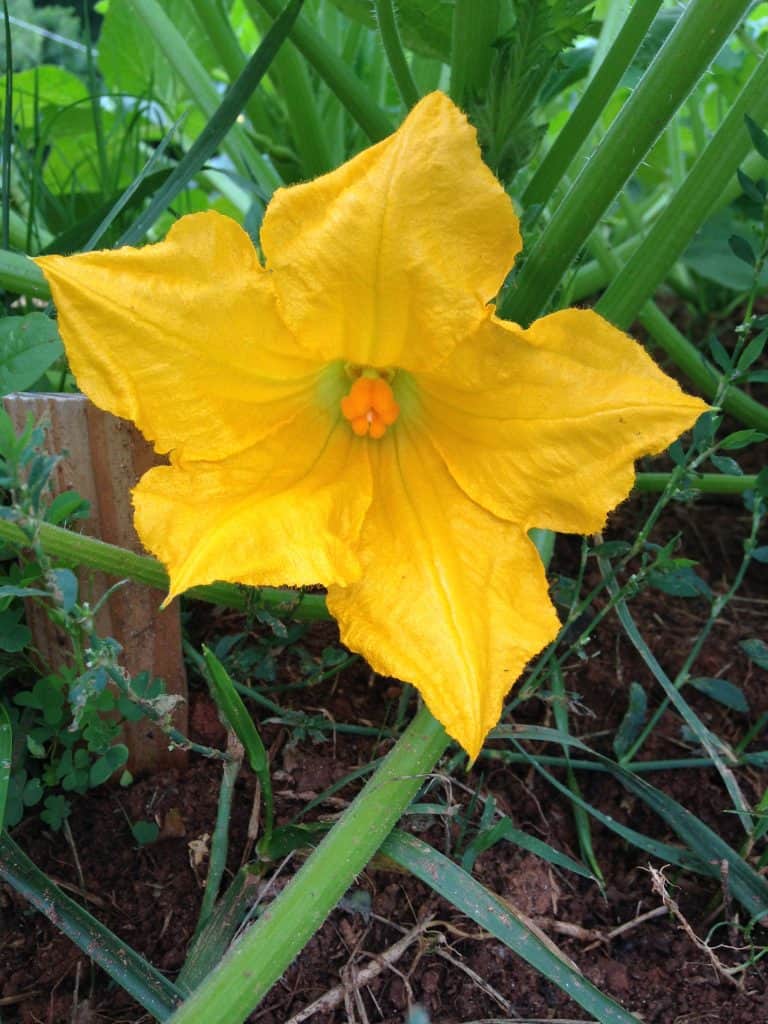
    blossom on a squash plant

    We can not get enough of squash in our house. But always going to the grocery store or farmer's market was getting to be a bit of a burden. So we decided to try our hand at growing yellow squash on our own.

    blossom on a squash plant

    Seriously, yellow squash is great. It's a wonderfully delicious garden fruit. It's one of the easiest plants to grow for beginner gardeners; way easier than growing green beans. It is one of our top choices for types of summer squash everyone should grow. And, you can freeze yellow squash after harvesting and it will keep for a long time.

    Convinced yet? We hope so. Here is how to get started.

    Growing Yellow Squash Is Easy

    Obviously, there is a level of difficulty when it comes to gardening. It isn't exactly a relaxing hobby. In fact, we rank it up there as a great way to get in a good outdoor workout.

    So, as far as gardening goes, yellow squash is as close to set it and forget it as you can get. Basically, once you plant it, you really only need to make sure it has sunlight, water, and you protect it from pests.

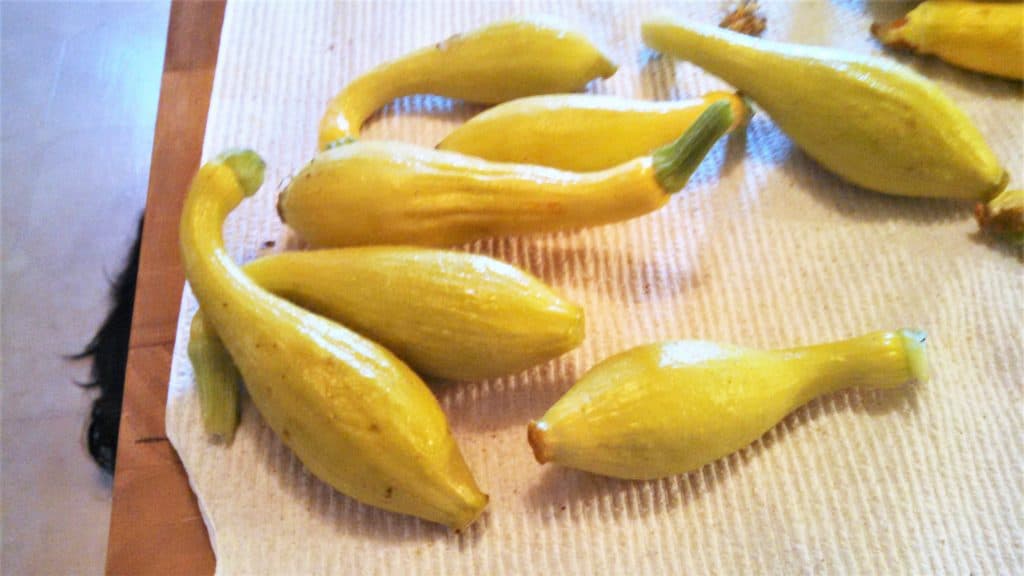
    pile of yellow squash

    How to grow yellow squash

    Like growing zucchini, yellow squash is a summer squash. The major difference between summer and winter squash is the thickness of their skins. Yellow Squash has a very thin and fragile skin versus the hard almost shells of winter squash.

    You will need to find a place to get your seeds. Pretty much every farm store will have them, maybe even you local grocery store. If you want something a little more specialized, you can also order online or maybe even find some heirloom seeds at a farmer's market.

    We prefer to not use pesticides so we opt for ordering organic seeds online. Wherever you get your seeds is up to you.

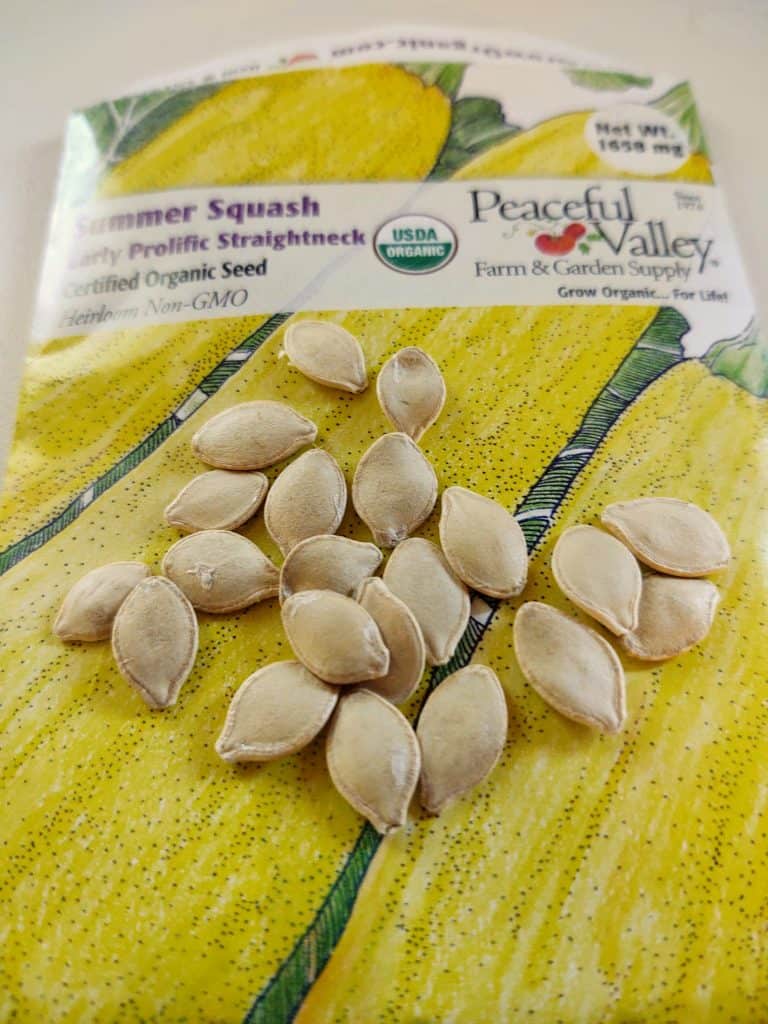
    packet of yellow squash seeds with seeds on top

    How to plant zucchini

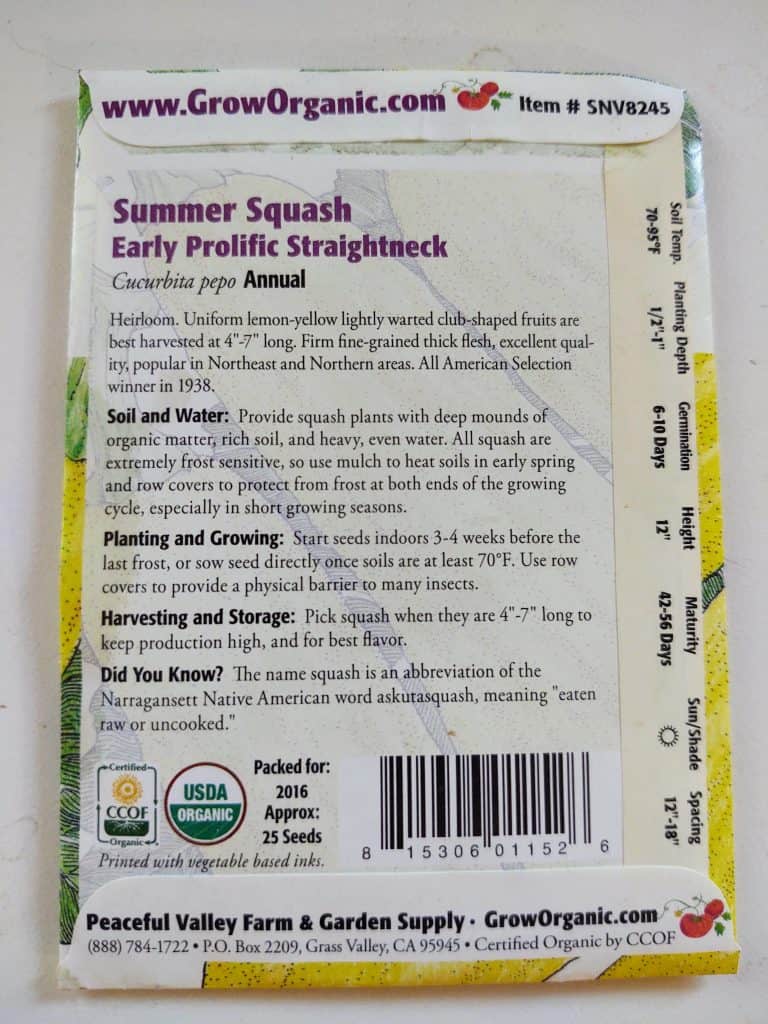
    Most seed packets will have planting and care instructions on the back of the pack. The only times we have not seen them is if we gave gotten them locally from a local farmer. Most of the time, you will have instructions.

    If you don't, this is a great reference guide for you to bookmark and come back to whenever you need to.

    back of seed packet with planting and care instructions

    We like to start our plants inside when we can and transplant started plants later. That way we can get a jump on the season and extend our harvest a little bit longer.

    All you need to do this is some organic potting soil and starting trays. It is recommended that you start your plants inside about 3-4 weeks prior to your zone's last frost of the winter.

    That date will vary depending on which gardening zone you are in. Make sure you check that out so you can make a specific gardening plan.

    If starting your seeds inside is not your thing, you can also sow them directly into the soil. You will want to make sure your soil temperature is somewhere between 70 and 95 degrees.

    Much like zucchini, yellow squash LOOOVE sunlight. You do not need to worry about them having shade. Just make sure you give them water.

    What is the best way to grow yellow squash?

    When we garden, we like to use square foot gardening. It's a great space saver and makes calculating plant distance really easy. Instead of gardening in rows, you make individual planting boxes. We make ours about 3-4 ft x 3-4 ft. Then you divide those boxes into a 3 x 3 or 4 x 4 grid. Each grid box should be 1 square foot.

    square foot gardening grid

    The recommendations for yellow squash say to space your plants 12 - 18 inches apart. So, with square foot gardening, that would put one plant in the center of each box.

    When we planted, we would put two of our started plants in each grid box. The reason for doing this is we could determine after a week or two, which plants would be healthiest. After that time, you pull the plants up that you do not think will do well and only leave the best plants.

    If you do not start your plants inside and you plant directly, you can follow the same plant multiples and cull what is not needed method. Place a few seeds in each grid and press them gently into the soil. You should only need to go down about ½ - 1 inch. This is roughly the length up to your first knuckle past your fingernail.

    Once your seeds are in the ground, water them and wait. Germination takes around 6 -10 days. After that you will see the exciting little plant buds sprouting out of the ground.

    Can Yellow Squash and Zucchini be planted together?

    Both plants can be planted together. It really just depends on how much fruit you want and how much space you have. Again like zucchini, yellow squash will grow to a height of around 1 foot. But they will also grow out.

    long shot of garden in early stages of growth

    One yellow squash plant can produce up to 25 pounds of squash in a single season. Just keep that in mind when you are deciding how many plants to plant.

    How long does it take for yellow squash to grow after flowering?

    You will notice your plants will start flowering before they start to bear fruit. That is normal. Generally, once you start seeing flowers, you will have yellow squash within 3 - 5 days.

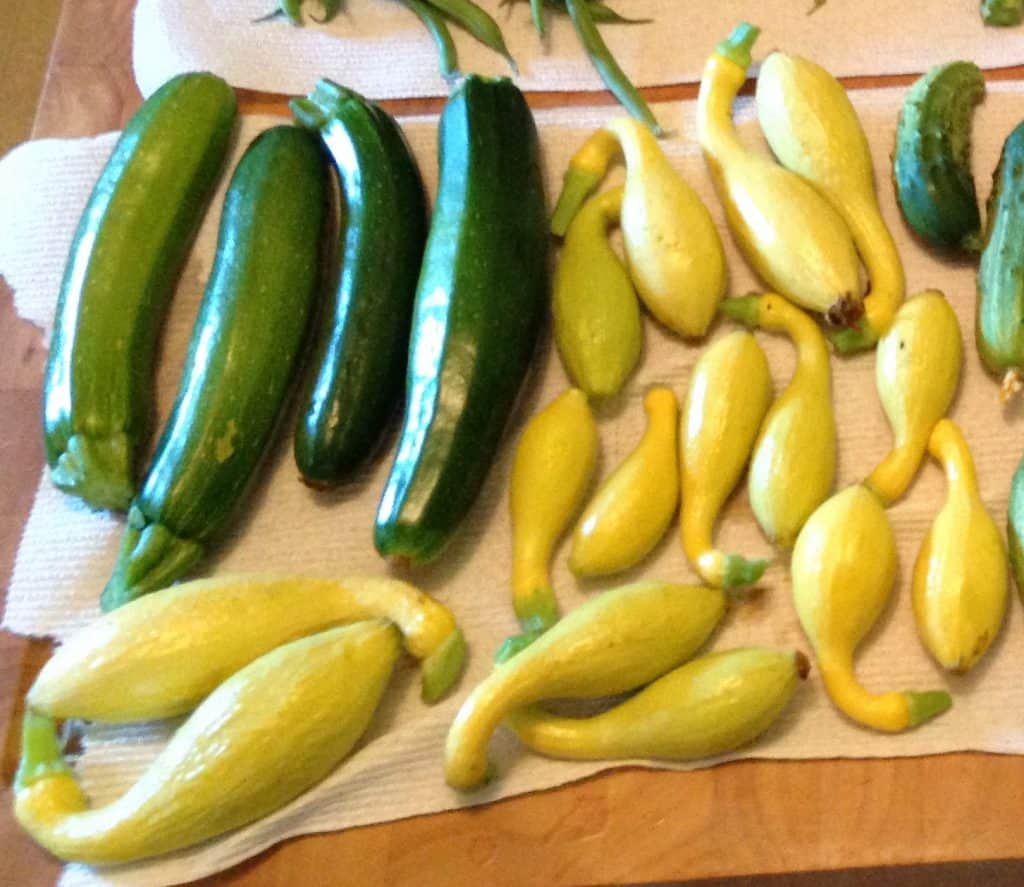
    yellow squash and zucchini from our garden

    Your plants will reach maturity between 42 and 56 days, or about a month and a half to 2 months. Yellow Squash is actually one of the fastest growing vegetables we grow. Once you start seeing fruit, you will want to harvest it when it is in the 4 - 7 inch range. Anything bigger than that start to suffer in flavor.

    Yellow squash was a super rewarding gardening experience. We absolutely recommend you giving it a try this season. Let us know how it goes in the comments below.

    pinterest image.
top image: the start of a yellow squash on plant.
bottom image: yellow squash seed packet with pile of seeds next to it.
Middle text box: "Yellow Squash Growing Guide. How to get started"

    For more gardening tips

    [pt_view id="5f37129sdf"]

    Growing Zucchini

    By MrAnimal Farm

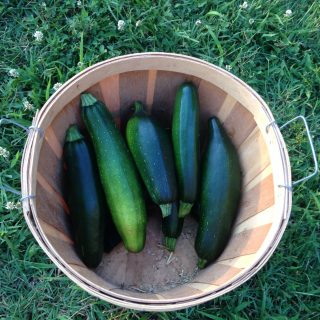
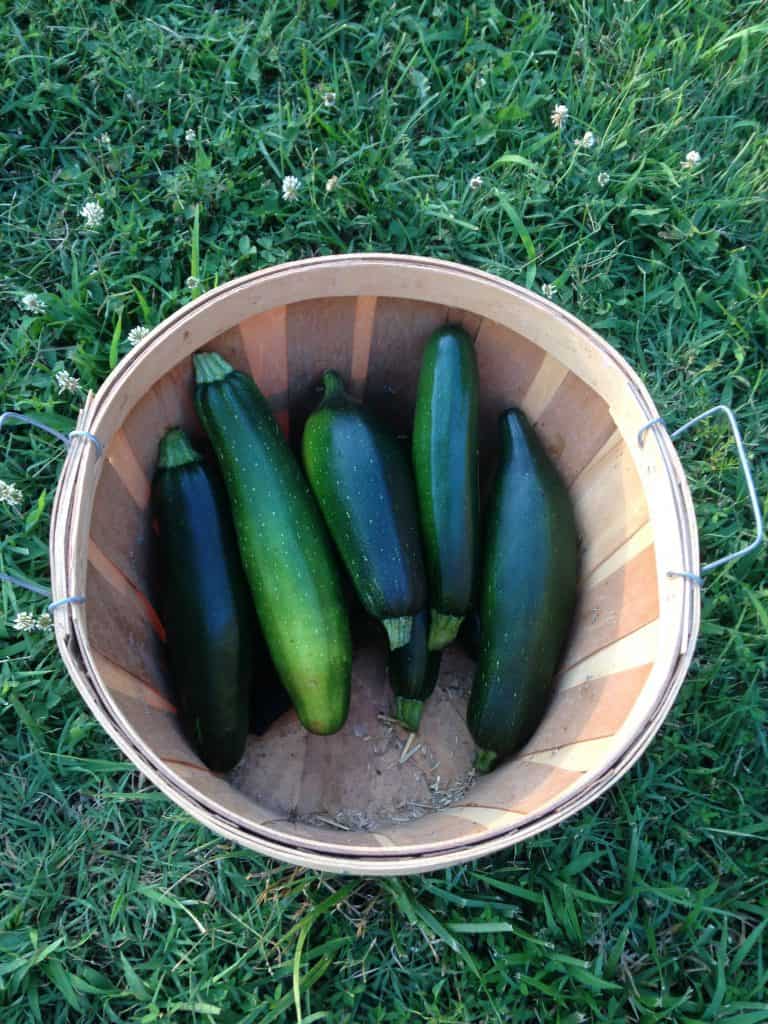
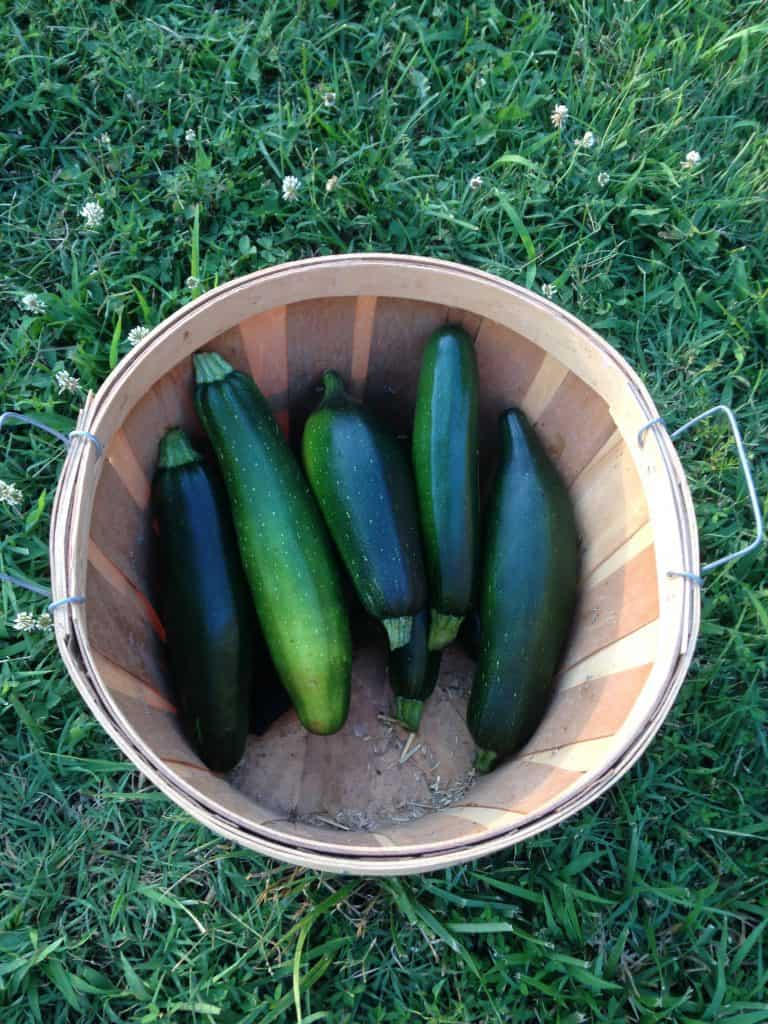
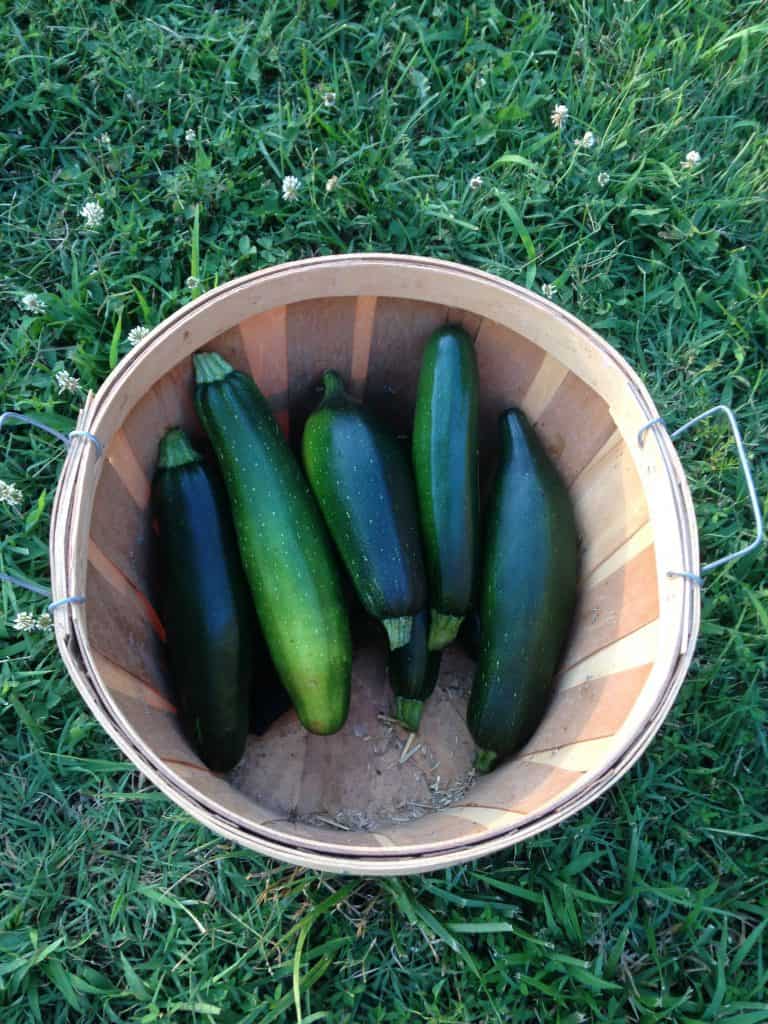
    full harvesting basket after growing zucchini

    Produce can be expensive. Especially if you don't like the use of pesticides and prefer you fruits and veggies to be organic. These are the three biggest reasons why we choose growing zucchini in our own garden.

    full harvesting basket after growing zucchini

    If you haven't been able to tell from our other posts, we love zucchini. We love zucchini bread, zucchini nachos, zucchini lasagna. We love that you can freeze zucchini and use it for any number of zucchini based recipes.

    With zucchini being such a versatile food, we decided to see if we could grow it ourselves. This way we would always have zucchini and we could sleep better at night knowing we would not run out.

    Did I mention we love zucchini?

    Growing Zucchini Is Easy

    Is it easy to grow zucchini? It is definitely easier than growing green beans, but isn't any more difficult than most other item in your garden. But, just like gardening in general, it takes some effort to maintain healthy and productive plants.

    We don't like pesticides but we also don't like to weed our garden either. Every season is a race to harvest as much as we can before the pests take the plants over and kill them.

    There are, of course, other techniques to deal with zucchini growing problems, but to each their own. We think we do pretty well, if we do say so ourselves.

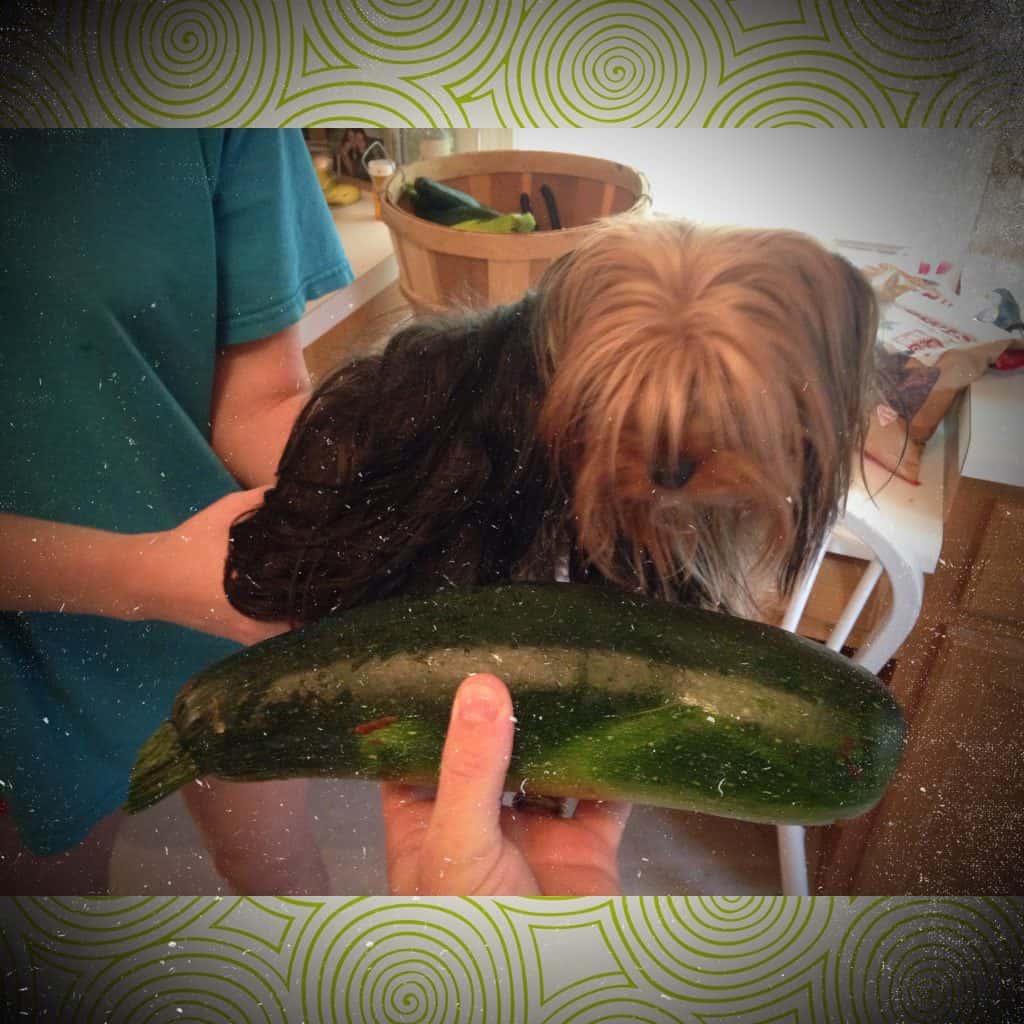
    zucchini compared to the size of a small dog

    How to grow zucchini

    Zucchini is a summer squash. That basically just means it has a softer skin than winter squash, like acorn squash.

    Interesting fact about zucchini: while most consider it a vegetable, it is actually a fruit. There are several other vegetables that are fruits as well.

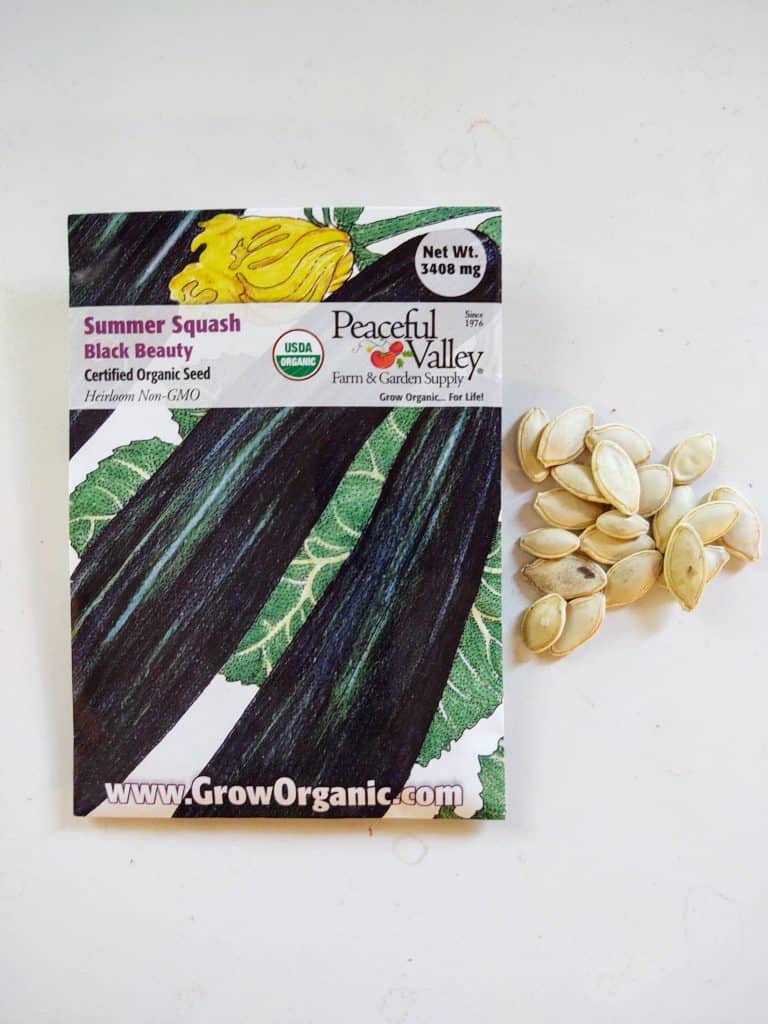
    The first thing you will want to do is get yourself some zucchini seeds. When you are looking for seeds, we really like Black Beauties. They grow well in our region and grow fairly large (see picture of dog sized zucchini above.

    We only mention the detail about Summer Squash and Black Beauty labels so you don't get frustrated if you can't find a seed packet with the actual word "zucchini".

    packet of zucchini seeds with pile of seeds next to it

    How to plant zucchini

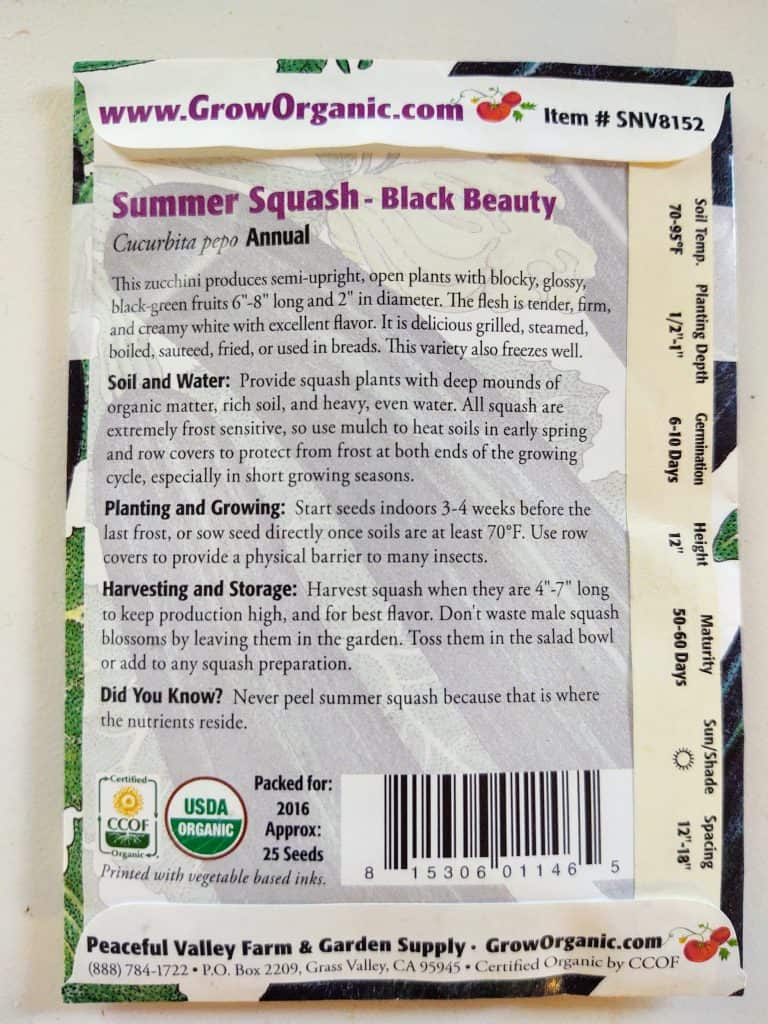
    Depending on where you get your seed, they may have directions on the back of the packet. If not, you can just check out this guide and leave it open as a reference when you are ready to plant.

    back of seed packet with grow and care instructions

    Just like growing yellow squash, zucchini is nice because you can sow it straight into your garden or you can get a jump on the season and start it inside. We like to start ours inside so that we can make sure the plants are ready for the outdoors and the weather.

    You can start plants inside using some organic potting soil and a starting tray When to plant zucchini really depends on your specific gardening zone's last frost date. You will want to start your seeds about a month prior.

    If you decide to sow them directly into your garden, you'll want to make sure the soil temperature is at least 70 degrees but not over 95.

    Do zucchini plants need a lot of sun?

    Your plants are able to withstand full sun exposure so you do not need to worry about having a shade for them.

    Do zucchini plants need a trellis?

    They do not. Your plants are mostly upright and will spread out instead of up.

    How much space do your plants need?

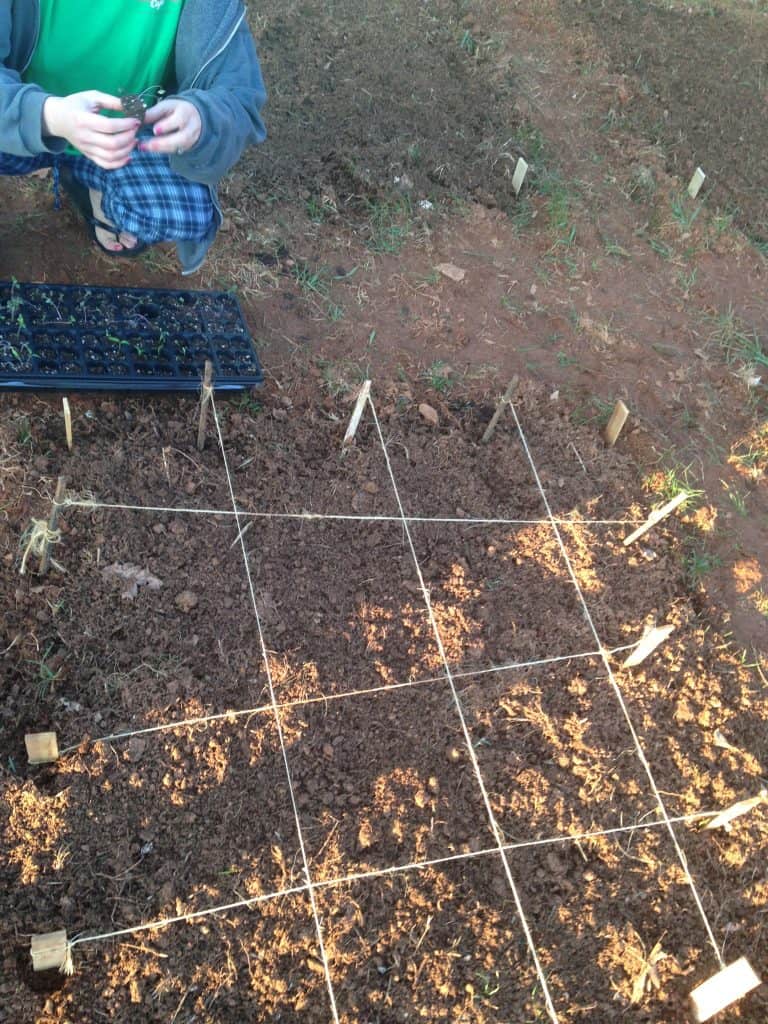
    We like to use a method called square foot gardening. Essentially, you make planting squares about 3-4 ft x 3-4 ft and make a 3 x 3 or 4 x 4 grid. Each box should be 1 square foot.

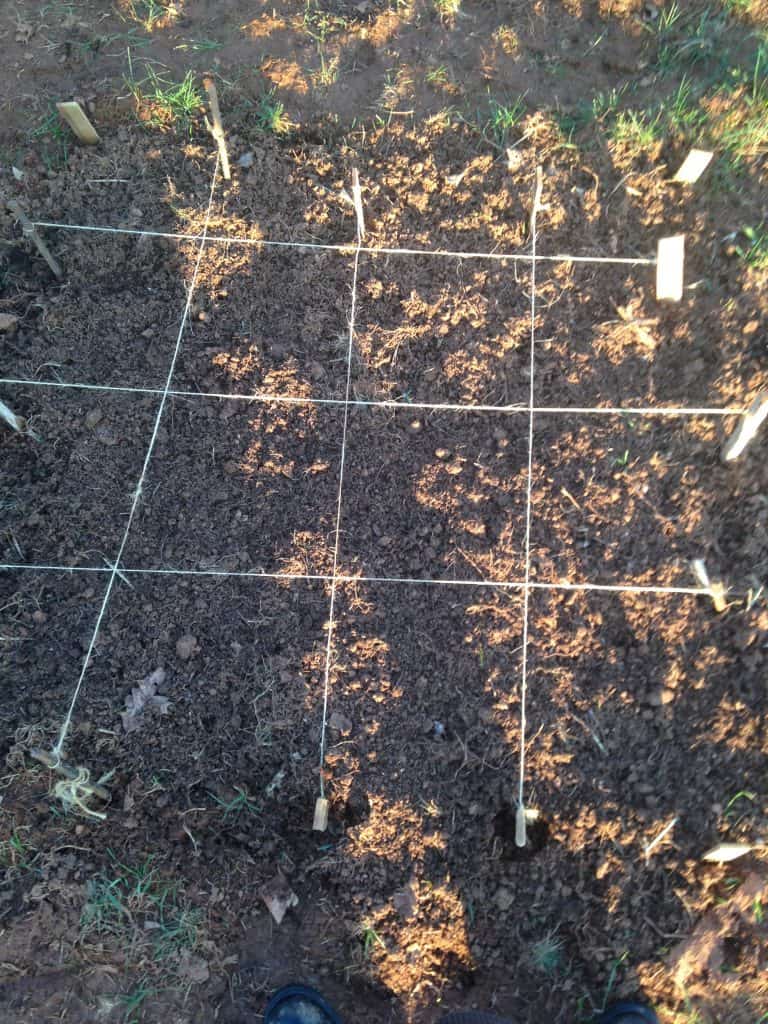
    string used to make a square foot gardening planting box

    Zucchini should be planted 12 - 18 inches apart. We typically would put 2 or 3 seeds in each square to see what comes up and what looks healthiest. Germination is usually 6 - 10 days. So around the 2 week point you will know which plants to cull.

    When you plant, you will want to plant each seed about ½ - 1 inch deep. What we would usually do is put the seed in your planting box and just gently press it into the soil until the dirt is up to your first knuckle past your fingernail.

    How many zucchini plants should I plant?

    Remember when we said we love zucchini and never wanted to run out? We planted WAAAAY more than we needed. When it came time to cull our plants, we decided to leave them. They still grew extremely well and we had a huge harvest.

    long shot of garden in early stages of growth

    A single plants can produce up to 10 pounds of fruit in a single season. In our 3 x 3 grid planting boxes we had the initial 9 and then another 5 or 6 we decided to keep. And did I mention we had 2 boxes of them? Our goats and chickens ate well that entire season even after we froze zucchini for after the gardening season.

    What we're trying to say is, they are super prolific. If you have a single planting box and plant 18 inches apart, you will still have plenty of zucchini. The plants also grow to be about a foot or so tall but will grow out several feet.

    When can I harvest my zucchini?

    Zucchini is actually one of the fastest growing vegetables we grow and will reach maturity at around 2 months, give or take a week. Keep an eye on your plants to check for pests and disease and you will get a very nice yield.

    Also, when you are harvesting, be thorough when checking for zucchini. We have managed to pass over some that were low to the ground only to find a massive (dog sized) zucchini later.

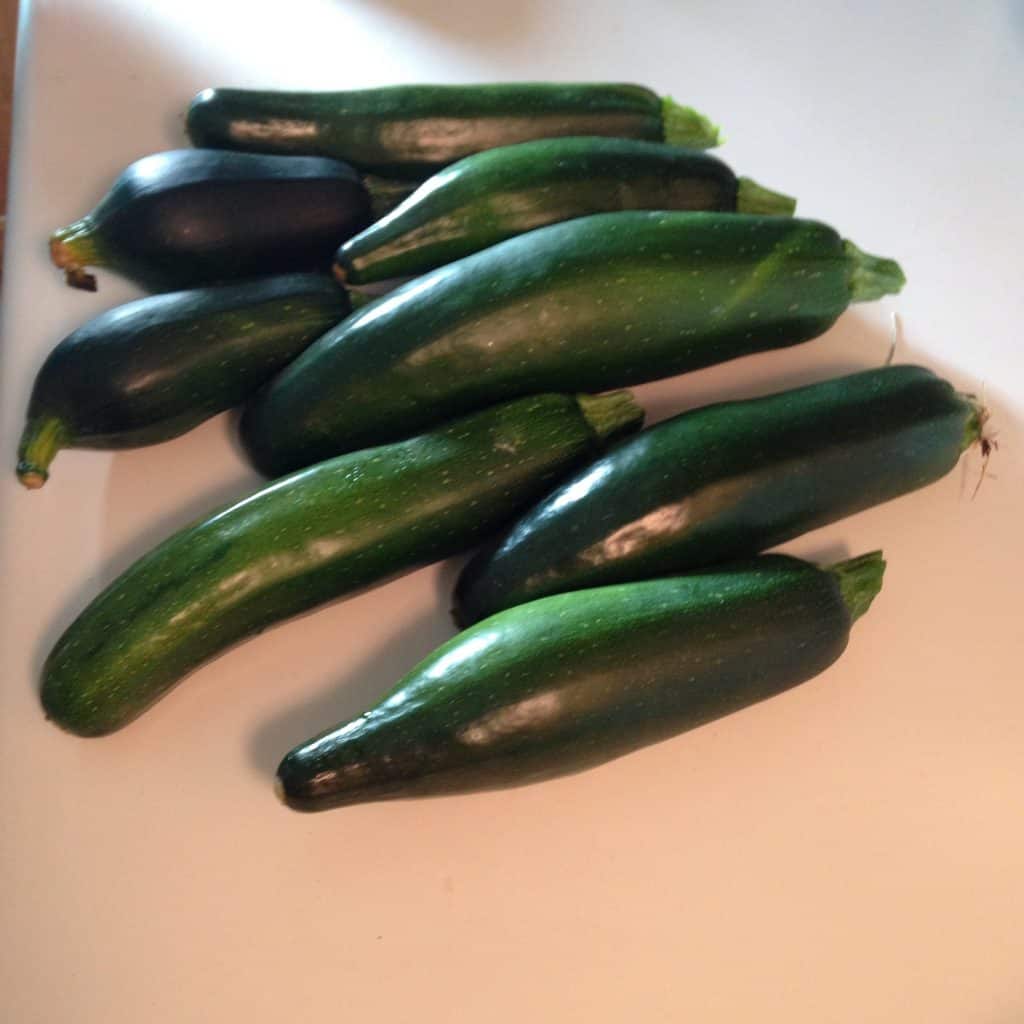
    pile of 8 zucchini of various sizes

    You will want to harvest your zucchini when they are around 6 inches long. This is when they are at peak flavor. If they get much bigger than that, they tend to lose flavor and taste almost watered down. You can also learn how to freeze zucchini if you have an especially large yield.

    Give your zucchini gardening skills a shot this season and let us know how it goes in the comments below.

    pinterest image with harvest basket of zucchini. Text reads, "How to grow zucchini. The ultimate guide."

    For more gardening tips

    [pt_view id="5f37129sdf"]

    How To Make Pumpkin Bread

    By MrAnimal Farm

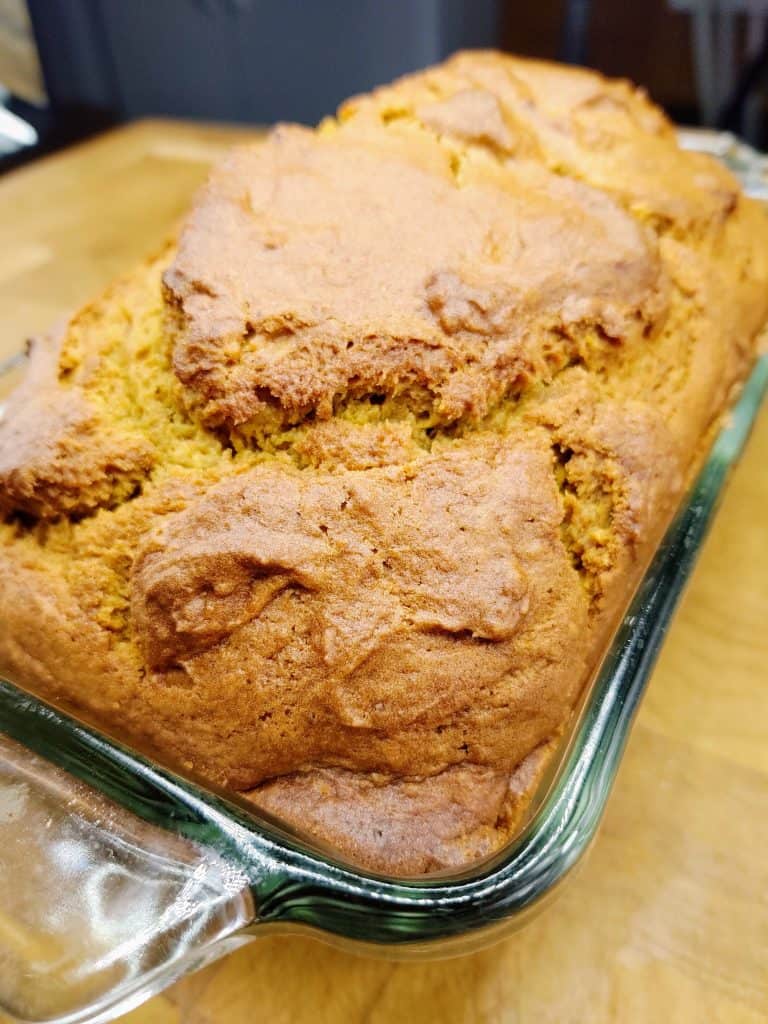
    closeup of finished pumpkin bread loaf in pan

    Got some extra pumpkin hanging around? You should learn how to make pumpkin bread.

    closeup of finished pumpkin bread loaf in pan

    Maybe you're like us and always buy waaay too much food around the holidays. Then you do a pantry challenge and during your pantry inventory you find a can or twelve of pumpkin. Kinda like when we had extra bananas for banana bread and zucchini noodles for our zucchini bread.

    Pumpkin bread is super easy to make and is one of our favorite recipes when we're craving something a little carby.

    How to make pumpkin bread from scratch

    You will likely already have everything you need, but here is a supply list:

    What you will need

    large mixing bowl

    electric hand mixer

    spatula

    bread pan

    canola spray (or any flavorless cooking spray)

    Ingredients

    ½ teaspoon cloves

    ½ teaspoon of ginger

    1 teaspoon baking soda

    1 teaspoon baking powder

    1 teaspoons cinnamon

    1 teaspoons nutmeg

    2 teaspoons vanilla

    1 stick butter

    1 can pumpkin pie filling (puree 15 oz)

    2 cup sugar

    3 cups flour

    3 eggs

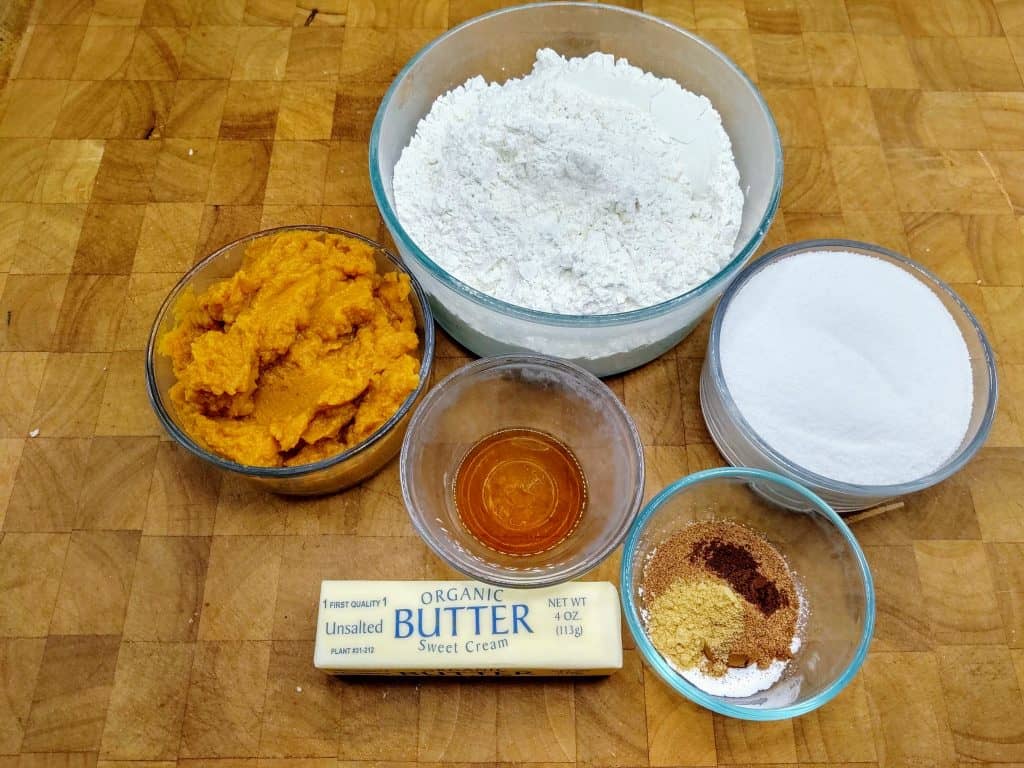
    how to make pumpkin bread ingredients displayed

    Directions

    First things first, preheat your oven to 350 degrees. Now combine all of your small portion spices and dry ingredients. That includes your baking soda, baking powder, cinnamon, cloves, ginger, and nutmeg. Put them all in a small dish and set them to the side.

    Melt your butter in the microwave or on the stove top. It only takes a minute or 2 in the microwave so we usually go that route.

    In a large mixing bowl, combine your butter, sugar, vanilla, and eggs. Use your hand mixer on the lowest setting and blend everything together. You will want to go easy so you don't whip your eggs too much. Just whip enough to get everything good and mixed together.

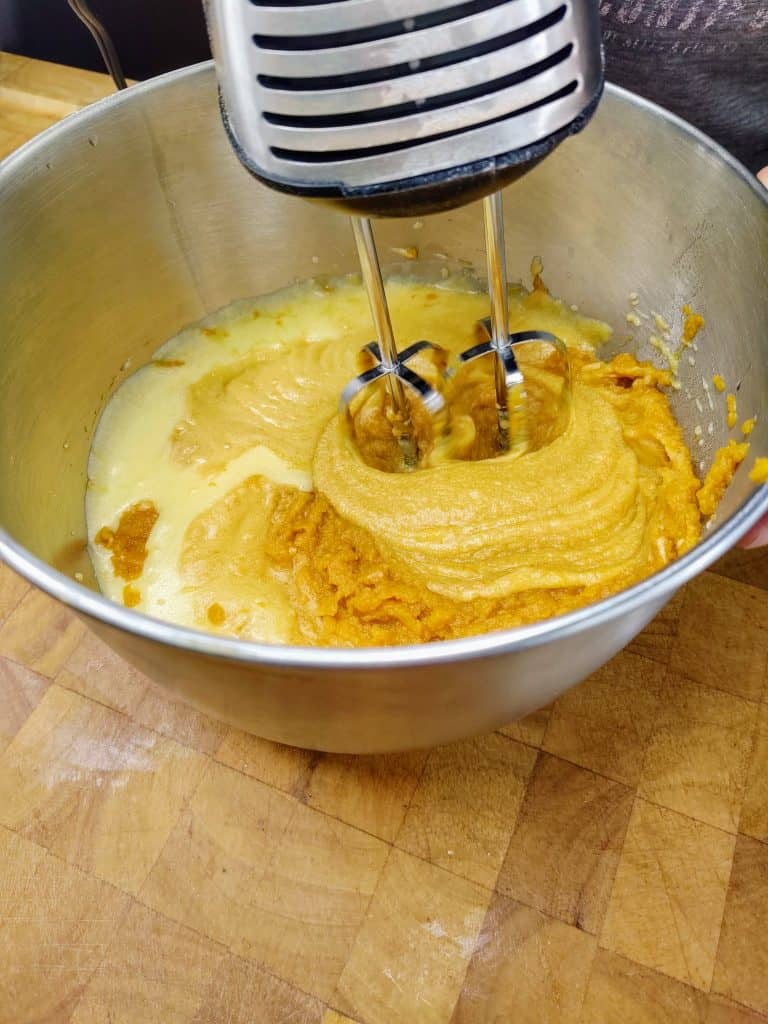
    mixing pumpkin into sugar/butter mix

    Now you will add in your can of pumpkin. You can also use fresh pumpkin as long as you have 15 ounces pureed. Using your mixer, mix this into the butter/sugar mix.

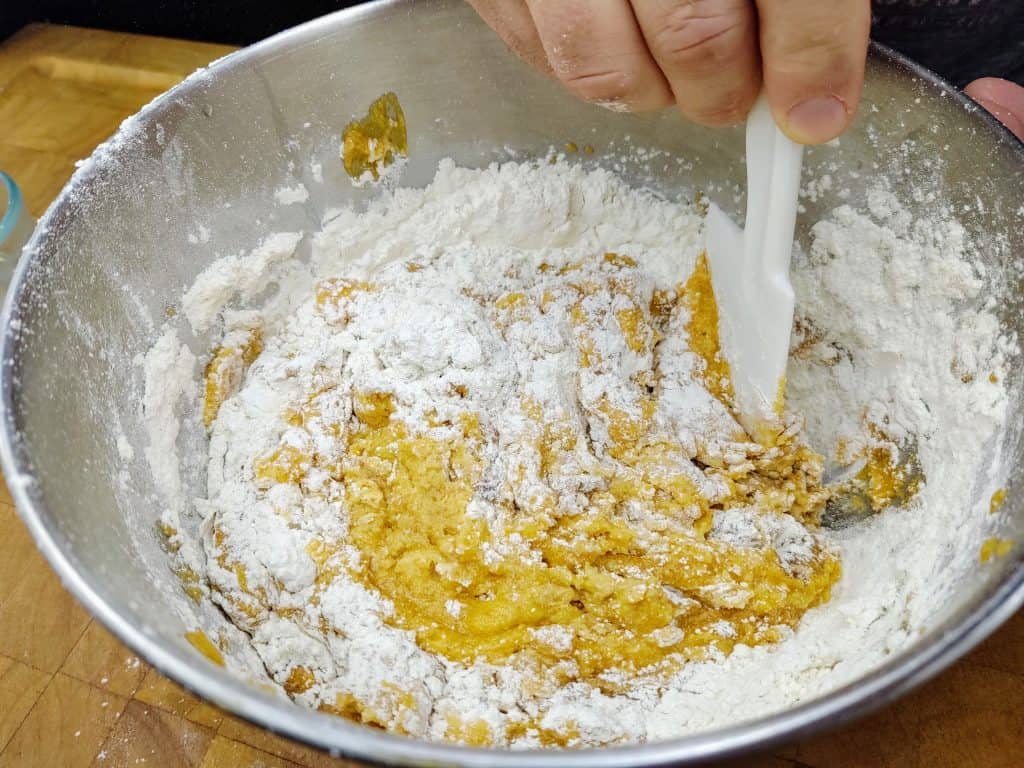
    After mixing in the pumpkin, add your spices into your flour. Pour them all into your pumpkin batter and hand mix. You can use a spatula during this part.

    mixing flour into the pumpkin mix

    Hand mixing is preferable here for 2 reasons. The first is it will keep you from over whipping the eggs in the mixture. The second is you don't want to turn a spinning machine loose in a pile of powder. Trust me on the second point.

    Pull out your loaf pan and spray it with your choice in cooking spray. Now, pour your batter into the loaf pan. It should flow freely but you may need to use your spatula to get everything into the pan.

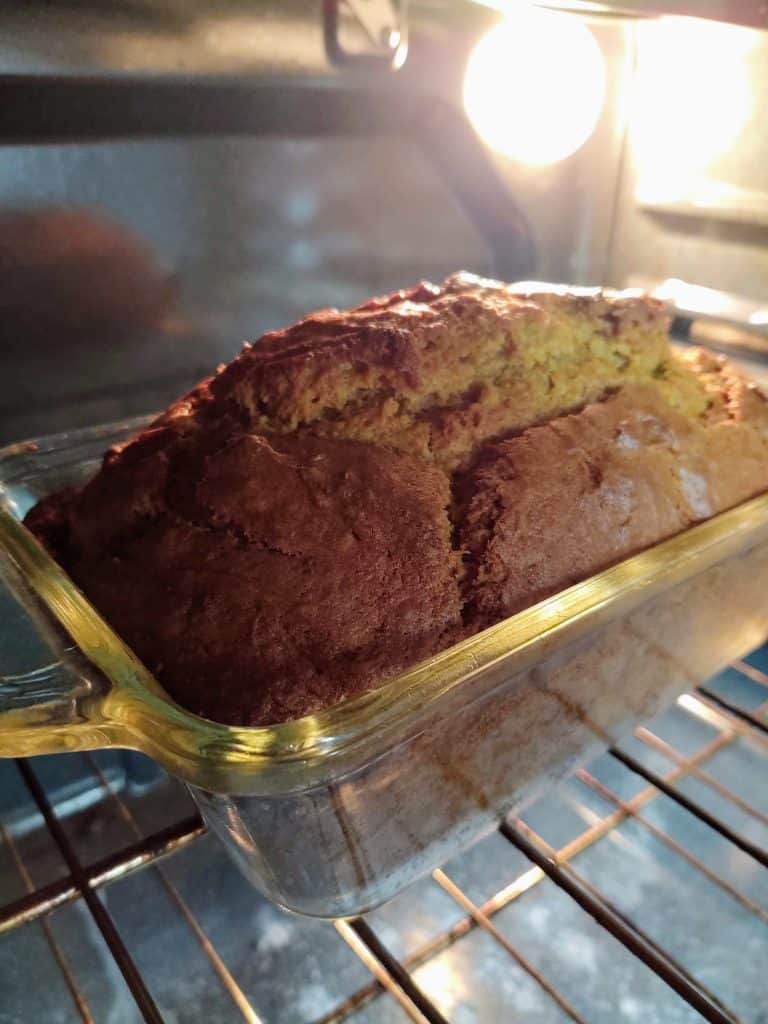
    Put the pan into the already preheated oven and set your time for an hour and 10 minutes. You will want to check on this periodically to make sure it is not burning.

    pumpkin bread baking in oven

    When you think it is getting close, stick a butter knife or toothpick into the center of your bread. If it comes out with batter still on it, add a few more minutes. Repeat until the knife/toothpick comes out clean.

    Remove from the oven and allow to cool. Once your bread is cool you can place it in your bread slicer and use a bread knife to cut thick slices.

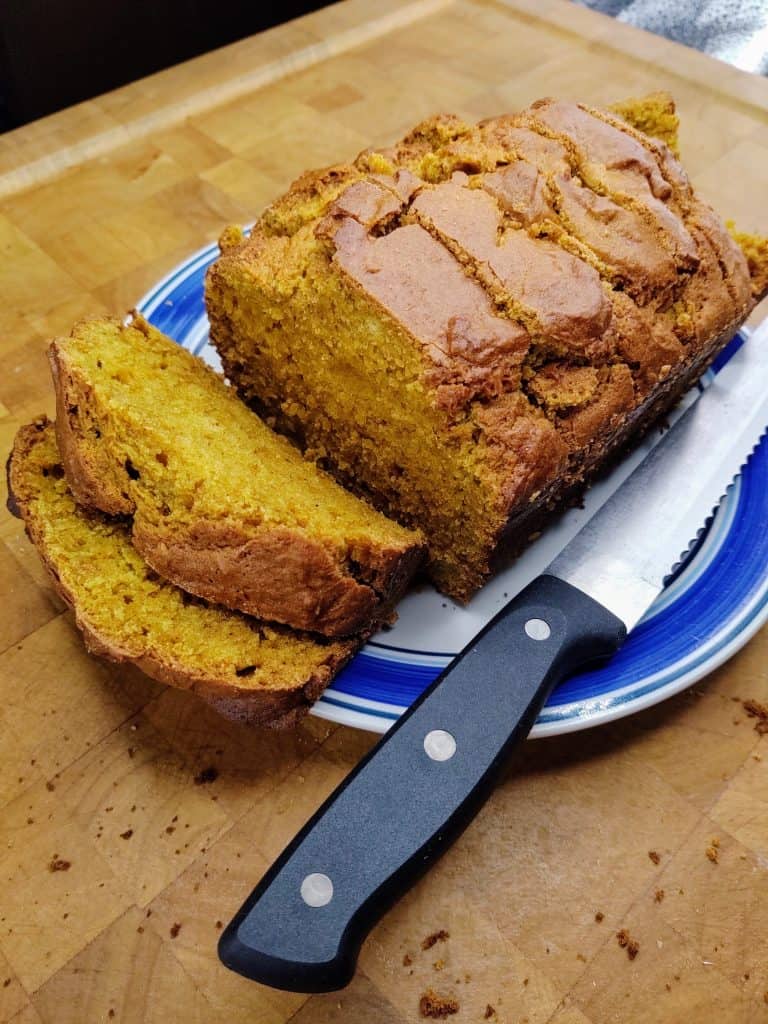
    pumpkin bread sliced on plate

    Common Questions

    Is pumpkin bread healthy?

    In moderation it is not too terribly bad for you. Obviously, everyone's body and nutrition requirements are a bit different. You can decrease the amount of sugar in the recipe and make a bit healthier as well.

    Why is my pumpkin bread dry?

    Most often, dryness is due to being overcooked. If your bread is coming out dry, decrease your cooking time and check regularly with a toothpick or knife to make sure your bread is not cooking too quickly.

    Can I freeze pumpkin bread?

    You can. Just allow it to cool before cutting. Then put the slices into a large freezer safe bag, seal, and place in freezer. You can put it in the fridge overnight to thaw.

    pinterest image with pumpkin bread loaf in pan with text reading, "How to make the best pumpkin bread. it's super easy too."

    How To Make Zucchini Bread

    By MrAnimal Farm

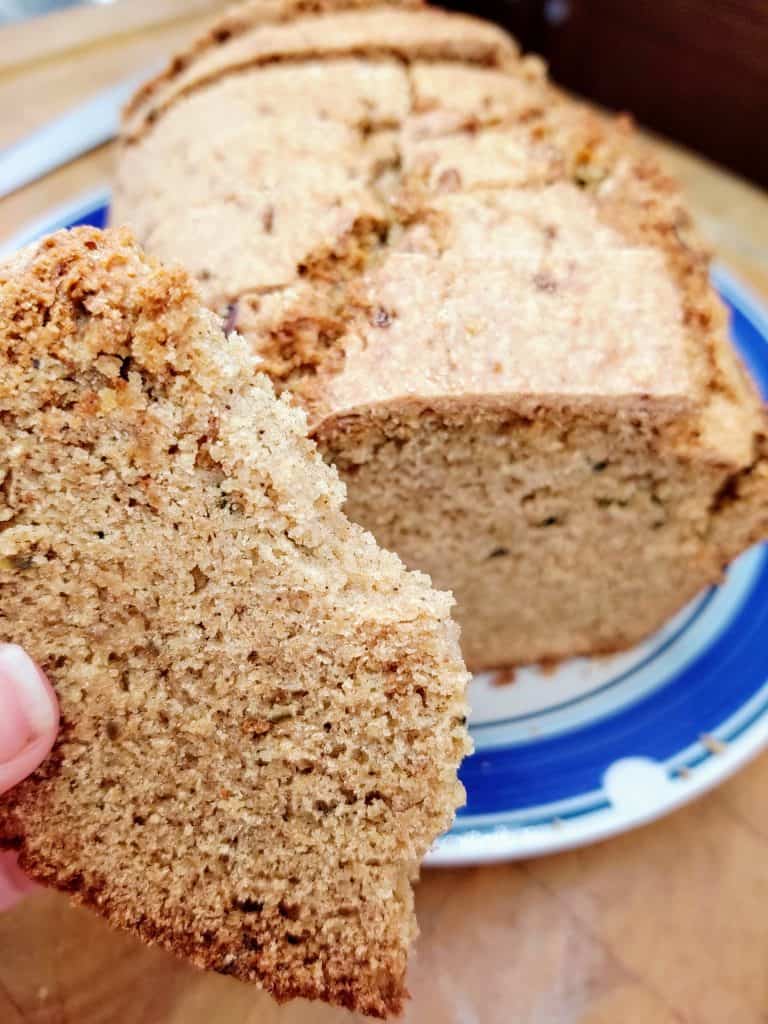
    close up slice of zucchini bread with bite taken out

    Looking for something new and different to do with your zucchini? Learn how to make zucchini bread.

    close up slice of zucchini bread with bite taken out

    This recipe is the best if you have a sweet tooth as it is similar to our banana bread and pumpkin bread recipes.. You can also add this to your arsenal of other great zucchini recipes, like zucchini lasagna and zucchini nachos.

    This easy recipe will also work if you freeze zucchini or we've made it with store bought (even zucchini noodles we found on sale). If you haven't already, you can also try growing zucchini on your own.

    How to make zucchini bread

    What you will need

    large mixing bowl

    electric hand mixer

    spatula

    bread pan

    canola spray (or any flavorless cooking spray)

    Ingredients

    1 teaspoon baking soda

    1 teaspoon baking powder

    2 teaspoons cinnamon

    2 teaspoons nutmeg

    2 teaspoons vanilla

    1 stick butter

    1 ½ cups shredded zucchini

    2 cup sugar

    2 cups flour

    3 eggs

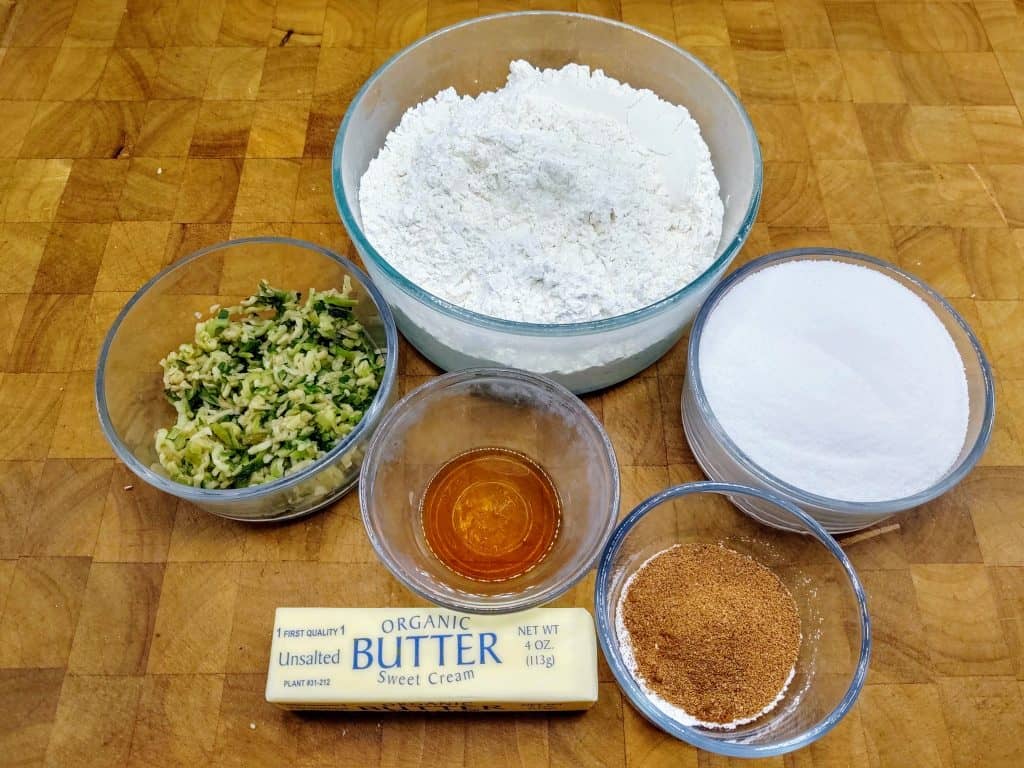
    how to make zucchini bread ingredients

    Directions

    Preheat your oven to 350 degrees.

    The first thing we like to do when gathering our ingredients is to combine anything we can right away. So put all of your baking soda, baking powder, cinnamon, and nutmeg into a small dish. Set this to the side.

    Next, you will want to melt a stick of butter. You can melt it on your stove top or in the microwave. Usually about 1.5 - 2 minutes in the microwave will do it.

    Take out your large mixing bowl and combine your sugar, vanilla, melted butter, and eggs. Using your hand mixer on the lowest setting, mix everything together. Be careful not to whip the eggs too fluffy. You just want everything mixed together.

    Once it is mixed thoroughly, add in your spices and mix. Now add in your flour and, using a spatula, gently fold everything together.

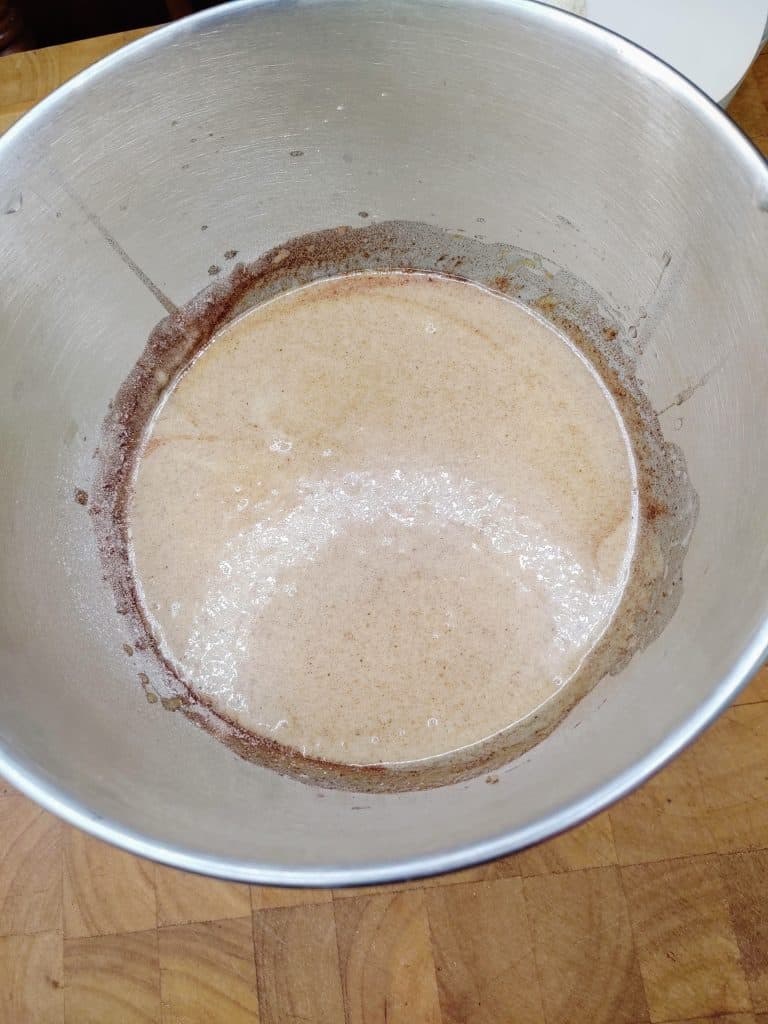
    mixture of sugar, butter, vanilla, and spices

    After you have a nice thick dough, drop in your shredded zucchini. Still using your spatula, mix thoroughly until you have a nicely mixed dough with no visible white flour spots.

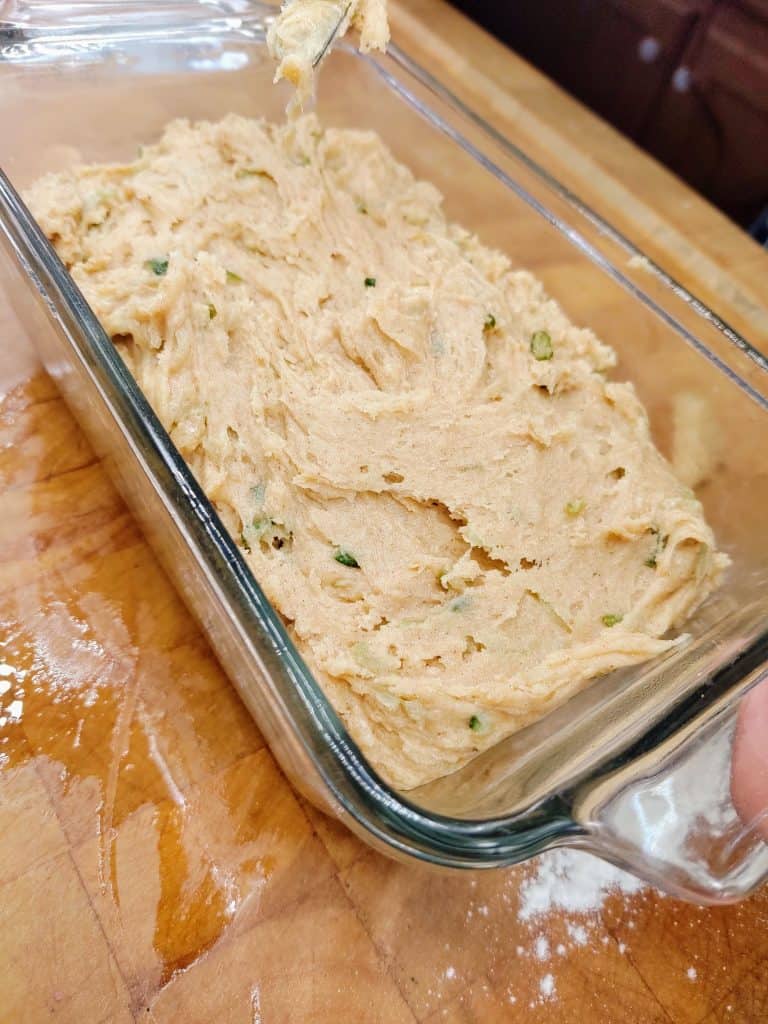
    Pull out your bread pan and spray the bottom and sides with Canola oil. Again using your spatula, gently spread your dough from the mixing bowl into the bread pan. Depending on thickness, you may need to spread the dough into the pan to completely fill it.

    dough in bread pan

    Alternatively, you can also add your dough to a muffin pan and make zucchini bread muffins instead. You may just need to adjust the cook time a bit.

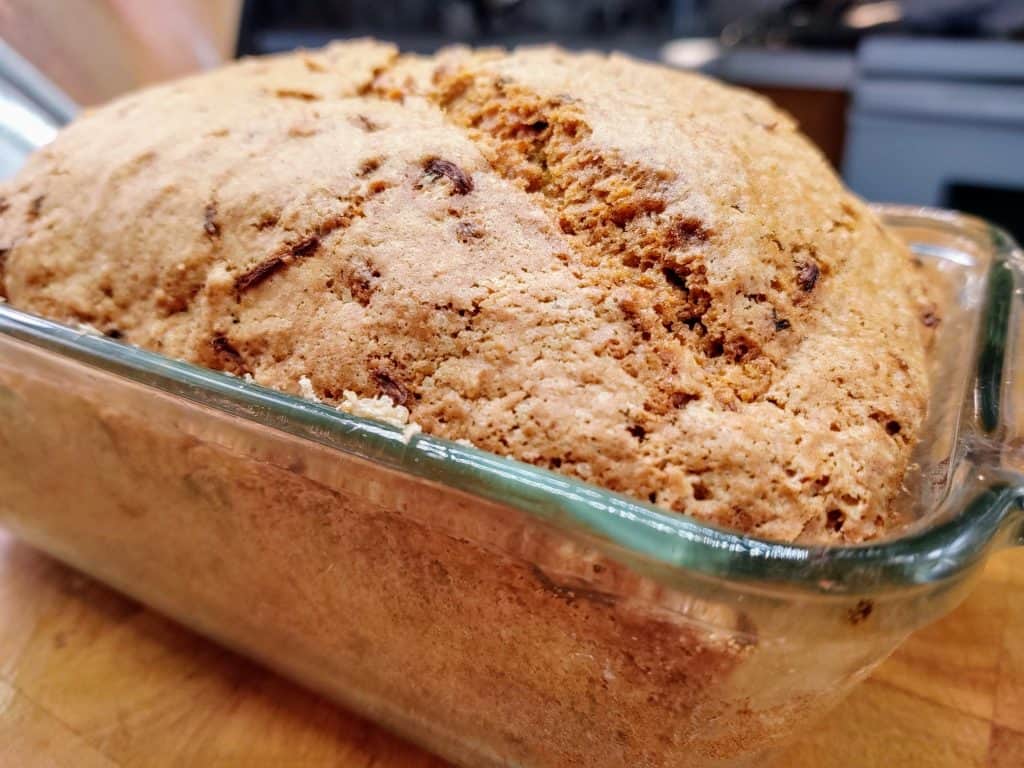
    Place the pan into your already preheated oven and set your timer for 60 minutes. Check periodically to make sure the top is not burning. It is normal for some bits of zucchini to become charred on the surface of the bread.

    baked loaf of zucchini bread

    Your bread is finished cooking when you can insert a butter knife or toothpick into the center of the loaf and pull it out clean. If there is still dough on the knife, allow to cook for an additional 3-5 minutes depending on the amount left on knife.

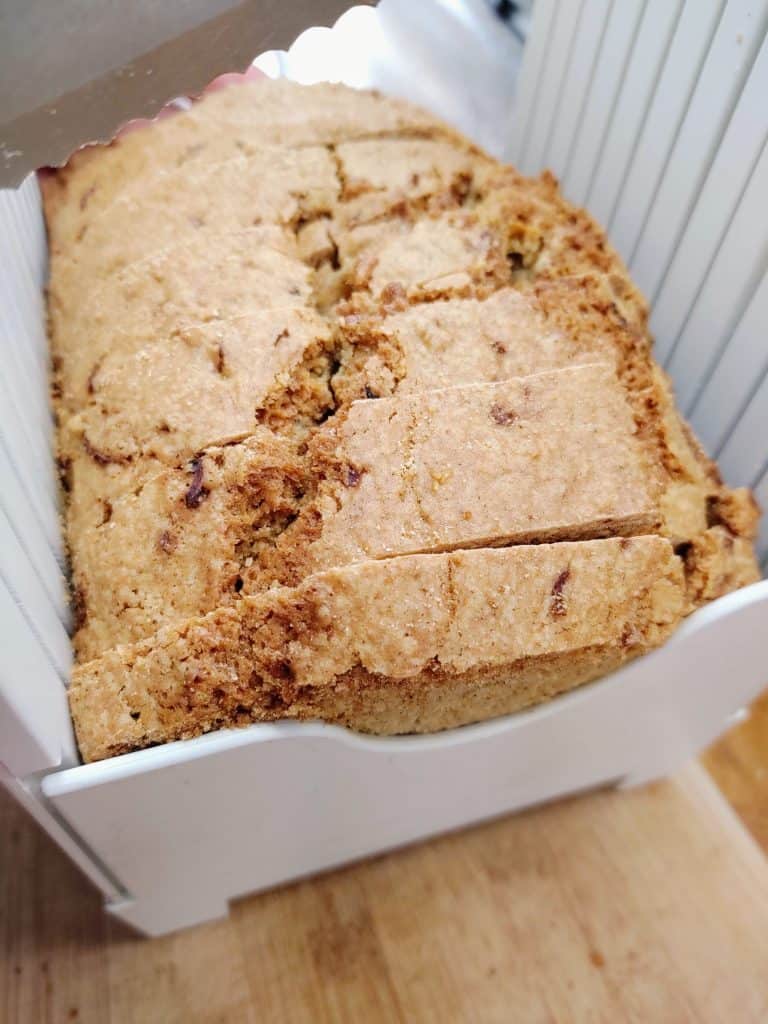
    Once cooked, leave in pan and allow to cool. Once cool, you can use a bread knife and bread slicer to cut into thick slices.

    zucchini bread in bread slicer

    Common questions

    Can you freeze zucchini bread?

    You can. After it has cooled and you have cut it, just place it in a freezer safe gallon bag, seal, and stick in the freezer. It should stay fresh for 2-3 months.

    How long is zucchini bread good for in the refrigerator?

    If you want to keep it long term, it is best to freeze. But if you plan on eating it pretty quickly, you can keep zucchini bread in the fridge for about a week before it starts to degrade in quality.

    Should I peel zucchini or take the seeds out when making bread?

    You can peel if you like but we have not found it necessary. Since you are shredding the zucchini you ed up removing the seeds anyway.

    double panel pinterest image. top image: closeup of zucchini bread in pan. bottom image: sliced loaf on plate. middle text box reading, "The best zucchini bread. Easy to follow recipe"

    For more frugal living tips

    [pt_view id="3dd74e01d7"]

    Hash Brown Casserole

    By MrAnimal Farm

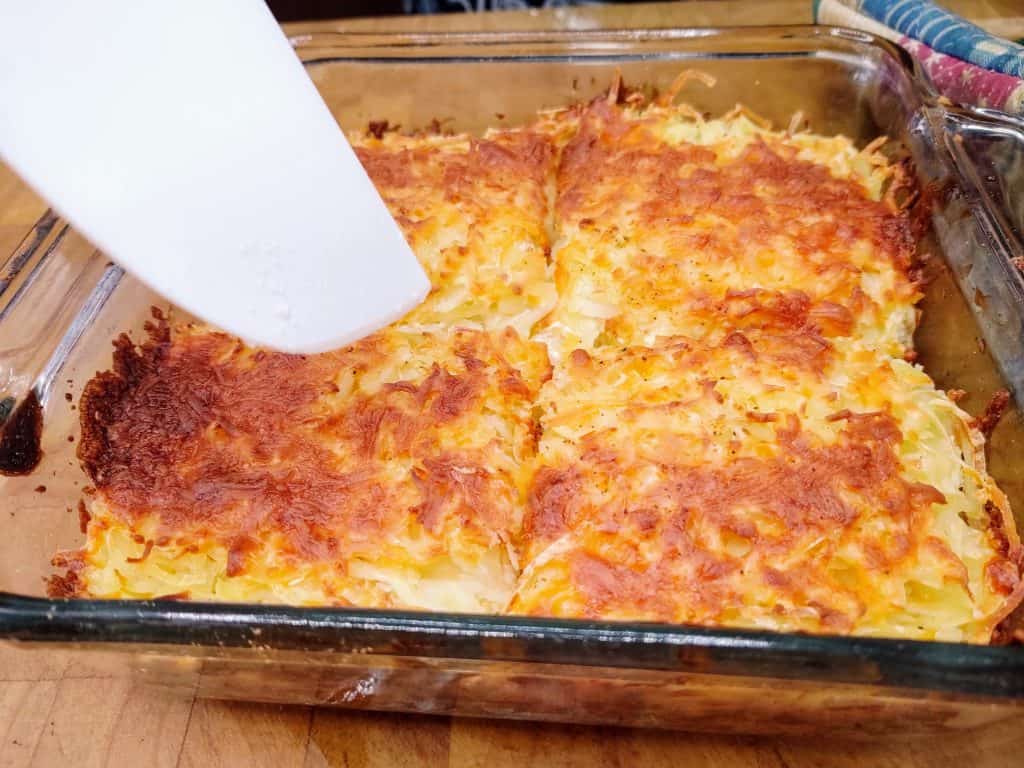
    close up of cooked hash brown casserole

    Who doesn't love a good hearty breakfast? If you do, you will love this easy hash brown casserole.

    close up of cooked hash brown casserole

    This is the ultimate make ahead breakfast casserole with hash browns. Waking up with a delicious breakfast like this makes mornings so much easier to deal with.

    A hot, tasty, and hearty breakfast is as simple as reheating and way cheaper than grabbing drive-thru.

    How To Make Hash Brown Casserole

    Similar to our other make ahead freezer meals, like lasagna, this hash brown casserole is completely customizable. Here is our list of recommended ingredients. But you can add more veggies, meat, or whatever you like for your breakfasts!
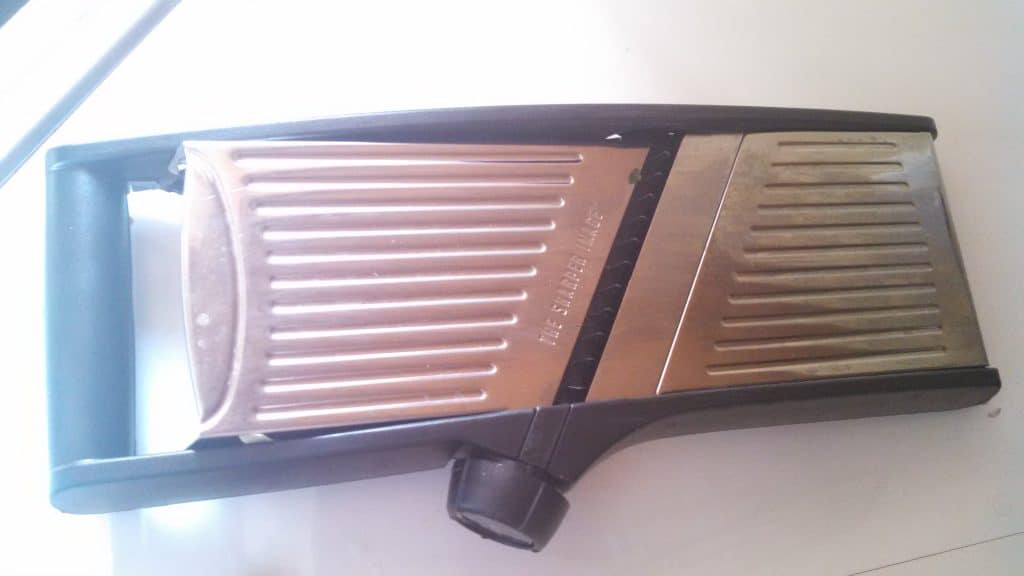
    Ingredients

    ½ cup or 1 stick of butter (salter or unsalted up to your preference)

    1 cup of shredded cheese (we like to use a Mexican blend)

    1 cup of sour cream

    1 bag frozen hash browns

    salt and pepper (to taste)

    Can I use fresh potatoes instead of frozen hash browns?

    Absolutely! Frozen hash browns are just easier because they are washed, cut, portioned, and ready to go. But if you prefer to prepare the potatoes yourself, feel free to do so.

    Directions

    Start by preheating your oven to 400 degrees. Next you will melt your butter. You can do this on your stove top or break the stick into a few pieces and put in the microwave. We find it will melt completely in about 90 seconds to 2 minutes.

    Pull out a large mixing bowl and pour your melted butter into it. Next, add in 1 cup of sour cream. You can use a rubber spatula to make sure you get everything from the bowl.

    Add in a few grinds of salt and pepper. Add as much as you like depending on your taste. You can also put in any extra ingredients you may like. Diced peppers, ham, bacon, etc. are all great choices to give a little something extra.

    Using your electric mixer, mix everything together. Make sure everything is well blended but don't over whip the sour cream. We usually use the lowest setting to make sure everything is not overly mixed.

    Now you will want to get out your 8x8 pan and Canola spray. Spray the inside of your pan to coat the bottom and sides. If you want to make a larger serving (like a 9x13 pan) just double the ingredients.

    partially layered hash brown casserole

    Open your bag of frozen has browns and sprinkle a layer across the bottom of the pan. Now add a layer of cheese. Make this as thick as you want. We LOVE cheese in our house so we always end up using too much (as if "too much" is even a thing with cheese).

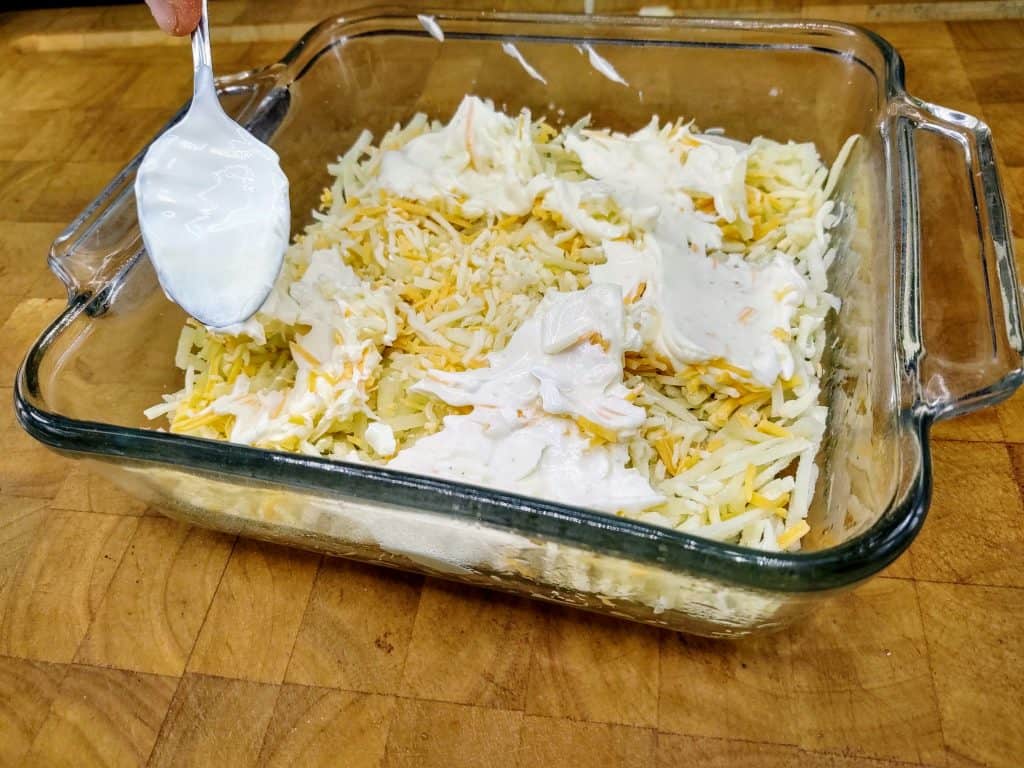
    After your cheese is layered you will take about half of your butter/sour cream mix and layer it over the cheese. You can spread it with a spatula. Just be careful not to squish it down into the cheese or potato layer. You want to have clear layers.

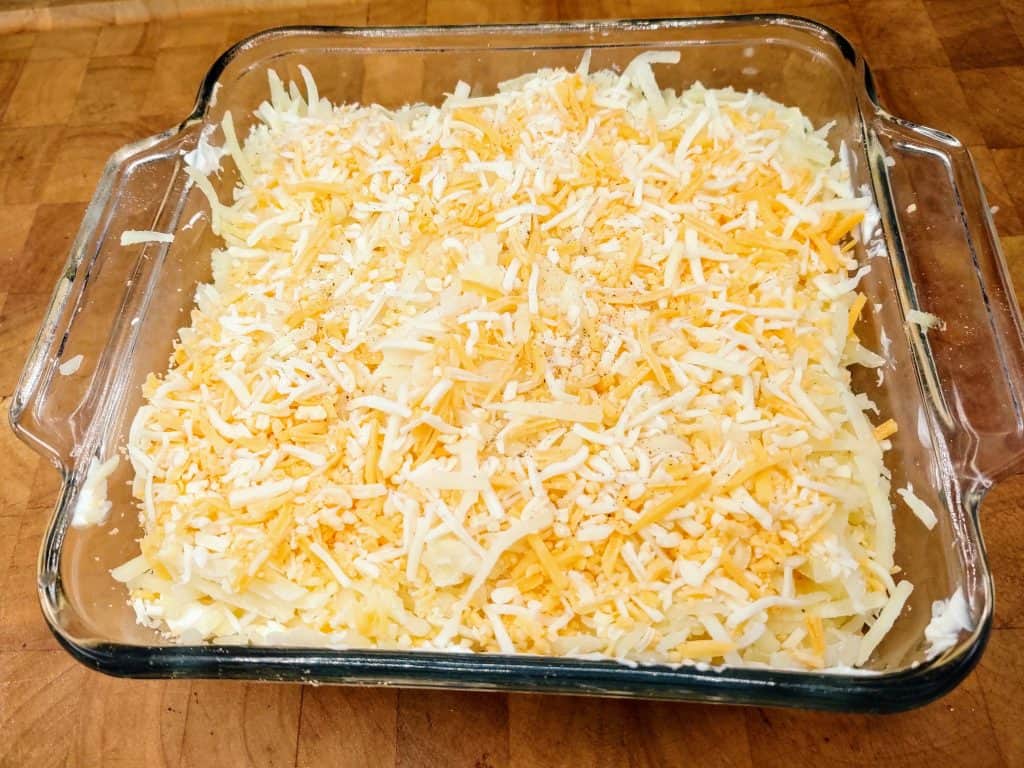
    Repeat the layers of potato, cheese, and the rest of the butter/sour cream mixture. Finally, add one more layer of hash browns and cover the top of the sour cream mix completely. Now add one more layer of cheese across the top.

    precooked casserole

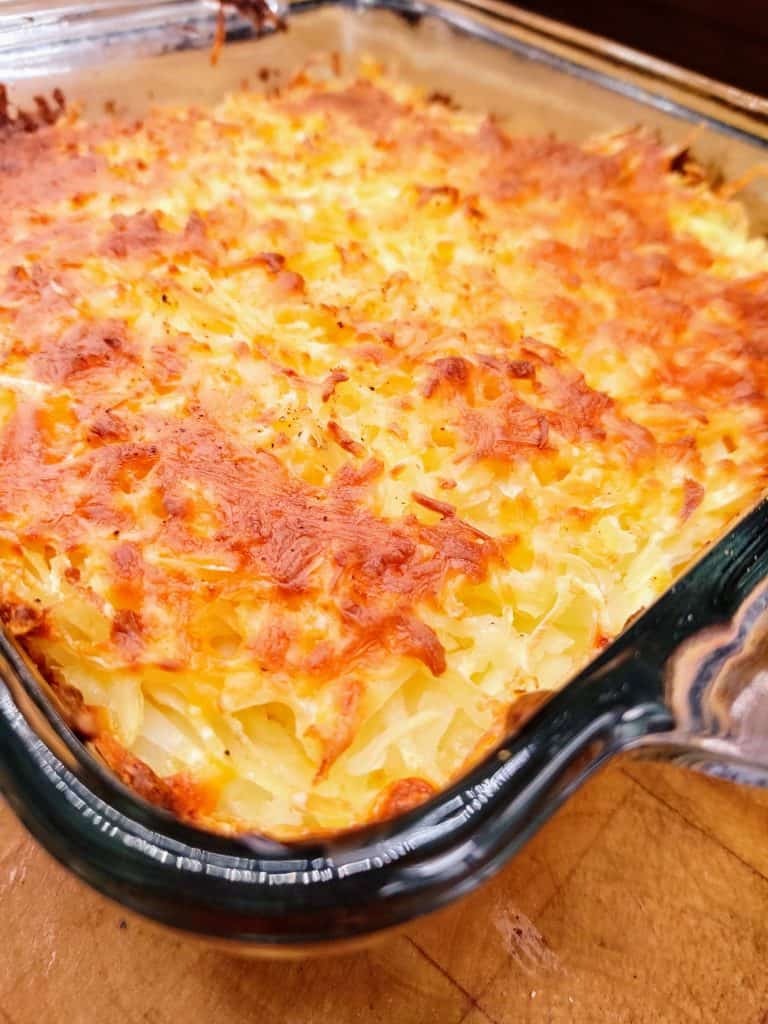
    Your oven should be preheated by this point. Just place your casserole in the center rack and set your timer for an hour. Check periodically to ensure the cheese is not burning on the top. Cook until the entire casserole is heated throughout.

    cooked casserole cut into quarters

    Common Questions

    How do you freeze hash brown casserole?

    This recipe makes a great candidate for a freezer meal. All you need to do is cover it with a lid or plastic wrap and stick it in the freezer before cooking.

    How do you reheat hash brown casserole?

    It's just as easy as freezing it. Pull it from the freezer and stick it in the fridge over night.

    Should I thaw frozen hash browns before cooking?

    You don't have to. You can put your casserole straight into the oven. If it is frozen, the cooking time may be a bit longer, but there's no need to thaw beforehand.

    pinterest image of hash brown casserole on a plate with text reading, "How to make hash brown casserole. easy recipe. make ahead meal"

    How To Freeze Broccoli

    By MrAnimal Farm

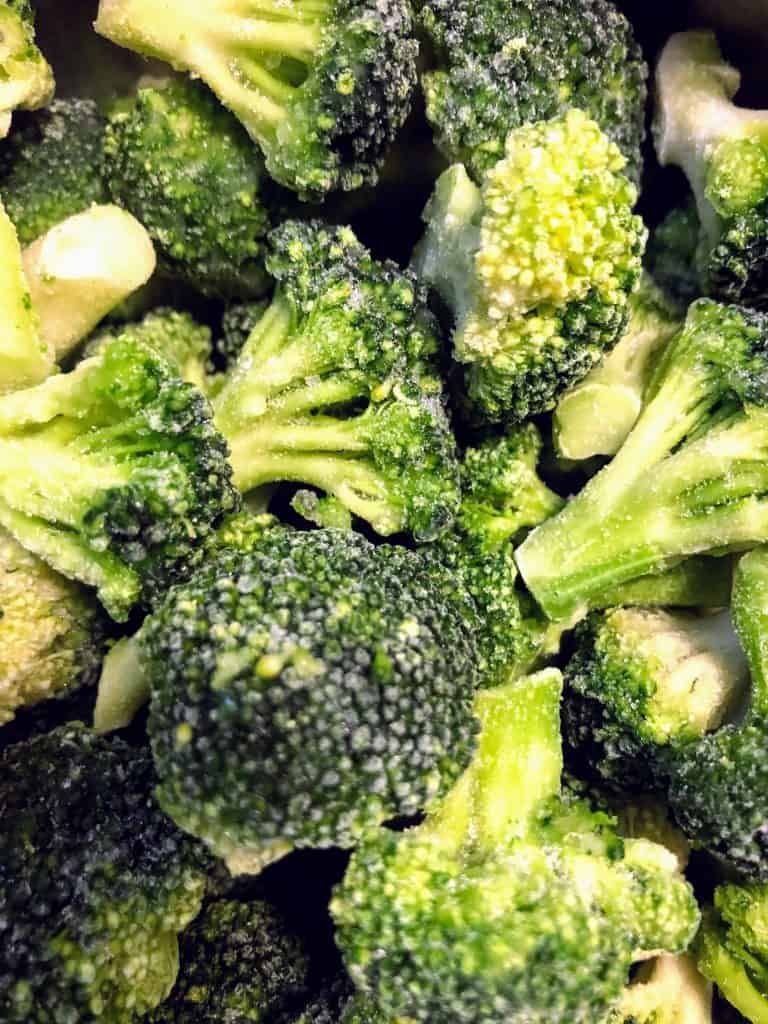
    closeup of frozen broccoli

    Did you get an above average harvest of broccoli this season? Maybe you found a killer produce sale. Whatever reason, what do you do when you have an over abundance of broccoli? You learn how to freeze broccoli, of course!

    closeup of frozen broccoli

    If you already know how to freeze yellow squash and zucchini, then this method will be pretty familiar. If you have not tried your hand at freezing, you're in luck because it is super easy. Welcome to the world of freezing vegetables!

    How To Freeze Broccoli

    So, you decided to grow broccoli this season and you had WAAAAY more success than you expected. What do you do?

    You do what we recommend for almost every bit of food that could potentially go to waste; you freeze it!

    Step One

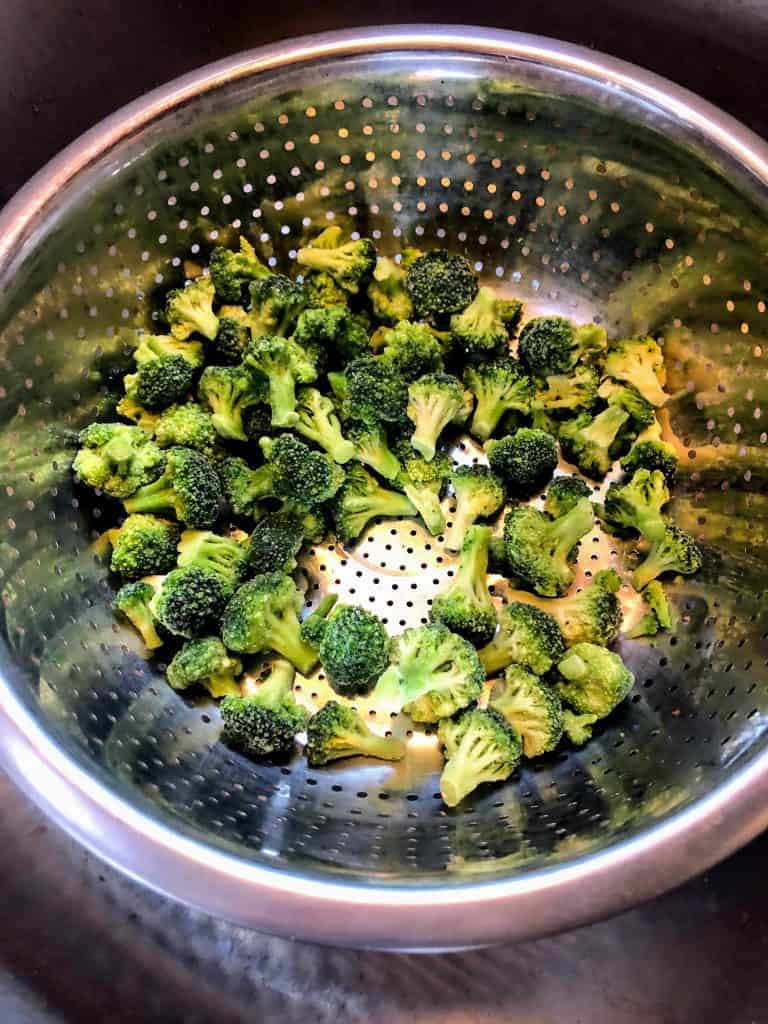
    First things first, gather up your broccoli and prepare it for washing. We like to use a colander to allow the water to flow over the broccoli and not pool in the bottom of a bowl.

    You can also run the water directly over the broccoli but we find the colander method to be much easier, quicker, and effective.

    Break you broccoli head into smaller florets (just like you do when freezing cauliflower) and place them into your colander. Then just run water over them, gently moving the colander from side to side and tossing the florets to turn them over.

    broccoli in colander ready to wash

    Step Two

    Now that your broccoli is clean, we will learn how to blanch broccoli for freezing. What is blanching? Blanching is the process of heating your broccoli to destroy the enzymes that cause vegetables to continue the decaying process even while frozen.

    Blanching is really easy and makes your frozen vegetables taste better for much longer. To blanch you will need to bring a stock pot of water to a rolling boil. Once boiling, simply put your broccoli into the boiling water.

    Set your kitchen timer for about 3 minutes. You want your broccoli still crisp but not soggy. You may need to adjust this time.

    While your broccoli is boiling, prepare a large bowl of ice water. When your time goes off, pull your broccoli out of the boiling water and immediately put into the ice water bath. The reason you do this is to stop the cooking process as soon as possible.

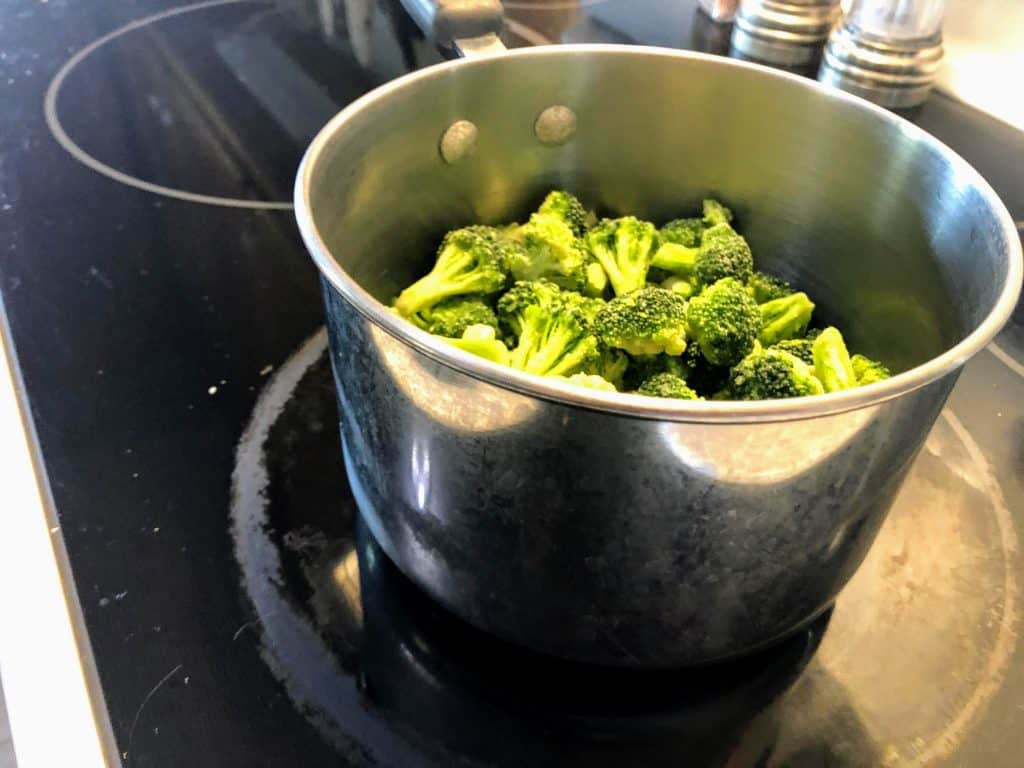
    broccoli in pot for blanching

    Can I freeze broccoli without blanching?

    You can simply stick a head of broccoli into the freezer and call it a day. The problem with doing this is due to a enzymes that many vegetables contain.

    These enzymes cause the vegetable to essentially still age even while frozen. So, while you can freeze broccoli without blanching, it is not advised. Your broccoli will change in color, texture, taste, and quality rather quickly without blanching.

    With blanching your broccoli should stay high quality in your freezer for up to a year. Of course, always follow FDA guidelines when preserving your own food.

    Step Three

    Once your broccoli has sufficiently cooled in the ice bath, it's time to get it ready for freezing.

    Pull out your measuring cups and scoop your desired portions. We like to sort 1 to 2 cup portions into quart sized freezer bags. These are great for single meal servings or recipes.

    If you are cooking for a family, you can always use the gallon size freezer bags. Just scoop whichever portion you decide and put them in the baggies.

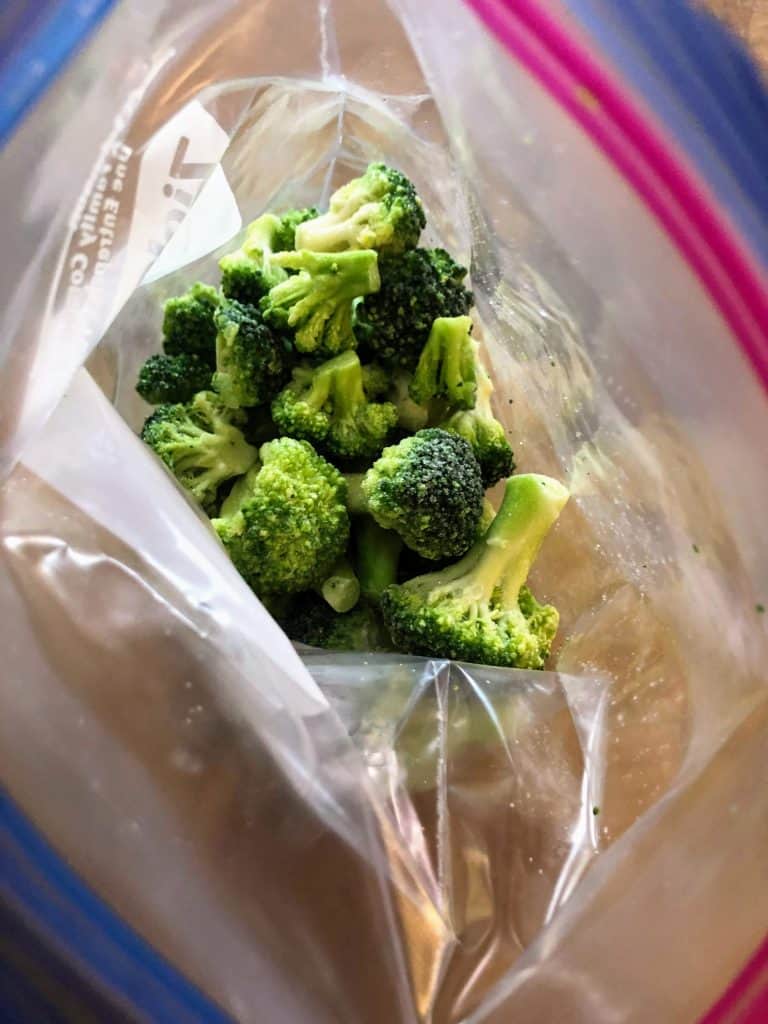
    bag of broccoli

    Step Four

    After you have your bags filled, flatten them out. This removes all of the air and excess water and cuts down on freezer burn. Flattening them also makes them easier to stack in the freezer.

    How do you store broccoli in the freezer? You don't need to do anything else special to store them. Simply find a space and put them in the freezer. They will typically freeze in an hour or 2.

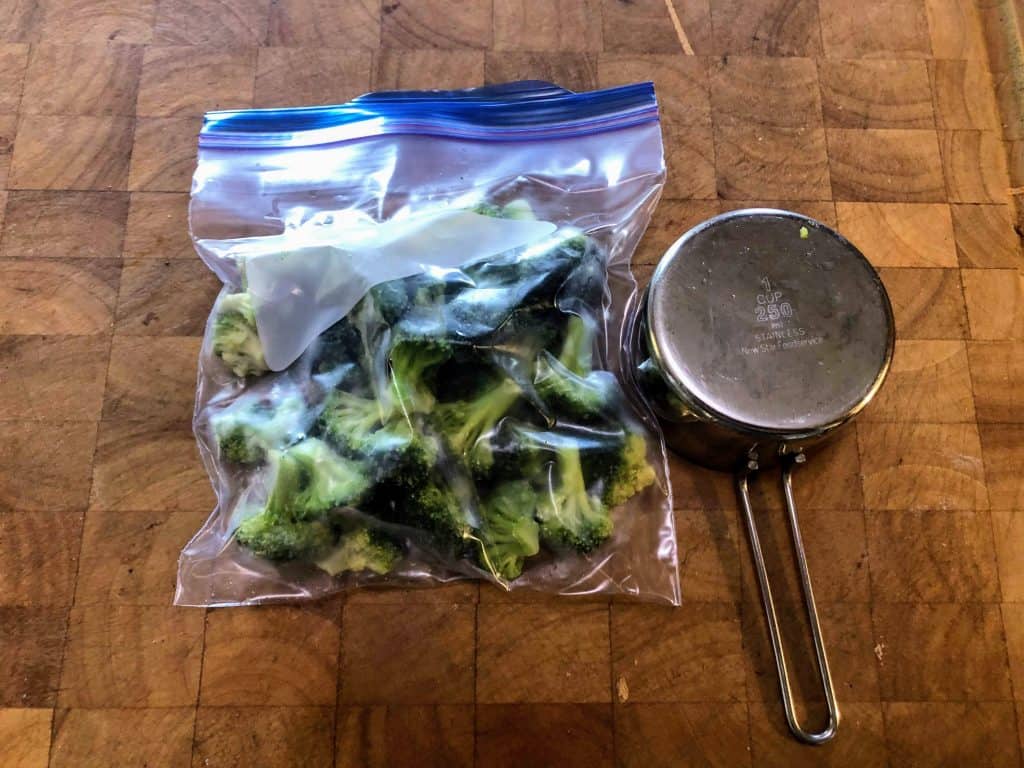
    broccoli in ziplock bag next to measuring cup

    Common questions

    Is frozen broccoli good for you?

    There is a popular belief that states that fresh fruits and vegetables are healthier than frozen. This is a myth. In fact, produce is typically preserved when it is most ripe. So, yes, frozen broccoli is healthy for you. You can now end the fresh vs frozen debate in your mind!

    Should you thaw broccoli before cooking?

    It depends on what you need it for. If you want a snack, you will probably want to. If you're adding it to a smoothie, it's not necessary.

    To thaw, you just need to put it in the fridge over night. You can also heat it on the stovetop, in the microwave, or put it in a casserole or some other dish.

    pinterest image of broccoli in measuring cup with text reading "How to freeze and blanch broccoli"

    For more frugal living tips

    [pt_view id="3dd74e01d7"]

    Egg Recipes - 30+ Recipes That Use A Lot of Eggs

    By MrAnimal Farm

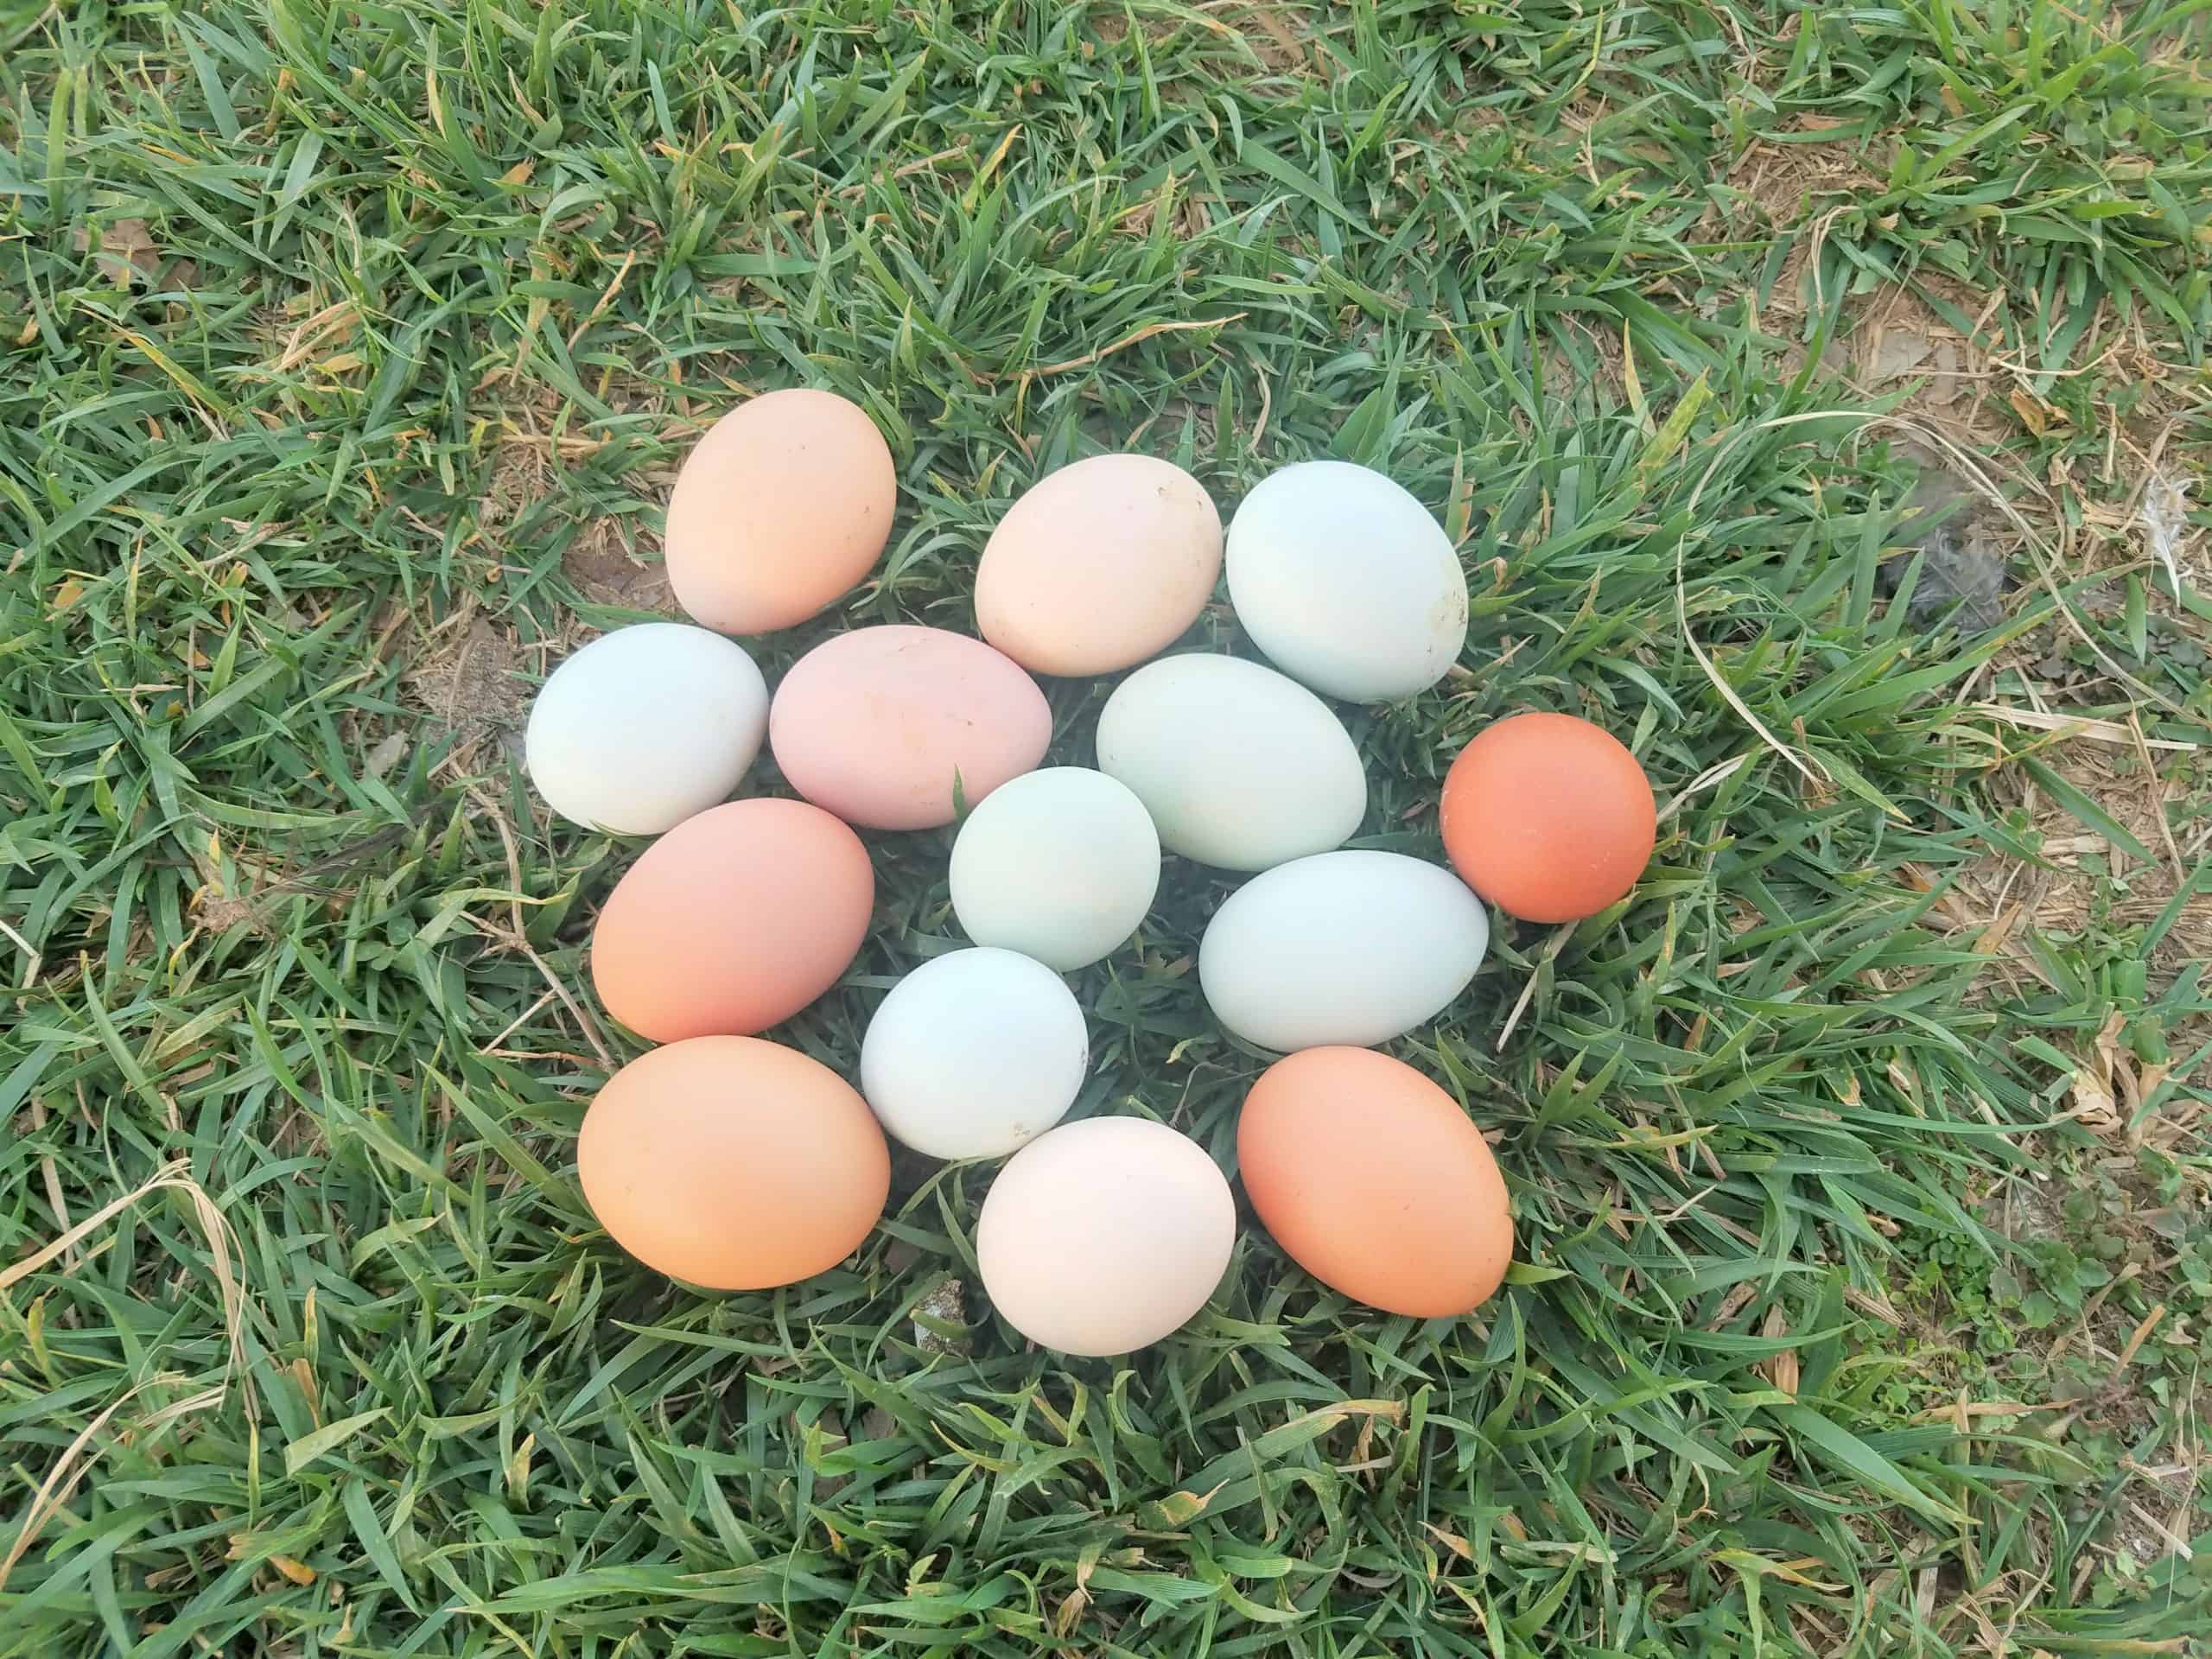
    pile of eggs in grass

    When you have backyard chickens or maybe you have found a fantastic sale on eggs and you end up with a surplus, you may need to find what to do with extra eggs. Of course you can simply try freezing eggs. But perhaps you want to find some ways to prepare eggs to eat them. Here are some awesome egg recipes that use a lot of eggs.

    pile of eggs in grass

    Egg Recipes That Use a Lot of Eggs

    If you have a surplus of eggs, figuring out lots of different ways to cook eggs is a good way to use them up without getting bored. Eggs are a really versatile food that you can use as the main ingredient or use as a background ingredient and get lots of different flavors and types of foods.

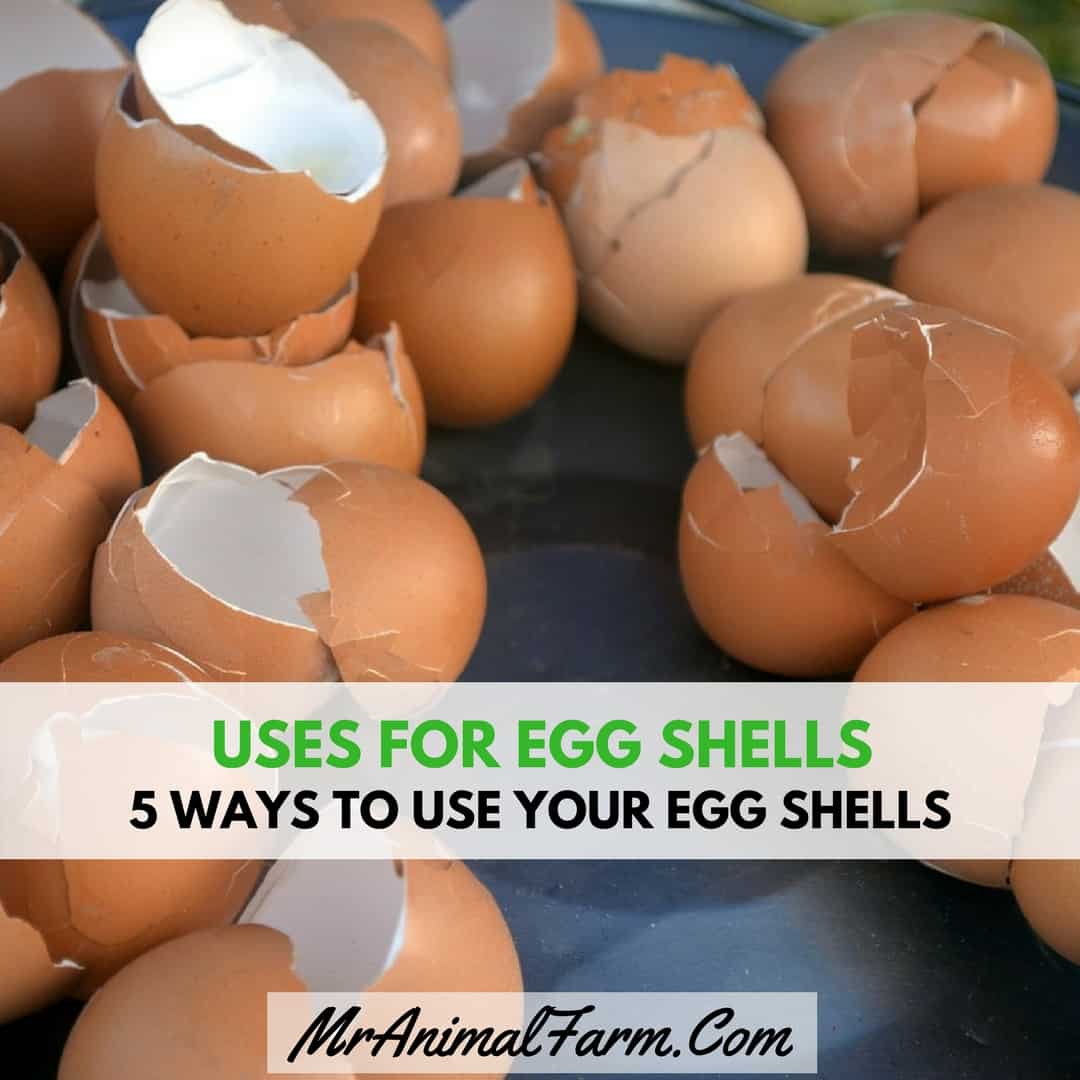
    Of course, if you are using all these eggs in these egg recipes that use a lot of eggs you will end up with a TON of egg shells. Try out these ways to use your eggshells so that they don't go to waste either!

    Bread Recipes That Use A Lot of Eggs

    Focaccia Flax Bread - Gluten Free! This uses a whopping 22 eggs!

    focaccia flax bread recipe that uses a lot of eggs

    Nut Free Keto Bread - Super Yummy and healthy bread option that uses 9 eggs!

    Egg Recipes for Breakfast

     Egg Cheese Muffin Melts Recipe - fast and easy and they use 6 eggs

    Freezer Breakfast Sandwiches - You'll love these more than an Egg McMuffin!

    Sweet Potato Frittata - healthy and uses 6 eggs.

    sweet potato frittata

    Crescent roll breakfast pizza - these look like great freezer meals!

    Easy Breakfast Casserole - another great freezer meal open and it uses 12 eggs.

    Breakfast Quiche

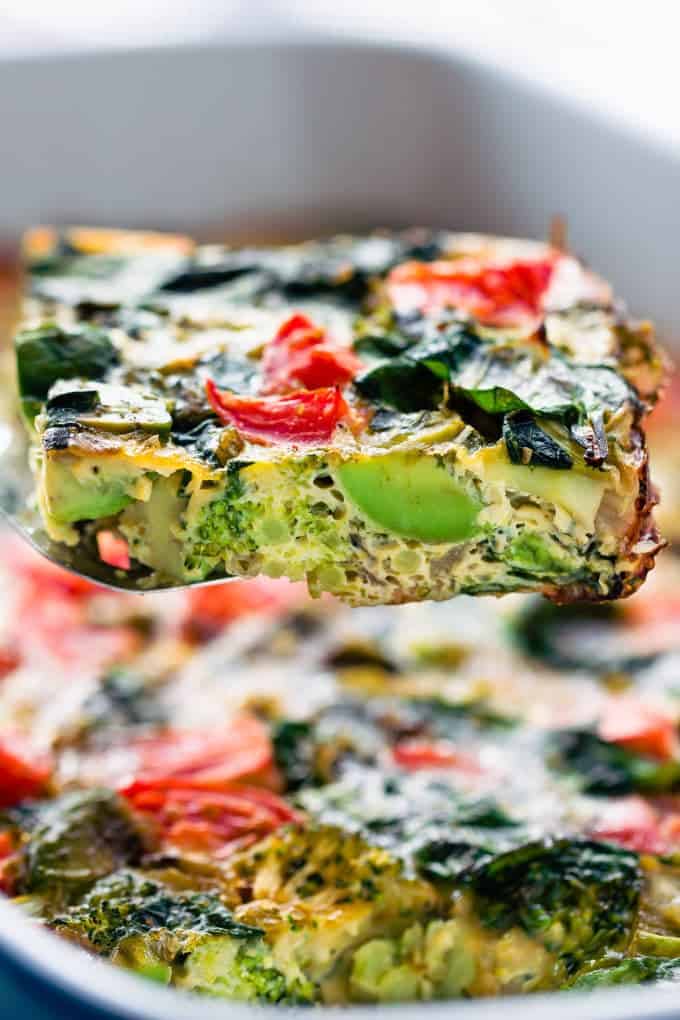
    Whole30 Breakfast Casserole - packed full of veggies and 12 eggs.

    veggie & egg breakfast casserole recipe that uses a lot of eggs

    Sorbian Eggs

    Egg Tacos

    Alpine Eggs - Might want to try these with the Flax bread listed above.

    Dessert Recipes That Use A Lot of Eggs

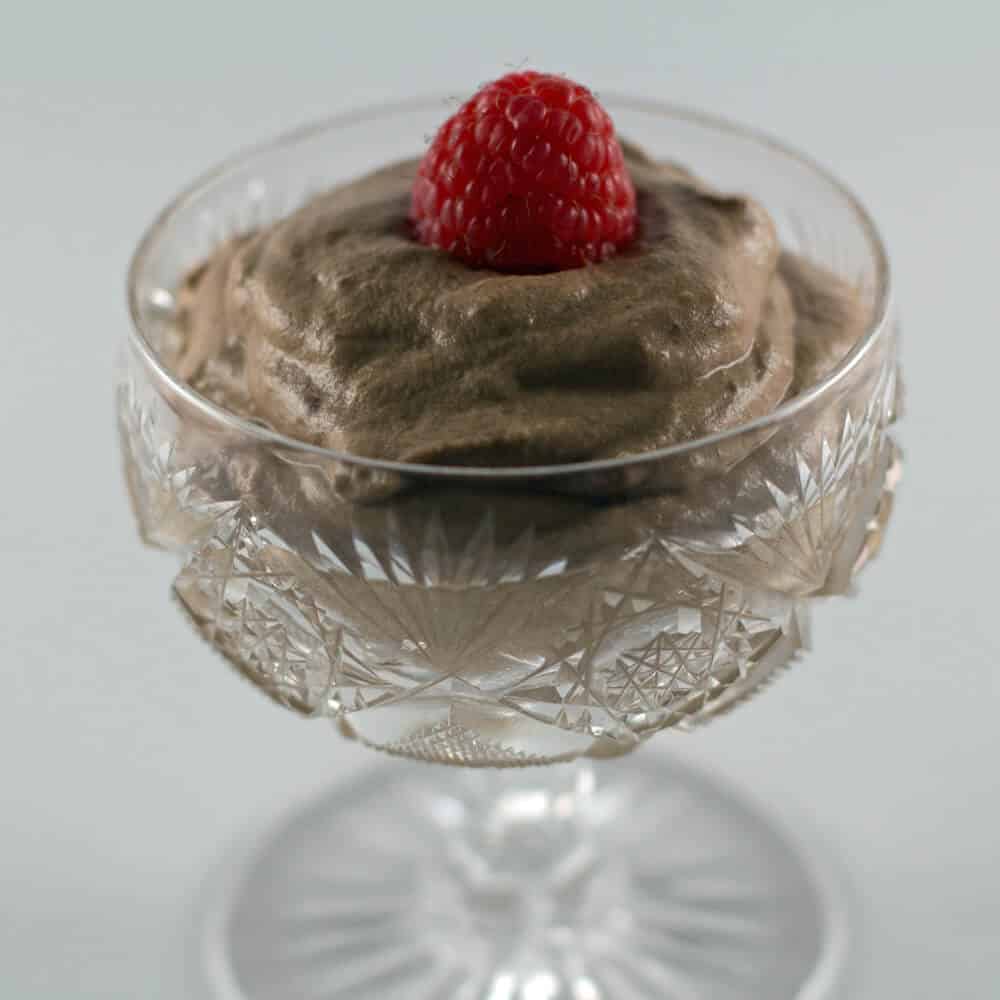
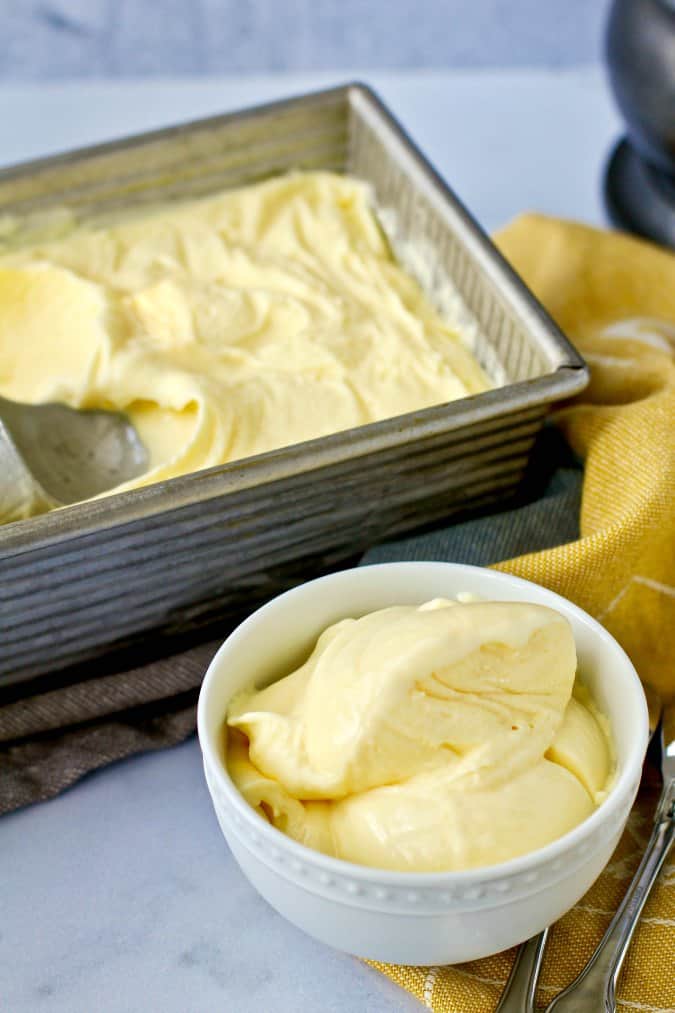
    Creamy Chocolate Mousse with Orange Liqueur

    chocolate mouse with raspberry on top

    The Best Eclairs Recipe

    Best Flourless Chocolate Cake - gluten free and uses 6 eggs.

    Banana Pudding Pie - Delicious and uses 6 eggs.

    If you need more help getting your foods frozen, check out the Ultimate Freezing Food Guide for a complete quick start reference so that you can have a well-stocked freezer.

    Access the Ultimate Freezing Food Guide Here

    Chocolate Pound Cake

    Lime Curd Frozen Custard - this uses 12 eggs.

    Lime curd frozen custard recipe that uses a lot of eggs

    Mini Eclairs with Lime Custard Filling and Meringue Topping

    Mint Chocolate Chip Ice Cream - Super yummy!

    Quiche & Casserole Egg Recipes

    Easy Crust Dairy-Free Veggie Quiche 

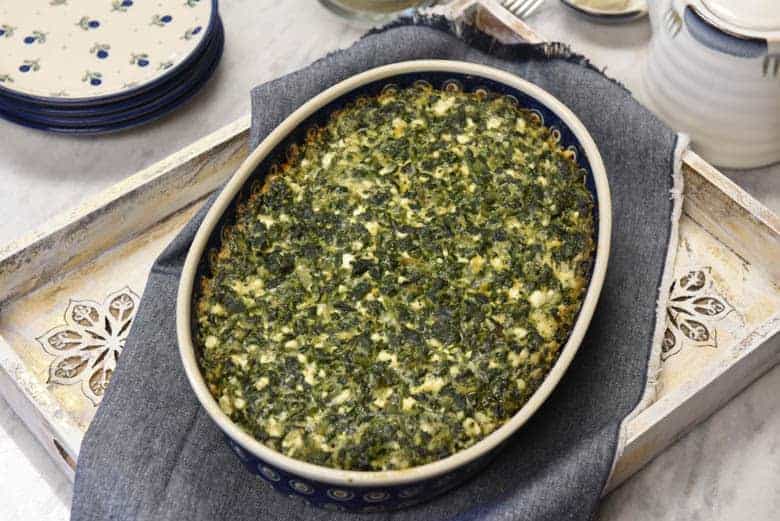
    Crustless Spinach Quiche

    crustless spinach quiche recipe that uses a lot of eggs

    Green Chili Egg Puff Casserole - this one uses 10 eggs.

    Keto Crust-less Kale & Cheddar Quiche - this would make a great one to freeze for later.

    Crustless Quiche

    Deviled Eggs & Egg Salad Recipes That Use A Lot of Eggs

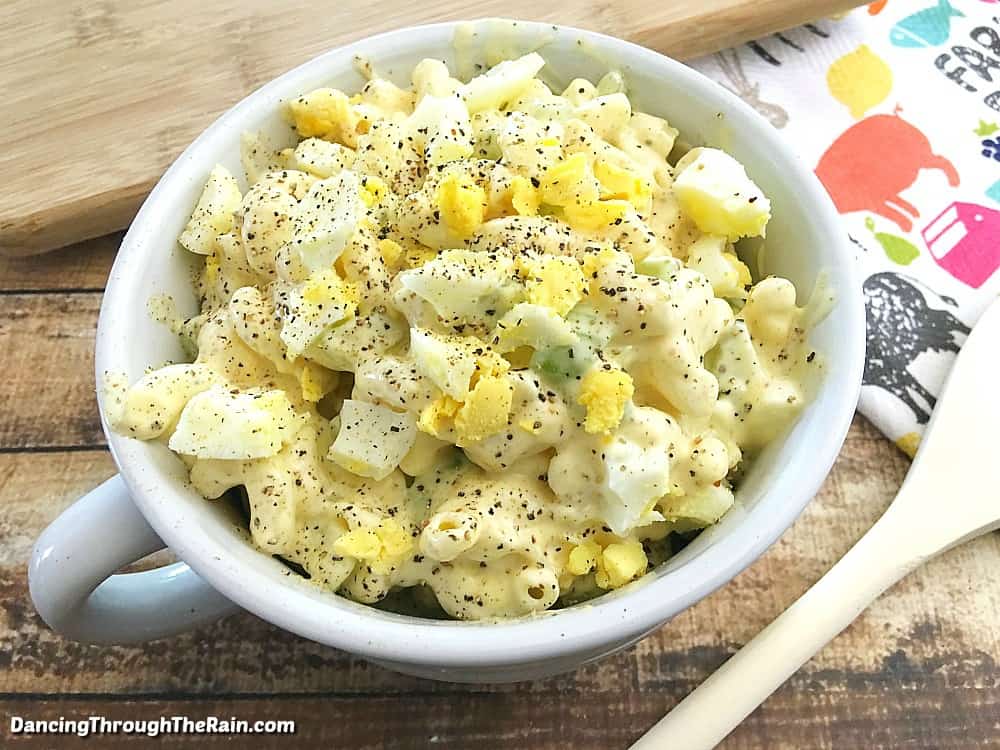
    Macaroni Egg Salad

    macaroni egg salad

    Everything Seasoning Deviled Eggs - Super yummy and it uses 12 eggs.

    Jalapeno Popper Egg Salad

    Easy Deviled Eggs

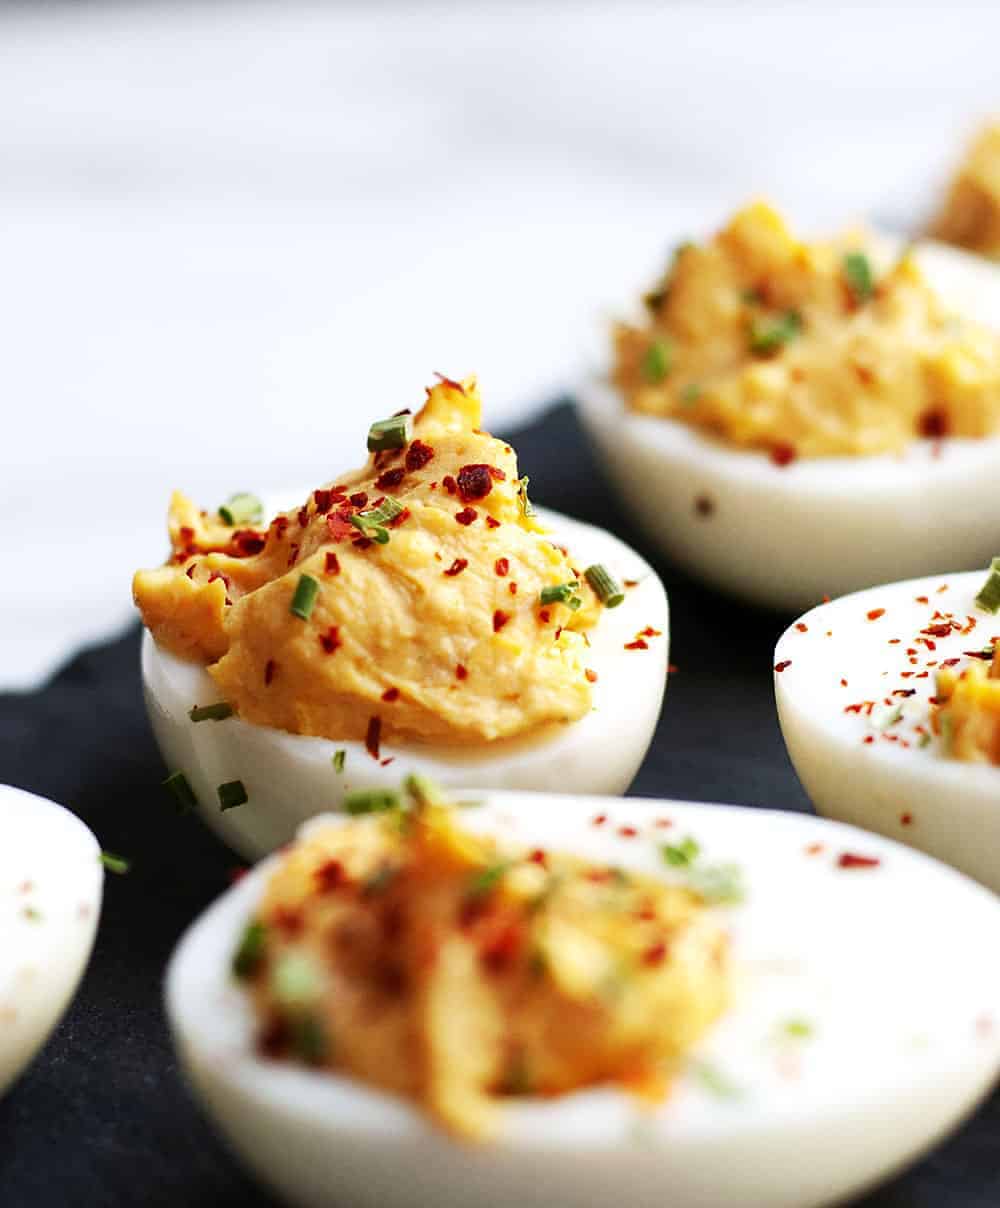
    Spicy Deviled Eggs

    spicy deviled eggs

    Deviled Egg Macaroni Salad - this one uses 12 eggs.

    Deviled Egg Dip

    If you need more help getting your foods frozen, check out the Ultimate Freezing Food Guide for a complete quick start reference so that you can have a well-stocked freezer.

    Access the Ultimate Freezing Food Guide Here
    pinterest image with hand holding 2 eggs above mixing bowl. Text reads, "30+ recipes that use a lot of eggs"

    Chicken Tractor Plans

    By MrAnimal Farm

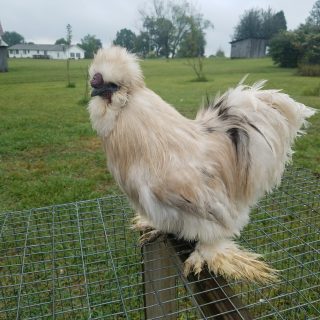
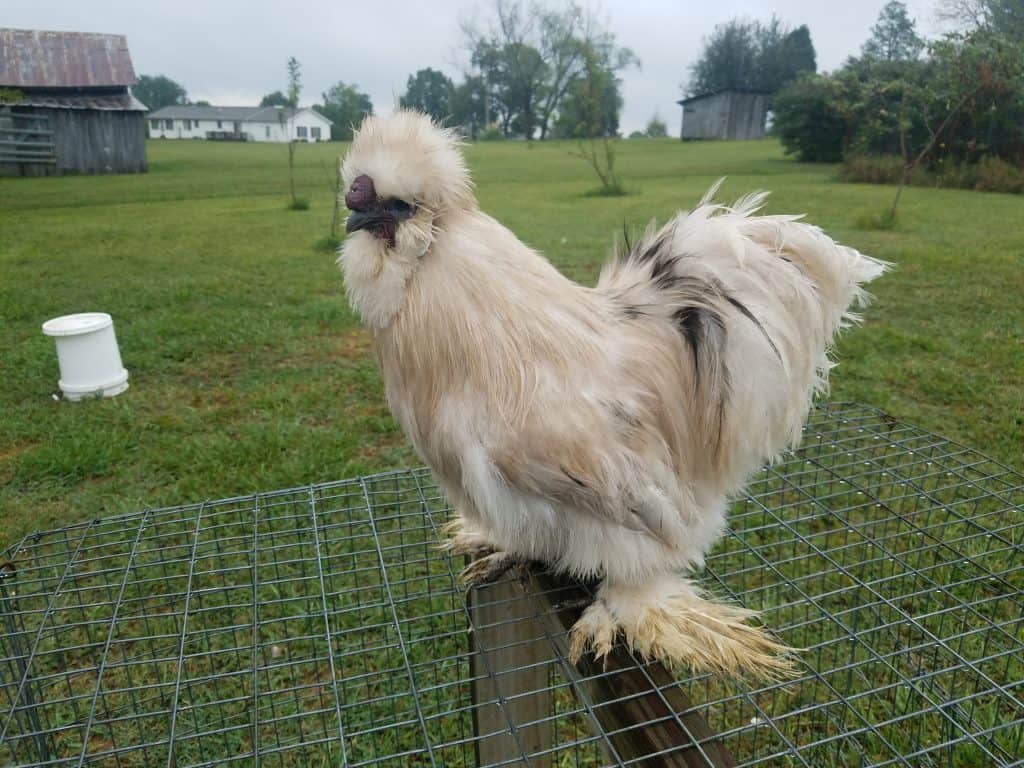
    silkie chicken rooster

    Whenever I hear a new term I want to learn as much about it as I can. I was talking with a friend recently and the term chicken tractor came up. I used the word so naturally and my friend had no idea what I was talking about. So, I thought I wonder who else needs to know?

    silkie chicken rooster

    What Are Chicken Tractors?

    If you have never heard of the term before, you may be wondering what exactly does it mean? Although, in your mind you may be picturing a big tractor in the shape of a chicken, this is not the case. 

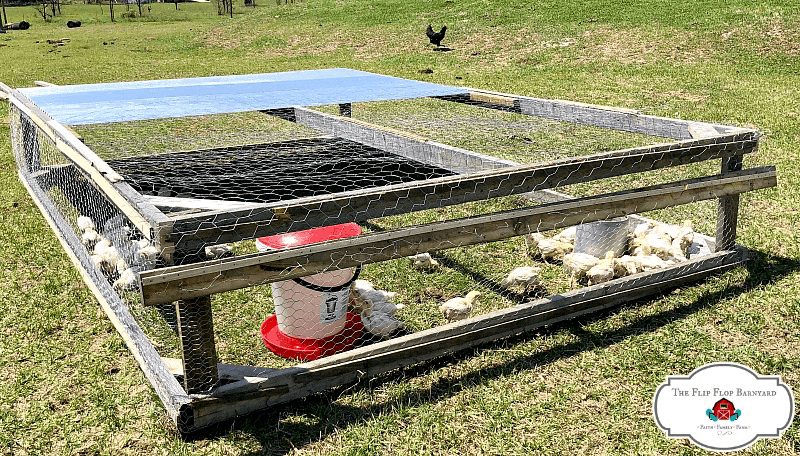
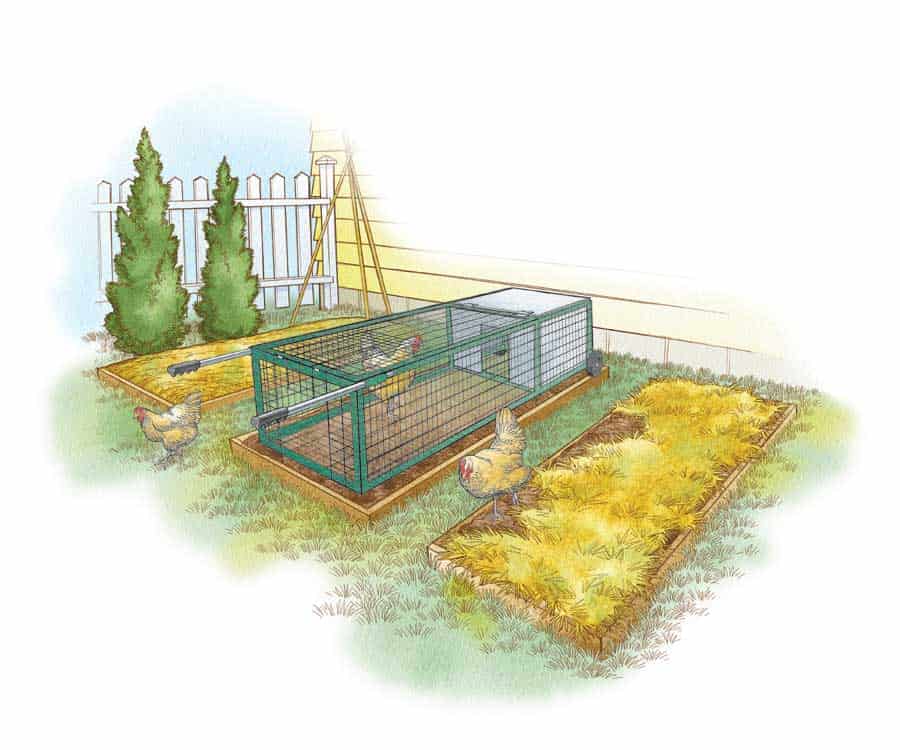
    A chicken tractor is simply a movable chicken coop (I know, less interesting). Unlike a heavier, fixed in place chicken coop. Most of these DIY chicken tractors are just an A-frame that is lightly built. It can be moved about the yard, usually by one person. You’ll notice these pens can be moved around your yard and don’t need a floor.

    What Are They For?

    Think of chicken tractors as the RV of the poultry world. The tractor is moved around the yard to help the chickens get fresh food. 

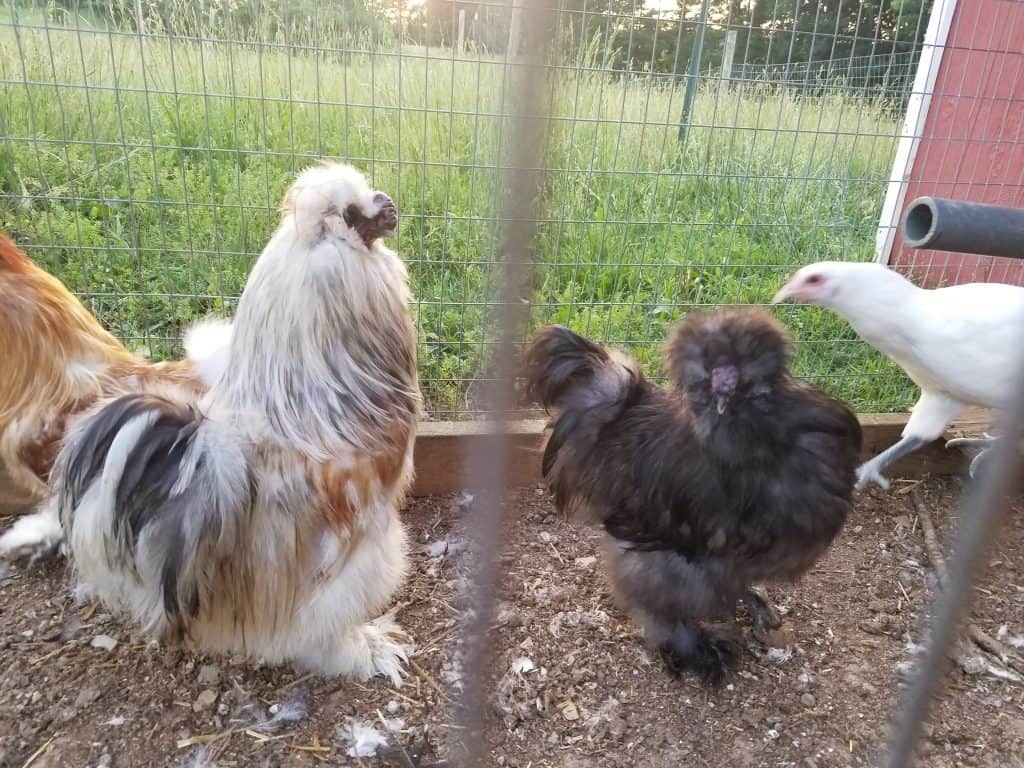
    2 silkie chicken roosters in their run together

    This term also comes from the fact that the chickens work like a tractor. Using their feet, the scratching movement loosens the top layer of the earth. This is a really great way to make the ground garden ready.

    So, if you already have a flock or if you're thinking of some of your own backyard chickens, these plans could save you some money (money you can spend on more chickens, of course).

    What are the Benefits?

    Your chickens will have access to grass and soil and all of the little bugs that come along with them. Park them in your garden area over winter and get started tilling early.

    If the tractor is moved every 24 hours, you get the benefit of natural fertilizer. That means you have chicken manure exactly where you may need it.

    You chickens will also get protection against potential predators. You’ll have less with rodents or snakes getting to your eggs.

    All of these plans are great too because you can customize them for average sized chickens, large breeds, and even smaller breeds like Frizzle silkies or Bantam chickens.

    The Plans

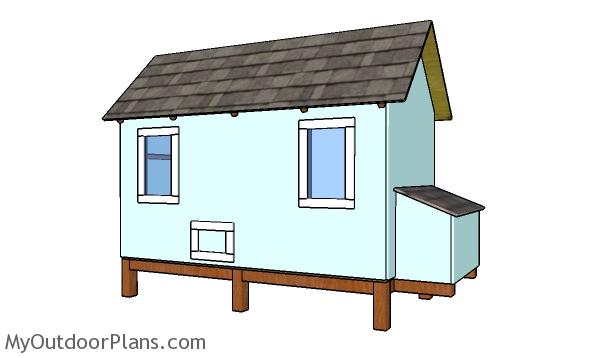
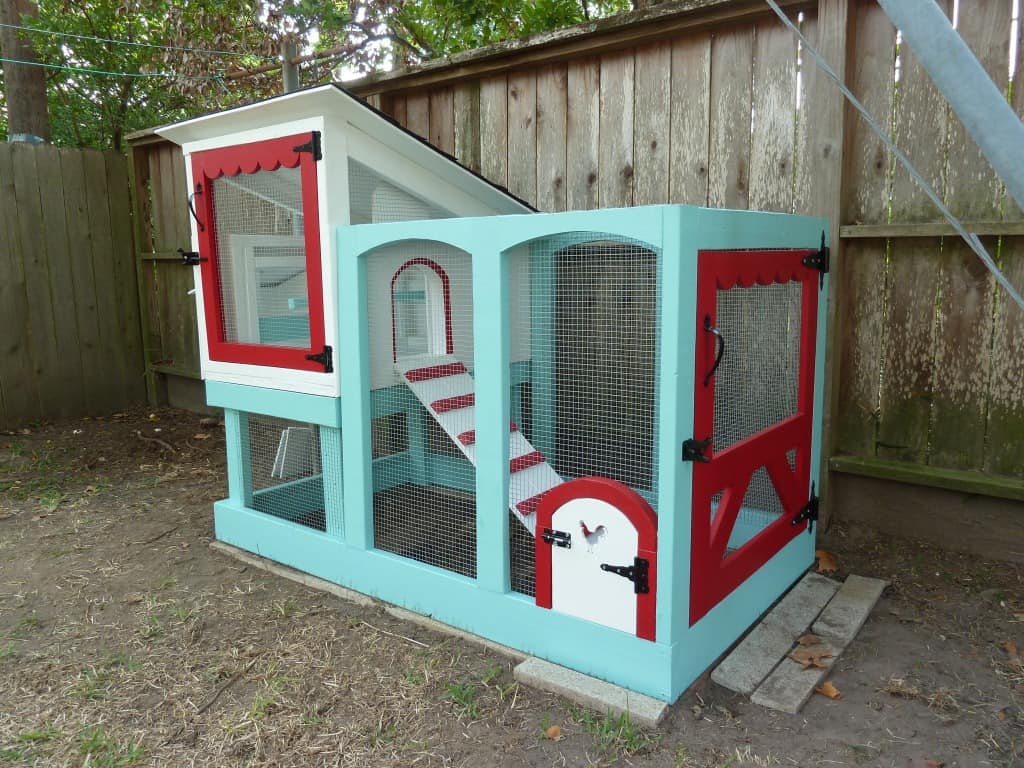
    And while this is not exactly a chicken tractor, you can use these plans as the run section if you are building a larger living space for your chickens. And finish off your whole setup with these DIY chicken feeders.

    This chicken tractor is a DIY plan with materials that are super inexpensive!

    If you want a single structure, you will love this simple A-frame plan.

    These simple, step-by-step plans will have your chickens in their new chicken tractor in no time! 

    Here’s a quick afternoon project that is really easy to put together. Your chickens will love their new home.

    large square shaped chicken tractor

    DIY chicken tractor plans are available and I love this resource for doing it all yourself. You’ll love this A-frame coop with a larger grazing area combo chicken tractor.

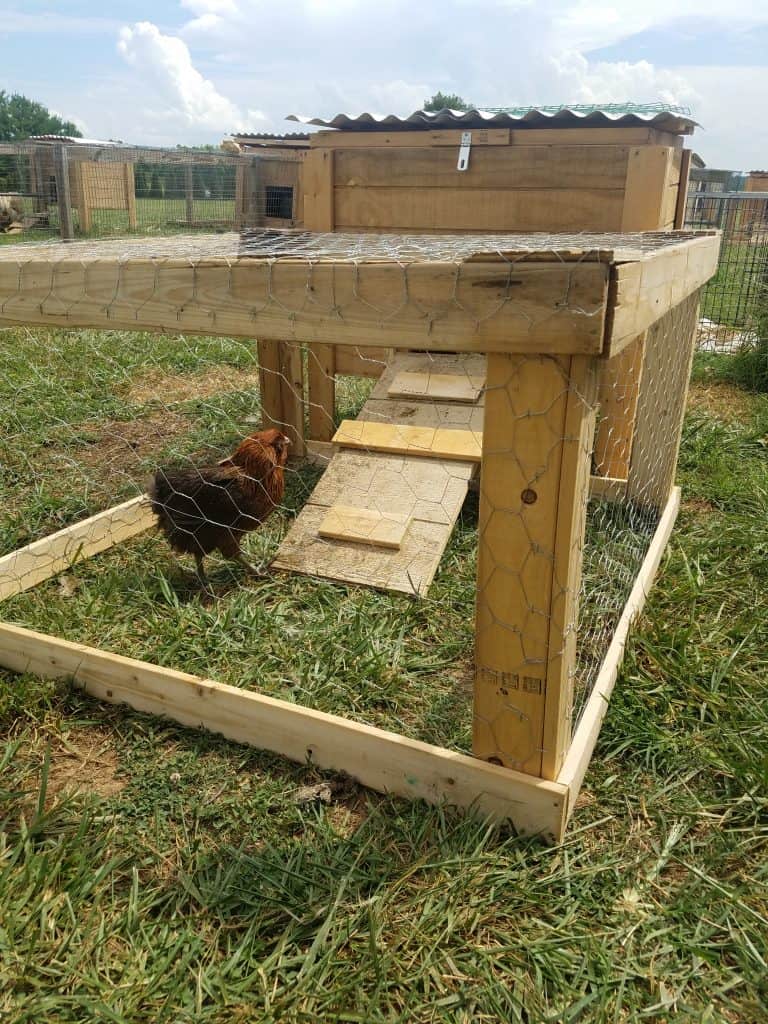
    This chicken tractor can probably be built with supplies you already have lying around your homestead. 

    You can learn how to build a chicken tractor all on your own, no fancy materials needed.

    For more about raising chickens

    [pt_view id="3d0b212jvx"]

    Essential Pantry Staples You Should Never Run Out Of!

    By MrAnimal Farm

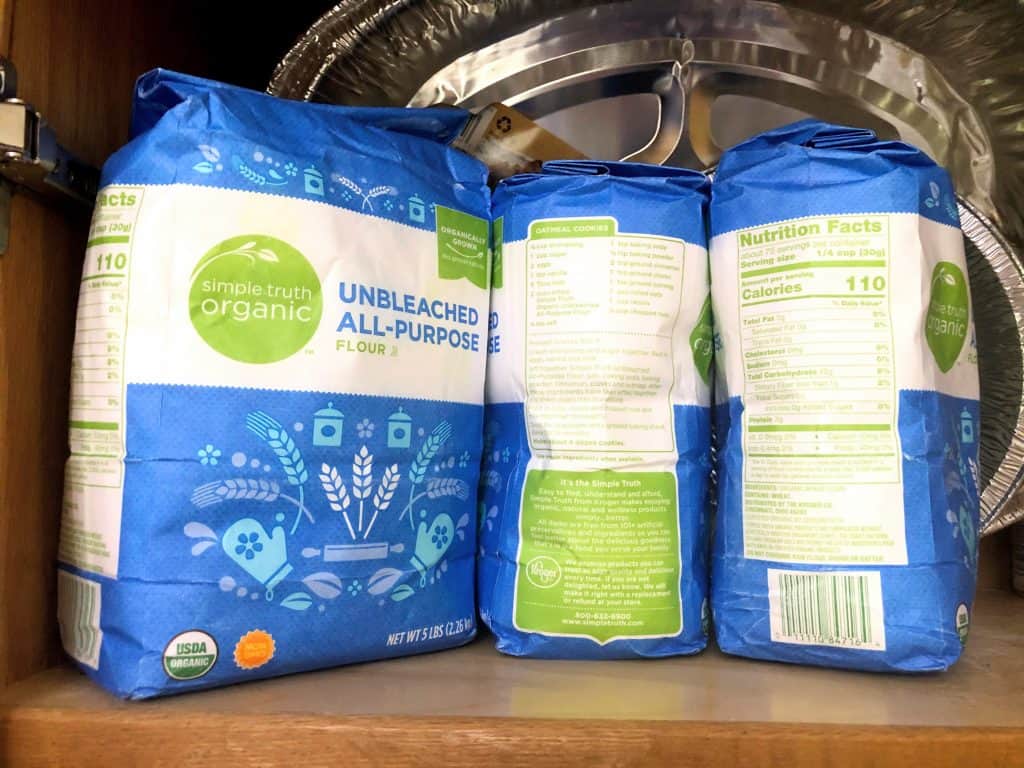
    cabinet of flour

    If you're ready to take the pantry challenge and you've already done your pantry inventory, you know you may be missing a few pantry staples.

    bags of flour in the cabinet

    Pantry staples are the building blocks that every home should have. If you have these on hand, you should be able to deal with any unexpected situation.

    What are pantry staples?

    We like to make sure that our pantry is fully stocked at all times. You never know when a small emergency (or even a global catastrophe) may land you stuck at home longer than you anticipate.

    In just such a scenario, having all of the pantry staples you need will help to alleviate some of the stress that may come along with uncertain times.

    What staples should you always have in your pantry?

    These are the essential items you need for your pantry.

    Dry goods

    Dry goods can come in a couple of different forms. You can make sure you have a good amount of easy or quick to cook items.

    We like to have a lot of pasta on hand. It's easy to make as you really only need boiling water to cook it. If you have sauce on hand, you can add that, melt some butter, or add some oil & vinegar.

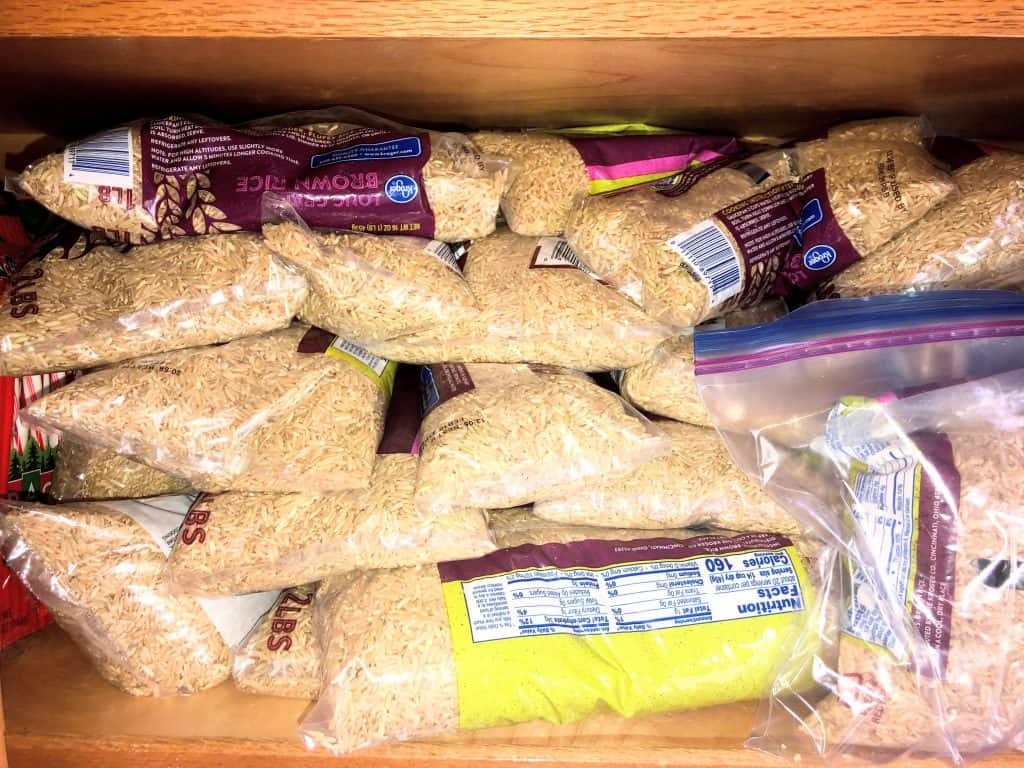
    Rice is another great staple to always have available. Like pasta, you only need water to cook rice. You can also pre-make it and freeze rice for later.

    cabinet full of rice

    Rice is also a great base for a variety of dishes for a variety of preferences

    Maybe the most valuable dry good items are things you can use to bake. If you have flour, sugar, and baking soda, you can bake just about anything.

    Canned goods

    The next pantry staple is canned goods. Canned goods are especially great because they are designed to last for a very long time. Often times, you can still eat whatever is in the can well beyond the 'best by' date. Obviously, you will want to abide by FDA guidelines but if it's only out of date by a few months it will just suffer in taste.

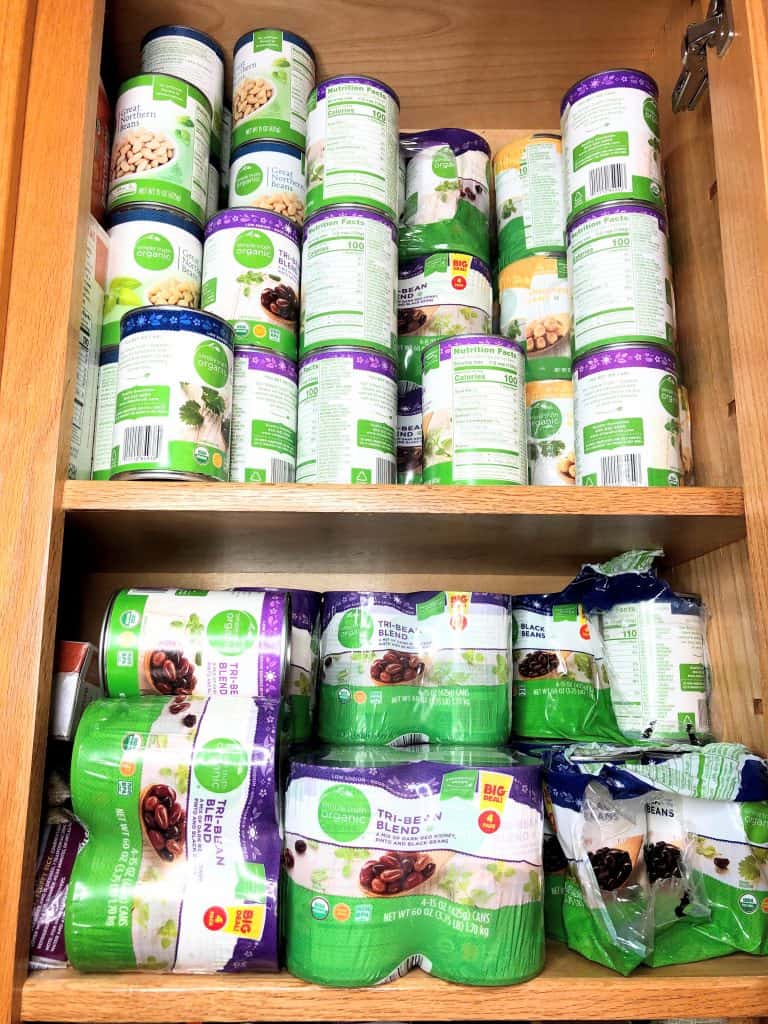
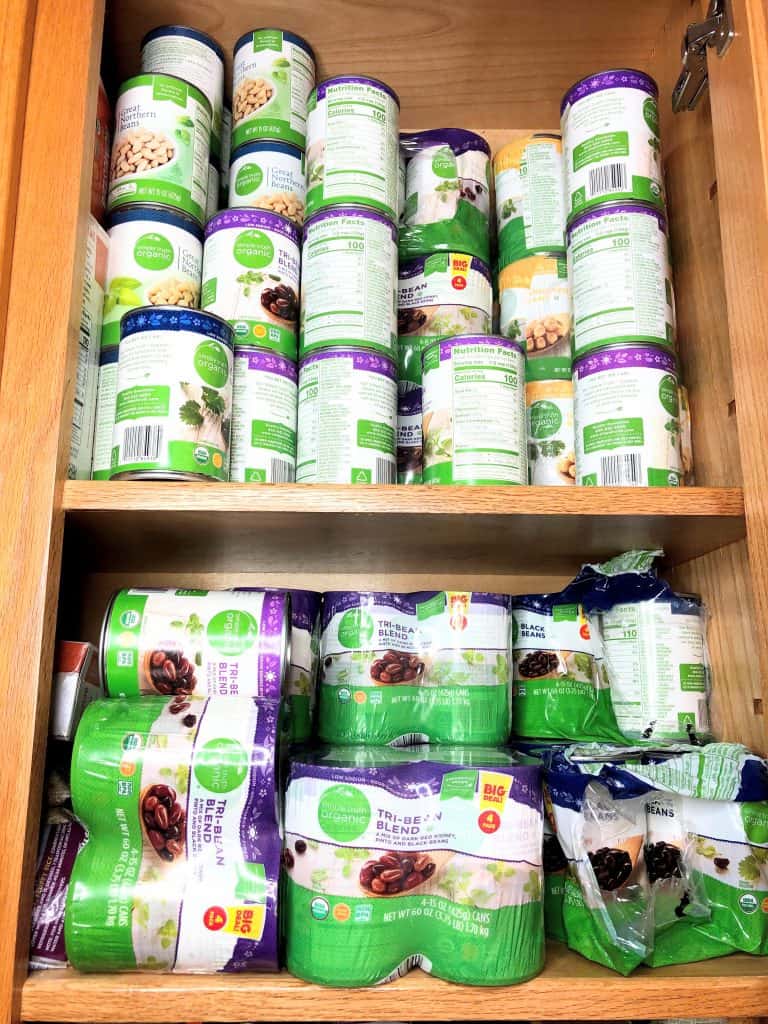
    We buy a lot of beans. I mean, A LOT of beans. So many beans that when we go through the checkout at the grocery store we get odd looks and are often asked if we own a restaurant. like I said, we eat A LOT of beans.

    We always make sure we have at least 2-3 months worth of canned beans in our pantry at a time. Beans are a great because, like rice, it makes a great base protein for so many meals.

    cabinet full of beans
    Did I mention we eat a lot of beans?

    You can slow cook it and make crockpot chili. You can cook it on the stove and add in some garlic powder, onion powder, and red pepper for some delicious refried beans.

    Canned fruits and vegetables are a few other canned goods you may want to stock up on. Obviously, if you have a garden and you freeze peas, freeze green beans or freeze other vegetables, you may not need them in cans.

    However, if you have a bad crop yield or your freezer goes out, it never hurts to have a few cans tucked away in case of an emergency.

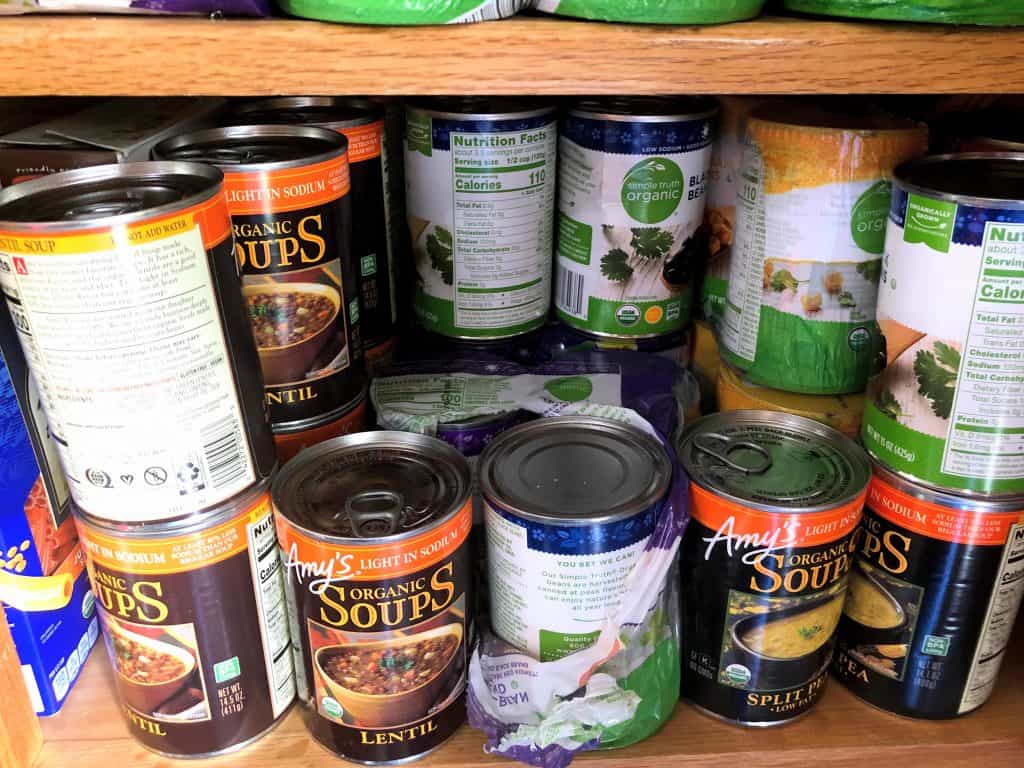
    You can also stock up on tuna. You can get cans, or pouches, of tuna for relatively cheap. It will stay fresh for a long time and is a great protein for a quick snack or meal.

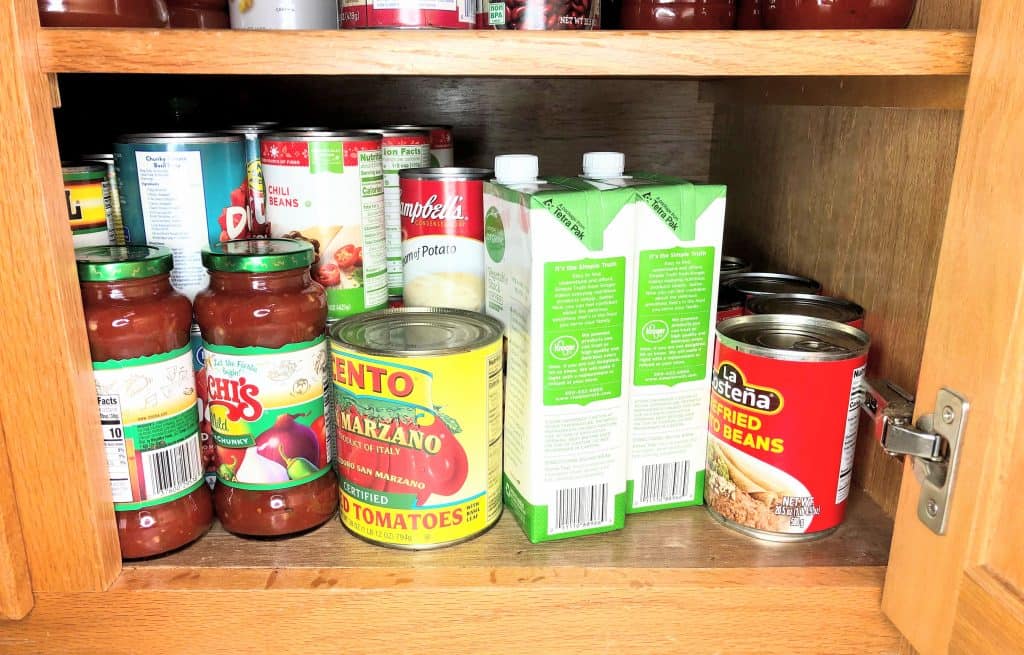
    pantry full of canned soup and canned beans

    Spices

    You may be thinking that things like rice, beans, and pasta are some pretty bland necessities. You're not exactly wrong either.

    This is where the final staple category comes into play. The world of spices can open up your eyes to so many more flavor possibilities than you ever thought possible. Learning how to cook with different spices is such a valuable skill to learn.

    What spices you keep in your cabinet is really going to depend on what your personal preferences may be. You can't go wrong with salt and pepper. From there, the possibilities are endless.

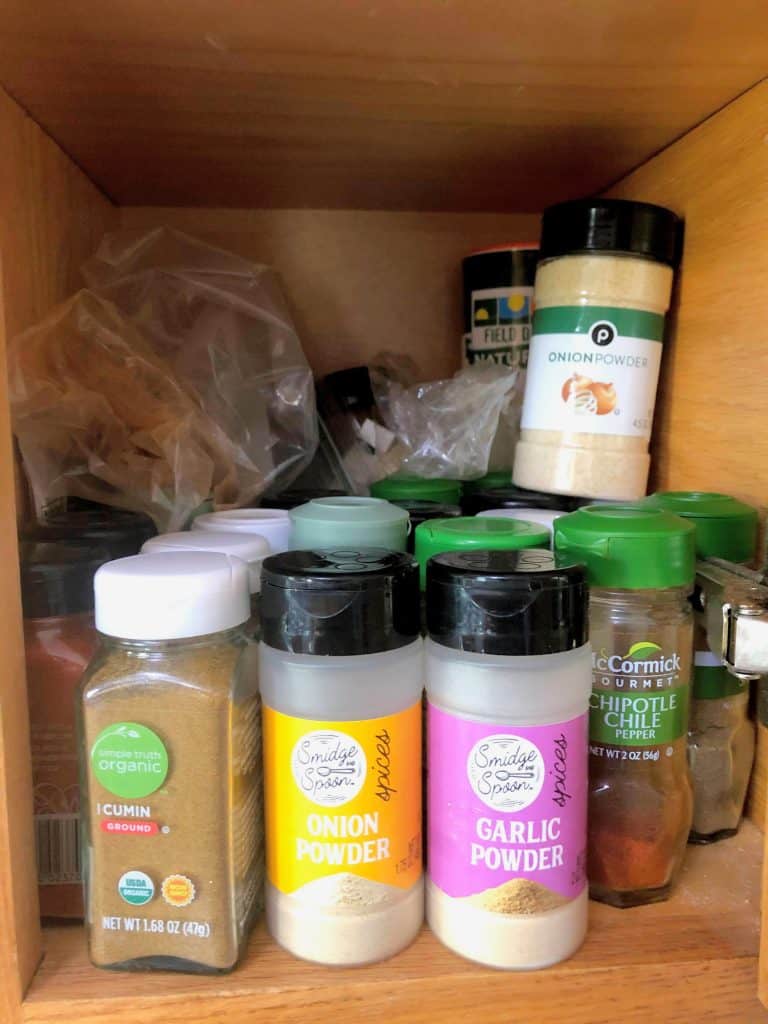
    If you like Italian food, you may want to have a good supply of things like basil, garlic powder, and oregano. A lot of Latin cuisine also uses garlic powder but also onion powder, chile powder, and cilantro. Indian food will often feature spices like cumin & curry.

    Figure out what kind of flavors you can NOT live without and make a list of the spices and different ethnic flavors you need to fill out your pantry. Or you can just pick up a large spice set and have a variety to choose from.

    pantry with spices

    How to stock your pantry for a year

    How do you stock up your pantry for a year? The first thing you will want to do is take a pantry inventory.

    Once you have a list of how much you have, you can start to calculate how much of your pantry you go through a month. Multiply that by 12 months and you know how much you need for a year.

    For example, between the two of us we probably eat 2-3 cans of beans a day. That is around 14-28 cans per week. With 52 weeks in a year we will need around 728-1,218 cans of beans in a year (did I mention we eat a lot of beans?).

    Obviously, we can't fit that many cans in our pantry at once, but it gives you an idea of the scope of what you should have on hand if you are truly trying to fill your pantry with the essentials.

    Pinterest image of bags of flour with text reading, "Do you have all of these pantry staples in your kitchen?"

    For other frugal living tips

    [pt_view id="3dd74e01d7"]

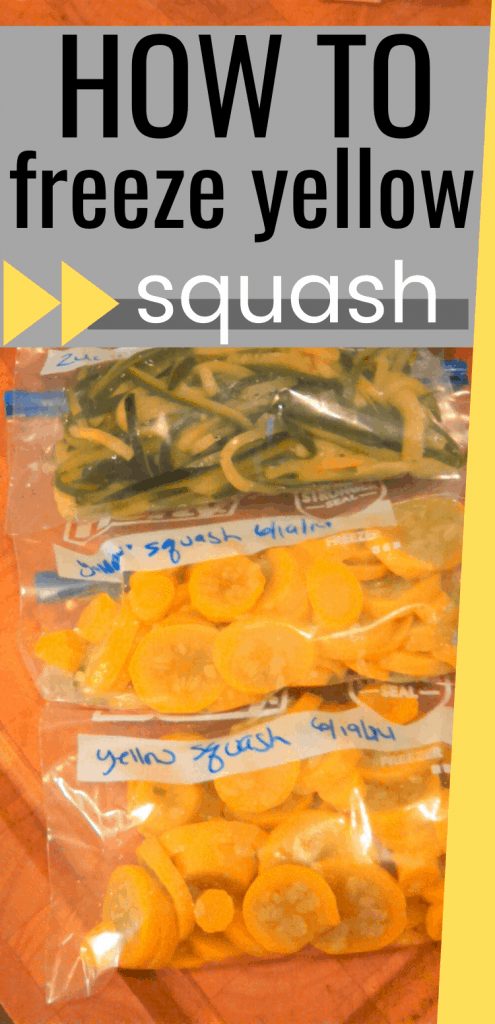
    How To Freeze Yellow Squash

    By MrAnimal Farm

    Did you overestimate how much yellow squash you needed to plant? If so, you need to learn how to freeze yellow squash.

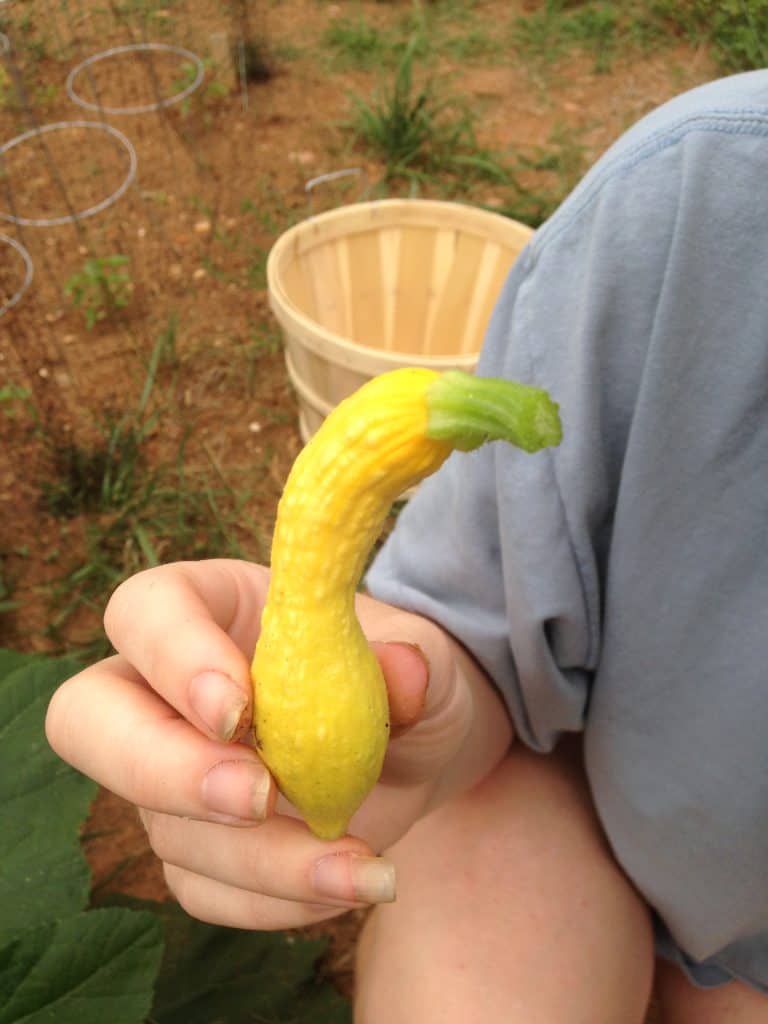
    holding yellow squash just picked from the garden

    If you already know how to freeze zucchini, freeze broccoli, or freeze strawberries, then learning how to freeze yellow squash will be a breeze for you. If you have never preserved anything before, it's easy to do and there is a whole host of vegetables you can freeze (not to mention fruits and other foods).

    How to Freeze Yellow Squash

    Let's say you are growing yellow squash this season and you're having an awesome harvest in your garden. Now you have more yellow squash than you know what to do with. How can you preserve it without it going bad? You wouldn't want to waste food.

    Step One

    Gather up all of the yellow squash that you think you won't eat anytime soon. Now you will want to give it a good scrub to remove any dirt, bug poop (ew!), pesticides (double ew!!) or anything else you don't want to put in your mouth.

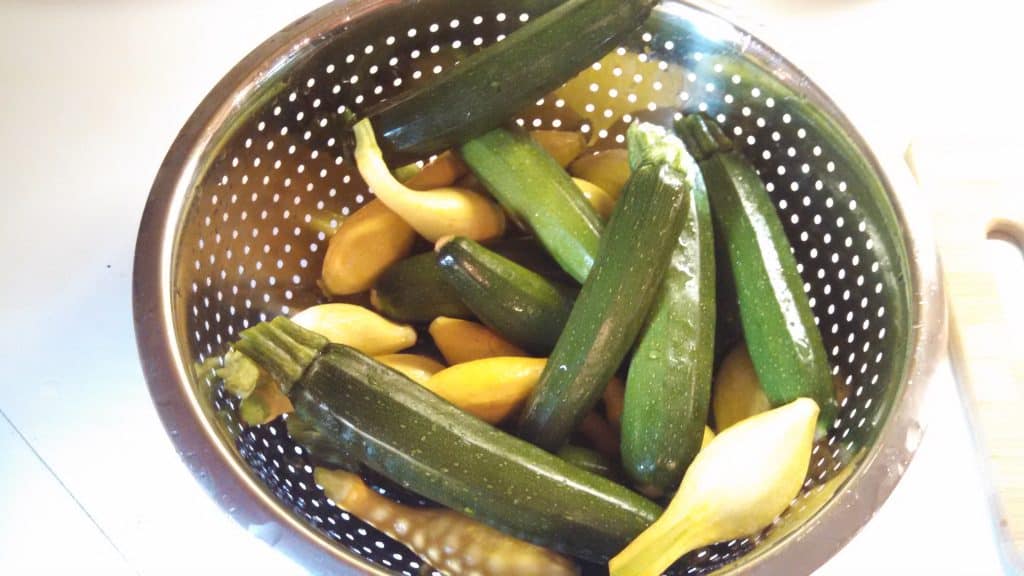
    yeloow squash and zucchini on colander prior to washing

    We usually put everything in a colander and run cold water over the veggies while we scrub with a vegetable cleaning brush. You can also get cleaning sprays that are specifically made for vegetables (don't worry, they make organic ones).

    Step Two

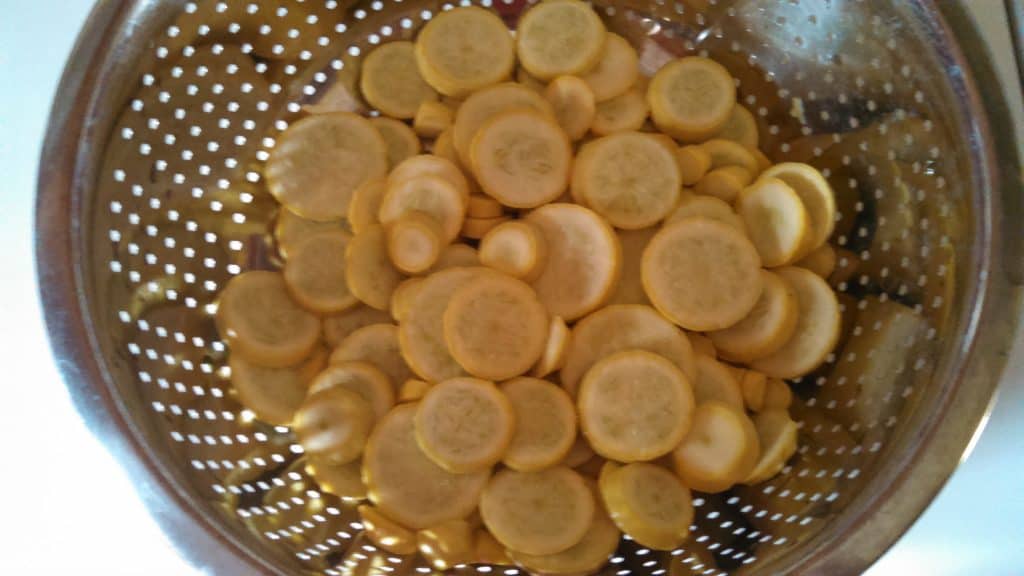
    With a whole pile of fresh and clean squash, you want to prep them for blanching. The way we do this is by cutting them into slice.

    To get the best results in slicing squash, we like to use a mandolin slicer. This kitchen utensil is the most accurate way of getting even consistent slice every time. Be careful though, it is really easy to cut yourself on one of these tools. Trust me, you will want to wear protective gloves while using it.

    mandolin slicer

    You can also go the old fashioned route and use a knife and cutting board. The mandolin slicer just makes things quicker especially if you have a lot of squash to cut. But if you want to use a knife, here are a few ways to safely cut squash.

    Step Three

    This is the most important step of the entire process. Now, we blanch your yellow squash. Don't worry, it's not hard, at all.

    Fill a large stock pot with water and bring it to a boil on your stove top. Once you have a good rolling boil, place a portion of your squash chips into the water. Let the water continue to boil and set your timer for 3-5 minutes.

    This time range may seem pretty wide. It just depends on the size of the squash and how large of a portion you boil at once. Test out your chips during the process. You want you squash to still be pretty crisp.

    Once your timer goes off immediately put your squash chips into an ice water bath. The sudden shift from hot to cold will stop the cooking process so your squash will stay nice and crisp.

    Can I freeze squash without blanching?

    Yes, you can, but we don't advise it. Squash, in general, has an enzyme that does not die during the freezing process. So unlike most things when frozen your squash will continue to age and degrade over time. This will cause a drop in quality, changes in color, and the flavor will suffer.

    My blanching prior to freezing, this enzyme is destroyed and your squash will last much longer in your freezer. So, we totally recommend blanching as the best way to ensure long term quality.

    Step Four

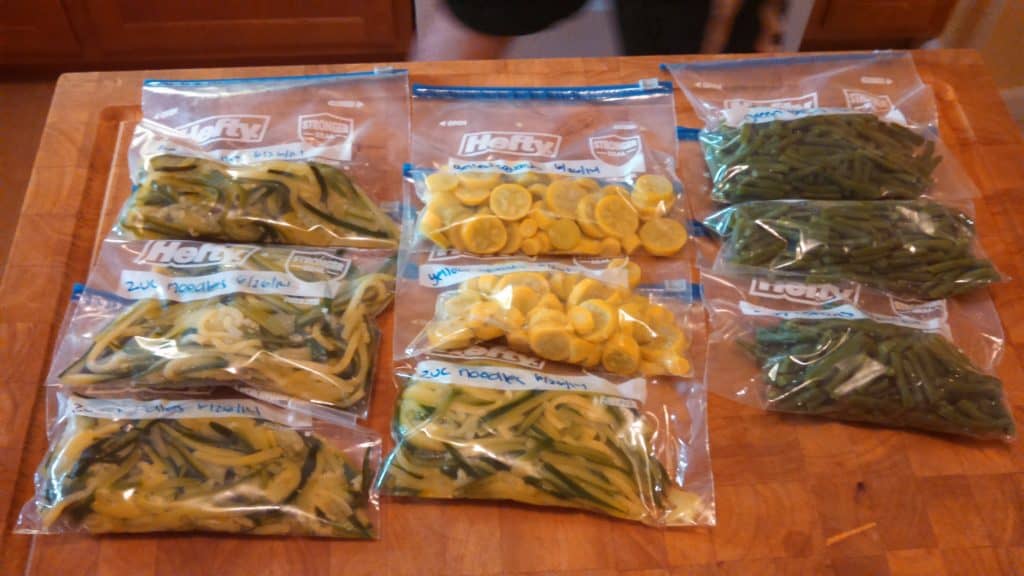
    Once all of your squash has been cut, blanched, and cooled, pull out a measuring cup and start sorting out portions. We prefer to portion in 1 cup increments and freeze in quart bags. For larger families you can freeze entire batches in a gallon freezer bag.

    sliced and blanched squash

    Whichever size you pick remember to squeeze out as much of the water as possible. Any excess water in the bag will turn to ice once frozen and may cause your squash to frost bite.

    Step Five

    This is the easiest step. Flatten out each of your bags and stack them on a shelf in your freezer. If you have a larger chest style freezer we will reuse an old grocery bag put them all in there and label the bag with a date. Then stick them in your chest freezer until you need them.

    Common Questions

    How long will will frozen squash stay good?

    We always recommend abiding by FDA standards for food safety. We have found that squash can stay high quality up to a year after freezing!

    How do you thaw frozen squash?

    Easy-peasy! Just pull your pre-portioned bag out of the freezer and put it into the fridge over night. They will usually thaw by morning and be ready for whatever recipe you are making.

    You can also stick them in the microwave but they tend to come out a bit soggy. You can mitigate this by using a steamer but it's still kinda iffy.

    For best results, use a stove top steamer after thawing overnight.

    Pinterest image with text saying "How to freeze yellow squash"

    For more frugal living tips

    [pt_view id="3dd74e01d7"]

    How To Make Freezer Breakfast Sandwiches

    By MrAnimal Farm

    close up image of breakfast sandwich

    Are you spending a fortune grabbing fast food breakfast every morning? You need to learn how to make freezer breakfast sandwiches!

    close up image of reheated freezer breakfast sandwich

    This may come as a shock but the guy making your Egg McMuffin is NOT a 15 star Michelin chef. You can definitely make something better at home and with this tutorial, you can have it ready faster than a drive-thru line.

    How To Make Breakfast Sandwiches

    You can add yet another meal to your freezer meals repertoire. These breakfast sandwiches are super easy to make and pair great with oatmeal. We recommend starting out by first learning how to make a large pan of freezer eggs. They will be the base of your breakfast sandwiches.

    Ingredients

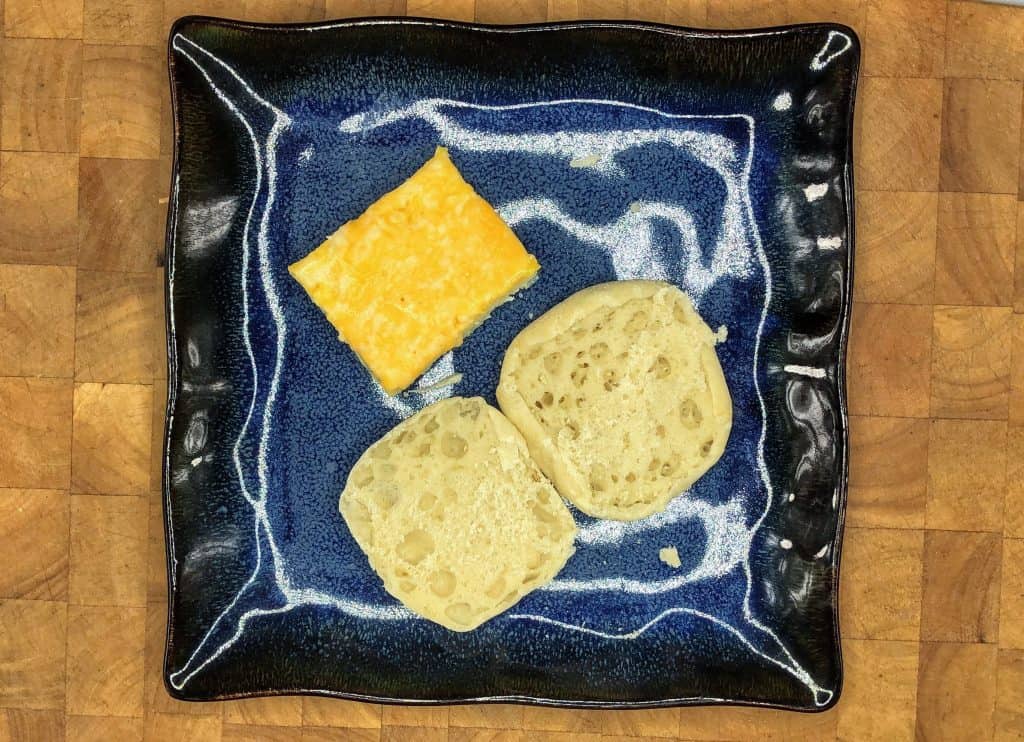
    1 pack of English muffins (we use Thomas Nooks & Crannies)

    6 squares of freezer eggs

    1 pack of sliced cheese

    english muffin open on plate next to egg square with cheese

    Directions

    These directions are really easy. Open up your pack of English muffins. Use a knife to cut them in half if they are not already.

    Take out your pan of precooked eggs. If you have not already melted cheese on the whole pan, place a slice of cheese on a single square now.

    Put your egg and cheese on the bottom half of your muffin. Stack the other half on top and you're done.

    When you are ready to eat stick a toothpick through the top center of the muffin all the way through to the bottom. This will allow you to heat your sandwich without the cheese melting and the muffin top sliding off.

    Heat for around a minute and a half and enjoy!

    close up of reheated freezer breakfast sandwich being held above plate

    Variations

    These directions are obviously a very simple version of a breakfast sandwich. You can use this as a base and add your own ingredients to really make something special.

    Some other options that we've tried are swapping out the English muffin for a bagel. The precooked egg square is perfect for this because it won't fall apart through the hole in the bagel.

    We have also added some turkey bacon before. We're sure it would work just as well with pork bacon or even a sausage patty.

    What's really great about making your own sandwiches is that you can customize them however you like and you can try out different things.

    How to Freeze Breakfast Sandwiches

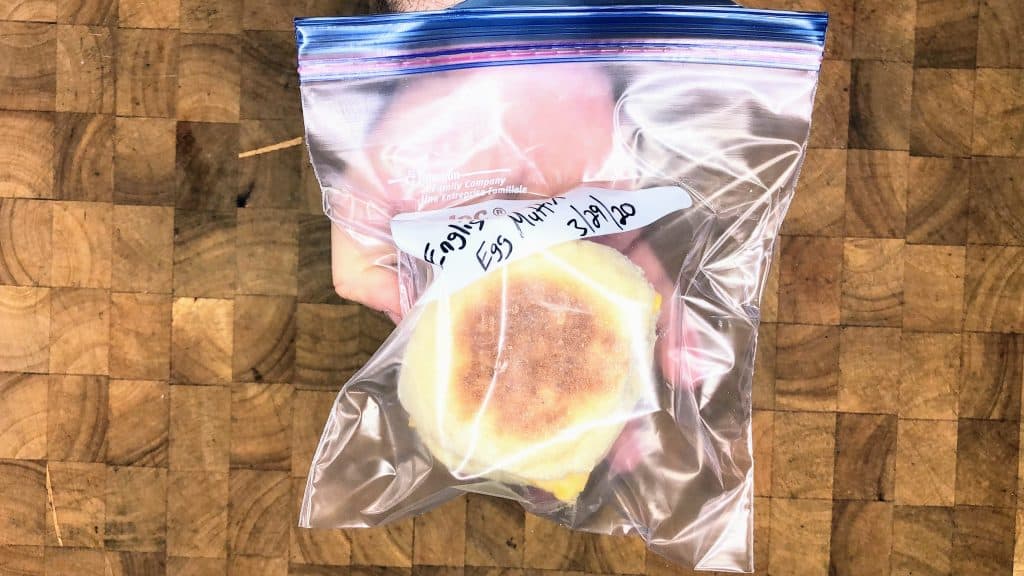
    Once you've narrowed down your favorite ingredients and assembled your sandwiches, simply place each sandwich into a freezer safe ziplock bag, or put multiple in one bag (you can usually fit about four in a gallon freezer bag).

    egg muffin in freezer bag

    You should not freeze your sandwiches with the toothpick in them. You may forget it's there when you're ready to heat and that could be dangerous.

    How long do they last in the freezer? The main thing to worry about in the freezing process is the egg. No one wants to accidentally eat an egg that's gone bad. These eggs will generally keep up to six months in the freezer.

    Any longer than that and they will likely start to lose quality. And, as always, please follow FDA guidelines for food preservation.

    How do you reheat them?

    When you're ready to eat you can stick them in the microwave for around a minute and a half or two minutes. Microwave time varies depending on the microwave and how thick the eggs is.

    If you want to prepare overnight you can put a frozen sandwich in the fridge just before bed. It should be thawed enough by morning to heat for around forty-five seconds to a minute and be good to go.

    Now you know how to make freezer breakfast sandwiches! Give them a try and let us know how you like them.

    Pinterest image of breakfast sandwich on plate with text reading "Make Your Own Freezer Breakfast Sandwiches at home"

    For more Frugal Living Tips

    [pt_view id="3dd74e01d7"]

    How To Make Lasagna

    By MrAnimal Farm

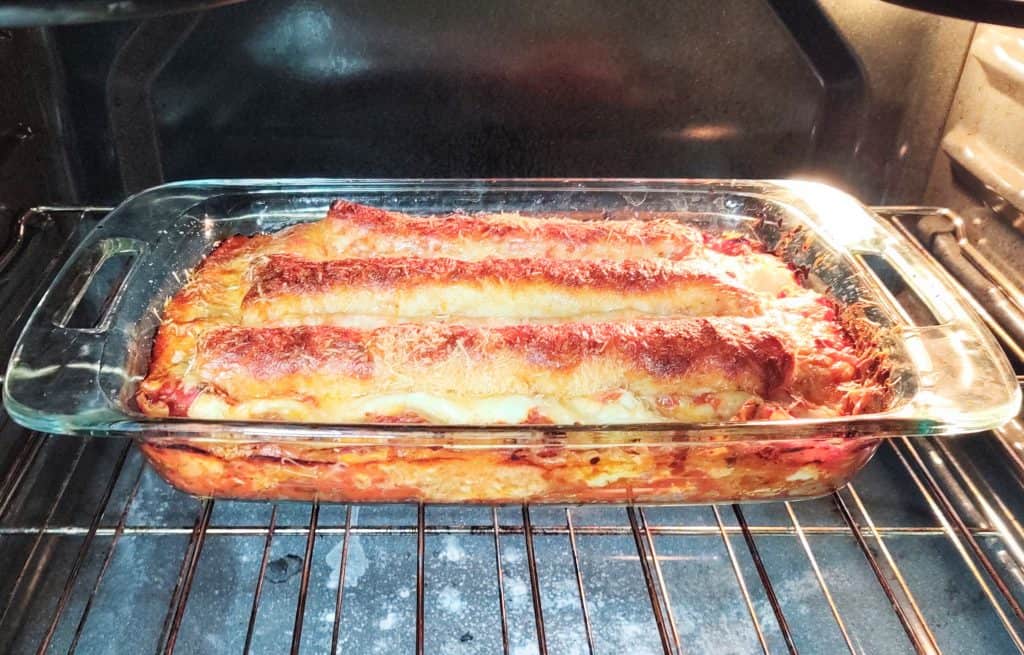
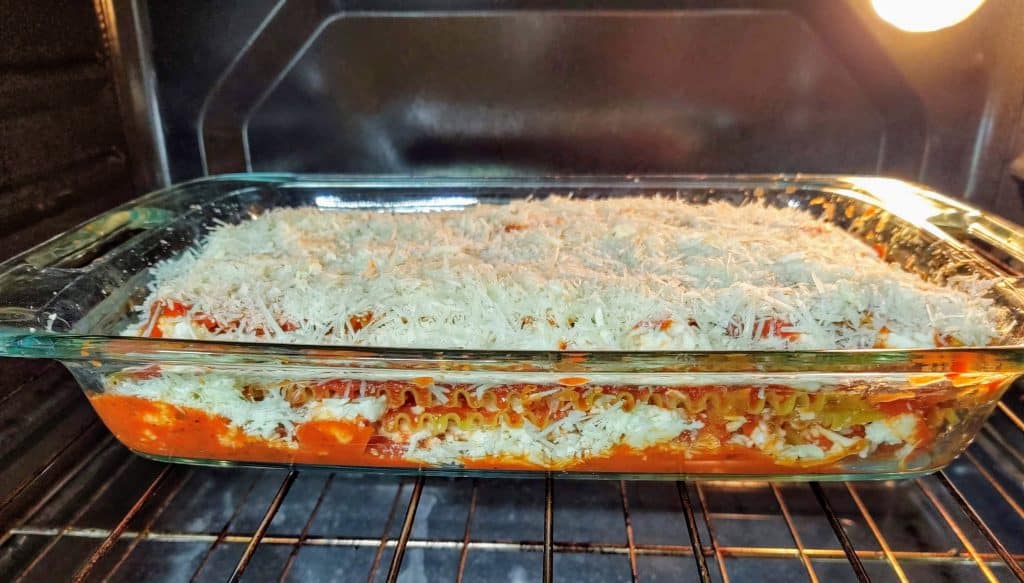
    cooked lasagna in oven

    If you love going out to Olive Garden you definitely need to learn how to make lasagna at home. All you need is a bottomless salad bowl.

    cooked lasagna in oven

    We love, love, LOOOOVE pasta in our house. But going to our local Italian restaurant can get pretty expensive. So we decided we would bring a little bit of Italy home to us.

    How To Make Homemade Lasagna

    This recipe is so easy to make. It is also completely customizable to your own specific taste. This recipe is delicious on it's own but can also be the base for your own imagination.

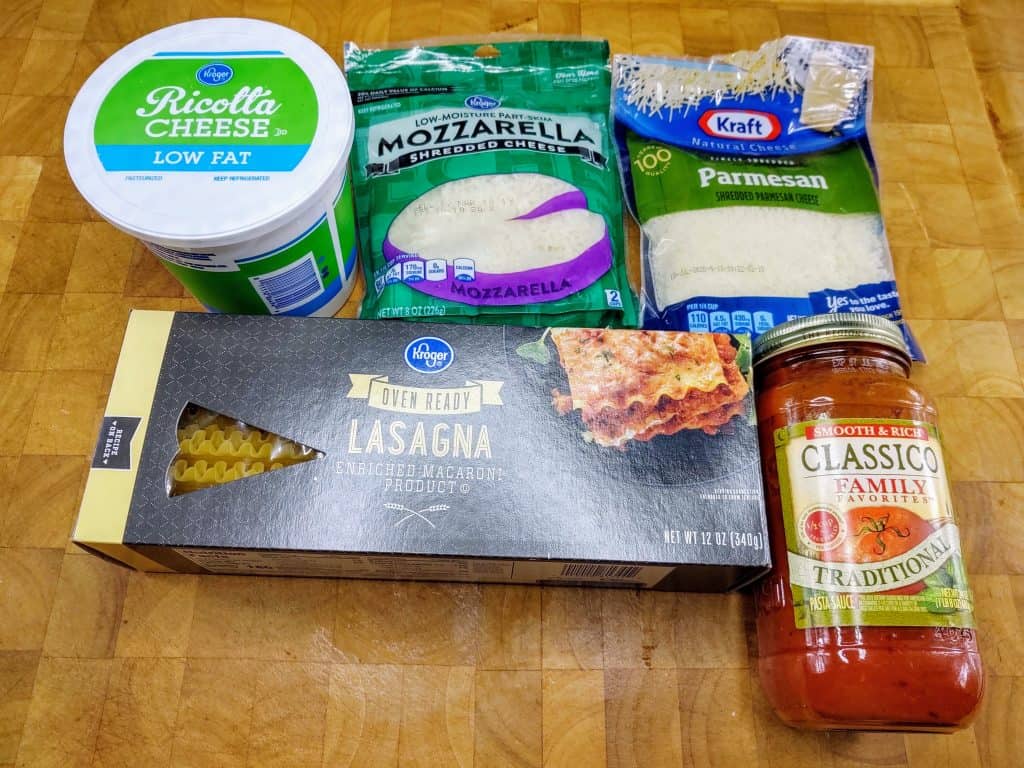
    Ingredients

    1 box of oven ready lasagna noodles

    1 jar of Traditional pasta sauce (we use this Classico sauce)

    1 tub ricotta cheese (16 oz)

    1 bag of shredded mozzarella cheese (8 oz)

    1 cup shredded parmesan cheese

    ingredients grouped together. top from left: Ricotta cheese, mozzarella cheese, Parmesan cheese, lasagna noodles, jar of pasta sauce.

    Directions

    Start by preheating your oven to 350 degrees. The oven can preheat while you are putting the ingredients together

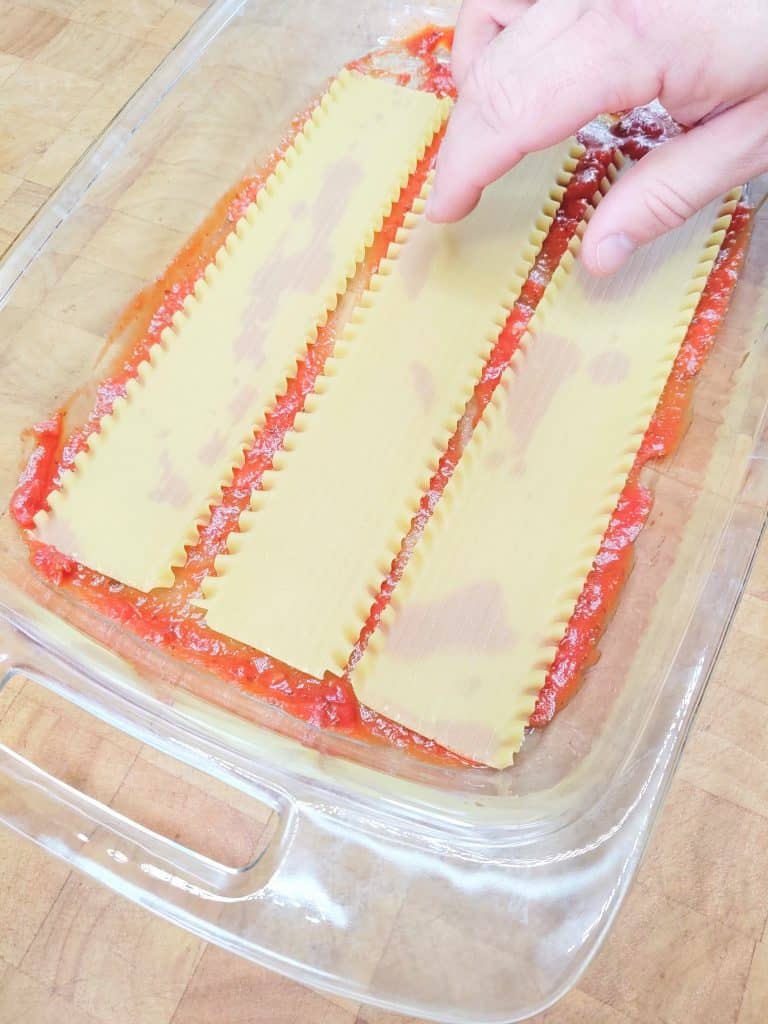
    Take out a 9x13 baking pan. Open your jar of sauce and put a very thin layer of sauce into the bottom of the pan. You can spread it with a spoon.

    You just want enough sauce at this point to make the bottom of the pan wet for the noodles. Now, open up your pack of oven ready noodles and lay them across the bottom of your pan. We can usually do about 3 across length-wise and we will snap one to fit width-wise.

    layering noodles into sauce in 9x13 pan

    We like to use the oven ready lasagna just because it is quicker. You can also use regular lasagna noodles for this. Just follow the instructions on the package on how to prepare them. Then you can continue with this same recipe.

    Once you have put down your first layer of noodles, use a spoon to put down another thin layer of pasta sauce. This layer should be thicker than the first layer. Just remember you need conserve enough for four total layers not counting the bottom of the pan.

    On top of the sauce, add a layer of ricotta cheese. Try the best you can to spread it without mixing it with the sauce. You will want to portion this out between three layers. If you want to measure it out you can.

    After you have the ricotta spread, make a layer of mozzarella. Same as the ricotta, you will need to plan for four total layers of mozzarella. However, you will want more for the top layer.

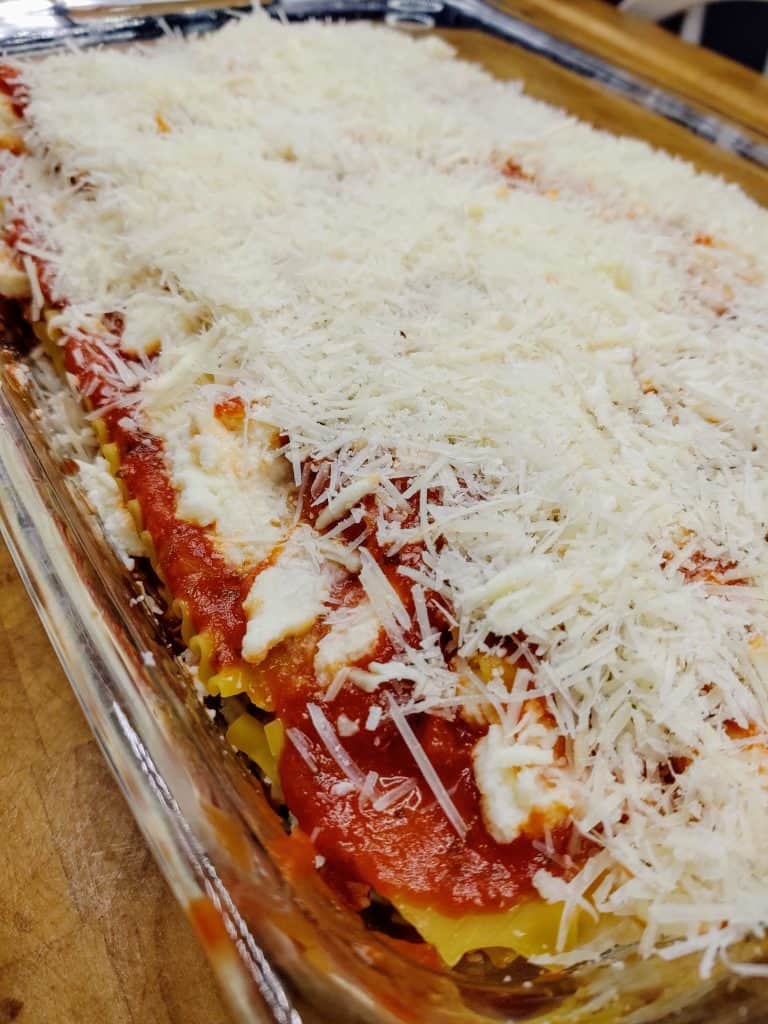
    closeup of uncooked lasagna

    Repeat this process of pasta, sauce, ricotta, mozzarella two more times. When you get to the final top layer, you will not put ricotta. You will add the final layer of sauce followed by a super layer of mozzarella.

    Finally, add a healthy sprinkling of shredded parmesan. So your top layer will be noodles, sauce, mozzarella, parmesan.

    So, how long does it take for lasagna to cook? With your oven already preheated, set your timer for 30 minutes.

    Place on the center rack and go relax for a while.

    uncooked lasagna in oven

    When the timer goes off, grab your oven mitts and pull your lasagna out from the oven. Place it on your stove top or cooling rack.

    Once your lasagna has cooled, you can use a knife to cut it. We generally get about 15 decent sized squares.

    Variations

    As we mentioned above, this recipe is great on it's own or it can be an excellent base for a more complicated dish. You can add or substitute cottage cheese. You can add various veggies, like peppers from your own garden, into each layer. You can make a layer of spinach, if you like. You can't beat throwing some sausage in their either.

    Be creative. Make this recipe yours and add whatever you think will make it better.

    What sides go well with lasagna?

    Since, we've already mentioned Olive Garden, it's probably obvious that we think salad and garlic butter bread sticks go great with lasagna. But you can get a little more creative and add a whole host of other lasagna side dish ideas.

    How to freeze lasagna

    If you want to freeze individual pieces, use a spatula to lift each piece from the pan and put it into a small quart sized freezer bag. Freezing individually is kind of messy, but it is nice to have a quick single serving lasagna sometimes.

    If you are planning freezer meals for the family, you will want to make sure your lasagna has completely cooled, put a lid on your baking pan, and put it into your freezer on a flat shelf. If you don't have a pan with a lid, you can also use disposable aluminum pans.

    You may be wondering is it better to freeze cooked or uncooked? Honestly, you can do both. Make two, cook one and freeze the other. Whether or not you bake it before freezing depends on how much time you want to spend reheating and if you want to portion out individual servings for the freezer.

    How to thaw

    Just pull your lasagna from the freezer and place in refrigerator over night. For a full sized pan, it may take 2 days in the refrigerator.

    You can also put individual pieces in the microwave and full size frozen lasagna in the oven.

    How to reheat/cook frozen lasagna

    If uncooked, preheat oven to 350. Bake for 60 minutes, check around 45 to make sure top is not burning.

    If pre-cooked, preheat oven to 350. Bake for 45 minutes or until warm throughout. Check often so that top does not burn.

    Pinterest image of a pan of cooked lasagna with text reading "Easy & Delicious Homemade Lasagna. Easy 5 ingredient recipe"

    How To Make Banana Bread

    By MrAnimal Farm

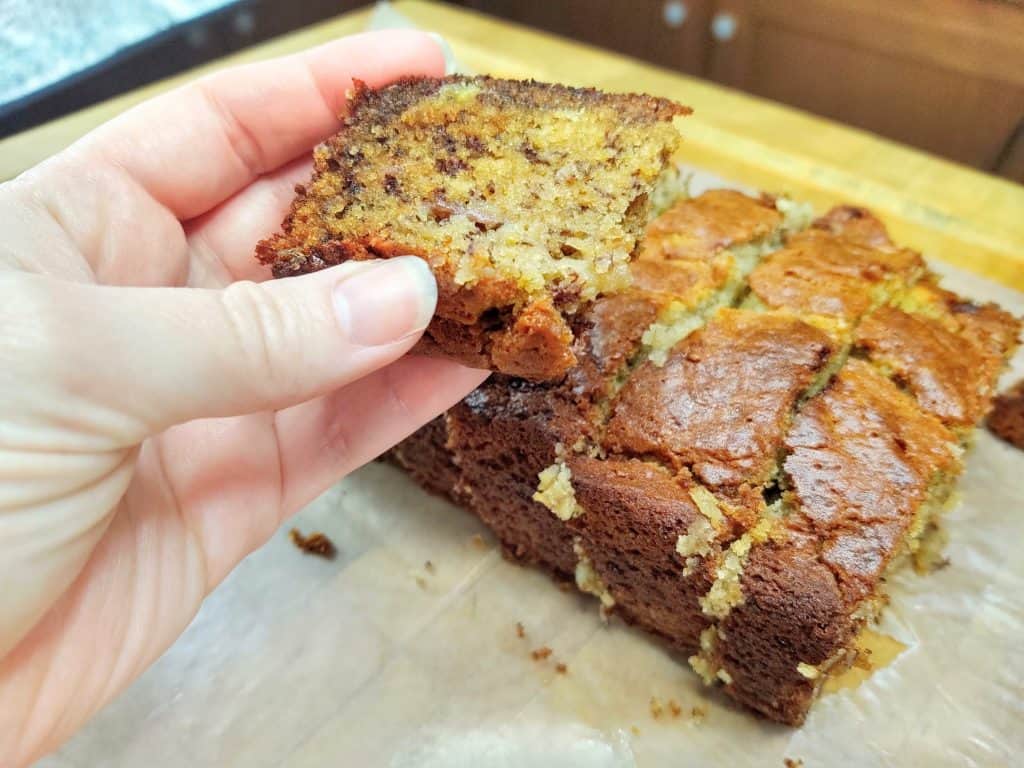
    close up shot of banana bread slice

    Wanna use up your overripe bananas? Learn how to make banana bread!

    Close up of slice of banana bread

    Maybe you have a bunch of bananas sitting on your counter that you forgot about and they are about to go bad. Maybe you were doing the pantry challenge and during your pantry inventory and found some frozen bananas.

    Wanna Know How to Make Banana Bread?

    Banana bread is just one of those recipes that we love to make here. It's a tasty treat, similar to how to make pumpkin bread or how to make zucchini bread, that is easy and you probably already have the ingredients in your pantry. It also makes your house smell delightful.

    So, let's get to it.

    Ingredients

    3 large over-ripe bananas

    2 large eggs

    1 ¼ cup flour

    ½ cup butter

    1 teaspoon baking soda

    grind of Himalayan pink salt (to taste)

    non-stick cooking spray

    (optional) 1 cup chocolate chips

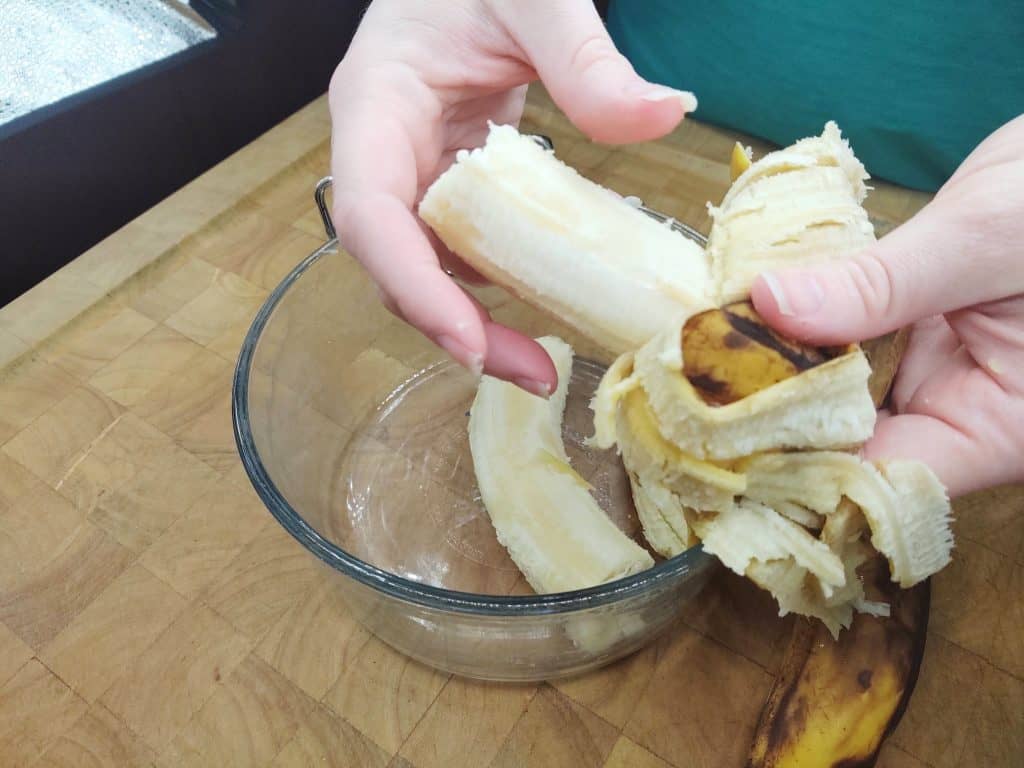
    peeled banana

    Directions

    Preheat oven to 350 degrees. I always do this first before I start ingredients, otherwise I will forget and then have to wait.

    Use ½ cup of softened butter. Add in 1 teaspoon of baking soda and 1 cup of sugar.

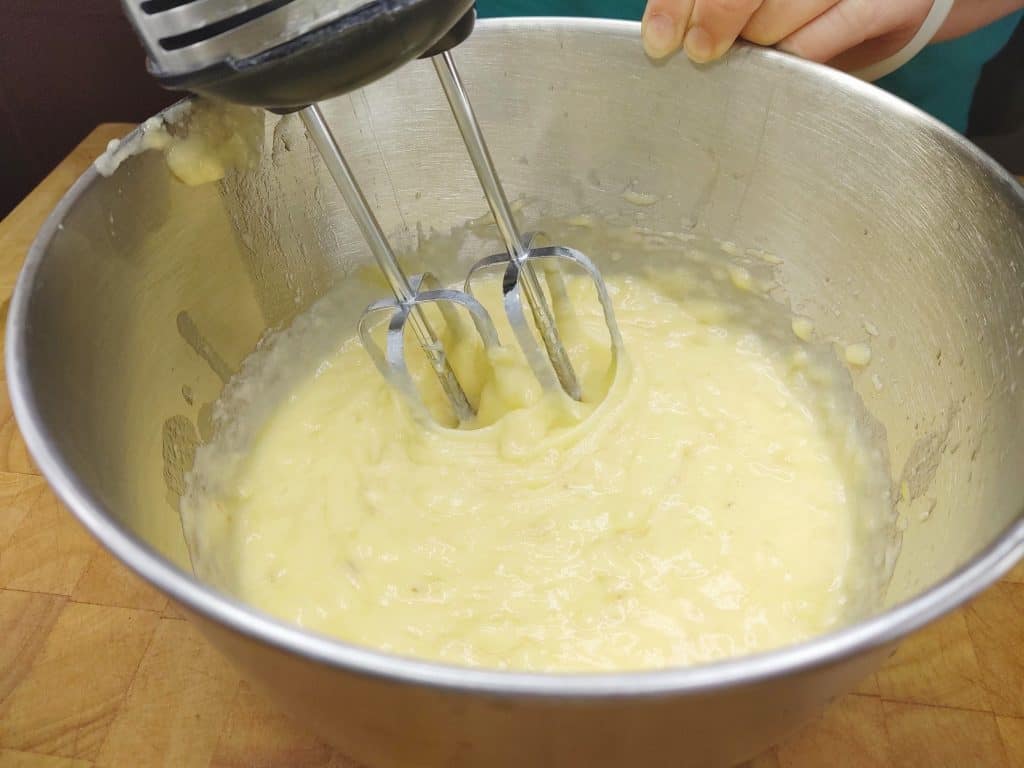
    With an electric mixer, mix everything together on a low setting. You don't want to whip this up too much. You just want it to be well blended.

    electric mixer mixing batter

    Now take 3 large over-ripe bananas. You can tell when they are over-ripe when they are a deep yellow color with large brown spots. They will also start to feel a bit softer.

    You just want to make sure they are still ripe and have not gonna bad. But the softer the better.

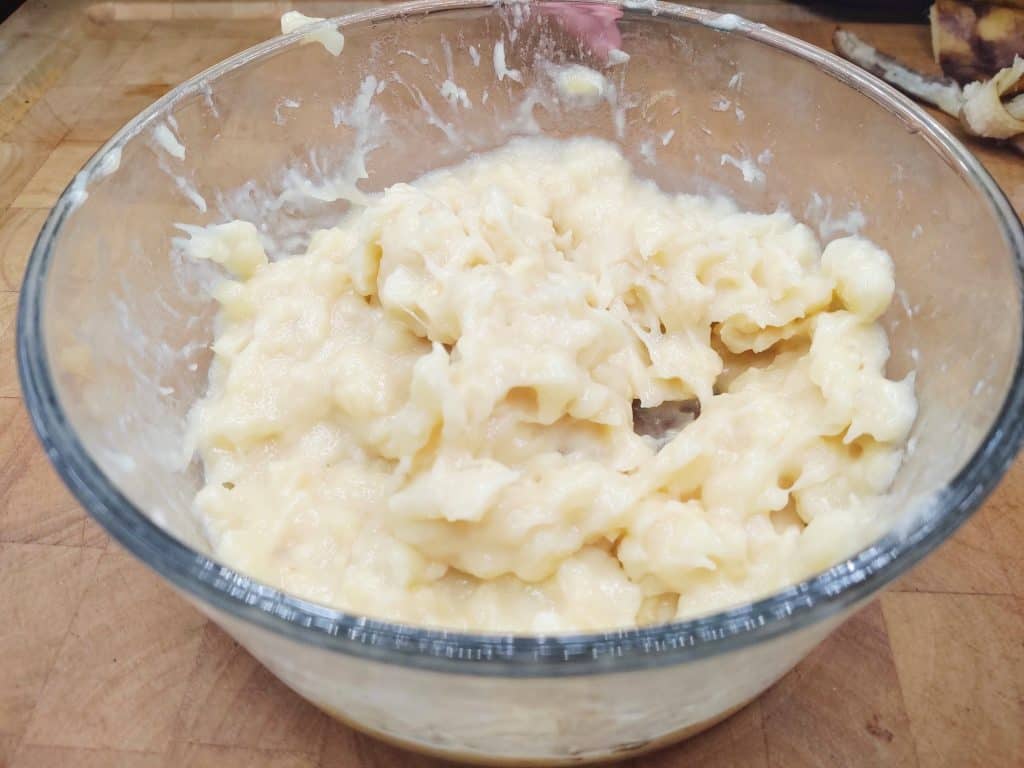
    Peel your bananas and place them in a bowl separate from your butter/sugar mix. Using a potato masher, start mashing your bananas into a mushy mess.

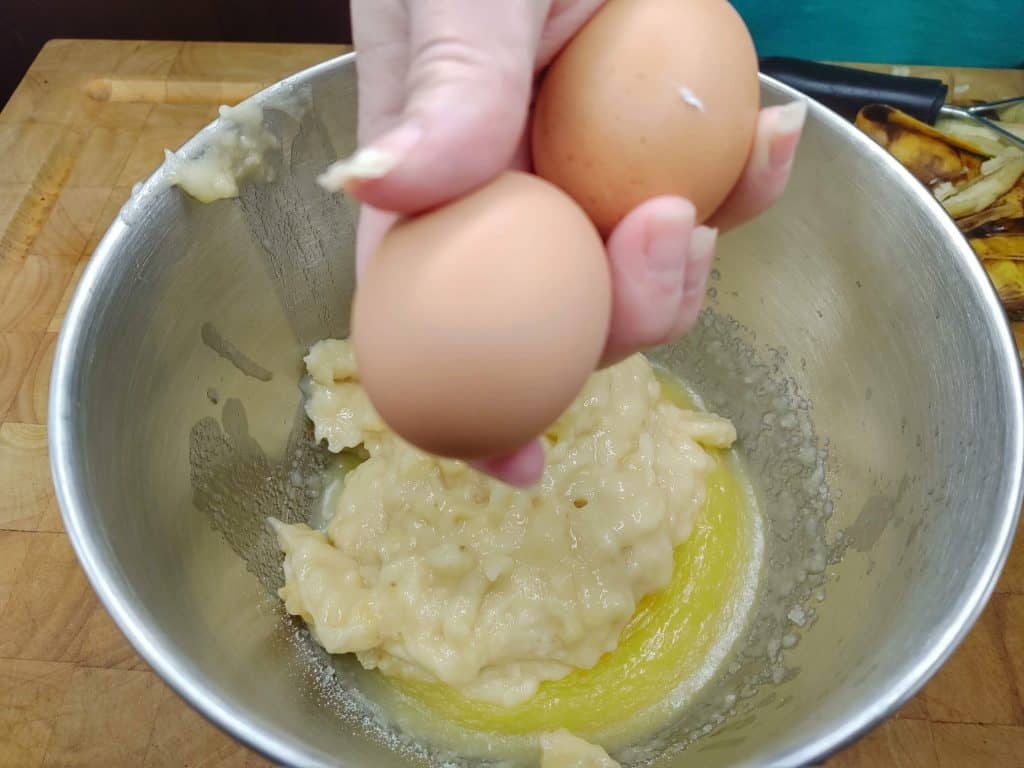
    Once you have a good banana paste, you can start to pour it into the large mixing bowl with your butter/sugar combination. You will also add your 2 large eggs at this point.

    2 large eggs over bowl of banana bread batter

    Mix everything together again with your electric mixer until well blended. Again, you want to be well blended but not finely whipped.

    Now pour in 1 ¼ cup of flour and a grind of Himalayan pink salt. Table salt is also fine. The salt is really just to add a bit of flavor but not completely necessary.

    Now, you will want to use a spatula and hand mix the flour and salt into your banana base. Gently fold your flour into the bananas until everything is mixed well together and you do not have any dry pockets of flour leftover.

    Pull out your bread pan and spray it with Canola oil, or whichever non-stick baking spray you prefer.

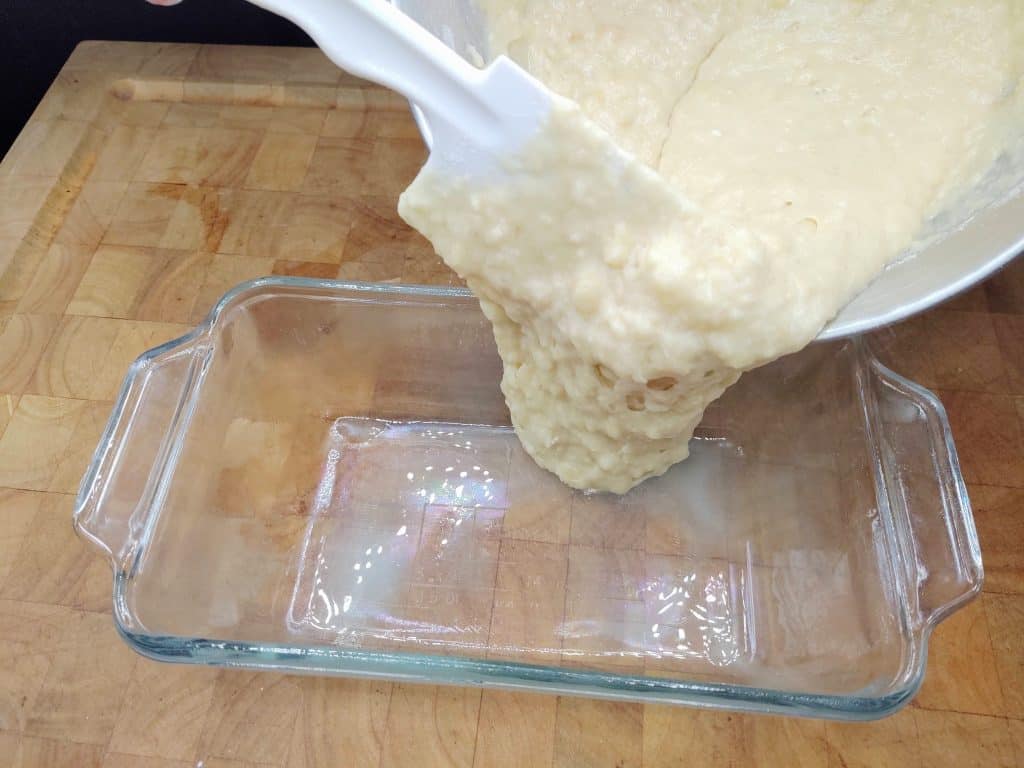
    Pour your banana bread mix into the bread pan and place onto the center rack of your already preheated oven. Set your time for 50 minutes and walk away.

    pouring batter into bread pan

    Remember, cooking times can vary depending on your geographic location, you may want to check on your banana bread around the 45 minute mark depending on your elevation.

    After your timer has gone off, use oven mitts and pull your delicious banana bread from the oven and place on your stove top or cooling rack. Allow your banana bread to cool. You don't want it to tear apart while cutting.

    Once your banana bread has cooled for a bit, run a butter knife or spatula between the loaf and the inside of the bread pan. You can then flip the bread pan upside down onto a sheet of parchment paper and the loaf should pop right out.

    You can use a bread slicer and bread knife to cut your banana bread into measured slices. Typically this recipe will make around 8 thick slices.

    Delicious variations

    You may also wonder how to make chocolate chip banana bread? It's super easy to do. Just add in a cup of chocolate chips (more or less depending on how much you love chocolate) when you are adding in your flour. Everything else is the same.

    What can you put on banana bread? Banana bread is delicious on it's own but you can make it even tastier. Some people will toast it and add butter. You can put some almond butter on it, pumpkin butter, nutella, drizzle a streussel topping, etc. Honestly, just use your imagination and try some fun stuff out.

    How do you make banana bread muffins? Do you prefer muffins to a whole loaf of banana bread? That's super easy too! Follow the same recipe as above and just swap out the bread pan for a muffin tin and cook for 20-25 minutes depending on size. Easy-peasy!

    bowl of mashed bananas

    How to Freeze Banana Bread

    Freezing banana bread is pretty simple. After you have allowed it to cool and it has been cut you can put it back on the parchment paper and slide it right into a large zip-lock freezer bag.

    Stick you bag into your freezer. Your bread should be frozen in a few hours and should not lose much quality over 2-3 months. We wouldn't store it longer than 6 months. It may still be safe (check the FDA for their suggestions) but it will likely suffer in quality.

    How to thaw

    When you're ready to thaw just remove it from freezer and put in refrigerator. Should thaw in a few hours. Serve cold or heat for 20 seconds in microwave.

    How do you keep banana bread moist after freezing? We keep ours in a sealed bread bag in the refrigerator. The fat from the butter will generally keep the bread nice and moist when stored properly. And, honestly, our banana bread never lasts long enough in the house to go stale.

    Pinterest image of sliced loaf of banana bread. Text on image says "Easy Banana Bread Recipe with ingredients you already have!"

    For more frugal living tips

    [pt_view id="3dd74e01d7"]

    How To Freeze Bananas

    By MrAnimal Farm

    cutting a banana in half

    Ever wondered how to freeze bananas? If not, you probably should have at some point.+

    knife cutting banana in half

    I know you've done it. We've done it too. You buy a whole bunch of bananas and then they sit on the top of your refrigerator or counter until they start to turn brown. You consider tossing them before the fruit flies show up. But wait!

    You can totally make good use of those bananas. If we can avoid wasting food, we will always do what we can. We try to stick to our food budget as best we can. Which means we preserve all sorts of food like freezing peppers, freezing eggs, freezing milk; and bananas are no exception.

    In fact, with just a little bit of prep work you can freeze those bananas and make them last a whole lot longer.

    Now, before you freeze them you do want to make sure that they aren't over ripe. If they are too close to turning they'll be way too mushy once you thaw them out. If they are over ripe, you can always use them to make banana bread.

    half peeled banana on blue plate

    How to freeze bananas

    Now that you have determined if they are over ripe or not, it's time to prep them for freezing.

    This part is way easy. First you want to peel your banana. Like I said, easy.

    Take out a sharp knife and cutting board. Use the knife to cut the banana in half. We recommend cutting the banana in half because it's easier to put in the bag that way. You can freeze a whole banana just as easily, if you prefer.

    banana that has been cut in half on blue plate

    Take each half and place them into a freezer bag. Be sure to squeeze out as much air as you can without squashing the banana halves.

    Put the bag into the in freezer and allow to freeze. Should be frozen in a few hours.

    You can also freeze banana chips

    Again, you'll want to peel your banana.

    Using a sharp knife you'll want to carefully cut the banana into slices. About a ¼ inch thick should hold up nicely.

    Pull out a sheet of parchment or wax paper and put it over a cookie sheet or baking pan. Place each individual banana slice flat on the parchment paper and place pan in the freezer.

    Flash freezing the slices like this is done for the same reason you do it when freezing slices of mozzarella cheese. It prevents them from getting all stuck together once they are packed in the freezer bag.

    banana chips on parchment paper

    After a few hours your banana slices should be pretty well frozen. Pull the baking pan out of the freezer and pull your frozen banana chips off. Place them into a quart sized freezer bag and put them back in the freezer.

    The reason you want to freeze them on parchment paper first is because they will clump together and freeze as a big banana ball. As funny as that may sound this is not the result you want.

    This is called flash freezing and is commonly used when you freeze cantaloupe, freeze watermelon and other fruits as well.

    The best way to get individual banana slices for later is to pre-freeze them. Plus, if you slice them, you can always make dehydrated banana chips later.

    How to thaw your frozen bananas

    Again, this is pretty easy. When you're ready to eat your frozen bananas, just pull them out of the freezer and stick them into the fridge.

    It shouldn't take very long for your bananas to become soft enough to eat.

    Common questions

    Q1. How long can you freeze bananas?

    The FDA website says they can be frozen for 2-3 months without a significant loss of quality. They can actually last a lot longer but I wouldn't recommend longer than 6 months.

    Q2. Why would I want to freeze bananas? What can I do with frozen bananas?

    Aside from not having to toss out perfectly good fruit, there are a couple of reasons. You can put them in a blender with some milk and other frozen fruits and make a smoothie. You can also use frozen bananas to make a great ice cream alternative.

    Frozen bananas (or unfrozen), along with many other foods like rice, tomatoes, peanuts, blueberries, grapes, and peaches, can make great snacks for your chickens and some other animals (definitely chickens, check before feeding them to other animals first).

    Q3. Can you freeze mashed bananas?

    Absolutely! In fact, as we mentioned above, frozen mashed bananas are a really tasty and healthy alternative to frozen yogurt or ice cream.

    Q4. When you freeze bananas do you need to peel them first?

    Yes, you won't want to freeze them in the peel. The peel gets dark and smushy. They also tend to stick to the banana and is a hassle to remove. So, it is safe to freeze them in their peel but life is easier if you peel before freezing.

    pinterest image with plate of banana slices. text overlay says, "Can you freeze a banana? here's why and how"

    For more frugal living tips

    [pt_view id="3dd74e01d7"]

    Take The Pantry Challenge

    By MrAnimal Farm

    Have you ever taken the pantry challenge before? If not, you're in for a treat. If you have, it's about time you do it again.

    cabinet full of cereal and dessert baking goods

    So, what is the pantry challenge?

    The pantry challenge will take your frugal living to the next level. It is an efficient use of your food budget and will really expand your capabilities in the kitchen.

    The best part is that it's totally free and easy to do. You just need to set aside a little up front time for planning and then you are good to go.

    But really, what is the pantry challenge?

    The pantry challenge is when you take a set amount of days where you and your family ONLY eat food that is already in your pantry. For the purpose of this challenge we can expand the definition of pantry to also include cabinets, refrigerator, and freezer.

    The main goal is to find many different ways on how to use everything in your pantry.

    Why should I do this?

    If you are only using food that you have already have, the obvious reason is that nothing will go to waste. If nothing is going to waste you will overall save money on your food budget.

    You can also make good use of your coupon stockpile.

    Another good reason is that it will ultimately save you time. And who couldn't use more of that?

    Mickey Mouse watch

    Alright, I'm in. How do I do this?

    First step is to sit down and decide what your challenge goals will be. How many days will the challenge last?

    Will you shop at all? If you eat a lot of fresh foods like fruit, vegetables, eggs, milk, etc you may need to make a few trips. If so, set a strict food budget and stick to it.

    If you're already in the super frugal department you may know you can preserve perishables by freezing milk, freezing eggs, freezing broccoli, and freezing vegetables and fruits. You can skip shopping altogether during the challenge if you've planned far enough ahead.

    For the next step you will want to do a pretty thorough pantry inventory. This is really how you assess what you already have on hand and will also help you clear out anything that you won't use or may have already expired. You should already know a lot of your pantry staples that you typically keep and those should be items you use regularly in meals anyway.

    Meal planning

    Now that you have your pantry inventory, you will need to use that information to make a meal plan. But first you need to do a little bit of math.

    You need to know exactly how many meals you are going to need. SO make a list of EVERY.SINGLE.MEAL. you and your family will eat during this challenge. Meals include breakfast, lunch, dinner, snacks, brunches, midnight food raids, etc.

    For this example we will assume a family of 4 people eating 3 meals and 1 snack everyday. The example challenge will last for 30 days.

    3 meals per person + 1 snack = 4 meals per day

    4 meals per day x 4 people = 16 meals per day

    16 meals per day x 30 days = 480 meals

    calculator showing 16*30=480

    Those numbers may seem a little intimidating but there is no need to be scared. You are most likely already eating this number of meals anyway, this plan just means you will know what you are eating ahead of time.

    That means you won't have to stare aimlessly into the fridge when it's after dinner time and you don't feel like cooking. You will already have something prepared.

    You can also factor that for some meals, like dinner, you will have a whole meal prepared that the family will eat together.

    Once you have your inventory together and your meal count, it's time to start your pantry challenge meal plans. A great website to help with your planning is Supercook.

    You can take your pantry inventory, put each item into their database and it will give you a whole list of different recipes you can make with what you ALREADY have (like this 4 ingredient hash brown casserole)!

    This next pantry challenge tip is completely optional, but we highly recommend it. Once you have your meal plan, take a day or so, meal prep, and freeze as many of those meals as you can.

    Meal prep and freezing will ensure that your ingredients won't expire before your challenge is over. It also will save you a ton of time because you will only need to reheat each meal instead of cooking every time you want to eat.

    bags of frozen milk

    Meal prepping will also help you stay on track because you've already made the meals. If you plan a wide enough variety of meals you will also never get bored of eating the same thing.

    Remember, the secret to a successful pantry challenge is not being afraid to try new recipes, substitute ingredients, and be creative. Most importantly, have fun!

    pinterest image with cabinet full of pasta with text stating, "Take the pantry challenge and start saving. think you can do it?"

    For more frugal living tips

    [pt_view id="3dd74e01d7"]

    Cooking & Freezing Rice

    By MrAnimal Farm

    pyrex of cooked rice

    Cooking and freezing rice is not hard at all. It's great to do because rice is such a great base for so many recipes. Once it is frozen and stored away, all you need to do is thaw it to make a ton of great recipes.

    pyrex of cooked rice

    We will be using an Instant Pot for this recipe. You can also use a Ninja Foodi or any pressure cooker. We chose the Instant Pot because it makes everyday cooking easier and you can find traditional stove top instructions on the rice packaging.

    Before freezing rice you've got to cook it

    First step is you will want to make sure your Instant Pot is clean and ready to cook. Then you will add in two cups of water and two cups of rice.

    Most Instant Pots or any modern pressure cooker will have a preset rice cooking function. You can try that out, if you like. If it works for you, that's super easy and you don't need to set anything manually.

    cup of uncooked rice

    If you like to customize the process to your personal preferences, you can use the manual function. This is how we do it and we ALWAYS have delicious results. The rice comes out fluffy, not too moist or dry; in other words, it's perfect!

    To use the manual function you just push the manual button and then set the timer for 20 minutes. Now you can walk away until the Instant Pot is finished cooking. That's it! Again, it's super easy to do.

    Natural release Vs manual release

    Once the timer has gone off, you will want to let the rice natural release for about 10 minutes. The reason you let it release the pressure naturally is that this extra time will allow the rice to soak up any excess moisture and become really fluffy.

    This next part is optional, but we feel like it really improves the preservation process. Take your cooked rice and dump it into a colander. You can leave it to drain or you can even press down on the rice with a cooking spoon or spatula to squeeze the extra water out.

    You want to get the extra moisture out so that there is no extra moisture in the bag once you start the freezing process.

    baggie and cup of cooked rice

    How to freeze rice

    Now, grab your measuring cups and start to scoop out your rice. If you have a large family or like to make big dishes, you can freeze the whole batch in a large freezer bag.

    You can also portion into smaller portions and put them in freezer bags. We like to put 1-2 cups in quart bags. Smaller portion sizes makes thawing quicker and we can make quick single serving meals.

    3 baggies of cooked rice

    If you go the route of smaller bags you will then want to flatten out the rice in the bag to make stacking easier. Finally, just place the bags in your freezer and you're done!

    Now, how do you thaw frozen rice? You can thaw frozen rice by putting it in the fridge overnight or defrost/heat in your microwave. Times will vary depending on how much rice you are trying to thaw.

    Common questions

    Can you freeze uncooked rice? Yes, you can. Make sure you use proper freezer bags. They are designed to lock out any moisture so your rice will stay fresh.

    Can you freeze leftover cooked rice? Absolutely! Just follow the same instructions above.

    Can you refreeze rice after it has been thawed? Yes, but it can lose some quality. You also want to make sure that the rice has not gone bad after the initial thawing. You definitely do not want to freeze spoiled rice. If you want to be extra sure, check out the FDA's website and follow their food preservation safety guidelines.

    Can I freeze any type of rice? Yes. The above method will work for jasmine rice, basmati rice, white rice, etc. Cook times may vary but the freezing rice and storage process is essentially the same.

    What if my rice is too hard? Can I fix that? Hard rice is an easy fix. Just add a little bit of water, put a lid on it's container and heat. You can do this on a stove top or in the microwave. You are essentially steaming the rice. This will soften up any rice that may have been under cooked or not had enough water to begin with.

    Can you freeze other food? You sure can! Freezing is like nature's pause button. You can freeze mashed potatoes, freeze eggs, and freeze oatmeal just to name a few.

    How And Why To Do A Pantry Inventory

    By MrAnimal Farm

    If you want to save money, stay fit, or just waste less, you MUST do a pantry inventory! Taking inventory of what you have to eat in your home will allow you to better create meal plans, use foods before expiring and be prepared with plenty of food anytime. Plus you'll know exactly how much and what items to stock up on when you find them on sale!

    stacks of canned beans in a cabinet

    How To Do A Pantry Inventory

    Doing a pantry inventory is one of THE biggest game changers in frugal living, self sufficiency, and building your emergency stockpile. Once you know what you have on hand you will begin to better understand what you and your family actually need on a day to day basis.

    Once you can narrow down what you need you can start to bring a little more order to your kitchen and food budget.

    We recently did a full inventory of our pantry, refrigerator, and freezers. (Yes, multiple freezers. We go all in when making our coupon stockpile so we needed the extra storage space.) We used the information we collected specifically to build a meal prep plan.

    With a plan in place, you know exactly what you need from the store so you never end up wandering around and buying stuff you don't need.

    You can also find those hidden gems that seem to find their way to the back of the cabinets never to be found until they expire. This inventory plan helps you organize your pantry so nothing gets lost and you use everything before it expires.

    inside of a large chest freezer with stacks of frozen vegetables

    How to get started

    First thing you will want to do is figure out how you want to keep track of everything. Some people prefer the good old fashioned pen and paper. Some like to be a little more technical and make a spreadsheet.

    We are of the opinion that spreadsheets make it easier to keep things organized. So we like to keep track of our food inventory that way.

    cabinet with rows of vegetable stock, refried beans, salsa, tomatoes, and soup

    Once you have your tracking method, it's time to get down and dirty with your inventory. Pick an area in which you want to focus. Decide if you are just trying to count your dry stock, fresh foods, frozen foods, or the whole shebang.

    Figure out where you're starting and make sure you have plenty of room with which to work. For example, pick a set of cabinets for a dry storage inventory. Remove EVERYTHING from the cabinet.

    While removing everything, you may find it easier to sort things into like categories as you go. For example, pasta with pasta, soup with soup, SPAM with SPAM (just kidding, no one likes SPAM), etc.

    If you really love organizing, you can sort within each category. For example, spaghetti with spaghetti, linguine with linguine, SPAM with outdoor trash, you get the idea.

    When sorting everything into your predetermined categories it is a good time to check everything for it's expiration date. You can toss anything that is out of date.

    pasta sorted by type on countertop

    You may want to double check each item though. Sometimes they have a "Best By" date which is about quality and not safety. You can look up specific foods on FDA.org and find their recommendations for how long after the label date an item can still be safely consumed.

    If you come across anything that is still within it's expiration date but you know you will not ever eat (*cough*SPAM*cough*) you can always donate them. Do a quick online search for local food banks and help those that may be a little less fortunate.

    If you have a bunch of random ingredients that you want to keep but don't know what to do with you can always run everything through a recipe ingredient website and make some new dishes.

    Now that you have everything organized out of the cabinet, it is time to actually do the inventory! This part is easy though. Just enter the item into your tracker and count how many you have of each item. Do this until everything has been counted.

    Now that we have counted everything it's time to put everything back in an orderly fashion. We put like items with like items (so black beans with black beans and ignore the brand) and arrange them in order of expiration date. Oldest to the left and front and newest to the right and back. Pull from the left and move things as the rows start to dwindle down.

    pasta organized by type and date in cabinet

    If you prefer, you can count as you put things back into your cabinet, whatever makes this easier for you. As you enter items into your tracking sheet we like to note amount, size, and expiration date.

    If you're really a spreadsheet nerd (no judgement from us, we love our spreadsheets) you can dive deep and set up formulas with alerts for when you are running low on an item and when you need to replenish your supply.

    You can repeat this process for all of your cabinets, pantry, fridge, freezer, panic room, 1950's style bomb shelter (you do you, okay); anywhere you may keep food. While you are making your inventory, you should also think about the typical pantry staples you need to have to make your most commonly eaten foods.

    Pinterest image with stacks of cans with the text "Have you done a pantry inventory yet? Here's how & why to do it"

    For more frugal living tips

    [pt_view id="3dd74e01d7"]

    Free Chicken Coop Plans You AND Your Flock Will Love

    By MrAnimal Farm

    chicken outside of coop in it's run

    Just got backyard chickens and need a place to keep them in? Check out these free chicken coop plans ranging from specialty coops to simple small coops.

    artists rendition of basic chicken coop

    Free DIY Chicken Coop Plans

    This backyard chicken coop idea may be perfect for you! We love that this one is so affordable. 

    Go back to the basics with chicken coop building with this free tutorial. 

    Is your flock more of the backyard variety? Then you need these backyard chicken coop plans in your life. 

    Don’t make this harder than it needs to be, use these DIY chicken plans to get the ball rolling.

    MyOutdoorPlans.com chicken coop

    Sometimes you need an urban style chicken coop and these plans are perfect for that! 

    If your chickens are a little extra and like it nice and cozy, then check out this cozy chicken coop option. 

    For the chickens living the suburban lifestyle, they may need a specialty chicken coop like this one. 

    Are you wanting to build a custom chicken coop for your chickens? You may want to look into this tutorial.

    cozy chicken coop

    Who can say no to free? These free chicken coop plans may be just what you need to build that awesome chicken pen in your backyard. 

    Planning on building a chicken coop? If you don’t know where to get started, then these free building plans may work great for you. 

    Not all chicken plans need to be big and fancy. These chicken coop plans will help you build a chicken coop that’s just the right size.

    Other Chicken Plans

    Chicken Feed Storage Bin

    Keep all your chicken feed safe from rodents. This feed storage bin is easy to make and super sturdy.

    Baby Chick Brooder

    Baby chicks need a safe space to live and grow for the first few months of their lives. This DIY chicken brooder is durable and can be put together in an afternoon.

    Chicken Coop Run

    Give your chickens a little extra room to stretch their legs. This chicken run can be added to just about any coop.

    chicken outside of coop in it's run

    Common Coop Questions

    How much do chicken coops cost to make?

    Depending on where you get your supplies the cost can range from free to super expensive. You can definitely make one for cheap but most will be in the mid price range depending on where you source your materials.

    Can I build a coop for 12 chickens?

    You can change any one of the above mentioned coops to accommodate a flock of any size. You will just need to determine how much space you need and then make the appropriate adjustments.

    The recommended space for a coop is 2-3 square feet per chicken for inside the coop and 8-10 square feet of outside run space. So for a 12 chicken flock you would need 24-36 feet of inside coop space which would equate to 6x4 - 6x6.

    [pt_view id="3d0b212jvx"]

    Freezing Vegetables - 15+ Vegetables You Can Freeze

    By MrAnimal Farm

    fresh zucchini in a basket

    Freezing vegetables is a super fantastic way to save money, stockpile some healthy food that is either on sale or that you grew in your garden and save time for cooking later dinner.

    The year that we gardened, we went a little crazy garden planning. And ended up with WAAAY more vegetables than we could possibly use before they all went bad. This left us looking for the best ways to preserve our extra vegetables.

    So, we started asking, can you freeze vegetables?

    The answer for pretty much every vegetable is YES! Freezing vegetables is actually quite simple most of the time. But you do need to know how to freeze vegetables and follow some specific tips for each vegetable as some need different preparation than others.

    Why might you need to think about freezing vegetables?

    Well, of course, if you end up in the situation we did above where we grew more vegetables than we could possible use before they go bad would be one reason that you might need to start freezing vegetables. Also, if you find a vegetable on a fantastic sale you might want to buy a bunch and freeze some for later when they are not in season and are quite a bit more expensive.

    Another reason to think about freezing vegetables is if you want to make meal prep go faster at a later time. For example, we like to make zuccini noodles and then freeze them so that they are ready to defrost and use in meals like zucchini noodle and beef casserole.

    Supplies for Freezing Vegetables

    Each different vegetable may need some additional supplies, but there are a few very basic supplies that you may want to have when freezing any type of vegetable.

    Ziplock bags - to make sure that you keep your vegetables stored well in the freezer.

    Permanent Marker - to mark type of vegetable and freeze date on the bag.

    Knife - to cut up and prepare the vegetables

    Chest freezer - in case you want to go freezing crazy so you will have plenty of storage.

    How to Freeze Vegetables

    OK, now that you know if you can freeze vegetables, why you might want to and some very general supplies you will need let's talk about how to freeze vegetables!

    Most vegetables are really super easy and fast to freeze. Some need a little more preparation than others as some need to be cooked in some way first while others can get washed and go straight into the freezer.

    Here are guides to freezing several different types of vegetables:

    How to Freeze Spaghetti Squash

    How to Freeze Summer Squash

    How to Freeze Zucchini

    How to Freeze Shredded Zucchini

    How to Freeze Sweet Potatoes

    How to Freeze Mashed Potatoes

    How to Freeze Potatoes as French Fries

    How to Freeze Peppers

    How to Freeze Green Beans

    How to Freeze Green Peas

    How to Freeze Sweet Corn

    How to Freeze Broccoli

    How to Freeze Kale

    How to Freeze Fiddleheads

    How to Freeze Eggplant

    How to Freeze Avocados - avocados are TECHNICALLY a fruit, but are used like a vegetable, so we figured it was worth including here.

    How to Freeze Tomatoes

    How to Freeze Strawberries

    For more frugal food tips

    [pt_view id="154e2b6g10"]

    How To Freeze Zucchini

    By MrAnimal Farm

    fresh zucchini in a basket

    Did you plant too much zucchini in your garden? Now you're overrun with more than you know what do with? Learn how to freeze zucchini.

    how to freeze zucchini

    If you read our freezing strawberries, freezing yellow squash, freezing broccoli, or freezing green beans posts, you'll notice a running theme. We tend to plant just a little more than we can eat in a reasonable amount of time.

    However, this is not a problem at all. Zucchini is the type of food that has a million and one uses like zucchini nachos, lasagna, zucchini bread, and many other zucchini recipes. So if you've been growing zucchini then preserving it is a great way to ensure you can make a variety of dishes throughout the year.

    Our preferred method of preservation is freezing. In fact, we freeze just about anything we can. Here's a whole list of vegetables you can freeze.

    How to freeze zucchini?

    We will assume you already have zucchini. But if you don't, you'll want to harvest some from your garden or go stock up at your local grocer or farmer's market.

    Step one

    Once you have your zucchini, you will need to wash it. Washing is essential because you do not want to freeze all the dirt, bug stuff, pesticides, or anything else that may come in contact with your zucchini while it is outside.

    Washing is easy. We prefer to place our zucchini in a colander and run it under cold water for a few minutes. You can pick up each zucchini individually and give it a good scrubbing, by hand or with a brush, to make sure it is completely clean of anything you may not want to eat later.

    You can also get vegetable cleaners and brushes at your local grocery store or online.

    Step Two

    Once your veggies are clean it's time to cut them. We use a mandolin slicer to cut our zucchini into chip slices. Just be careful, you will want to wear protective gloves because it is really easy to slice your hand on this tool (trust me!).

    You can also use a sharp knife and a cutting board, if your prefer. That just takes a little bit longer.

    Don't want to use chips?

    Maybe you want to freeze your zucchini noodles? This method also works if you cut your zucchini into zucchini noodles or you can shred it and freeze to use in baking later.

    freezing zucchini

    Step Three

    The next step is blanching. Blanching is the most important part of the preservation process for a lot of vegetables.

    When freezing peas, freezing asparagus and zucchini (just to name a few) they contain an enzyme that causes them to continue to age. Unless, you blanch them first. Fortunately, it is really easy to do.

    Bring a large stock pot of water to a rolling boil. Once your water is boiling, drop your zucchini chips into the pot. Allow to boil and set a timer for 3-5 minutes. Time varies depending on the amount and size of your zucchini batch. You will want your zucchini to be still be crisp.

    Once 3-5 minutes have passed you will need to immediately place your zucchini into an ice water bath. This will stop the cooking process and keep your zucchini crisp and fresh tasting.

    Can you freeze fresh zucchini without blanching?

    You can, but the zucchini will continue to age and degrade in quality. Sometimes the color will change and the flavor will suffer over extended periods of time as well.

    The reason for this is zucchini contains a specific enzyme that causes the zucchini to continue the decomposition process. Blanching destroys that enzyme and your frozen zucchini will last much longer this way.

    We recommend blanching for the best results.

    how to freeze zucchini

    Step Four

    Now it's time to portion and bag your zucchini. You will want to make sure that all of the water has been squeezed out of your zucchini chips. You don't want excess water to freeze in the bag with your zucchini.

    We portion things out in two or three sizes. Using a measuring cup we add one or two cups to a quart sized freezer bag. If you anticipate a large meal or have a large family you can use gallon freezer bags.

    Step Five

    Finally, it's time to stick your zucchini into your freezer. The bags tend to be easier to store if you squeeze all of the air out of them and lay them flat on top of each other.

    How do you thaw frozen zucchini?

    Thawing frozen zucchini is pretty simple. You can pull it out of the freezer, put it into a bowl (so you don't get melted ice everywhere), stick it in the refrigerator and let it thaw overnight.

    If you don't have as much time, you can stick it straight into you microwave and use the defrost setting. Times will vary so check the guide for your microwave.

    Pinterest image of zucchini in a harvest basket with text reading, "Freeze all your extra zucchini step by step guide"

    For more frugal living tips

    [pt_view id="3dd74e01d7"]

    How To Freeze Green Beans

    By MrAnimal Farm

    Why would you want to know how to freeze green beans? Let's say you are growing green beans and while harvesting your crop you realize you have grown WAAAAAY more than you and your family (and possibly your entire county) can hope to eat before they go bad. Maybe you’re in the grocery store and they have an unbelievable sale on green beans in a can (no judgement here). Either way, you have more beans than you know what to do with and you don’t want them to go to waste.

    how to freeze green beans

    Using a similar technique to freezing Spaghetti Squash or freezing Sweet Potatoes, you can freeze those green beans and keep them as long as you need them. We love freezing vegetables, in fact, here's a whole list of vegetables you can freeze.

    The first thing you will need is to actually get green beans. So go out and harvest your garden, make a trip to the farmer’s market or grocery produce section (or buy canned goods) and gather you green beans. For this blog we will assume you have fresh green beans. 

    Once you have your green beans, you will need to wash them. This is easy peasy. You will simply put your green beans into a container and run cold water over them. You will want to make sure that you turn them over several times by hand so the water has a chance to wash over everything.

    how to freeze green beans

    Washing your green beans ensures that all the dirt, grime, pesticides (gasp!), or any other unwanted material will not be a part of the preserving process. We find the easiest way to wash our vegetables is to use a colander. This will allow the water to pass through and not pool in your container.

    Your green bean has two distinct ends. One end is a flower end and the other is the end that attaches to the vine. All you need to do is hold your green bean close to the end you are snapping, break the end off, and pull the string the full length of the bean. You will want to repeat this for the other side. Then you will snap the bean in half (or several bite sized pieces) and put them aside. Repeat this until you have nothing but snapped green beans.

    You can save the snapped ends for your chickens as an extra snack/boredom buster.

    how to freeze green beans

    This next step is possibly the most important step of them all. It is called blanching and is what causes the green bean to essentially “pause” once they are frozen. The blanching process essentially destroys the enzymes that cause green beans to decay. These enzymes can survive during freezing temperatures and the green beans will continue to decay in the freezer.

    The blanching process consists of three steps; preparation, boiling, and cool down. You will need a pot, a large bowl, and enough ice water to almost fill the bowl.

    You will want to bring the pot of water to a rolling boil. While waiting for your water to boil, you can prepare your bowl of ice water. Next, take your snapped green beans and dump them into your pot. Let them boil for three minutes. 

    how to freeze green beans

    After three minutes, remove the beans from the boiling water and immediately place them in an ice bath. This phase is called rapid cooling and will stop the cooking process.

    Once your green beans are cool and no longer cooking, it is time to portion and freeze. You can decide what portions work for you. We prefer to use quart size freezer bags and fill them with one to two measured cups.

    If you are planning for a larger gathering or are feeding a large family, you can use gallon size freezer bags and just fill them up.

    Finally, it’s time to freeze your green beans. This is probably the simplest step of them all. Simply label your bags (we put name, quantity, and date) and stick them in your freezer. Simple as that!

    pinterest image with basket of green beans in garden. text reading "How to freeze green beans. easy 5 step tutorial"

    For more gardening tips

    [pt_view id="5f37129sdf"]

    How to Freeze Strawberries

    By MrAnimal Farm

    how to freeze strawberries

    If you're like us, you may grow a little more strawberries then you meant to. Because we have so many we needed to know exactly how to freeze strawberries.

    A few years ago, we decided we wanted to grow our own strawberry patch. We looked at the recommended number of plants for the size of our household listed on the site and thought, “Nah. That won’t be enough!”. So we doubled the amount. Turns out, they know what they are talking about and we were quickly overrun with strawberries.

    how to freeze strawberries

    Steps for how to freeze strawberries

    It may come as a surprise to you but there are only so many strawberry based dishes you can eat before you need a little break. 

    We didn’t want to start throwing them out so we looked into how to preserve them. The obvious answer is to make strawberry preserves but we wanted to keep our options open for the future. So we decided to try our hand at freezing them.

    So, can you freeze strawberries? You sure can! And it’s really easy to do. In fact, you can do it in three easy steps.

    how to freeze strawberries

    Step One

    You will want to wash your strawberries. Gather all of your strawberries into a single container. We like to use a colander because it allows water to pass over your strawberries, cleaning them, without the water pooling in the bottom of the bowl.

    Be sure to work your hands through all of the strawberries to allow the water to wash over all of the fruit and thoroughly get everything clean.

    Step Two

    You will now want to find a sharp knife and a cutting board. Take a strawberry out of your bowl or colander, place it on the cutting board, and cut the green top off of the strawberry.

    Repeat cutting each strawberry until they no longer have any tops. 

    how to freeze strawberries

    Step Three

    Now that you have freshly cleaned and shorn strawberries, it is time to portion and bag them. We like to portion them in quart size freezer bags and measure them out a cup or two at a time. 

    You can also portion them into a larger gallon size freezer bag if you think you will use them quickly enough. As you portion them out, be sure to get as much water out as you can.

    Finally, take your newly packed bags and place them in your freezer. You can remove a bag at a time and thaw in the freezer if you want a snack. You can also pull frozen strawberries straight from the freezer if you want to make a fruit smoothie.

    If you don’t want to learn how to grow your own strawberries you can always stock up when you find a killer sale.

    pinterest image of frozen strawberries. text reads, "how to freeze strawberries. never run out again!"

    How to Create Your Own Emergency Stockpile

    By MrAnimal Farm

    No matter if you are just learning Couponing for beginners or if you don't coupon at all, everyone should know how to create their own emergency stockpile.

    Creating a coupon stockpile is a basic skill all couponers learn. The way you save the most money couponing is by stocking up when prices are the lowest.

    But what about when emergency situations occur? Whether it be natural disasters like hurricanes and snow storms, health issues like seasonal flu or the coronavirus or even times like loss of income it is important to know how and when to stockup for emergencies.

    When to Create an Emergency Stockpile?

    Creating an emergency stockpile isn't just for "preppers". And it doesn't have to be done with hysteria either.

    It would be best if you always have an emergency stockpile on hand. This is, of course, because we don't ALWAYS know when an emergency will happen. Also, being prepared beforehand let's you create your stockpile cheaper because you can do so while shopping sales and couponing.

    If you aren't sure, here's how to start couponing.

    Also, if you wait until an emergency is upon you, sometimes shelves are already cleared out!

    emergency stockpile

    However, if you aren't able to have one on hand at all times, you should be ready to create one when necessary. This means any time you are likely to be without power, have limited travel options, limitations on the general supply of items or if you may be ill for an extended period of time.

    How to Create an Emergency Stockpile

    Creating an emergency stockpile is like creating your normal couponing stockpile in general. You will want to assess what items you will most need.

    In addition to identifying what items you most need, you will also want to know how quickly you use items. As well as identifying how long you may be needing to live on your stockpile. For example, if a tube of toothpaste lasts you 6 weeks you probably don't need 10 of them in your emergency stockpile.

    From this information, you can then work out how many of each of your necessary items you will need to get you through your time of emergency. It is important to make a list of spreadsheet to track this information so that you can be as accurate as possible. You don't want to leave out important necessities!

    Important Items to Include

    Everyone will have their own individual necessities, but there are some general items that everyone should think about.

    Health Supplies

    Medications, both prescription and over the counter. So, things like daily prescription meds - try to get a 3 month refill instead of a month. Over the counter meds like pain relievers and cold and flu relief.

    Any vitamins and supplements you normally use.

    Also make sure you have a stocked and non-expired first aid kit.

    If you are stocking up for health related emergencies you may also want to have things like Gatorade or other electrolyte sources on hand.

    Cleaning and Hygiene Supplies

    Toothpaste

    Hand soap

    Body Wash

    Shampoo and Conditioner

    Feminine hygiene items

    Laundry detergent

    Dish Soap

    General purpose cleaners like bleach, hand sanitizer, lysol wipes.

    Food and Water

    Depending on the type of emergency, this will dictate what types of food items you need to stock up on.

    If you are looking at a natural disaster situation, you should focus on non-perishables and water. So things like:

    Canned goods

    Flour, wheat, and other shelf stable cooking supplies

    Rice and Pasta

    Gallons of Water

    Peanut Butter or regular nuts

    If you are looking at situations where you may be isolated due to health issues or loss of income (so you will still have power), you can look at non-perishables as well as perishables.

    So, all the same things as for natural disasters, but also include:

    Frozen items - protein sources like meat, veggies, fruits.

    You likely don't need bottled water for these situations if you still have power.

    Additional Items

    If you are likely to lose power, make sure to have backup power sources:

    Candles

    Batteries

    Solar Chargers

    Manual Can Opener

    If you have young kids, make sure to have supplies for them:

    Diapers

    Wipes

    Formula

    Food and Supplies for your animals such as:

    Dog and Cat food

    Hay for goats, cows, horses

    Chicken Feed

    Medical supplies like dewormers and antibiotics

    How Being Self-Sufficient Can Help

    Being self-sufficient can really help for emergency situations. If you have backyard chickens then you get your own eggs without having to go to the store. If you raise dual purpose chickens then you have egg and meat potential without relying on the store or supply chain.

    what chickens lay green eggs

    If you are raising dairy goat breeds then you will have your own milk as long as you know how to milk a goat.

    If you are a gardener, then you should have a surplus of fruits and vegetables. Assuming a disaster such as a hurricane doesn't wreck your garden. Just make sure you know how to preserve your food.

    You can freeze most anything and stock it up for later such as:

    Freezing Eggs

    Freezing Milk

    Freezing Peppers

    Freezing Sweet Potatoes

    Freezing Spaghetti Squash

    How to Build a Chicken Run in 4 Easy Steps

    By MrAnimal Farm

    How to Build a Chicken Run in 4 Easy Steps

    How to Build a Chicken Run

    If you have chickens, they will likely need a chicken run.  Because pre-made chicken runs can be expensive we decided learn how to build a chicken run ourselves.

    This portable chicken run is light and easily moveable.    Therefore, it is perfect for keeping chickens on new ground and grass.

    We use this type of portable chicken run for our breeder pens.  You can also make a predator proof permanent chicken run.

    When starting to learn how to build a chicken run, it is really important to know what qualities you are looking for in your chicken run.  These chicken run plans below are for a lightweight, easy to move, portable chicken run.

    Ready to learn how to build a chicken run?

    First, what will you need when building a chicken run?

    ...

    Read More

    Chick Brooder Plans - How to Build a Brooder in 3 Steps!

    By MrAnimal Farm

    brooder box for chicks

    So, you already know how to incubate chicken eggs and help chicks hatch if they have any trouble. You know how to raise baby chicks and even made them a DIY Chicken feeder. But, a chicken math sets in you may find you have a need for a larger brooder.  We have some easy chicken brooder plans that we use to build ours.

    If you have more than just a few little chicks to brood, or if they are getting older, but not quite ready for the coop (and you want them out of the house) then these chick brooder plans are for you!

    brooder box for chicks

    Chick Brooder Box Ideas

    You can, of course, use things like a rubbermaid tote if you have a small amount of chicks. Totes like this will work for just a few chicks until they are a few weeks of age.

    You can also use a feed trough for your chicks. While this will hold a few more chicks a little longer than a plastic tote does, it is not very versatile overall.

    And, you can come up with a whole slew of other homemade chick brooder designs like turning old dressers, tv stands and other furniture pieces into cozy brooder boxes for your chicks.

    However, if you want an easy to move, lightweight brooder. One that is easy to clean and you can customize the size. Then, you might want think about building your own. And, quite frankly, often times this can end up being a sturdier and cheaper option. And any option that makes taking care of chicks easier is helpful.

    When Will You Need A Larger Chicken Brooder Box?

    When we started out raising chickens we would only have a few (like 10 or so) chicks at a time.  So, having pretty small chicken brooders inside the house was super easy to handle.

    However, then we started raising pullets to sell.  We would only get about 25 or so at a time, but that was too many to have in a small rubbermaid tote which was our original brooder box.  So, we built two smaller chicken brooders from 2x4's and chicken wire in our basement.

    As chicken math often times will do, those 25 chicks at a time started to increase a lot when we started breeding our own chicks regularly.  We introduced about 8 different chicken breeding coops (we build these chicken runs for our breeders and they have worked GREAT!).

    So, when we started getting into hatching our own chicks regularly and we would have single hatches of 25 chicks or more.

    We quickly realized that the smaller brooders in the basement just wasn't going to cut it anymore.

    We were lucky enough to already have a metal storage shed (complete with electricity) already on our property.  We were not currently using it.  So, we started designing a larger chicken brooder to fit into our shed.

    I have to tell you, it was a BIG relief to get the dusty chicks out of the house and into a shed outside.  These large DIY chicken brooders work super great!  We have four of them that fit snugly into our metal shed.

    You could certainly put these chicken brooders in your basement if you have a large one, or in a barn area as well.  We chose a metal shed because there is not hay and whatnot to blow around and create more of a fire hazard.

    We have an easy guide to build a nice and sturdy chicken brooder perfect for your feathered (or almost feathered) friends.

    Need some help keeping your chickens health and care taken care of? Check out the Organized Chicken Keeper for an easy to follow system.

    Homemade DIY Chicken Brooder Plans:

    Before starting you will want to measure the area in which you want to put the chicken brooder. You are, of course, free to make any modifications you like so that it will fit comfortably wherever you choose to put it.

    This set of plans will make a brooder that is 3' tall (1' off the ground + 2' brooder height), 2' in depth, and 3' wide.

    We have actually used these plans to make 2 brooders this size and then we modified them slightly to make 2 additional more square brooders.

    This sized poultry brooder can very comfortably fit 30 - 50 chicks as day olds.  Of course, as they start to get older and bigger, they will need more room.

    chicken brooder box

    Supplies:

    4 – 3' 1×4’s (width)
    4 – 3' 1×4’s (height)
    4 – 2' 1×4’s (depth)
    2 – 3' 1×2’s for lid (width)
    2 – 2' 2" 1×2’s for lid (depth)
    2 – 2×3 sheets of plywood or 0.375-in treated/untreated wood siding panel(front/back walls)
    2 – 2×2 sheets of plywood or 0.375-in treated/untreated wood siding panel (side walls)
    3 - 2' 2" 1x2's (support for bottom and lid)
    1 Pack of 2 cabinet hinges
    1 drawer handle
    1? Torx screws
    2 - 2' 2"x3' sheets of Galvanized Steel Hardware Cloth
    1 ½" fencing staples
    Drill or Screwdriver
    Pencil
    Level
    Zip Ties
    Wire Cutters
    Rubber Mallet (optional)

    1.) Build your Frame

    First, measure 12" up on each of the 3' 1x4's (height) and make a mark with a pencil. This 12" section is the lower part of the brooder leg.

    Line the end of one 2' 1×4 (depth) perpendicularly with the mark you just made on the 3' 1x4 (height) so they are flush. Screw these together.

    Repeat this with another 3' 1x4 (height). You should have 3 pieces connected to form an 'H'.

    side of a brooder box for chicks

    Connect a second 2' 1x4 (depth) to close off the top of the 'H' you just made. This should form an 'A'.

    Repeat the above to steps to complete construction of the chicken brooder's sides.

    Use a level to make sure each side is straight and does not wobble.

    Take a 3' (width) piece and line it flush with the lower section of the side piece where the height and depth pieces connect. Screw them together.

    Repeat this with the other side piece. This should again form an 'H'.

    Connect a second 3' (width) piece to close off the top of the 'H' to form an 'A'.

    You will now have ¾'s of a box complete. Flip the box over and use your remaining 3' (width) 1x4's to complete the frame.

    Flip your finished frame upright and make sure it is level.

    back of chicken brooder
    back of brooder

    2.) Close the Sides and bottom

    With your frame lying down, line your 2×3 sheets of plywood or 0.375" treated/untreated wood siding panel with the front opening of your frame. Screw this in place.

    Flip the frame over and repeat for the back.

    The side 2x2 sheets of plywood or 0.375" treated/untreated wood siding panel may fit a bit snugly. If they will not fit easily into place you may need a rubber mallet to tap them into the proper position. Once they are in place, screw them down.

    Turn the frame upside down and stretch a 2x3 sheet of Galvanized Steel Hardware Cloth across the bottom. You may need to use the wire cutters on each corner to make the sheet fit around the leg of the frame. Secure the sheet with 1 ½" fencing staples.

    bottom of chicken brooder

    Finally, with the brooder still upside down, measure 12" in from each side and attach a 2' 2" 1x2's support for bottom at each spot. You can use zip ties to secure the hardware cloth to the supports.

    3.) Build and Attach the Lid

    Line one end of a 2' 2" 1x2 with the end of one 3' 1×2 and screw them together; forming an 'L' shape.

    Repeat the above step so that you have two 'L' shaped piece.

    Connect the 'L' pieces together to form a box.

    Take the final 2' 2" 1x2 and secure it in the center of the lid. It should look like a long rectangle containing two square sections or a sideways 8.

    Stretch a 2x3 sheet of Galvanized Steel Hardware Cloth across the lid and secure it with more fencing staples.

    Place the lid on top of your brooder and make sure everything lines up as it should.

    front of chick brooder box

    Measure in 12" from each side of the lid and attach a cabinet hinge to each position.

    Finally, attach the drawer handle to the front of the brooder lid.

    FAQ

    How big should a brooder box be?

    When chicks are hatched to 4 weeks or so of age, they should have about .25 - .5 square feet per chick. Bantam chicks will take up less space. As chicks get to be 4 - 8 weeks they will need a little more room.

    As a good key, make sure they all have room to move around freely without being right on top of one another. Although, especially when they are young, they will like to pile up to stay warm.

    What can I use for a chick brooder?

    You can really use any enclosed space as a chick brooder such as a plastic tote, feed trough, animal cage/crate or a homemade wooden box.

    What does a brooder box need?

    A brooder box needs four enclosed sides and a bottom - solid or a grate. It also needs a heat source, feeder and waterer.

    How long do you keep chickens in a brooder?

    You keep chicks in a brooder until they are around 8 weeks of age.

    Can I use a kiddie pool as a chicken brooder?

    Yes, you can use a kiddie pool as a chicken brooder. Just be sure to set pine shavings in the bottom so they are not straight on the slick plastic bottom. Also, they will likely be able to start jumping out pretty early on, so you might need a covering for the top or another, taller brooder for them after a few weeks.

    Can a chicken brooder be outside?

    Yes, a brooder box can be outside as long as it is in a draft free area - a shed, barn etc - that has a heat source.

    Final thoughts

    These chick brooder plans should not take too much time to complete and your new brooder will keep your fast growing chicks safe and secure!

    Using the above dimensions for your chicken brooder plans should give you a brooder big enough for about 30 full sized young chicks.  Of course, as they get older, they will need to be split into probably two brooders and then can be put into your coops.

    Additionally, the sides of the poultry brooder are perfect for attaching a heat lamp. We clamp it to the side and then use metal twine to secure it so that if the clamp fails the heat lamp will be less likely to fall and be a fire hazard.

    These chicken brooder plans have made it possible for us to hatch a lot of chicks to sell which helps to make money with chickens all while keeping the chicks happy and healthy with plenty of space.

    Are you planning to use these exact chicken brooder plans or will you change the dimensions? We would love to see your completed chick brooders!


    If you need more help with taking care of your chickens, check out The Organized Chicken Keeper for a complete system for managing their health through keeping their supplies stocked and coop clean.

    Access The Organized Chicken Keeper Here


    Goat Fencing - Tips and Tricks for Fencing for Nigerian Dwarf Goats

    By MrAnimal Farm

    Goat Fencing

    Goat Fencing

    Since we are new to Nigerian Dwarf goats, we have done quite a lot of research getting ready for our three coming in the next week.  I like to know what I am getting into in as much detail as possible.  Goat fencing can be confusing because there are a lot of opinions on what does and does not work....

    Read More

    Uses for Eggshells - 5 Ways to Use your EggShells

    By MrAnimal Farm

    Uses for Eggshells - 5 Ways to Use your EggShells

    If you have backyard chickens, you probably get a lot of eggs and therefore, end up with a lot of eggshells. Do you have any uses for eggshells? What do you do with them all?  Well, you've probably been just throwing them out.

    If you have just been throwing your eggshells out, stop! We try to use everything on our homestead.  And, there are several uses for eggshells that you can start with to keep from wasting them.

    Uses for Eggshells - 5 Ways to Use your EggShells

    Here are 5 Uses for Eggshells so they don't go to waste:

    1. Feed your eggshells to your chickens.

    This is one of the best uses for eggshells. They work super great because they are full of calcium which is something chickens need anyway to lay eggs with strong shells.  If you just crush the eggshells up, you can add them into a feeder or straight into the feed for your chickens.

    eggshells cracked open

    From chicken to egg back to chicken to an even stronger egg. I think they call that the circle of life.

    2. Put them in your garden as a deterrent for slugs.

    Slugs are a HUGE problem when it comes to trying to grow a big and healthy garden. Fortunately, one of the uses for eggshells is to crush them and sprinkle them around your plants.

    slug on plant leaf

    Now, be warned if you have a soft spot in your heart for slugs. The reason this works (in theory anyway is because the broken eggshells will essentially cut the slugs belly up and it will die.

    3. A great use for eggshells is to add them to your compost pile.

    This is one of the most simple uses for eggshells. Depending on how often your chickens lay will determine how many eggshells you will have for your compost pile.

    If you can't think of any other uses or you just don't want to add the extra work, adding them to your compost pile is a great option.

    compost pile

    Simply take your eggshells and toss them into your compost pile.  If you don't have a compost pile, you can crush them and put them directly into your garden soil.

    4. Start Seedlings in them.

    This is one of the most environmentally friendly uses for eggshells. For the best results, many plants do better when you start plants inside.

    started plants in seed starting tray

    You can use Jiffy Seed Trays or you can use eggshells which are free!

    seeds started in seed starting cups

    Try to keep the eggshell mostly in tact, add soil and your seeds.

    eggshell used for starting a plant

    Then the eggshell can just be crushed when you go to transplant your seedlings.

    5.  Make Decorative Ornaments.

    Try blowing out your eggshells (the contents - You can still eat the egg white and egg yolk) and decorate them to make ornaments.  Here is a tutorial on how to do this.

    decorated eggshell

    If you have so many eggs that you are looking for uses for eggshells, you may also need to do something with all the eggs.  Try freezing eggs to keep them good for later use.

    For More Homesteading Tips:

    [pt_view id="1b72340sjr"]

    Uses for Eggshells

    How To Use Everything on Your Homestead - 6 Ideas to Get Started

    By MrAnimal Farm

    Use everything on your homestead

    So, you've made the decision to be more self-sufficient.  Perhaps you have one or more of the following:  a garden, backyard chickens for eggs, meat birds, dairy goats or cows, pigs.  Of course as these ventures start to produce, you will want to learn how to use everything on your homestead so none of it goes to waste.

    As you start to cultivate these ventures, it is likely you will face decisions on how to feed the animals, how to grow the garden and what to do with extras.

    When we first started, as much as I don't want to admit, we did let things go to waste because we just didn't know how to use everything on our homestead effectively.

    Now, our goal for our homestead is to use everything that we make in some way.

    Use everything on your homestead

    You may also be interested to know that by using everything on our homestead, we save at least $2500 a year by homesteading!

    Want to take it a step further and make a profitable homestead?  We currently make a profit on our homestead and manage it with these profitable homesteading tips.

    So, how can you use everything on your homestead?

    You may be thinking you won't be able to use everything on your homestead if you are getting into several different areas.  However, in reality, most homesteading adventures actually integrate really well together.

    Many of our homesteading activities actually lead to value adds to our other homesteading activities.  It's almost as if being more self-sufficient was meant to be 😉

    Here are some of the ways we manage to use everything we produce:

    Broken eggs

    If you have chickens and they have started to lay eggs then you know sometimes their eggs will get broken.  Instead of throwing it out, we either put it in the compost or scramble it up and give it back to them for breakfast (you can break the shell up for them too for extra calcium!).  You can also feed the eggs to your Livestock Guard Dogs if you have some.

    stack of used eggshells

    Even if your egg isn't broken, don't forget to use the egg shells in additional ways.

    If you aren't sure how to get started raising chickens, check out this raising chickens ecourse!

    Extra milk

    We have 2 goats in milk currently and sometimes we either have more milk than we can use or run out of time to do stuff with the milk.

    You can always freeze milk and use it for later (soap, cheese, cooking).

    frozen goat milk

    When we have a really large surplus we feed it to our chickens in their fermented chicken feed.

    Not sure how to make soap?  This is our favorite soapmaking book!

    If you have pigs, they would also LOVE some extra milk.

    Want to know more about raising dairy goats?  Join us in our Raising Goats eCourse!

    You can make your own homestead profitable with these Profitable Homesteading Worksheets.

    Garden scraps

    If you went overboard with your garden planning and have extra stuff from the garden, maybe a bumper crop of different types of peppers.  Or perhaps, you did some processing of your harvest and you have the ends of the green beans left, pumpkin seeds or other goodies.  We toss them to the chickens and goats (also pigs if you have them) for an extra special treat!

    goats and chickens eating garden scraps

    Cleaning out the Garden

    Once your plants are done producing and you are pulling them up toss them in the compost or out to the animals for a tasty treat (make sure not to give anything poisonous to the animals you have).

    Extra food from the kitchen

    Again this can all go to the compost pile or to your animals.  For instance, we eat apples every morning with breakfast and since chickens can eat apples, we always give them the core when we finish.

    apple core

    Chicken Coop & Goat Stall clean up

    When you are cleaning all the straw and poop out of your coops and stalls, don't let it go to waste!  We put all of the waste into our compost pile which we then put on our garden each year.

    stall clean out pile

    These are just a few of our ideas we try to use everything on our homestead.  And, as I mentioned, using everything on our homestead has allowed us to save over $2500 a year!

    The super awesome thing? We not only save money but we have also turned our venture into a profitable homestead!  And you can too, check out our profitable homesteading worksheets.

    What are some ways you re-purpose things so you can use everything on your homestead?

    Kidding Preparation - 4 Essential Steps for Kidding Season

    By MrAnimal Farm

    Kidding Season Preparation - 4 essential steps for kidding season

    Kidding Season can get really hectic, really fast.   So, if you know how to tell a goat is pregnant and you have verified your goat is then, you should be sure to be prepared. Goat kidding preparation will be important so that you don't get overwhelmed when kidding is in full force.

    We like to have all of our girls due around the same time so that we can get all of the sleep deprivation and bottle feedings out of the way all at once.  However, this means LOTS of work for a period of time, like refilling water and making sure we are choosing quality hay. Trimming goat hooves more often, giving them extra hugs, etc; exhausting!

    Make sure you know about goat gestation periods so that you know when to expect your kiddings.

    I don't think there is any way to make sure that all the work is done without properly preparing for kidding season.  However, with the proper kidding preparation, kidding season can go fairly smoothly.

    Kidding Season Preparation - 4 essential steps for kidding season
    ...

    Read More

    Splayed or Spraddle Leg: A step-by-step Treatment Guide

    By MrAnimal Farm

    splayed leg

    Raising baby chicks is a fun and rewarding experience.  They are so cute and fluffy and watching them grow is a learning experience.  Unfortunately, with raising baby chicks, you may have a few face some health issues such as spraddle leg, curled toes or pasty butt.

    chick with splayed or spraddle leg

    One of the common (and usually fixable) issues that a chick might face is spraddle leg which is also called splay leg.  Here is how to identify and help fix splay or spraddle leg.

    What is Splayed or spraddle Leg?

    Splayed leg (also known as spraddle leg) is a condition that some chicks will develop.  A chick that has splay leg (sometimes in one and sometimes in both legs) will look like it is doing a split or straddle.

    The chick often times will have difficulty or be completely able to get their legs under them.  Depending on how severe the condition is, they may be unable to walk.

    chick that has spraddle or splay leg

    What can cause Splay or spraddle Leg?

    Causes of splay leg can be several things including incubation issues (temperature, humidity or getting stuck in the shell in an awkward position).  Another cause is when chicks try to walk on too slick of a surface such as newspaper.

    They will need a solid, textured bottom on their brooder.

    How can you fix or correct Splay or spraddle Leg?

    The fix is relatively simple, all you need is a band-aid, a pair of scissors, and a chick with splayed leg.

    (You can also use vet wrap instead of a band-aid.)

    1. You can use any type of band-aid you like. I prefer to use a cloth band-aid instead of a plastic band-aid. The cloth is more pliable and comes off more naturally when the chick is ready.

    Take the band-aid and cut it in half lengthwise.

    scissors cutting band aid in half

    2. Wrap one end of the band-aid around the chicks leg at the knee joint. With Silkies, you have to make sure you do not wrap their fifth toe or leg feathering under the band-aid.

    placing a band aid on a chicks leg

    3. Repeat the process on the other leg and wrap the other end of the band-aid around the chicks other leg again at the knee joint.

    silkie chick with band aid on it's leg

    4. The band-aid should keep the chicks legs under its body allowing it to walk and also helping the legs to re-position themselves correctly.

    chick with band aid in place for treatment

    The chick will likely have trouble getting used to the brace. It will probably seem a little dramatic at first but it will learn to adjust.

    5. Often times the chick will be unsteady while walking.  Make sure it is able to get to food and water.  We add marbles to the water in case it falls in to ensure it won't get stuck and drown.

    6. Leave the band-aid on until the chick is walking strongly enough that it pulls it off.

    Rarely, a case of splayed leg is severe enough that this treatment will not work. If the initial treatment doesn't work, just repeat the process again and it should work just fine.

    Video Tutorial for how to correct splay leg

    (As always, don't forget to subscribe to our YouTube channel so you won't miss out on videos like this!)

    For more on chickens:

    [pt_view id="3d0b212jvx"]

    splayed leg

    The Araucana Vs Ameraucana Vs Easter Egger Chicken

    By MrAnimal Farm

    Differences Between Ameraucana, Aracana and Easter Egger Chickens

    Differences between the Ameraucana chicken, Araucana chicken and Easter Egger chicken breeds are important to be aware of due to the fact that many people confuse them and think they are all the same breed.  A lot of people think that Easter Egger chickens are the same as Ameraucana's and Araucana's, but they are not.

    feature image: text reads, "Differences Between Ameraucana, Aracana and Easter Egger Chickens" left image: Ameraucana chicken, center image: Easter Egger, :right image: Aracauna chicken.
    [feast_advanced_jump_to]

    Differences Between Ameraucana, Araucana, and Easter Egger Chickens

    The biggest differences between Ameraucana chickens, Araucana chickens, and Easter Egger chickens are that the Easter Egger is a hybrid breed while the other two are purebred. But there are some other differences as well:

    • All three CAN lay blue eggs, but only Easter Eggs can also lay other colors like green, pink and brown.
    • Araucanas are rumpless while the other two breeds are not.
    • Ameraucanas have muffs and beards while Araucanas do not. Easter Eggers can have them, but not always.

    These three breeds have some similarities (like the fact that they all can be bantam breeds) also, and are often times mixed up and mislabeled. So, it's important to know the specifics for each breed so you can tell them apart.

    If you don't know the differences between these types of chickens and you are looking for a specific trait or characteristic, like egg color or feather color, you might end up really disappointed if you get the wrong breed!

    Keep reading below for specifics on each breed and comparisons to one another.

    Ameraucana Chicken
    Ameraucana Chicken

    Ameraucana Chickens

    You will sometimes (well, often times) see this breed misspelled as Americana chicken or Americauna.  Many times farm stores that sell chicks on "chick days" will get Easter Egger chickens and then label them as an "Americana chicken".

    A true Ameraucana is a pure breed of chicken.  That means that they are one single breed and will have the same characteristics across the breed.

    Ameraucanas lay blue eggs only.  There are other chickens that lay blue eggs as well.

    They also have muffs and beards.  Muffs are basically puffy feathers on their cheeks.  Beards are, just what they sound like, puffy feathers under their chins.

    Ameraucanas come in several colors:

    • Blue & Self Blue
    • Black
    • Splash
    • Wheaton & Blue Wheaton
    • Brown Red
    • Buff
    • Silver
    • White

    If you want a true Ameraucana, you should only breed like colors together. Otherwise, they are considered a mixed chicken.

    Need some help keeping your chickens health and care taken care of? Check out the Organized Chicken Keeper for an easy to follow system.

    Aracana Chicken
    Aracana Chicken

    Araucana Chickens

    Araucana chickens are the most rare of these three breeds. Two qualities that they have which can help you tell them apart is that Araucanas have tuffs and are rumpless.

    Rumpless means that they do not have tail feathers.  Tufts are groups of feathers that stick out by their ears.

    As mentioned above, Ameraucanas have muffs and beards. Unlike Ameraucanas, Araucanas do not have muffs or beards.  

    Aracana's are similar to Ameraucanas in that they do lay blue eggs.

    Araucanas come in a variety of colors including:

    • Black
    • Silver & Gold Duckwing
    • Black Breasted Red

    Ameraucana Vs Araucana

    Both the Ameraucana and the Araucana chicken breeds are purebred chickens and are, thus, very similar. They also both will lay blue eggs.

    The easiest way to tell them apart is through their feathering, Ameraucana chickens have muffs, beards, and tailfeathers while Aracaunas are rumpless and do not have muffs or beards.

    Another difference is their accepted colors. Both come in Black, but their other accepted colors differ.

     
    Easter Egger Chicken
    Easter Egger Chicken

    Easter Egger Chickens

    If you have purchased chicks from a farm store, you likely have an Easter Egger chicken.  Many times people will mistakenly think that they have an "Americana Chicken" or a pure bred Ameraucana chicken, however, the chicks sold at farm stores are almost always actually Easter Egger chickens.

    One main difference between Ameraucana, Araucana and Easter Egger chickens is that Easter Eggers are hybrids while the other two are pure breeds.  This means that Easter Eggers do not always have the same qualities since they can be mixes of different breeds.

    Easter Eggers are usually a combination of a blue egg layer and a brown egg layer. Ameraucanas are typically used for the blue eggs, but you can also use other blue egg layers.

    Easter Eggers do sometimes have muffs and beards (since often times they are a mix of an Ameraucana and another breed), but they do not always have them. It depends on the genes of the mating pair. If you are breeding chickens, make sure you know how chickens mate.

    Get started raising your own chickens with our Raising Chickens eCourse and eBook!

    Another difference is that Easter Eggers do not only lay blue eggs. When you have an Easter Egger chicken they can lay blue, green, brown or light pink eggs. 

    However, each Easter Egger chicken will only lay one color egg.  Meaning, one Easter Egger chicken may lay all pink eggs while another Easter Egger chicken may lay all green eggs.

    Olive Egger Vs Easter Egger

    Both the Olive Egger and Easter Egger chicken breeds are hybrid chickens. The key difference between them is, obviously, in their name. Olive Eggers have been bred specifically to lay dark, olive green eggs while Easter Eggers will lay a variety of colors.

    There are chickens that lay green eggs.  There is a type of chicken that many consider to be a specific type of Easter Egger chicken which will only lay green eggs.  This breed is called Olive Eggers.  An olive egger chicken lays (surprise!) olive colored eggs.

    To get an olive egger chicken you would cross (or breed) a dark brown egg layer - like a Marans or a Welsummer - with a true blue egg layer - like an Ameracana or Aracana.  When the resulting chicks are old enough to lay their own eggs, you should get olive or green colored eggs.

    So, as you can see, while these three breeds do have some similarities, like how often they lay eggs, there are many differences between Ameraucana, Aracana and Easter Egger Chickens.

    Easter Egger Vs Ameraucana

    Though many times Easter Eggers are part Ameraucana and therefore will have similar attributes, that is not always the case. As we mentioned earlier, the Easter Egger is a hybrid breed chicken while the Ameraucana is purebred.

    Ameraucanas will always have muffs and beards while Easter Eggers may or may not. Finally, Easter Eggers lay several different color eggs while Ameraucana chickens will only lay blue eggs.

    In Conclusion

    All three of these breeds have some similarities - like the ability to lay blue eggs. However, there are substantial differences between each breed giving them unique and distinct characteristics.

    If you need more help with taking care of your chickens, check out The Organized Chicken Keeper for a complete system for managing their health through keeping their supplies stocked and coop clean.

    Access The Organized Chicken Keeper Here

    Hatching Chicks With A Broody Hen

    By MrAnimal Farm

    hatching chicks with a broody hen

    Have you ever wondered about hatching chicks with a broody hen? Ok, I will admit, on the surface this seems so simple.  I mean, afterall, broody hens hatched chicks for a long time before people learned to hatch chicks with incubators.

    ...

    Read More

    Curled Toes in Chickens - Causes and Treatment

    By MrAnimal Farm

    Curled toes in Chickens


    Curled toes in chickens is a relatively common issue that can affect baby chicks.  Curled toes will look pretty much just exactly what they sound like. The chick will have toes that are curled under or to the side on one or both of it's feet.

    Keep reading to find out the causes and treatment for how to fix a chick with curled up feet.

    Curled toes in Chickens

    If you are incubating chicken eggs on your own, you will likely notice if they have this issue right when you take the chick out of the incubator.

    Although, chicks can develop them after they have moved to the brooder.  Another issue to look for when raising baby chicks is pasty butt.

    Chickens with minor curled toes can do fine without treatment and sometimes they will straighten on their own.  While chickens with majorly curled toes can have issues walking and will need to have their toes treated.

    baby chick with curled toes

    What causes curled toes in chickens?

    Curled toes are generally caused by the same things that can cause splay or spraddle leg in chicks.  Some things that can cause them are:

    1.  Slippery surfaces.

    2. Too much room in the incubator.

    3. Injuries.

    4. Vitamin Deficiency.

    5. Fluctuations in temperature and humidity during incubation.

    Quickly and easily assess your flocks health without missing a step by using this free download: The Chicken Care Checklist.

    The first two causes of curled toes in chicks (slippery surfaces & too much incubator room) can pretty easily be prevented.

    Slippery Surface

    Make sure that your chicks have a textured surface (like paper towels or pine shavings) to walk on when they hatch and during brooding.  This is will take care of having a slippery surface.

    French Black Copper Marans Chicks in a box with pine shavings

    Too Much Room

    To ensure your chicks don't get curled toes from having too much room in the incubator, just be sure to have sufficient eggs set.

    If you are only setting a few eggs, you can simply block off parts of the hatching area to make it smaller.

    hatching eggs in incubator

    Injuries

    You can try to prevent injuries by keeping a close eye on chicks, but sometimes accidents do happen. Make sure that they have a safe brooder and incubator area where their feet are not going to get caught in anything.

    For example, if chicks get too cold and huddle on top of each other this can sometimes cause injury that will result in curled toes.

    Vitamin Deficiency

    This can be a result of the hen not having the proper diet when producing eggs. So, be sure that you are feeding your chickens a well-balanced diet with all the right nutrients.

    Temperature and Humidity Fluctuations

    Having your incubating temperature and humidity change too much during hatching time can cause your chicks feet to become curled. Make sure that you have a reliable hygrometer and thermometer in your incubator to watch these settings closely.

    How to treat curled toes in chickens?

    Treating curled feet is pretty inexpensive and easy to do.

    Supplies needed:

    You will need two small pieces of cardboard and a bandaid, tape, or vet wrap.

    You can use really any kind of cardboard.

    notebook
    We like to use the cardboard from a notebook since it is easy to snip a few pieces off of and it is thin and easy to work with.

    However, you can easily use cardboard from food packaging, a box or anything else you have around.

    Process to treat:

    1. You will want to make sure that your cardboard is cut so that it is just slightly bigger than the chicks toes.  The cardboard will look like little chick sandals.

    2. Place the chicks foot on top of the cardboard and arrange it's toes so that they are straight.

    3. Wrap the toes onto the cardboard with the tape, bandaid or vet wrap so that the chicks toes are secured in place.

    Curled toes in Chickens

    4. Leave these cardboard "shoes" on for a few days until the chick holds it's toes properly on it's own.

    Any questions?  Please drop us a comment below!

    If you need more help with taking care of your chickens, check out The Organized Chicken Keeper for a complete system for managing their health through keeping their supplies stocked and coop clean.

    Access The Organized Chicken Keeper Here

    Types of Summer Squash - Summer Squash Every Garden Should Have

    By MrAnimal Farm

    Summer Squash - Types of Summer Squash Every Garden Should Have

    Garden planning can be fun and overwhelming.  There are SO many types of vegetables you can grow, it can be hard to decide what types you should add to your garden.  One veggie that no garden should be without is a good variety of types of summer squash.

    Summer squash is a great choice for any garden.  These squash plants are fairly easy to grow (unless you get the dreaded squash bugs) and they are often extremely prolific producers.  There are several types of summer squash ranging in size, color and shape.

     Types of Summer Squash Every Garden Should Have

    ...

    Read More

    Goat Heat Signs - 6 Signs to Tell Your Goat is in Heat

    By MrAnimal Farm

    Goat Heat Signs – 6 Signs to Tell Your Goat is in Heat

    The goat heat cycle is when a doe goes through estrus. Goats cycle on average every 21 days during breeding season. This heat cycle typically only lasts 1 - 3 days with the mid-point being when they can breed. Estrus is the timeframe in which a female is able to conceive.

    Whether you are raising a type of dairy goat or another goat breed you will have to breed your goats, know how long goats are pregnant and care for them while they are bred if you want to have kids. In order to get a successful breeding, you must know about the goat heat cycle since they can only be bred while they are in heat.  Goat heat signs are easy to identify once you know what to look for.

    If you are interested in goat heat signs, that probably means you will be breeding your goats.  Make sure you have the Goat Breeding Planner so you have all the breeding information you need!

    Goat Heat Signs – 6 Signs to Tell Your Goat is in Heat

    What is the Goat Heat Cycle?

    Goats must be in heat, or their estrus period, in order to get pregnant.

    So, if you know that you want to get your girls bred, you'll need to know all the details about their cycles, including goat heat signs so that you can identify when they are in heat. This way, you won't miss your window of opportunity and can have a successful breeding season.

    Before your goats are showing signs of heat, make sure you decide which goats to pair up and breed by going through the important goat breeding planning steps.

    When do goats go into heat?

    Some goat breeds, like Saanen and Alpine are seasonal breeders. They typically only go into heat during the Fall months. Although, some can cycle during other times, especially if exposed to a buck. Other goat breeds, like Nigerian Dwarf goats will go into heat year-round, but will likely have the strongest heat cycles in the Fall.

    Does can start having a heat cycle as young as 8 weeks, though unlikely. However, by 4 - 5 months, does can definitely be having heat cycles and get pregnant if exposed to a buck. This doesn't mean that you SHOULD breed your does this young.

    How often do goats go into heat?

    A goat heat cycle is usually spaced out about every 18 - 21 days apart.  So, they go into heat about every three weeks.

    How many times a year does a goat go into heat?

    Seasonal breeder typically go into heat from Aug/Sept to Jan/Feb at the rate of about once every 21 days. So, they go into heat around 6 - 8 times a year. Other breeds can breed year round and they may go into heat almost once a month.

    How long is a goats menstrual cycle?

    A goats menstrual cycle is about 21 days long.

    How Long Do Goats Stay in Heat?

    They are only in heat for a short time (48 - 72 hours usually) and they have to be right at the right timing in that heat cycle to be willing to stand for the buck to be bred. This time is called standing heat.

    At the start of their cycle, the does will show just a few signs, then towards the middle they are in standing heat - when they will accept the buck breeding them, finally the last part they will slowly show less signs.

    What are the goat heat signs?

    As you can see, a goat heat cycle is a very short window of time to get your goat bred. So, you really need to know how to tell your goat is in heat so you don't miss it.

    First, you want to know what your doe "normally" looks and acts like.  This way, when her behavior changes, you will know.

    Goat on milk stand

    Behavior Changes

    Some girls will get more friendly when they are in heat.  Some goats will get more standoffish when they are in heat.  We have seen some girls mount other does when they are in heat.

    So, the actual behavior may vary from doe to doe when they are in heat.  But a good sign your goat is in heat is a change in that does typical behavior.

    Reaction to Bucks

    Walking the boys through will give you a DEFINITE yes or no if you are in doubt.  The boys will be very enthusiastic towards girls who are in heat.  And girls who are in heat will be VERY excited about the boys.

    Doe an Buck Nigerian dwarf goats together

    We REALLY love to use a leash and collar to walk our boys into our girls area when we see some of them showing the 6 goat heat signs below.

    If you don't want to take your bucks on a walkaround, you can use a buck rag. Essentially this is just a rag or other object that you rub on your buck to get it to smell like them.

    Then let your does smell the buck rag and if they react in some of the ways listed below, they are likely in heat.

    Extra tail wagging

    You have probably noticed that your goats will wag their tails some while eating, scratching etc.   A good goat heat sign to look for is EXTRA tail wagging.

    We weren't sure that this would be easy to spot, I mean what constitutes as "extra"?

    Buck goat with Doe during heat

     
    Well, if you have been doing observing your does regularly, you will likely know what "extra" is.  It is obvious that the does wag their tails more.  They also wag them at different times than usual. So, as long as you know what is typical, you should be able to easily identify what additional tail waging is.

    Swelling

    Often times when a doe is in heat you will notice her vulva ("lady parts" if we are being polite) will be swollen.  By knowing what she usually looks like, it is easier to notice any swelling.

    Discharge

    Your doe will likely have some vaginal discharge when she comes into heat.

    Goat with extra discharge

    You may notice it just on her vulva, but it can also end up on the underside of her tail and tail hair. It will just look like a little mucous, or some slight dried crust.

    More Vocal

    Our girls are all relatively quiet (unless they are separated from the herd or wanting bananas!).  However, during heat cycles, does will many times become more vocal.

    Goat Yelling

    We have one girl in particular who will literally SCREAM at the fence line ALL DAY LONG when she is in heat.  This is a VERY clear sign your goat is in heat.

    Wether detectors

    If you have a wether in with your does, they may also be able to help you detect if your does are in heat.

    Wethers (even though they aren't in tact) will often start to exhibit buck-like behavior -- curling lips, clicking noises, mounting -- towards the does in heat.

    Decreased Milk Production

    If your doe is in milk when she comes into heat, you may see a decrease in milk production during her cycle. Do keep in mind though that there can be several other causes for a doe producing less milk than usual.

    CIDR

    If you want your does to be bred during a certain time period, or if you have a doe who does not have strong heat cycles you can use a CIDR. CIDR is a small device that has progesterone and can be inserted into your doe. This will release progesterone and trigger your doe to go into heat.

    Once your girls are bred, make sure you are prepared for kidding time by knowing all of the goat labor signs.

    Want to see a doe who is displaying the signs of a goat in heat?

    Check out our YouTube video below.  Don't forget to subscribe!

    Goat Breeding Planning - Using ADGA to Make the Right Matches

    By MrAnimal Farm

    Goat Breeding Planning - Using ADGA to Make the Right Matches

    I have to admit something, we just wrapped up our first round of kidding season (one round left) and we are already battling with our goat breeding planning for next year.

    Has anyone else ever felt this pressure?  We are all working hard to make the right breeding decisions to improve our herd, but WHAT should those decisions be?

    Goat Breeding Planning - Using ADGA to Make the Right Matches
    ...

    Read More

    • « Go to Previous Page
    • Go to page 1
    • Interim pages omitted …
    • Go to page 5
    • Go to page 6
    • Go to page 7
    • Go to page 8
    • Go to page 9
    • Go to Next Page »

    Primary Sidebar

    kristin, justin and goat

    Hey, we are Justin & Kristin! Welcome to MrAnimal Farm where we share our knowledge on homesteading, livestock and poultry, gardening and food preservation

    More about us →

    Popular Posts

    • Differences Between Ameraucana, Aracana and Easter Egger Chickens
      The Araucana Vs Ameraucana Vs Easter Egger Chicken
    • Chickens That Lay Green Eggs - What Chickens Lay Green Eggs
      Chickens That Lay Green Eggs - What Chickens Lay Green Eggs?
    • brooder box for chicks
      Chick Brooder Plans - How to Build a Brooder in 3 Steps!
    • Curled toes in Chickens
      Curled Toes in Chickens - Causes and Treatment
    • Goat Toys
      DIY Goat Toys: Cheap Toys to Keep Your Goats Busy
    • hen or roo
      How To Sex A Chicken & Tell A Hen From A Rooster

    Fall Homesteading

    • Fresh carrots and beets being held over a wooden table.
      15+ Fall Garden Crops For a Longer Harvest
    • Molting Chickens
      Molting Chickens - What, Why & How to help!
    • two butternut squash on a wood board
      Can You Freeze Butternut Squash ?
    • Goat Breeding Planning - Using ADGA to Make the Right Matches
      Goat Breeding Planning - Using ADGA to Make the Right Matches

    Footer

    Amazon Affiliate Disclosure

    We are a participant in the Amazon Services, LLC Associates Program, an affiliate advertising program designed to provide a means for sites to earn advertising and linking to Amazon.com. As an Amazon Associate we earn from qualifying purchases.

    Privacy Policy

    For details on our privacy policy click here.

    Copyright © 2026 · MrAnimal Farm